To install a Blink Outdoor Camera, simply download the Blink app, create an account, add the camera to your account, and follow the on-screen instructions to complete the installation process. Installing a Blink Outdoor Camera is a straightforward process that requires the use of the Blink app.
With just a few simple steps, you can have your camera up and running in no time. In this guide, we will walk you through the process of installing the Blink Outdoor Camera, from downloading the app to following the on-screen instructions.
Whether you’re a beginner or an experienced user, this guide will provide you with all the information you need to quickly and easily set up your Blink Outdoor Camera for enhanced home security. Let’s get started!
Tools And Equipment Needed For Installation
Choosing the right tools and equipment for a successful installation

Installing a Blink Outdoor Camera is a simple and straightforward process that can be accomplished in just a few easy steps. However, to ensure a smooth and hassle-free installation, it is important to have the right tools and equipment at your disposal. This will not only make the installation process quicker but also help you achieve the best results.
Essential items for setting up the Blink Outdoor Camera
Before you begin the installation process, gather the following essential items to ensure a successful setup:
| Tools and Equipment | Description |
|---|---|
| Blink Outdoor Camera | The main component of the installation process. Make sure you have the camera ready with all the necessary components. |
| Mounting Bracket | This essential accessory allows you to securely attach the Blink Outdoor Camera to a surface. Ensure that it is included in your package. |
| Screws and Anchors | These are necessary to securely fasten the mounting bracket onto your desired surface. The screws and anchors should be suitable for the material you are mounting the camera on. |
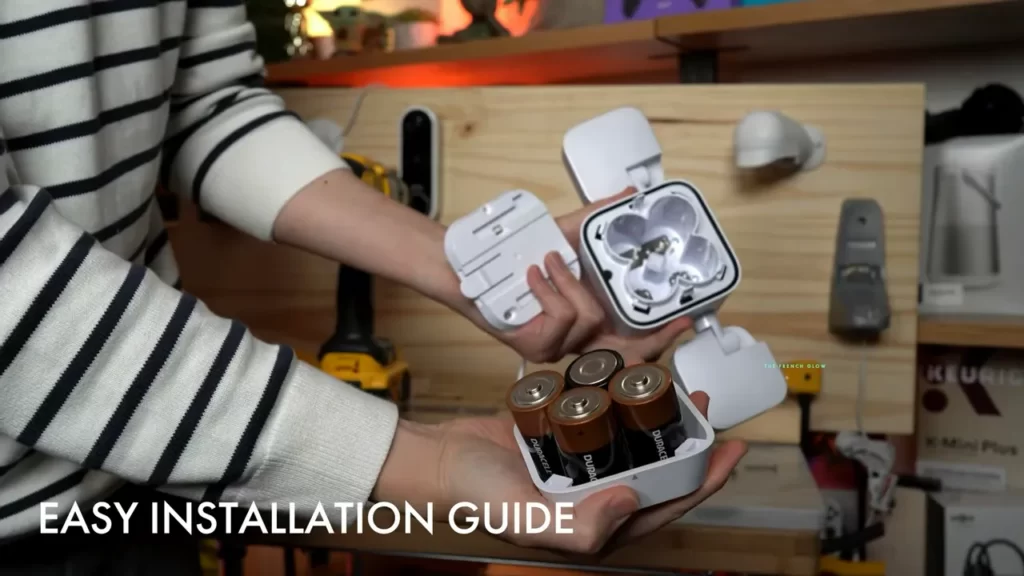
| Batteries | Blink Outdoor Cameras are powered by AA lithium batteries. Make sure you have fresh batteries on hand to power up your camera during installation. |
| Smartphone or Tablet | For a seamless installation process, you’ll need a smartphone or tablet compatible with the Blink app. This will allow you to connect and set up your camera effortlessly. |
| High-Speed Internet Connection | To ensure smooth operation and optimal performance of your Blink Outdoor Camera, a stable high-speed internet connection is required. |
By having the right tools and equipment ready to go, you’ll streamline the installation process and be well on your way to enjoying the peace of mind and security that the Blink Outdoor Camera provides.
Preparing For Installation
Before you start installing your Blink Outdoor Camera, it’s important to properly prepare to ensure a smooth and successful setup process. This involves selecting the optimal location for your camera and ensuring a stable internet connection for uninterrupted surveillance.
Selecting the optimal location for your Blink Outdoor Camera
Choosing the right location for your Blink Outdoor Camera plays a crucial role in maximizing its effectiveness. Here are a few factors to consider:
- Area coverage: Determine the area you want your camera to monitor, making sure it captures the desired view.
- Mounting height: Find the ideal height for mounting the camera, taking into account the best viewing angle and its ability to capture facial features.
- Weather resistance: Ensure that the chosen location is sheltered from harsh weather conditions to protect the camera from damage.
- Access to power source: Identify nearby power sources to ensure a reliable and continuous power supply.
- Obstructions: Avoid placing the camera where it may be obstructed by objects such as trees, plants, or furniture, as this can limit its field of view.
Ensuring a stable internet connection for uninterrupted surveillance
A stable internet connection is essential for seamless operation of your Blink Outdoor Camera. To ensure uninterrupted surveillance, follow these steps:
- Check your Wi-Fi signal strength: Make sure the camera’s intended location has a strong Wi-Fi signal to maintain a stable connection.
- Place the router strategically: Position your Wi-Fi router in a central location to minimize signal interference and maximize coverage.
- Consider a Wi-Fi range extender: If you have a large property or encounter weak signal areas, using a Wi-Fi range extender can expand the coverage and improve connectivity.
- Secure your network: Protect your Wi-Fi network with a strong password to prevent unauthorized access and ensure the security of your camera footage.
By taking these necessary steps to select the optimal location and ensure a stable internet connection, you’ll be on your way to experiencing the utmost convenience and security provided by your Blink Outdoor Camera.
Mounting The Blink Outdoor Camera
If you’ve recently purchased a Blink Outdoor Camera, congratulations! You’re on your way to enhancing the security of your home or office with a reliable and user-friendly surveillance system. One of the most important steps in installing the Blink Outdoor Camera is securing the camera mount in the desired location. This ensures that your camera has a stable base from which to capture footage. Let’s delve into the process of mounting the Blink Outdoor Camera and get you started on your home security journey.
Securing the camera mount in the desired location
The first step in mounting the Blink Outdoor Camera is finding an optimal location for the camera. This may depend on a few factors such as the layout of the area you wish to monitor and any potential obstructions. Take a moment to evaluate the surroundings and choose a spot that offers a clear line of sight and covers the area you want to monitor.
Once you have identified the ideal location, it’s time to secure the camera mount. The Blink Outdoor Camera comes with a versatile mounting bracket that can be easily attached to various surfaces such as walls, ceilings, or even poles. Here’s how to do it:
- Using a pencil or a marker, mark the screw holes on the surface you have chosen for mounting. This will serve as a guide while screwing in the mount. Ensure the mounting bracket aligns with your marked positions.
- Next, using a drill and the appropriate drill bit for your surface, carefully create pilot holes where you’ve made the marks. This will help prevent any potential damage to the surface and make it easier to screw in the mount. Remember to consult the drill’s user manual for the correct settings and safety precautions.
- Take the mounting bracket and align it with the pilot holes. Using screws that are provided with the Blink Outdoor Camera, screw in the bracket firmly. Make sure the bracket is securely fastened to the surface, ensuring stability and longevity.
Attaching the camera to the mount for optimal positioning and stability
Now that the camera mount is securely in place, the next step is attaching the camera to it. To ensure optimal positioning and stability, follow these steps:
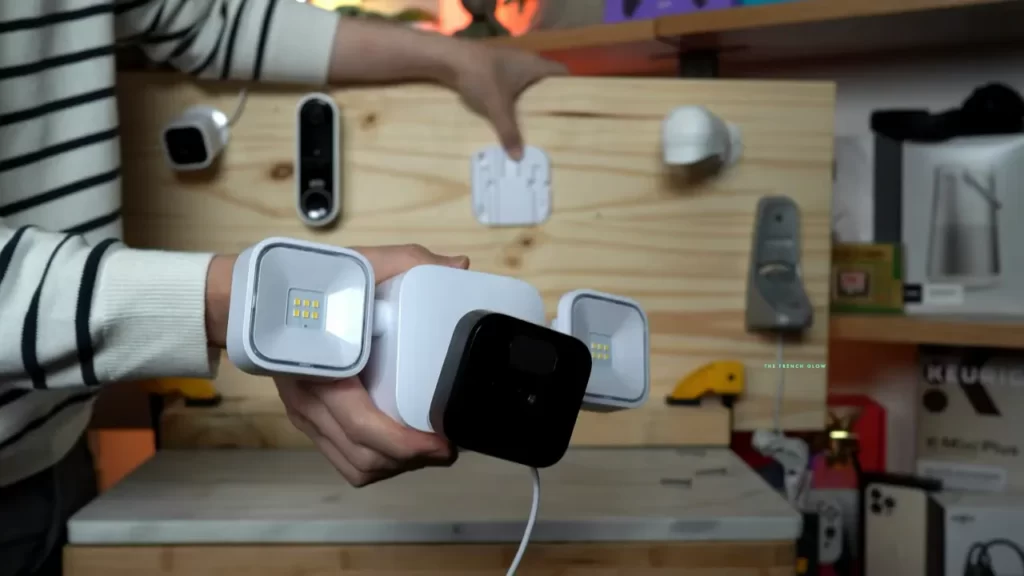
- Carefully remove the camera from its packaging, taking care not to touch the lens or obstruct the sensor.
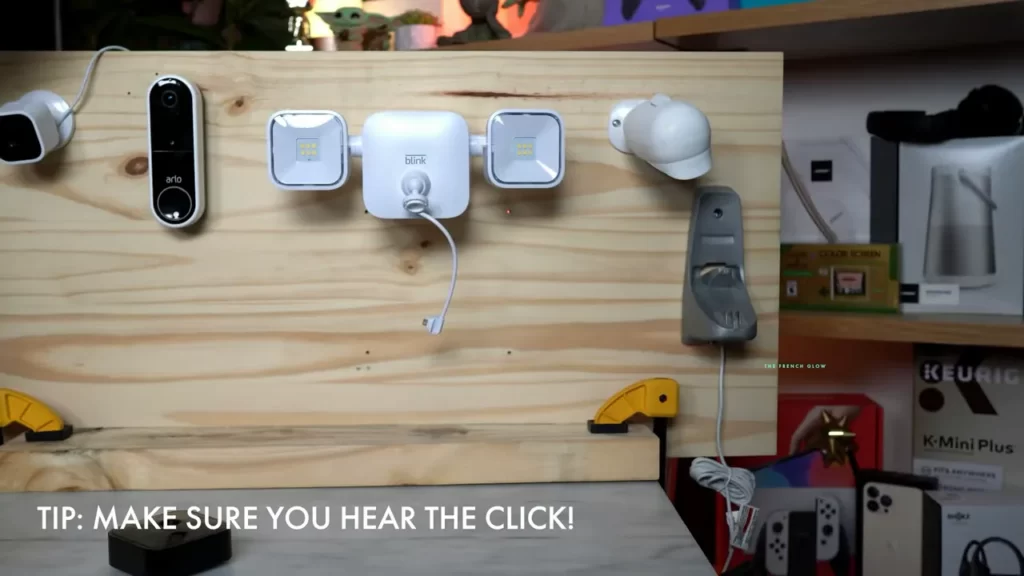
- Align the camera’s mounting plate with the bracket, ensuring it slots securely into place. Give it a gentle push to make sure it’s locked in correctly.
- Once the camera is attached to the mount, adjust the angle to achieve the desired field of view. You can do this by pivoting the camera up, down, or sideways, depending on your preferences.
- Finally, ensure the camera is tightly secured to the mount by tightening the screw on the camera’s underside using the included screwdriver.
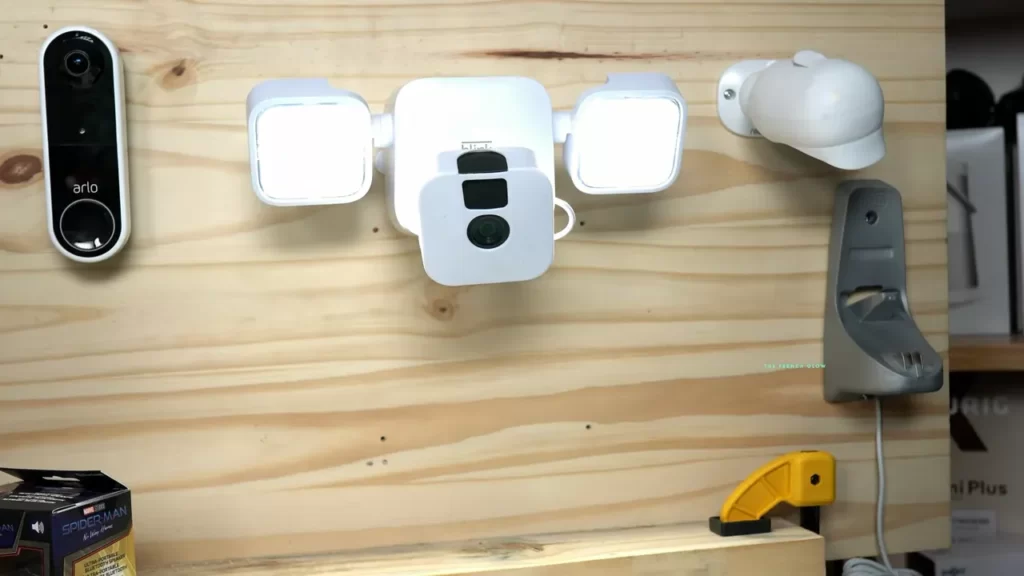
With the Blink Outdoor Camera mounted securely, you can now rest easy knowing that your property is under reliable surveillance. Take a moment to double-check the stability of the camera and make any necessary adjustments to achieve the best possible angle. Remember, a well-mounted camera ensures optimal performance and peace of mind.
Connecting The Blink Outdoor Camera To The Blink App
Connecting the Blink Outdoor Camera to the Blink App is a crucial step in setting up your home security system. The Blink App allows you to control and monitor your cameras seamlessly, giving you peace of mind and convenience. In this section, we will guide you through the process of downloading and installing the Blink App on your mobile device, as well as pairing the camera with the app for flawless functionality.
Downloading and installing the Blink App on your mobile device
To get started with the Blink Outdoor Camera, you need to download and install the Blink App on your mobile device. The Blink App is available for both iOS and Android devices, making it easily accessible for all users. Follow these simple steps to get the app up and running:
- On your mobile device, open the App Store (for iOS) or the Google Play Store (for Android).
- Search for “Blink App” using the search bar at the top of the screen.
- Click on the Blink App when it appears in the search results.
- Tap the “Install” or “Get” button to start the download and installation process.
- Wait for the app to download and install on your device. This may take a few moments depending on your internet connection.
Once the Blink App is successfully installed on your mobile device, you are one step closer to connecting your Blink Outdoor Camera and enjoying all its features.
Pairing the camera with the app for seamless control and monitoring
Now that you have the Blink App on your mobile device, it’s time to pair your Blink Outdoor Camera with the app for seamless control and monitoring. This process ensures that the camera and the app are synchronized, allowing you to access and control your camera’s settings effortlessly. Follow the steps below to complete the pairing process:
- Open the Blink App on your mobile device.
- Tap on the “+” icon or select “Add a Blink camera” from the app’s main menu.
- Ensure that your Blink Outdoor Camera is powered on and within range of your Wi-Fi network.
- Follow the on-screen instructions provided by the app to connect the camera to your Wi-Fi network.
- After successfully connecting the camera, the app will prompt you to name your camera and set personalized settings, such as motion detection sensitivity and recording duration.
- Once you have completed the setup process, you can start monitoring, controlling, and accessing your Blink Outdoor Camera using the Blink App.
Remember to keep your mobile device near the camera during the pairing process to ensure a strong and stable Wi-Fi connection. With the Blink App and your Blink Outdoor Camera successfully connected, you can now enjoy the benefits of a reliable and convenient home security system.
Configuring Camera Settings
Configuring Camera Settings
Once you have successfully installed your Blink Outdoor Camera, it’s time to customize the camera settings to suit your specific needs. By configuring these settings, you can maximize the accuracy of motion detection notifications and focus on specific areas of interest. In this section, we will guide you on how to adjust the motion detection sensitivity and set up activity zones for your camera.
Adjusting Motion Detection Sensitivity for Accurate Notifications
One of the key features of the Blink Outdoor Camera is its motion detection capability. By adjusting the motion detection sensitivity, you can avoid unnecessary notifications triggered by minor movements, such as swaying trees or passing cars, while ensuring that significant events are detected promptly.
To adjust the motion detection sensitivity:
- Open the Blink Home Monitor app on your smartphone or tablet.
- Select the Blink Outdoor Camera from the device list.
- Navigate to the camera settings by tapping on the gear icon.
- Find the “Motion Detection Sensitivity” option and tap on it.
- Slide the sensitivity bar to the desired level, ranging from low to high. A lower sensitivity will make the camera less prone to detection, while a higher sensitivity will make it more sensitive to even slight movements.
- Once you have selected the appropriate sensitivity, save the changes.
- Your Blink Outdoor Camera is now configured with the adjusted motion detection sensitivity, ensuring accurate notifications.
Setting Up Activity Zones to Focus on Specific Areas of Interest
Activity zones allow you to define specific areas within the camera’s field of view that you want to focus on. By setting up activity zones, you can receive notifications only when motion is detected in those areas, minimizing false alarms and enhancing the effectiveness of your camera.
To set up activity zones:
- Open the Blink Home Monitor app on your smartphone or tablet.
- Select the Blink Outdoor Camera from the device list.
- Navigate to the camera settings by tapping on the gear icon.
- Find the “Activity Zones” option and tap on it.
- On the activity zones screen, you will see a grid representing the camera’s field of view. Tap and drag on the grid to create a box that covers the area of interest.
- Resize and reposition the box as needed to focus on specific areas.
- Save the activity zones once you are satisfied with the configuration.
- Your Blink Outdoor Camera is now set up with activity zones, ensuring that you receive notifications only when motion is detected in the specified areas.
By adjusting the motion detection sensitivity and setting up activity zones for your Blink Outdoor Camera, you can customize the camera settings to provide accurate notifications and focus on specific areas of interest. Experiment with these settings to find the optimum configuration that best caters to your surveillance needs.
Testing And Troubleshooting
When it comes to installing your Blink Outdoor Camera, it’s important to not only set it up correctly but also ensure that it is functioning properly. This is where testing and troubleshooting come into play. In this section, we will cover how to verify camera functionality and video quality, as well as address common issues and error messages that you may encounter during the installation process.
Verifying camera functionality and video quality
In order to ensure that your Blink Outdoor Camera is working as intended, follow these steps to verify its functionality and video quality:
- Position the camera: Choose an optimal location to mount your Blink Outdoor Camera. It should have a clear view of the desired area and be within range of your Wi-Fi.
- Power on the camera: Insert the batteries or plug in the camera to activate it. Wait for the camera’s LED indicator to turn solid blue, indicating that it is powered on and ready for setup.
- Sync the camera: Open the Blink app on your smartphone and follow the on-screen instructions to sync the camera with your account.
- Check live view: Once the camera is synced, access the live view feature in the app to see if the camera is successfully capturing and transmitting video footage.
- Test motion detection: Trigger the camera’s motion sensor by walking in front of it or moving an object within its range. Verify that the camera detects the motion and starts recording accordingly.
- Review video quality: Assess the video quality by viewing the recorded footage in the Blink app. Look for clarity, sharpness, and if any issues such as pixelation or distortion are present.
Addressing common issues and error messages during installation
During the installation process of your Blink Outdoor Camera, you may encounter common issues and error messages. Here are some troubleshooting steps to address them:
| Issue/Error Message | Troubleshooting Steps |
|---|---|
| No Wi-Fi connection | Ensure that your Wi-Fi network is functioning properly and that the camera is within range. Check the camera’s LED indicator for a solid green light, indicating a successful Wi-Fi connection. |
| Syncing failed | Make sure that your smartphone is connected to the same Wi-Fi network as the camera. Restart the camera and smartphone, then attempt to sync again. |
| Poor video quality | Adjust the camera’s positioning to improve the view and reduce obstructions. Check for potential interference from other wireless devices and ensure that your Wi-Fi signal strength is strong. |
| Battery drain | Replace the batteries with fresh ones or use the provided USB cable for continuous power. If the issue persists, contact Blink customer support for further assistance. |
By following these steps and troubleshooting common issues, you can ensure a smooth and successful installation of your Blink Outdoor Camera. Enjoy the peace of mind that comes with a reliable home security system!
Integrating Additional Devices And Features
When it comes to home security, having a reliable and comprehensive system in place is essential. The Blink Outdoor Camera is a top-of-the-line option that not only provides HD video surveillance and motion detection but also offers the flexibility to integrate with other smart home devices. In this section, we will explore how to connect the Blink Outdoor Camera with other devices and take advantage of advanced features such as two-way audio and cloud storage.
Connecting the Blink Outdoor Camera to other smart home devices
One of the greatest advantages of the Blink Outdoor Camera is its compatibility with various smart home devices. Whether you already have a fully integrated smart home system or are just dipping your toes into home automation, the Blink Outdoor Camera can easily join the ranks of your other connected devices. Follow these steps to seamlessly connect your Blink Outdoor Camera:
- Start by downloading and installing the Blink Home Monitor app, available for both iOS and Android devices. Create an account or log in if you already have one.
- Open the app and select the plus (+) sign to add a new device. Choose “Blink Outdoor Camera” from the device options.
- Follow the on-screen instructions to connect your Blink Outdoor Camera to your home Wi-Fi network. Make sure to enter the correct Wi-Fi credentials to ensure a successful connection.
- Once your camera is connected, you can further personalize its integration with other devices by linking it to popular platforms like Amazon Alexa or Google Assistant. This allows you to control your camera through voice commands or include it in routines and automation scenarios.
Utilizing advanced features such as two-way audio and cloud storage
With the Blink Outdoor Camera, you don’t have to settle for basic security monitoring. This advanced device offers additional features that can enhance your home security and peace of mind:
- Two-way audio: The built-in speaker and microphone allow you to listen and speak to anyone near the camera. This feature comes in handy for greeting visitors, giving instructions to delivery personnel, or even scaring off unwanted intruders.
- Cloud storage: The Blink Outdoor Camera offers two storage options – local storage and Blink’s cloud storage service. While local storage allows you to save footage directly to an inserted USB flash drive, utilizing the cloud storage service ensures that your recordings are securely stored off-site. With cloud storage, you can access your video footage from anywhere, at any time, providing an extra layer of convenience and peace of mind.
By integrating your Blink Outdoor Camera with other smart home devices and utilizing advanced features like two-way audio and cloud storage, you can create a comprehensive and convenient home security system to keep your property and loved ones safe. Don’t miss out on the opportunity to enhance your home security; start integrating your Blink Outdoor Camera with other devices and exploring its advanced features today!
Maintaining And Updating The Blink Outdoor Camera
Proper maintenance and regular updates are crucial to ensure the optimal performance and security of your Blink Outdoor Camera. By keeping the camera and its surroundings clean and updating the firmware and software, you can enhance the longevity and functionality of your camera. In this section, we will delve into the essential steps for cleaning and maintaining the camera, as well as updating the firmware and software for an enhanced user experience.
Cleaning and maintaining the camera and its surroundings
Cleaning the Blink Outdoor Camera and its surroundings is essential to prevent obstructions in the camera’s field of view and ensure clear video footage. Follow these simple steps to maintain the camera and its surroundings:
- Regularly remove any dirt, dust, or debris that may accumulate on the camera lens. Use a microfiber cloth or a soft brush to gently wipe the lens in a circular motion. Avoid using harsh chemicals or abrasive materials that could damage the lens.
- Inspect the camera housing for any signs of damage or wear. If you notice cracks or other issues, contact the Blink support team for further assistance.
- Keep the surrounding area clean and free from any obstructions such as tree branches or shrubs that may interfere with the camera’s motion detection capabilities.
- Ensure that the camera is securely mounted to prevent it from being knocked out of position by strong winds or external forces.
Updating firmware and software for enhanced performance and security
Regular firmware and software updates are essential to ensure that your Blink Outdoor Camera remains up-to-date with the latest features, bug fixes, and security patches. Follow these steps to update the firmware and software:
- Open the Blink app on your smartphone and navigate to the settings section.
- Select the Blink Outdoor Camera from the list of devices.
- Check for any available firmware or software updates. If an update is available, follow the on-screen instructions to initiate the update process.
- During the update process, ensure that the camera remains connected to a stable Wi-Fi network and has sufficient battery power.
- Once the update is complete, restart the camera to apply the changes.
By regularly cleaning and maintaining your Blink Outdoor Camera and keeping the firmware and software up-to-date, you can ensure optimal performance, enhanced security, and a longer lifespan for your camera. Take the time to follow these steps, and enjoy peace of mind knowing that your camera is always ready to capture important moments and keep your property safe and secure.
Frequently Asked Questions On How To Install Blink Outdoor Camera
How Do I Install Blink Outdoor Camera?
To install Blink Outdoor Camera, simply follow the step-by-step instructions provided in the user manual or the accompanying smartphone app.
What Are The Requirements For Installing The Blink Outdoor Camera?
To install the Blink Outdoor Camera, you will need a stable Wi-Fi connection, a smartphone or tablet with the Blink app installed, and a mounting location with a clear view of the area you want to monitor.
Can I Install The Blink Outdoor Camera Indoors?
Yes, you can install the Blink Outdoor Camera both indoors and outdoors, depending on your monitoring needs and preferences.
Does The Blink Outdoor Camera Require Professional Installation?
No, the Blink Outdoor Camera is designed for simple and hassle-free installation, allowing you to set it up yourself without the need for professional assistance.
How Long Does It Take To Install The Blink Outdoor Camera?
On average, it takes about 10-15 minutes to install the Blink Outdoor Camera, including the setup of the smartphone app and the mounting of the camera in your desired location.
Conclusion
To sum up, installing the Blink Outdoor Camera is a straightforward process that can greatly enhance your home security. By following these simple steps, you’ll have peace of mind knowing that your property is well-protected. Don’t forget to position the camera strategically, connect it to the app, and customize the settings according to your preference.
With Blink Outdoor Camera, you can keep an eye on your home effortlessly, whether you’re at work or on vacation. Get started and enjoy the benefits of this reliable and user-friendly surveillance system.