o install a closet door, measure the opening, choose the door type and style, attach the tracks or hinges, and hang the door. Installing a closet door involves measuring the opening to determine the proper door size, selecting the appropriate door type such as bi-fold, sliding, or hinged, attaching the necessary tracks or hinges, and finally, hanging the door in place to complete the installation process.
Measuring Your Closet And Choosing The Right Door
Before you embark on installing a new closet door, it’s crucial to take accurate measurements of your closet and consider various factors that will help you choose the right door. This step is essential to ensure a seamless and hassle-free installation process.
Assessing the Closet Size and Dimensions
To determine the appropriate size for your closet door, start by measuring the width and height of your closet opening. Use a tape measure to get accurate measurements, rounding them up to the nearest inch. Record the width measurement first, followed by the height measurement, as this will help you identify the right size door for your closet.
Considering Door Material and Style Options
Once you have measured your closet, it’s time to consider the door material and style options that best suit your needs and preferences. The material you choose will not only impact the functionality and durability of the door but also contribute to the overall aesthetic appeal of your space.
Here are a few popular door material options to consider:
- Wood: Ideal for adding warmth and elegance to your closet space, wood doors are durable and available in various finishes and designs.
- Glass: If you want to create a visually open and modern look for your closet, consider glass doors. They allow light to filter through, making your space appear larger and more inviting.
- Mirror: Mirror doors offer a dual purpose, as they not only serve as a functional door but also provide a full-length mirror for convenience. These doors can amplify the light in your space, giving it a brighter and more spacious feel.
- Louvered: Louvered doors are an excellent choice if you want to add a touch of ventilation to your closet while maintaining privacy. These doors have slats that allow for airflow, preventing musty smells and keeping your clothes fresh.
- Accordion: If you have limited space, consider accordion doors. These doors fold in on themselves, providing easy access to your closet without intruding into the surrounding area.
Aside from material options, you can also choose from a variety of door styles such as traditional, contemporary, or even custom designs depending on your personal taste and interior decor theme.
By carefully assessing your closet size and dimensions, as well as considering the available door material and style options, you can confidently choose the perfect door for your closet. This ensures not only a functional and aesthetic addition to your space but also a smooth and successful installation process.
Gathering The Tools And Materials
Before you begin the installation of your closet door, it’s important to gather all the necessary tools and materials. Having everything at hand will make the process smoother and more efficient, saving you time and frustration. In this section, we will provide you with a comprehensive list of the tools and materials you will need to install your closet door.
List of Required Tools
To ensure a successful installation, you will need the following tools:
- A tape measure to accurately measure the dimensions of your closet door opening.
- A level to ensure the door is installed straight and aligned.
- A drill with different drill bits, including a screwdriver bit.
- A screwdriver to secure the door hinges and handles.
- A pencil to mark the positions for drilling and attaching hardware.
- A hammer for driving in screws or nails.
- An adjustable wrench to tighten any bolts or nuts.
- A carpenter’s square for ensuring corners are at right angles.
- A utility knife for cutting any necessary materials.
- A stud finder to locate the wall studs for secure mounting.
Necessary Materials for Installation
In addition to the tools mentioned above, you will also need the following materials:
- The closet door itself, whether it’s a pre-hung door or a sliding door system.
- Screws and nails for attaching the door hinges, handles, and any other hardware.
- Wood shims to level and secure the door in the frame.
- Caulking or weatherstripping to seal any gaps around the door for improved insulation.
- A paintbrush and paint or stain if you plan on refinishing the door.
Make sure you have all the necessary tools and materials before you begin the installation process. This will prevent any delays or interruptions, allowing you to complete the installation smoothly and efficiently. With everything ready, you can now move on to the next steps of installing your closet door.
Removing The Old Closet Door (Only If Applicable)
Before installing a new closet door, it’s important to remove the old one and any existing hardware. This step is only necessary if you already have a door in place, so if you’re starting from scratch, feel free to skip ahead to the next section!
Removing the Existing Door and Hardware
To begin, gather the necessary tools for removing the old closet door and hardware. You’ll need a screwdriver, pliers, and possibly a drill if any screws are deeply embedded.
1. Firstly, carefully examine the door to locate the hinges. These are typically attached to the side of the door closest to the jamb.
2. Use the screwdriver to remove the screws securing the hinges to both the door and the jamb. Set these aside in a safe place, as you may need them when installing the new door.
3. Once the hinges are detached, gently lift the door out of the doorway. Be cautious, as older doors can be heavy and awkward to maneuver.
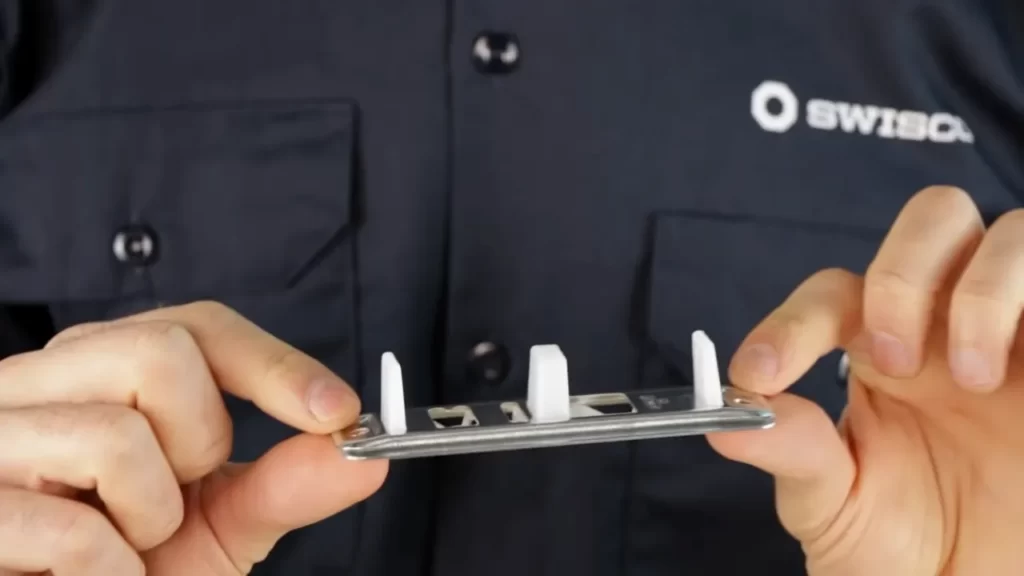
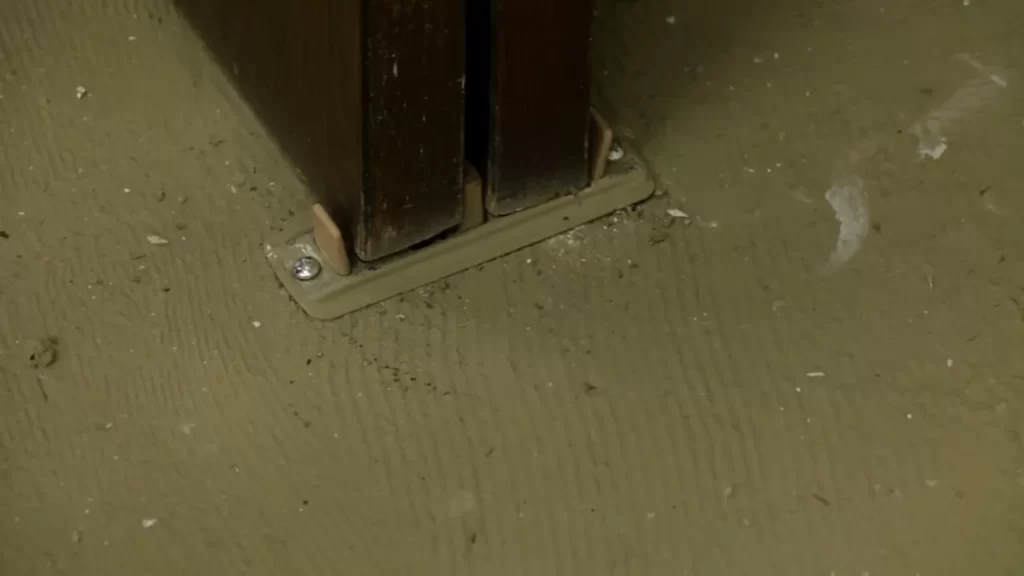
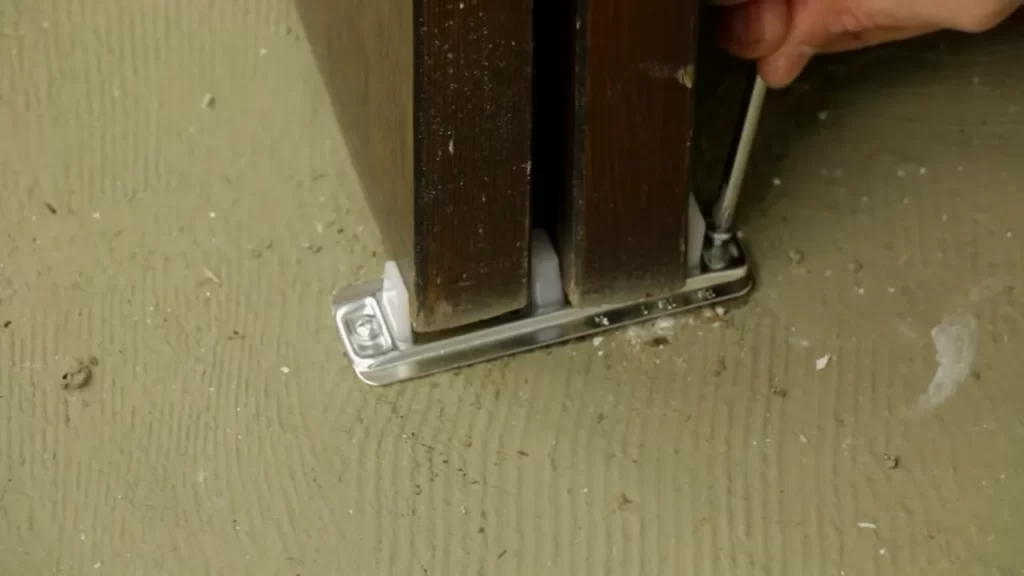
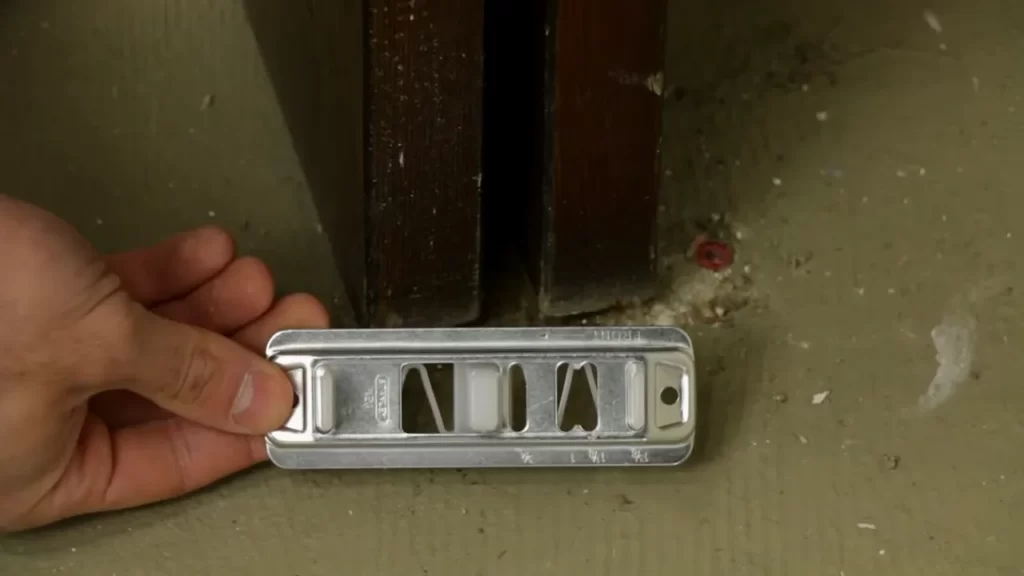
4. Take a moment to inspect the closet opening for any remaining hardware. Look for door guides or tracks along the floor or ceiling, as well as any screws or nails that may have held these components in place.
Note: If you encounter any stubborn screws or nails, pliers can be used to grip and remove them. For screws that are too difficult to remove by hand, a drill with a suitable bit can be employed.
Preparing the Closet Opening for the New Door
Now that the old closet door and hardware are removed, it’s time to prepare the closet opening for the new installation. This step ensures a clean, smooth surface for your new door to fit properly.
1. Start by inspecting the closet opening for any damage or imperfections. If you notice any cracks, dents, or holes, now is the time to repair them. Fill in any gaps with wood filler or putty, and sand down any rough spots to create an even surface.
2. Measure the width and height of the closet opening to determine the exact dimensions for your new door. Record these measurements, as they will be crucial when selecting and installing the new door.
3. Next, clean the closet opening thoroughly. Remove any dust, debris, or residue left behind from the old door. A damp cloth or vacuum cleaner can be used to ensure a clean surface.
4. Finally, double-check that the closet opening is level and plumb. Use a level tool to ensure that both the floor and ceiling are horizontal, and the sides are vertical. Any adjustments can be made with shims or a similar leveling tool.
Congratulations! You have successfully removed the old closet door and prepared the opening for the new one. It’s now time to proceed with the installation of your brand new closet door, and we’ll guide you through each step in the upcoming sections.
Installing The Door Frame
When it comes to installing a closet door, properly installing the door frame is crucial for a professional and secure finish. This is the first step in the installation process and sets the foundation for a smooth and functional closet door.
Measuring and Marking the Frame Placement
The first thing you need to do is accurately measure and mark the placement of the door frame. This ensures that the frame is in the correct position and will align perfectly with the closet opening. To measure the frame placement:
- Begin by measuring the height and width of the opening with a tape measure. Take these measurements at several points to account for any irregularities in the closet opening.
- Use a pencil to mark the top and bottom of the frame on the wall, based on your height measurement. Make sure the marks are level to ensure a straight frame.
- Next, measure and mark the sides of the frame according to your width measurements. Again, ensure the sides are level by using a level tool.
- Double-check your measurements and marks to avoid any mistakes before proceeding to the next step.
Securing the Frame in Place
Once you have accurately measured and marked the frame placement, it’s time to secure the frame in place. This step ensures that the frame is stable and will provide the necessary support for the closet door. Follow these steps to secure the frame:
- Place the door frame against the marks on the wall, ensuring it is aligned properly with the opening.
- Using a drill and appropriate screws, attach the frame to the wall at the top, bottom, and sides. Make sure the screws are long enough to securely hold the frame in place, but not so long that they penetrate the other side of the wall.
- Check the frame with a level tool to ensure it is straight and adjust as necessary before tightening the screws fully.
- Finally, double-check the stability of the frame by giving it a gentle shake. If there is any wobbling or movement, re-tighten the screws until the frame is securely in place.
Congratulations! You have successfully installed the door frame for your closet door. In the next steps, we will guide you through installing the actual door panels and making any necessary adjustments for a seamless finish.
Mounting The Door Panels
Now that you have successfully attached the hinges to the closet doors, it is time to move on to the next step in the installation process – mounting the door panels onto the frame. This step is crucial as it ensures that the doors are aligned properly and securely attached to the frame. In this section, we will guide you through the process, step by step.
Attaching Hinges to the Door
To begin, gather all the necessary tools such as a screwdriver, screws, and a measuring tape. Place the first door panel against the frame, ensuring that the hinge side aligns with the corresponding hinges on the frame. Take note of the position and mark the spots where the hinges will be attached to the door. Next, use a screwdriver to attach the hinges to the door. Insert the screws into the pre-drilled holes on the hinges and tighten them securely. Repeat this process for each hinge, ensuring that the door is properly aligned and the hinges are securely attached.
Aligning and Installing the Door Panels onto the Frame
After attaching the hinges to the door, it is time to align and install the door panels onto the frame. Start by positioning the door panel against the frame, making sure it is level and aligned with the corresponding hinges. If necessary, make adjustments to the hinges or the frame to ensure a proper fit. This may involve loosening or tightening the screws on the hinges or adjusting the position of the frame. Take your time during this step to ensure that the doors are aligned correctly. Once the doors are properly aligned, it’s time to secure them onto the frame. Use a screwdriver to insert the screws into the pre-drilled holes on the hinges, ensuring that they are tightened securely. Double-check the alignment one more time before fully tightening the screws. Congratulations! You have successfully mounted the door panels onto the closet frame. Repeat these steps for the remaining door panels, ensuring that each one is aligned and securely attached to the hinges. With the door panels mounted, you are one step closer to completing your closet door installation.
Adding Handles And Other Hardware
When it comes to installing closet doors, adding handles and other hardware is an important step that brings both functionality and aesthetics to your space. Choosing the right door handles and hardware is crucial for achieving the desired look and ensuring smooth operation. Once you have selected the right handles and hardware, installing and adjusting them correctly will ensure that they function properly and enhance the overall appearance of your closet doors.
Choosing the Right Door Handles and Hardware
When choosing door handles and hardware for your closet doors, you should consider both style and functionality. The handles and hardware you select should complement the overall design of your space while being durable and easy to use. Here are a few factors to keep in mind:
- Material: Choose handles and hardware that are made from high-quality materials such as metal or solid wood to ensure their durability and longevity.
- Style: Consider the style of your closet doors and the overall decor of the room. Whether you prefer a sleek and modern look or a more traditional and classic design, there are various styles and finishes available to suit your taste.
- Size and Shape: Determine the size and shape of the handles that will not only fit the doors properly but also provide comfortable grip and easy operation.
- Functionality: Depending on your needs, you may opt for handles with locks, latches, or additional hardware such as pulls or knobs. Ensure that the hardware you choose is compatible with your door type and provides the desired level of security.
Installing and Adjusting Door Handles, Locks, and Additional Hardware
Once you have selected the perfect door handles and hardware for your closet doors, it’s time to install and adjust them correctly. Follow these steps:
- Start by gathering the necessary tools, including a screwdriver, drill, measuring tape, and pencil.
- Measure the appropriate height and position for the handles or hardware on your closet doors. Use a pencil to mark the spots.
- Using the drill and appropriate drill bit, create pilot holes on the marked spots. Make sure to use the right bit size to avoid damaging the handles or hardware.
- Align the handles or hardware with the pilot holes and secure them in place using the provided screws. Use a screwdriver to tighten the screws adequately.
- Test the handles or hardware to ensure they function smoothly. If needed, make adjustments by loosening or tightening the screws slightly.
- If installing locks or additional hardware, follow the manufacturer’s instructions for proper installation and adjustments.
A well-installed and properly adjusted handle or hardware will not only enhance the functionality of your closet doors but also add a touch of style to your space. Take your time to choose the right handles and hardware, and follow the installation steps carefully for optimal results.
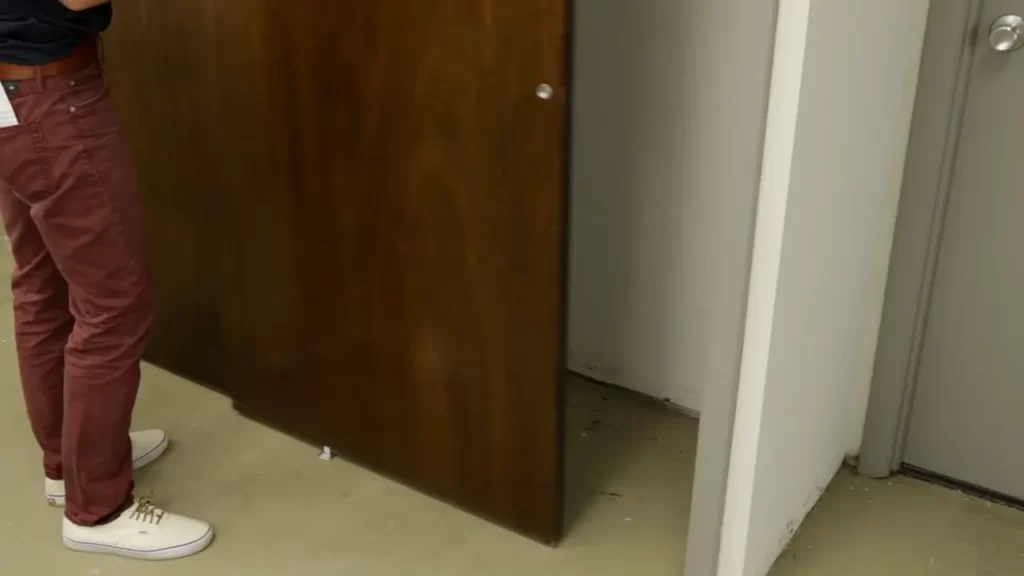
Checking And Adjusting For Proper Fit
Installing closet doors can greatly enhance the functionality and aesthetics of your space. However, achieving a proper fit is crucial to ensure smooth opening and closing of the door. In this article, we will guide you through the process of checking and adjusting the closet door for a perfect fit.
Ensuring Smooth Opening and Closing of the Door
Before you start adjusting the door, it’s important to ensure its smooth operation. A properly aligned closet door should open and close effortlessly, without any sticking or dragging. Here’s how you can ensure the smooth opening and closing of the door:
- Check the track: Inspect the track for any debris or obstructions that may hinder the door’s movement. Remove any dirt or dust particles and make sure the track is clean and free from any obstacles.
- Lubricate the track: Apply a silicone-based lubricant to the track to minimize friction. This will help the door glide smoothly along the track.
- Test the rollers: Examine the rollers and ensure they are properly attached and in good condition. Replace any damaged or worn-out rollers to prevent the door from sticking or wobbling.
By following these steps, you can ensure that your closet door opens and closes effortlessly, providing easy access to your belongings.
Adjusting the Door for Proper Alignment
If you find that your closet door is not aligning properly, adjustments may be necessary. Here’s how you can adjust the door for proper alignment:
- Check the top and bottom alignment: Start by examining the alignment of the top and bottom of the door. Use a level to ensure that the door is perfectly vertical. If needed, make adjustments to the hinges or pivot brackets to align the door correctly.
- Adjust the side alignment: Next, check the side alignment of the door. If the door is rubbing against the frame or not aligning properly, you can adjust the position of the hinges to achieve the desired alignment.
- Test the fit: After making the necessary adjustments, close the door and check its fit. It should close evenly and without any gaps. If the fit is not satisfactory, continue making minor adjustments until the door aligns perfectly.
Remember to check the alignment at both the top and bottom of the door to ensure an even fit. Taking the time to properly adjust the door will result in a seamless and professional look.
By following these steps, you can confidently install closet doors and ensure they are properly aligned for smooth opening and closing. With a bit of patience and attention to detail, you’ll have a perfectly fitting and functional closet door in no time.
Cleaning And Inspecting The Newly Installed Closet Door
Once you have successfully installed your new closet door, it is important to thoroughly clean and inspect it to ensure its longevity and optimal performance. Cleaning the door will not only enhance its appearance but also prevent the accumulation of dirt and dust, which can affect its functionality over time. Additionally, inspecting the door will enable you to detect any defects or issues that may have arisen during the installation process, allowing you to address them promptly. In this section, we will guide you through the necessary steps to clean and inspect your newly installed closet door.
Removing Dirt and Dust
The first step in the cleaning process involves removing any dirt and dust that may have accumulated on the surface of the closet door. Use a soft, lint-free cloth or a feather duster to gently wipe away the dust particles. Pay close attention to the corners and edges of the door, as these areas tend to collect more dirt. If there are stubborn stains or grime, you can moisten the cloth with a mild detergent solution and gently scrub the affected area. Remember to wipe away any excess moisture to avoid damage to the door.
Inspecting for Any Defects or Issues
Once the closet door is clean, it’s time to inspect it for any defects or issues that may affect its functionality. Start by visually examining the door for any visible damage, such as scratches, dents, or discoloration. Inspect the hinges, knobs, and tracks to ensure they are securely attached and functioning properly. Test the door’s opening and closing mechanism to see if it operates smoothly without any resistance or squeaking noises.
Make sure to check the alignment of the door as well. Stand at a distance and observe if the door is hanging straight and level. If you notice any misalignment, you may need to make adjustments to the hinges or tracks to ensure proper alignment. Additionally, inspect the seal or weatherstripping around the edges of the door to ensure it is intact and not damaged.
If you come across any defects, it is crucial to address them promptly. Depending on the severity of the issue, you may be able to fix it yourself or seek professional assistance. Keep in mind that addressing defects and issues early on will prevent further damage and ensure the longevity of your newly installed closet door.
Adding Optional Enhancements And Accessories
After successfully installing your closet doors, you may want to take your project to the next level by adding optional enhancements and accessories. These additions not only enhance the functionality of your closet doors but also elevate the overall aesthetic appeal. In this section, we will explore two popular options: installing door stops or bumpers, and adding decorative moldings or trim.
Installing Door Stops or Bumpers
Door stops or bumpers are essential accessories that help prevent your closet doors from slamming against the wall or other furniture. Installing them is a relatively simple process that can make a significant difference in preserving the longevity of your doors and maintaining a quiet and peaceful space. Follow these steps to install them:
- Measure the height at which you want the door stops or bumpers to be placed.
- Using a pencil, mark the desired position on the door jamb or wall.
- Drill pilot holes at the marked locations.
- Secure the door stops or bumpers using screws or adhesive.
Adding Decorative Moldings or Trim
If you want to transform your closet doors into stylish focal points, adding decorative moldings or trim is an excellent option. This enhancement adds depth, character, and a touch of elegance to your doors, enhancing the overall visual appeal of your space. Here’s how you can do it:
- Measure the length and width of your closet doors.
- Choose the type and style of molding or trim that complements your interior design.
- Cut the moldings or trim to the desired lengths using a saw.
- Apply adhesive or use finishing nails to secure the moldings or trim to the surface of the doors.
- Fill any gaps or nail holes with wood filler and sand the surfaces for a smooth finish.
- Paint or stain the moldings or trim to match the color scheme of your space.
By incorporating these optional enhancements and accessories into your closet door installation project, you can personalize your doors and achieve a professional and polished look. Whether you choose to install door stops or bumpers for added protection or add decorative moldings or trim for an extra touch of style, these enhancements can make a significant difference in elevating the functionality and appearance of your closet doors.
Testing And Enjoying Your New Closet Door
After successfully installing your closet door, it’s time to test it out and enjoy the benefits of having a functional and stylish addition to your space. Testing your new closet door allows you to ensure that it opens and closes smoothly, while personalizing and organizing your closet space can help optimize its functionality. In this section, we’ll explore how to open and close the door effortlessly, as well as how to personalize and organize your closet to maximize its potential.
Opening and Closing the Door
It’s essential to ensure that your newly installed closet door operates smoothly, allowing for easy access to your belongings. Follow these steps to open and close your door efficiently:
- Stand in front of the closed door, ensuring there is adequate space to maneuver.
- Grasp the doorknob or handle firmly with your hand.
- Apply gentle pressure while turning the knob or handle to the left (counter-clockwise) to unlock the door.
- Once unlocked, carefully push or pull the door, depending on its type, to open it.
- To close the door, gently push or pull it back into its closed position.
- Turn the doorknob or handle to the right (clockwise) to lock it securely.
By following these steps, you can ensure that opening and closing your closet door becomes a simple and efficient task, adding convenience to your daily routine.
Personalizing and Organizing Your Closet Space
Now that you have successfully installed your new closet door and familiarized yourself with its operation, it’s time to personalize and organize your closet space to suit your needs. Below are some suggestions to optimize your closet’s functionality:
Utilize Hanging Rails and Hooks
Maximize your closet’s storage potential by adding hanging rails and hooks. Hang your garments neatly on the rails to keep them wrinkle-free and easily accessible. Utilize hooks to hang bags, belts, or scarves for added convenience and organization.
Invest in Storage Bins or Baskets
Storage bins or baskets are excellent tools for organizing smaller items such as socks, accessories, or miscellaneous items. Place them on shelves or in compartments to keep everything tidy and within reach.
Create Labeled Storage Sections
Divide your closet into sections and label them accordingly. This will make it easier to locate specific items and maintain an organized space. Consider using adhesive labels or color-coded tags for quick and efficient identification.
Use Shoe Racks or Cubbies
If your closet has limited space for shoes, consider investing in a shoe rack or cubbies. These storage solutions keep your footwear neatly displayed and prevent them from getting damaged or cluttered.
By incorporating these personalization and organization tips into your closet space, you can create a welcoming environment that caters to your specific needs.
Frequently Asked Questions For How To Install Closet Door
Can I Install Closet Doors Myself?
Yes, you can install closet doors yourself. It is a simple and straightforward process that can be done with basic tools and some patience. Just follow the instructions provided with the doors and take the necessary measurements. Enjoy your DIY project!
What Are The Easiest Closet Doors To Install?
The easiest closet doors to install are sliding doors. They are user-friendly, require minimal tools and skills for installation, and come in various styles and materials. Sliding doors are a popular choice for DIY enthusiasts and homeowners looking for hassle-free closet door options.
Can You Install Sliding Closet Doors Without Bottom Track?
Yes, it is possible to install sliding closet doors without a bottom track. This allows for a sleek and modern look, as the doors hang from a top track instead.
How Do You Put A Closet Door Back On Track?
To put a closet door back on track, follow these steps: – Remove the door from the track by lifting it up and pulling it towards you. – Inspect the track for any debris or obstructions and clean it if needed.
– Align the door with the track and slide it back onto the rollers. – Ensure the door is level and adjust the rollers if necessary. – Test the door to make sure it slides smoothly along the track.
How Much Does It Cost To Install A Closet Door?
The cost of installing a closet door can vary depending on factors like material, design, and labor. It usually ranges from $150 to $500.
How Long Does It Take To Install A Closet Door?
The timeframe for installing a closet door typically depends on the complexity of the project. On average, it takes around 1 to 3 hours.
Conclusion
Installing a closet door may seem challenging, but with the right tools and a step-by-step approach, it can be a rewarding DIY project. By following the instructions in this guide, you can transform your closet and enhance the overall aesthetics of your space.
Remember to measure accurately, choose the right style of door, and take your time during the installation process. With a little patience and effort, you’ll have a functional and stylish closet door in no time. Happy installing!