Install a dash cam by mounting it on your car’s windshield and connecting it to the power source. A dash cam is a small video camera that you can place on your car’s windshield to record your driving experience.
It is a useful device that provides evidence in case of accidents and can help prevent insurance fraud. We will guide you on how to install a dash cam in your car, step by step. So let’s get started!
Prep For Installation

When it comes to installing a dash cam in your vehicle, proper preparation is essential. By prepping for installation, you can ensure a smooth and hassle-free experience. This section will guide you through the necessary steps to prep for installing your dash cam, including checking compatibility, gathering tools and equipment, and choosing a suitable mounting location.
Check dash cam compatibility with your vehicle
Before you begin the installation process, it’s important to check whether your dash cam is compatible with your vehicle. Different dash cams may have specific compatibility requirements, so it’s crucial to ensure that your dash cam is compatible with your vehicle’s make and model. Refer to your dash cam’s user manual or manufacturer’s website for detailed information on compatibility.
Gather necessary tools and equipment
Gathering the necessary tools and equipment beforehand will save you time and frustration during the installation process. Here is a list of the tools and equipment you may need:
| Tools | Equipment |
| Screwdriver setTrim removal toolElectrical tapeWire cutters/strippersZip ties | Dash camMemory cardPower cableMounting bracketAdhesive pads |
Choose a suitable mounting location
To ensure optimal performance and functionality, it’s important to choose a suitable mounting location for your dash cam. Keep the following considerations in mind when selecting a mounting location:
- Make sure the chosen spot does not obstruct your view while driving.
- Ensure the mounting location provides a clear line of sight for capturing the road ahead.
- Consider the dash cam’s field of view and adjust the mounting angle accordingly for best coverage.
- Avoid mounting the dash cam where it may be easily tampered with or stolen.
- Take into account any local laws or regulations regarding dash cam placement.
By adhering to these guidelines, you can select a suitable mounting location that meets your needs and ensures optimal dash cam performance.
Mounting The Dash Cam

Mounting your dash cam properly is crucial to ensure clear visibility and optimal performance. Follow these step-by-step instructions to securely attach and position your dash cam:
Clean the windshield and dash surface
Before installing your dash cam, make sure to thoroughly clean the windshield and dash surface where you plan to mount it. Any dirt, dust, or debris can interfere with the adhesive and compromise the stability of the mount. Use a glass cleaner and a microfiber cloth to wipe the area clean. Ensure that there are no streaks or smudges left behind.
Attach the dash cam mount securely
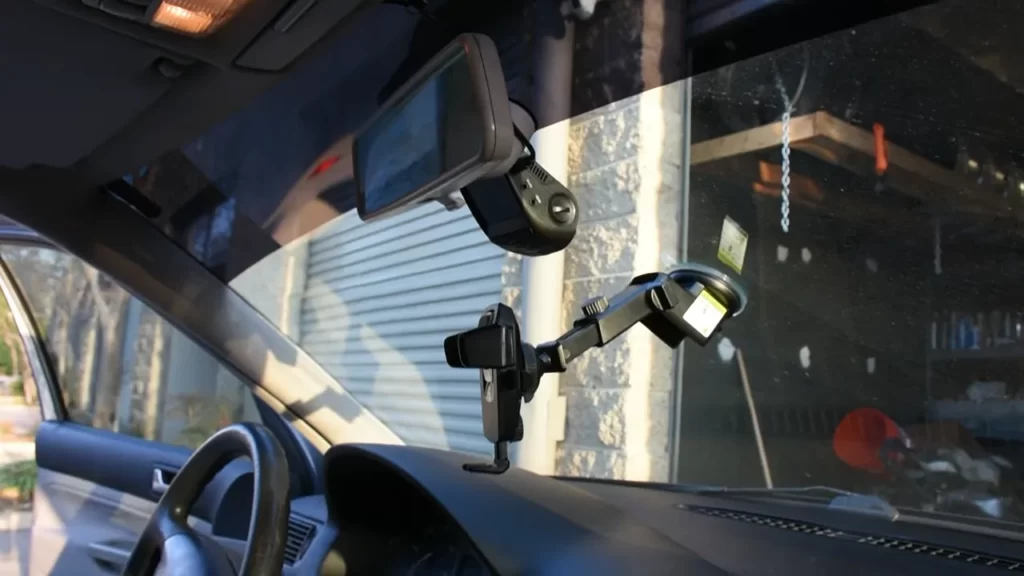
Once the surface is clean and dry, carefully attach the dash cam mount. Most dash cams come with a suction cup mount, which can be easily attached to the windshield. Alternatively, some models have adhesive mounts for a more permanent installation. Follow the manufacturer’s instructions to securely attach the mount to the windshield or dash. Press firmly to ensure a strong bond.
If you’re using a suction cup mount, activate the suction by pressing the lever or twisting the knob. This will create a vacuum seal that holds the mount in place. Give it a gentle tug to make sure it’s securely attached. If you opted for an adhesive mount, allow sufficient time for the adhesive to bond with the surface before proceeding to the next step.
Adjust the angle and position of the dash cam
Once the mount is securely attached, it’s time to adjust the angle and position of your dash cam. This step is crucial to ensure optimal video coverage and minimize any potential blind spots. Start by considering your line of sight while driving and adjust the dash cam accordingly.
Depending on your dash cam model, you may be able to adjust the angle by rotating the camera or tilting the mount. Experiment with different positions to find the one that provides the best field of view without obstructing your view of the road. Keep in mind that some states have restrictions on the placement of dash cams, so be aware of any legal requirements in your area.
Once you’ve positioned the dash cam, give it a final check to ensure it’s secure and doesn’t obstruct your view. Double-check that the power and other cables are appropriately routed and don’t interfere with your driving. Take a test drive to make sure everything is functioning correctly before hitting the road.
By following these simple steps, you can securely mount your dash cam and have peace of mind knowing that you have an extra layer of protection on the road.
Wiring The Dash Cam

Installing a dash cam in your vehicle not only enhances your safety but also provides valuable evidence in case of accidents or incidents on the road. One crucial step in the installation process is wiring the dash cam properly. In this guide, we will walk you through the process of wiring your dash cam for a seamless and tidy installation.
Locate the vehicle’s fuse box
The first step in wiring your dash cam is to locate the fuse box in your vehicle. The fuse box is usually located under the dashboard or in the engine compartment. Refer to your vehicle’s manual or search online to find the exact location of the fuse box in your particular make and model.
Identify a fuse to tap into for power
Once you have located the fuse box, you need to identify a suitable fuse to tap into for power. It is important to choose a fuse that corresponds to an accessory circuit or a circuit that is only active when the ignition is turned on. This ensures that your dash cam only operates when the vehicle is in use, preserving your car’s battery.
You can use a multimeter or a fuse tap with an indicator light to identify a fuse that provides power only when the ignition is on. Insert the multimeter probes into each side of the fuse and check for voltage. If the fuse has power only when the ignition is on, it is suitable for connecting your dash cam.
Connect the dash cam to the fuse
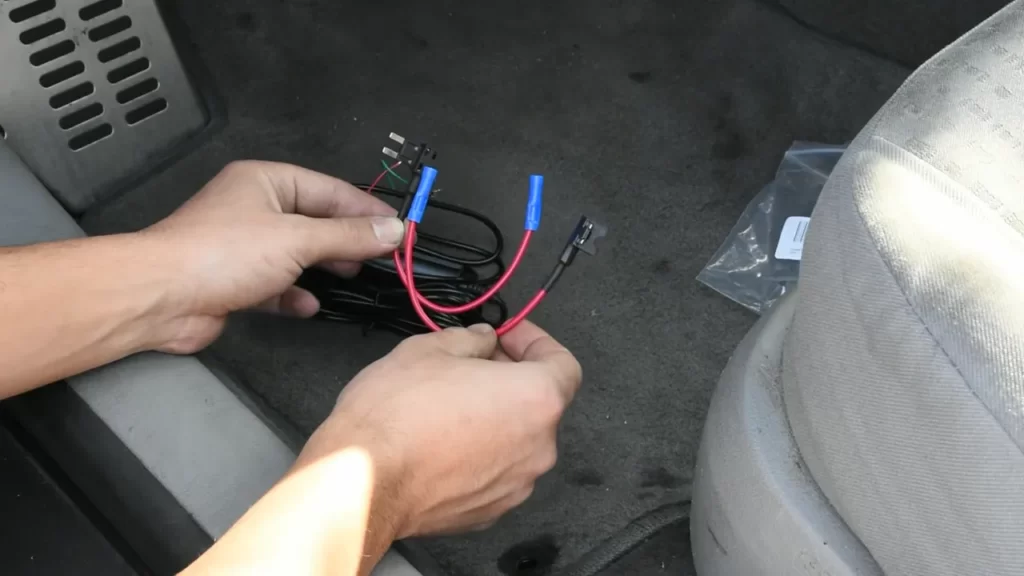
Now that you have identified a suitable fuse, it’s time to connect your dash cam to it. Start by attaching the fuse tap to the fuse you have chosen. Remove the fuse from its slot and insert it into one side of the fuse tap. Then, insert the new fuse provided with your dash cam into the other side of the fuse tap.
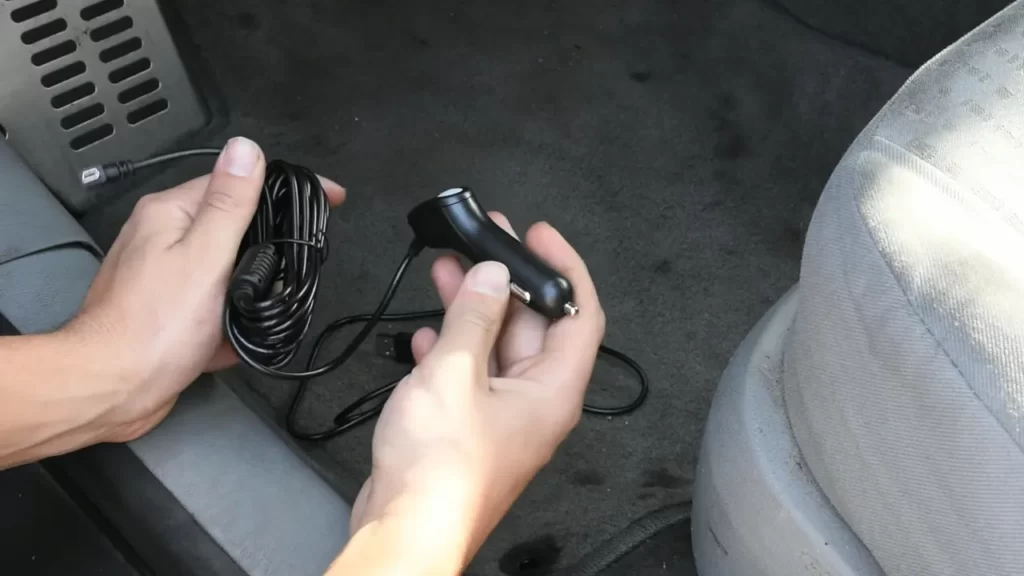
Next, connect the power cable from your dash cam to the provided port on the fuse tap. Ensure that the connection is secure to avoid any loose wiring. Some dash cams may require additional wiring for features such as GPS or rearview cameras. Follow the manufacturer’s instructions to connect these additional cables if necessary.
Hide the wiring for a tidy installation
To give your dash cam installation a professional and tidy look, it’s important to hide the wiring. Start by routing the power cable along the edges of the vehicle’s interior panels, making sure to avoid any moving parts or potential hazards.
Using adhesive clips or cable ties, secure the wiring along the edges and corners, keeping it out of sight and free from tangling. You can also tuck the excess cable behind trim panels or underneath the dashboard for a cleaner appearance.
Make sure to test your dash cam after the installation to ensure that it is functioning properly and recording footage as intended.
Wiring your dash cam may seem daunting at first, but by following these steps, you can ensure a hassle-free and professional installation. Remember to always refer to the manufacturer’s instructions and consult a professional if you are unsure about any steps in the process.
Testing And Finalizing

Once you have successfully installed your dash cam and connected it to a power source, it’s time to test and finalize the setup. This crucial step ensures that your dash cam is functioning properly and ready to record any incidents on the road. Now, let’s explore the steps involved in testing and finalizing your dash cam installation.
Turn on the vehicle to test the dash cam
Before you start adjusting settings and configuring the dash cam, the first step is to turn on your vehicle and ensure that the dash cam powers up as well. Check if the dash cam display screen or indicator lights turn on, indicating that it is receiving power. This simple step will verify that the wiring connection is correct and the dash cam is connected properly to the power source.
Adjust the settings and configure the dash cam
Once you have confirmed that the dash cam is receiving power, it’s time to dive into the settings and configurations. Most dash cams come with built-in menus that allow you to adjust various options such as video resolution, loop recording, and motion detection. Use the provided instructions or the manufacturer’s website to navigate through the dash cam’s settings menu and adjust them according to your preferences. Remember to set the correct date and time to ensure accurate recording and playback.
| Setting | Function |
|---|---|
| Video Resolution | Adjust the quality and clarity of the recorded videos |
| Loop Recording | Enable continuous recording by overwriting the oldest footage when the memory card is full |
| Motion Detection | Activate the dash cam to start recording when it detects any movement or impact |
Verify the dash cam is recording properly
After configuring the dash cam settings, it’s essential to confirm that it is recording properly. Start by driving around for a few minutes while keeping an eye on the dash cam screen or indicator lights. Check if you can see a live feed of the road on the screen and ensure that the dash cam is recording as expected. Additionally, make a mental note of where the dash cam is facing to ensure it captures the desired field of view.
Secure any loose wiring and tidy up the installation
Now that you have tested and verified the dash cam’s functionality, it’s time to tidy up the installation. Check for any loose wires that might be hanging or obstructing your view. Secure them neatly using zip ties or electrical tape to avoid any interference while driving. Additionally, reposition the dash cam if necessary to ensure it does not obstruct your view of the road. A tidy and secure installation not only improves safety but also prevents any damage to the dash cam or vehicle.
With testing and finalizing complete, you can now have peace of mind knowing that your dash cam is installed correctly and ready to document any unexpected events on the road. Remember to periodically check the dash cam’s operation and maintain a clear view of the lens for optimal recording performance. Stay safe, and happy driving!
Frequently Asked Questions On How To Install Dash Cam
Can I Install A Dashcam By Myself?
Yes, you can install a dashcam by yourself. It is a straightforward process that doesn’t require professional help. Just follow the instructions provided with the dashcam, and you’ll be able to install it without any difficulty.
Is It Hard To Install A Car Dash Cam?
Installing a car dash cam is not difficult. Just follow the provided instructions to connect it to your car’s power source and attach it to the windshield.
How Do I Connect My Dash Cam To My Car?
To connect your dash cam to your car, follow these steps: 1. Find a suitable spot to mount the dash cam. 2. Use the adhesive or suction cup mount to attach the dash cam to the windshield. 3. Connect the power cable to the dash cam and plug it into the car’s power outlet or cigarette lighter.
4. Adjust the camera’s angle for optimal view. 5. Ensure the dash cam is turned on and set up according to the manufacturer’s instructions. Enjoy recording your drives and enhancing your safety on the road!
Is There A Dash Cam With No Wires?
Yes, there are dash cams available that don’t require any wires. These wire-free dash cams are designed to operate on battery power, giving you the freedom to install them easily without any complicated wiring. They are convenient and offer efficient recording without the hassle of wires.
How Do I Choose The Right Dash Cam For My Car?
To choose the right dash cam for your car, consider factors like video quality, storage capacity, and additional features.
Conclusion
Installing a dash cam is a simple process that can greatly enhance your driving experience. By following the steps outlined in this guide, you can easily set up your dash cam and start reaping its many benefits. From capturing accidents to providing peace of mind, a dash cam is a valuable investment for any driver.
Don’t wait any longer – install your dash cam today and drive with confidence.
