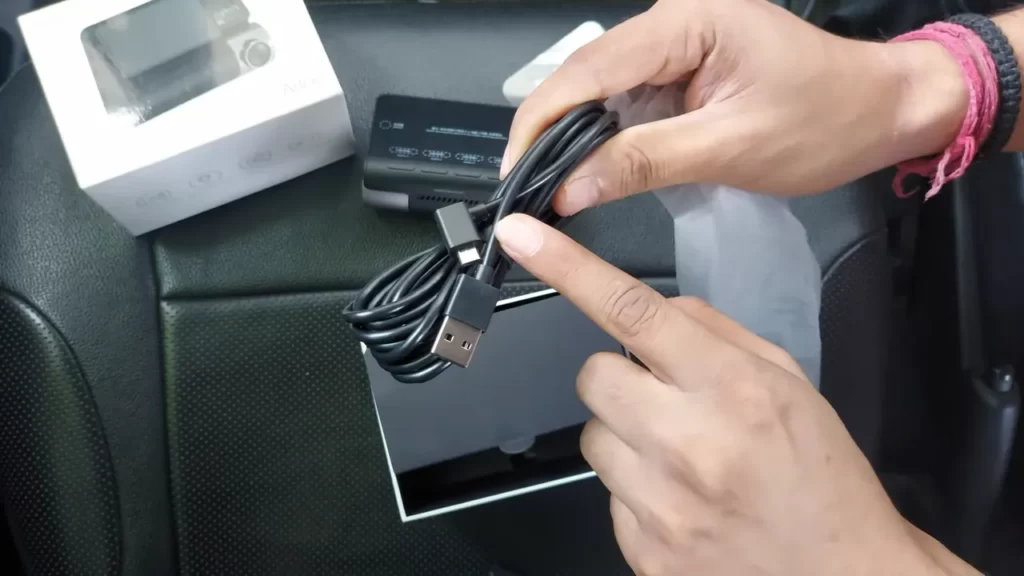
To install a dashcam wire, locate a power source within the vehicle and connect the wire to it. Begin by identifying a suitable source, such as the car’s fuse box or cigarette lighter socket.
Preparing For Installation
Before you begin installing a dashcam wire in your vehicle, it is important to properly prepare for the task at hand. This involves researching the best dashcam wire for your specific vehicle, checking its compatibility, and gathering the necessary tools and materials. These steps will ensure a smooth installation process and optimal functionality of your dashcam. Let’s dive into each of these preparations in more detail.
Researching the Best Dashcam Wire for Your Vehicle
Choosing the right dashcam wire for your vehicle is crucial for a secure and reliable installation. The market offers a variety of options, so conducting thorough research is imperative. Consider factors such as wire length, quality, compatibility with your dashcam model, and customer reviews. Look for wires specifically designed for your vehicle make and model, as they often provide the most seamless integration. This will help prevent any potential issues during installation and ensure optimal performance of your dashcam.
Checking Vehicle Compatibility
Prior to installation, it is essential to check the compatibility of the dashcam wire with your vehicle’s electrical system. Refer to your vehicle’s manual or consult with an expert to understand the type of electrical connections required. Some vehicles may have unique specifications, and using an incompatible wire might lead to malfunctions or even damage. Ensuring compatibility will help guarantee a successful and trouble-free installation process.
Gathering Required Tools and Materials
Before starting the installation, gather all the necessary tools and materials to ensure a smooth process. Here is a list of items you may need:
| Tools | Materials |
| Trim removal toolsWire strippersElectrical tapeWire connectorsZip tiesMulti-meter (for testing electrical connections) | Dashcam wireFuse taps (if required)Fuse holderGrounding wire (if needed)Mounting adhesive or bracket (for positioning the dashcam) |
Having all the necessary tools and materials at hand will save you time and ensure you can complete the installation without any interruptions or delays.
Planning The Route For Dashcam Wire
Installing a dashcam can provide you with valuable peace of mind and protection on the road. However, before you start the installation process, it’s crucial to plan the route for your dashcam wire. This step ensures optimal coverage, seamless integration, and avoids any potential obstacles or challenges. In this guide, we will walk you through the essential considerations for planning the ideal wire route for your dashcam.
Choosing the Ideal Wire Route for Optimal Coverage
When it comes to selecting the ideal wire route for your dashcam, there are a few factors to consider. First and foremost, you want to choose a route that provides optimal coverage of your vehicle’s surroundings. This means ensuring that the wire is strategically placed to capture a clear and comprehensive view of the road ahead, as well as any potential blind spots.
Additionally, it’s crucial to think about the aesthetics of the wire route. You want to choose a path that keeps the wire well-hidden and minimizes any visible cables. This not only helps maintain a clean and seamless look inside your vehicle but also reduces the risk of theft or vandalism.
Assessing Dashcam Placement Options
Before finalizing the wire route, you need to assess the various dashcam placement options within your vehicle. Look for an optimal position that doesn’t obstruct your view or interfere with any essential features such as the rearview mirror or airbags. Some popular placement options include mounting the dashcam behind the rearview mirror, on the windshield, or even on the dashboard.
Consider the angle and field of view provided by each placement option. Mounting the dashcam too high may result in capturing too much sky, while a low placement may hinder the views of the road. Experiment with different positions and adjust accordingly to find the perfect balance between visibility and discretion.
Identifying Potential Obstacles and Challenges
Before finalizing the wire route, it’s essential to identify any potential obstacles or challenges you may encounter. This step will help you avoid any unnecessary frustration and ensure a smooth installation process. Take note of door frames, side airbags, and other structural elements that could impede the wire’s path.
Moreover, be mindful of any electrical components or connections that may interfere with the dashcam wire. Avoid routing the wire near sensitive areas or high-temperature zones to prevent any damage or malfunctioning.In conclusion, planning the route for your dashcam wire is a critical step in the installation process. It ensures optimal coverage, seamless integration, and avoids potential obstacles or challenges. By carefully choosing the ideal wire route, assessing various dashcam placement options, and identifying potential obstacles, you can enjoy a hassle-free and effective dashcam installation.
Installing Dashcam Wire: Exterior Routing
Installing a dashcam is a smart decision to protect yourself and your vehicle on the road. However, ensuring a clean and professional installation requires careful consideration of wire routing. Exterior wire routing plays a crucial role in maintaining a tidy and inconspicuous appearance while maximizing functionality. In this guide, we will walk you through the step-by-step process of installing dashcam wire along the exterior of your vehicle, from removing panels and trims to concealing and securing the wire.
Removing Panels and Trims for Wire Routing
Before you can start routing the dashcam wire along the exterior, it is important to remove the necessary panels and trims to gain access to the areas where the wire will be routed. These panels and trims vary depending on the make and model of your vehicle. Carefully referring to your vehicle’s user manual or online tutorials specific to your vehicle will guide you in removing the required components.
Identifying Safe Entry Points for the Wire
Once the panels and trims are removed, it is crucial to identify safe entry points for routing the dashcam wire. Safe entry points are areas where the wire can be guided from the exterior to the interior of the vehicle without causing damage or interfering with the vehicle’s functionality. Common safe entry points include rubber grommets, existing wire harness holes, and gaps behind the vehicle’s panels. Take time to locate the safest and most convenient entry points for your specific vehicle.
Routing Dashcam Wire Along the Windshield
Now that you have identified safe entry points, it’s time to route the dashcam wire along the windshield. Start by carefully inserting the wire through the chosen entry point, making sure to avoid tight bends or sharp edges that could damage the wire or affect its performance. Slowly guide the wire along the edge of the windshield, ensuring it is neatly tucked away and not obstructing the driver’s view. Securing the wire with adhesive clips or Velcro straps can help maintain a clean and organized appearance.
Concealing the Wire Along the A-pillar
As you continue routing the dashcam wire, the next step is concealing it along the A-pillar, the vertical support structure connecting the roof to the front of the vehicle. Carefully tuck the wire into the gap between the A-pillar trim and the windshield, ensuring it is not visible from outside the vehicle. Adhesive clips or automotive-grade tape can be used to secure the wire along this path, providing a seamless integration.
Securing the Wire Along the Door Frame
Lastly, ensure the dashcam wire is securely routed along the door frame, maintaining its concealed and organized appearance. The door frame provides a natural pathway for the wire as it connects the A-pillar to the vehicle’s interior. Use adhesive clips or automotive-grade tape to secure the wire discretely along the door frame, preventing any movement or damage while the vehicle is in motion.
By following these step-by-step instructions for installing dashcam wire along the exterior of your vehicle, you can achieve a clean and professional installation. Remember to handle the wire carefully to avoid any damage and test the dashcam’s functionality before reassembling the removed panels and trims. Enjoy the peace of mind that comes with a well-installed dashcam, knowing that your journeys are being captured securely and wire-free.
Installing Dashcam Wire: Interior Routing
When it comes to installing a dashcam wire, proper interior routing is essential to achieving a neat and clean installation. In this section, we will explore the various steps involved in routing the wire through the interior of your vehicle.
Routing the Wire Through the Headliner
The first step in interior routing is to route the dashcam wire through the headliner. The headliner is the fabric or material that covers the interior roof of your vehicle. To do this:
- Start by removing any trim pieces or panels near the windshield to gain access to the headliner.
- Locate a suitable entry point near the windshield where the wire can be threaded through. This could be a gap between the headliner and windshield or a pre-existing wiring hole.
- Use a plastic trim panel tool or a credit card wrapped in cloth to gently pry open the gap.
- Thread the wire through the gap and carefully guide it along the edge of the headliner towards the desired routing area.
Concealing the Wire Along the Headliner and Pillars
To achieve a professional-looking installation, the dashcam wire can be concealed along the headliner and pillars. Follow these steps:
- Using a plastic trim panel tool or a credit card wrapped in cloth, carefully tuck the wire into the gap between the headliner and the windshield pillars.
- Use gentle pressure to push the wire into the gap, ensuring it is securely held in place.
- Continue this process along the headliner, concealing the wire in any available gaps or channels.
- When reaching the pillars, ensure the wire is hidden between the pillar trims and the vehicle body.
Routing the Wire Near the Rearview Mirror
The next step is to route the wire near the rearview mirror. Here’s how:
- Locate the wiring harness or wiring channels near the rearview mirror.
- Feed the dashcam wire through the available channels or gaps, ensuring it is secure and concealed.
- Use a plastic trim panel tool or a credit card wrapped in cloth to gently push the wire into place.
- Continue routing the wire towards the desired destination, ensuring it remains hidden and out of sight.
Concealing the Wire Under the Dashboard
To complete the interior routing of the dashcam wire, you can conceal it under the dashboard. Follow these steps:
- Find a suitable entry point under the dashboard where the wire can be routed.
- Carefully thread the wire through the entry point, ensuring it is hidden from view.
- Use zip ties or adhesive clips to secure the wire along existing wiring harnesses or brackets.
- Avoid routing the wire near moving parts, such as the steering column, to prevent any potential interference.
By following these steps and utilizing the available gaps and channels, you can achieve a clean and professional-looking installation of your dashcam wire. This ensures optimal functionality without compromising the aesthetic appeal of your vehicle’s interior.
Connecting Dashcam Wire To Power Source
Installing a dashcam wire is a crucial step in ensuring the smooth and reliable operation of your dashcam. Connecting the wire to a power source is one aspect that requires careful attention. In this section, we will explore the different options for identifying a power source and connecting the dashcam wire. Let’s dive in!
Identifying Power Source Options
Before you begin connecting the dashcam wire, it’s essential to identify the various power source options available to you. Here are a few common options:
- Fuse box
- Cigarette lighter
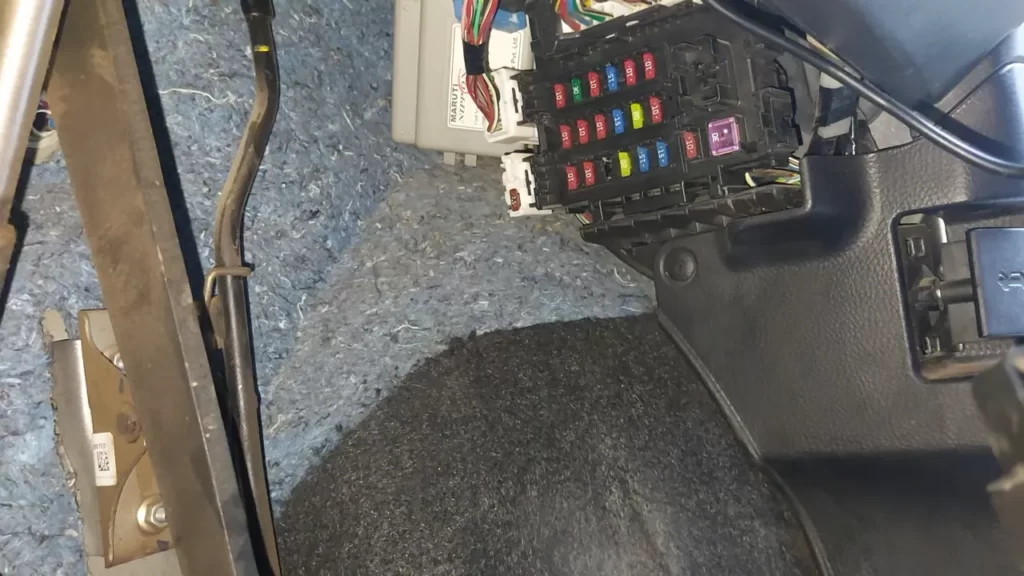
Connecting Wire to Fuse Box
Connecting the dashcam wire to the fuse box is a popular and reliable method. Here’s a step-by-step guide to help you with the process:
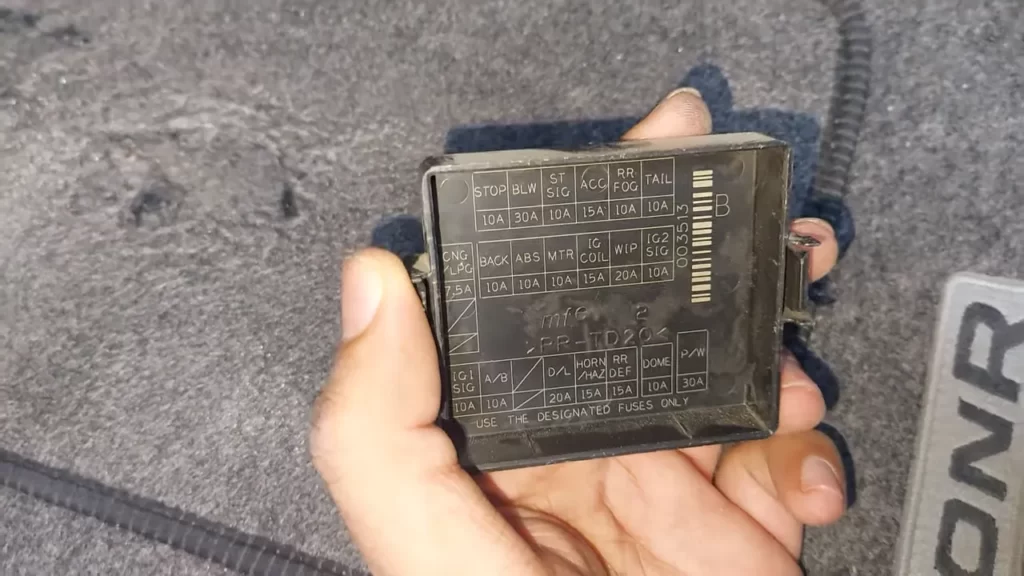
- Locate the fuse box in your vehicle. It is usually found under the dashboard or in the engine compartment.
- Select a suitable fuse slot that has power when the ignition is turned on. Refer to your vehicle’s manual or consult a professional if necessary.
- Remove the chosen fuse from its slot using a fuse puller or a pair of pliers carefully.
- Connect the positive wire of the dashcam to the metal tab on the fuse, which provides power.
- Reinsert the fuse and ensure it fits securely into the slot.
By connecting the dashcam wire to the fuse box, you can ensure a stable power supply, as it is directly connected to the vehicle’s electrical system.
Using an Add-a-Fuse Adapter
An alternative method to connect the dashcam wire to the fuse box is by using an add-a-fuse adapter. The steps are similar to connecting the wire directly to the fuse box. Here’s how:
- Obtain an add-a-fuse adapter suitable for your vehicle’s fuse box.
- Identify a fuse slot that will provide power when the ignition is turned on.
- Insert the add-a-fuse adapter into the chosen fuse slot.
- Connect the positive wire of the dashcam to the metal tab on the add-a-fuse adapter.
- Securely insert the original fuse into the adapter.
The add-a-fuse adapter provides a convenient and safe way to connect the dashcam wire without interfering with the vehicle’s existing electrical system.
Connecting Wire to Cigarette Lighter
If connecting the dashcam wire to the fuse box is not feasible or you prefer an alternative method, using the cigarette lighter can be a suitable option. Follow these steps:
- Locate the cigarette lighter outlet in your vehicle.
- Plug the dashcam power adapter into the cigarette lighter outlet.
- Route the wire along the interior of your vehicle to the desired location for the dashcam.
While this method is relatively straightforward, it’s important to ensure that the cigarette lighter outlet provides power even when the ignition is turned off. Some vehicles may have cigarette lighter outlets that are only active when the ignition is on.
That wraps up the section on connecting the dashcam wire to a power source. Whether you choose to connect it to the fuse box or the cigarette lighter, make sure to take the necessary precautions and follow the instructions provided by the manufacturer.
Securing And Testing The Dashcam Wire
Installing a dashcam in your vehicle can provide valuable footage in case of an accident or other incidents on the road. However, it’s essential to ensure that the dashcam wire is securely installed and tested for proper functionality. In this section, we will discuss how to secure the wire with clips or adhesive hooks, hide excess wire length, properly ground the dashcam, and test it to ensure it’s working correctly.
Securing the Wire with Clips or Adhesive Hooks
When it comes to securing the dashcam wire, you have two options: using clips or adhesive hooks. Both options have their advantages, so it ultimately depends on your preferences and the interior of your vehicle. Here’s how you can securely attach the wire using each method:
- If you choose to use clips, start by identifying suitable locations along the edges of the windshield where you can attach the clips. Make sure to avoid obstructing your view while driving.
- Use a screwdriver or a similar tool to carefully insert the clips in the chosen spots. Make sure they are firmly secured.
- Route the dashcam wire through the clips, ensuring that it is taut and doesn’t hang loose. This will help prevent any dangling wires that could distract or obstruct your view while driving.
- If you prefer adhesive hooks, clean the surface of the windshield and the dashboard where you plan to attach them. This will ensure better adhesion.
- Peel off the backing of the adhesive hooks and firmly press them against the cleaned surfaces. Allow them to adhere for the recommended amount of time.
- Thread the dashcam wire through the hooks, ensuring that it is neatly organized and doesn’t interfere with your line of sight.
Hiding Excess Wire Length
Excess wire length can not only look messy but also pose a safety risk by potentially getting tangled or snagged while driving. To hide the excess wire length, follow these steps:
- Start by gently pulling the extra wire towards the headliner of your vehicle.
- Secure the excess wire using zip ties or adhesive clips, making sure to keep it hidden and out of sight.
- You can then tuck the wire along the edges of the headliner, pillars, or dashboard using a plastic pry tool or your fingers.
- Be careful not to damage any wires or components inside the vehicle while routing the excess wire.
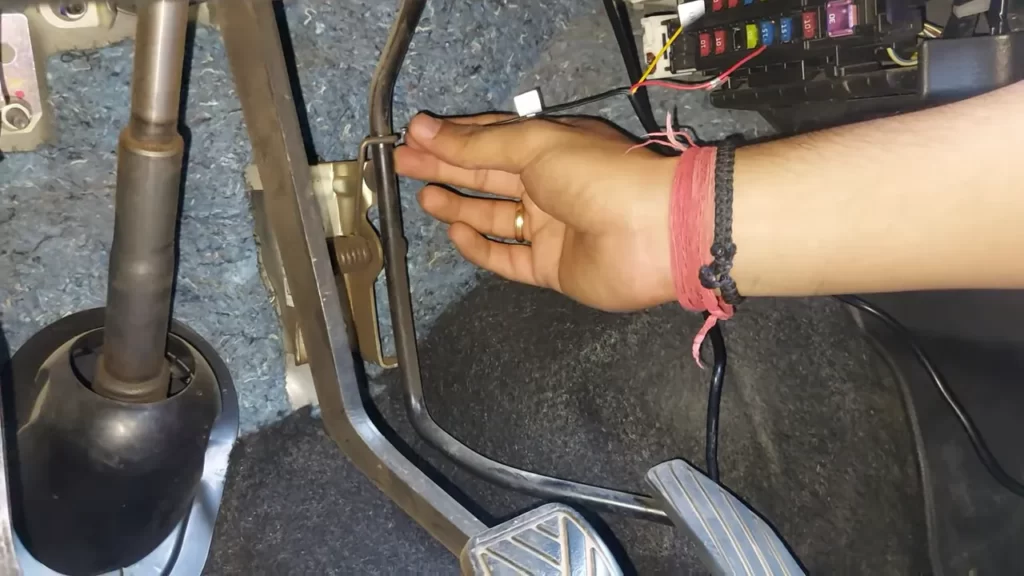
Properly Grounding the Dashcam
Gounding the dashcam is crucial for its proper functioning. It helps reduce electrical noise and interference, ensuring a clear and stable video recording. Here’s how you can properly ground your dashcam:
- Locate a bare metal surface, such as a screw or bolt, near the dashcam installation site.
- Use sandpaper or a wire brush to remove any paint or corrosion from the metal surface.
- Connect the ground wire of the dashcam’s power cable to the cleaned metal surface using a suitable ring terminal.
- Ensure that the connection is secure and tight.
Testing the Dashcam for Functionality
Before considering the installation process complete, it’s essential to test the dashcam to ensure it is working correctly. Follow these steps to test the functionality:
- Connect the dashcam to its power source, such as the vehicle’s cigarette lighter or fuse box, as per the manufacturer’s instructions.
- Turn on the ignition or start the vehicle to power up the dashcam.
- Ensure that the dashcam is recording and that the video quality is clear.
- Perform a short test drive to check if the dashcam remains stable and captures footage without any issues.
- If you encounter any problems, double-check the connections and consult the manufacturer’s troubleshooting guide.
Securing and testing the dashcam wire is crucial to ensure its functionality and reliability. By following these steps, you can confidently install a dashcam in your vehicle, knowing that it is securely mounted and ready to capture any unexpected events on the road.
Finalizing Installation
After successfully completing the wiring process for your dashcam, it’s time to finalize the installation. This crucial step ensures your dashcam is securely in place and all wiring is neatly concealed.
Checking and Adjusting Dashcam Position
Before reinstalling any trims or panels, it’s important to double-check the positioning of your dashcam. Ensure that it is mounted in a location that gives you optimal visibility without obstructing your view of the road. Additionally, make sure the dashcam is tilted at the right angle, allowing it to capture the desired field of view. A properly positioned dashcam is essential for capturing clear and accurate footage.
Reinstalling Trims and Panels
Once you are satisfied with the dashcam’s position, it’s time to reinstall any trims or panels that were removed during the installation process. Take your time to align them properly and make sure they snap back into place securely. This not only gives a clean and finished look but also prevents any rattling or loose parts while driving. In case you encounter any difficulties, refer to the manufacturer’s instructions or seek professional assistance.
Cleaning Up Any Remaining Wire
With the dashcam securely in position, it’s important to clean up any remaining wire that may be visible. Start by tucking excess wire neatly behind the trims and panels, using cable ties or adhesive clips if necessary. This not only ensures a clutter-free installation but also minimizes the risk of wires getting tangled or caught on anything while driving. Take the time to conceal any exposed wires, ensuring a professional-looking finish.
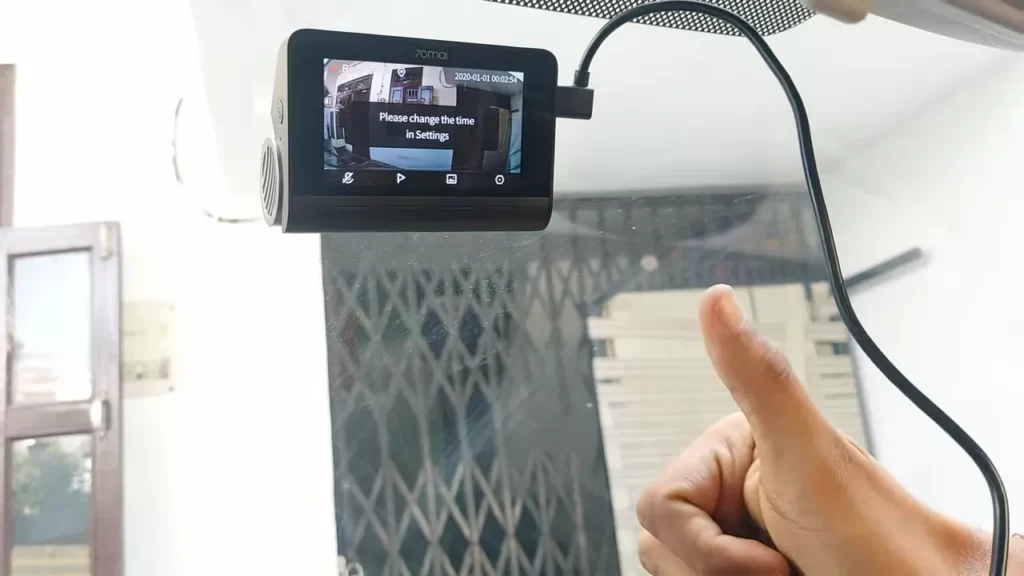
Double-Checking Dashcam Settings
Before you hit the road, it’s crucial to double-check the settings on your dashcam. Ensure that the date, time, and any other preferences are correctly set according to your preference. Take a moment to familiarize yourself with the various dashcam features and explore the menu options if needed. This way, you can be confident that your dashcam is ready to capture all valuable footage whenever needed.
Troubleshooting And Common Issues
Installing a dashcam wire can be a straightforward process, but sometimes issues may arise. Troubleshooting and resolving these common problems can ensure that your dashcam functions optimally. In this section, we will discuss some common issues you may encounter when installing a dashcam wire and provide solutions to overcome them.
Identifying and Fixing Power Supply Problems
One common issue that you may face when installing a dashcam wire is power supply problems. If your dashcam is not turning on or experiencing intermittent power loss, it is crucial to identify and fix the underlying power supply problem. Here are a few steps to help you troubleshoot and resolve power supply issues:
- Check the power cable connection: Ensure that the power cable is securely connected to both the dashcam and the power source. Often, loose connections can disrupt the power supply. If necessary, disconnect and reconnect the power cable to ensure a proper connection.
- Inspect the fuse: A blown fuse can also cause power supply problems. Locate the fuse for the dashcam in your vehicle’s fuse box, and visually inspect it to see if it is blown. If the fuse is blown, replace it with a new one of the same rating.
- Test the power source: If the power cable and fuse appear to be in good condition, you should test the power source itself. Use a multimeter or voltage tester to check if the power source is providing the appropriate voltage to the dashcam. If the voltage is below the required level, you may need to replace the power source.
Resolving Connectivity Issues
Connectivity issues can hinder the proper functioning of your dashcam wire. If you are experiencing problems with the dashcam’s connection, whether it is not syncing with your smartphone or showing errors during playback, try the following steps to resolve the connectivity issues:
- Check the Wi-Fi connection: Ensure that both your dashcam and smartphone are connected to the same Wi-Fi network. A mismatch in the network can result in connection problems.
- Reset the dashcam’s Wi-Fi settings: If the connection issue persists, try resetting the dashcam’s Wi-Fi settings. Consult your dashcam’s user manual to locate the Wi-Fi reset option and follow the instructions to perform the reset.
- Update dashcam firmware: Outdated firmware can cause connectivity problems. Visit the manufacturer’s website and check if any firmware updates are available for your dashcam model. If updates are available, follow the instructions to update the firmware.
Addressing Dashcam Malfunctioning
If your dashcam is malfunctioning, such as freezing, recording glitches, or not saving footage correctly, it can compromise the effectiveness of the device. Here are some troubleshooting steps to address dashcam malfunctioning:
- Check the memory card: A faulty or incompatible memory card can cause various issues. Ensure that the memory card is inserted correctly and is of the recommended type and capacity specified by the dashcam manufacturer.
- Format the memory card: Formatting the memory card can resolve file system errors. However, keep in mind that formatting will delete all existing data on the card. Before formatting, make sure to back up any important footage that you want to keep.
- Factory reset the dashcam: If the above steps don’t resolve the malfunctioning issues, you can try a factory reset. Refer to your dashcam’s user manual for instructions on how to perform a factory reset. Keep in mind that a factory reset will restore the dashcam to its default settings, so make any necessary backups before proceeding.
By following these troubleshooting steps, you can overcome common issues related to the installation of a dashcam wire. Remember to consult your dashcam manufacturer’s instructions and guidelines for specific troubleshooting procedures based on your dashcam model.
Maintenance And Care Tips
Proper maintenance and care of your dashcam not only ensures its longevity but also plays a crucial role in its optimal performance. By following these maintenance and care tips, you can keep your dashcam in excellent condition and capture crystal-clear footage without any issues.
Cleaning the Dashcam Lens and Housing
Over time, dirt, dust, and smudges can accumulate on the lens and housing of your dashcam, affecting the quality of your video recordings. To maintain a clear view and sharp image capture, it’s essential to regularly clean the dashcam lens and housing.
Here’s a step-by-step guide on how to clean your dashcam:
- Begin by turning off the dashcam and disconnecting the power source.
- Gently remove the dashcam from its mount.
- Using a soft microfiber cloth or lens cleaning solution, carefully wipe the lens and housing to remove any smudges or dirt.
- Avoid applying excessive pressure or using abrasive materials, as it could scratch or damage the lens.
- Once cleaned, reattach the dashcam to its mount and reconnect the power source.
Regularly Checking Wire Connections
The reliable functioning of your dashcam largely depends on secure wire connections. Any loose or faulty connections can lead to power or data transfer issues, rendering your dashcam ineffective. Therefore, it’s vital to regularly check the wire connections.
Follow these steps to inspect the wire connections:
- Turn off the dashcam and disconnect the power source.
- Examine all the wires leading to and from the dashcam, including the power cable, data cable, and any additional cables or accessories.
- Ensure that each connection is firmly attached and free from any damage or corrosion.
- Secure any loose connections by adjusting or tightening them as necessary.
- Once done, reconnect the power source and turn on the dashcam to check if it’s functioning properly.
Protecting Dashcam from Extreme Temperatures
Extreme temperatures can have a detrimental effect on your dashcam’s performance and durability. Protecting your dashcam from excessive heat or cold is vital to ensure its longevity.
To safeguard your dashcam from extreme temperatures:
- Install the dashcam away from direct sunlight or heating vents, as excessive heat can damage the internal components.
- Avoid leaving the dashcam inside the vehicle during extremely hot or cold weather conditions, as it can lead to overheating or freezing.
- If parking your vehicle for an extended period in extreme temperatures, consider removing the dashcam temporarily to prevent any potential damage.
Updating Dashcam Firmware for Optimal Performance
Manufacturers often release firmware updates for dashcams to enhance their performance, fix any bugs, and introduce new features. Keeping your dashcam’s firmware up to date is crucial to ensure optimal performance.
Here are the steps to update your dashcam’s firmware:
- Visit the manufacturer’s website and locate the support or downloads section.
- Identify your dashcam model and download the latest firmware version.
- Copy the firmware file onto a microSD card.
- Insert the microSD card into the dashcam.
- Power on the dashcam, and the firmware update process will typically start automatically.
- Ensure the dashcam remains connected to a stable power source during the update.
By following these maintenance and care tips, you can ensure your dashcam remains in optimal condition, providing you with clear, reliable, and uninterrupted video footage of your journeys.
Frequently Asked Questions Of How To Install Dashcam Wire
Where Do You Put The Dash Cam Cable?
Attach the dash cam cable along the windshield edge or tuck it under the car’s interior trim to hide it. Secure the cable with clips or adhesive hooks to keep it neat and prevent it from dangling. Make sure the cable doesn’t obstruct your view or interfere with the airbags.
Can You Hardwire A Dash Cam Yourself?
Yes, you can hardwire a dash cam yourself. It is a simple process that does not require professional help. Just follow the instructions provided in the user manual, connect the wires to the car’s fuse box or battery, and make sure to secure the wiring to avoid any interference while driving.
Is It Worth Hardwiring A Dash Cam?
Yes, it is worth hardwiring a dash cam. It ensures continuous power supply and eliminates the need for manual operation. Additionally, hardwiring provides stability, uninterrupted recording, and saves car battery. Overall, hardwiring a dash cam enhances its functionality and reliability.
Is Hardwiring Dash Cam Hard?
Hardwiring a dash cam is not difficult. It involves connecting the dash cam directly to the vehicle’s electrical system. It ensures continuous power supply and eliminates the need for manual charging. Although it may require some basic knowledge of car wiring, it can be done by following the instructions provided by the dash cam manufacturer.
How Do I Install A Dashcam Wire In My Vehicle?
To install a dashcam wire in your vehicle, first, locate the fuse box. Then, identify a fuse that turns off when the car is off. Finally, connect the dashcam wire to the chosen fuse using an add-a-fuse kit.
Conclusion
Installing a dashcam wire may seem daunting at first, but with the right tools and steps, it can be a simple process. By following this guide and taking the necessary precautions, you’ll ensure a clean and professional installation. Remember to consult the dashcam manufacturer’s instructions and seek professional help if needed.
With a dashcam in place, you’ll have peace of mind knowing that you have an extra layer of protection on the road. Drive safely!