To install door casing, measure and cut the casing pieces to fit the door frame, then attach them using a hammer and nails. Door casing is an essential finishing touch for any door installation, providing a decorative frame around the door frame.
Installing door casing is a relatively straightforward process that requires careful measurement and cutting of the casing pieces to fit the door frame. Once the casing pieces are cut, they can be attached using a hammer and nails. This article will guide you through the steps necessary to install door casing and achieve a professional-looking finish for your doors.
So, let’s dive in and learn how to install door casing effectively.
Factors To Consider When Selecting Door Casing
Determining the Style and Design
When it comes to selecting door casing, one of the first factors to consider is the style and design that will complement your overall interior aesthetics. The door casing you choose should blend seamlessly with the existing décor and architectural style of your home. Consider the visual appeal you wish to achieve. Are you aiming for a sleek and modern look or a more traditional and ornate design? Evaluate the architectural elements in the room and determine if the door casing should match the crown molding or baseboards. This will help ensure a cohesive and visually pleasing result.
Measuring the Existing Door Frame
Accurate measurements are crucial when selecting door casing. Before you start shopping for materials, take precise measurements of your existing door frame. Measure the height and width of the door opening, accounting for any irregularities or uneven surfaces. Ensuring accurate measurements will allow you to purchase the right amount of door casing and avoid unnecessary expenses and delays. Remember to measure the thickness of the door as well, as this will determine the appropriate size of the door casing.
Considering the Material Options
Choosing the right material for your door casing is another important consideration. Various materials are available, each offering unique benefits in terms of durability, maintenance, and overall appearance. Common options include wood, MDF (medium density fiberboard), PVC (polyvinyl chloride), and composite materials. Wooden door casings are popular for their timeless appeal and natural beauty, but they require regular maintenance to prevent moisture damage and warping. MDF and PVC casings offer a more budget-friendly alternative with easy maintenance. Composite materials combine the best qualities of different materials, offering a durable and low-maintenance option.
If you prefer the elegant look of real wood, make sure to choose a high-quality species that will withstand wear and tear. For a more budget-friendly option, consider MDF or PVC casings that mimic the appearance of real wood. Ultimately, the material you choose should align with your desired aesthetics, durability requirements, and budget limitations.
By considering these key factors, you can confidently select the perfect door casing that not only enhances the overall look of your space but also withstands the test of time.
Tools And Materials Needed
When it comes to installing door casing, having the right tools and materials is essential for a successful installation. Here is a list of the tools and materials you will need:
Measuring Tape and Level
The first step in installing door casing is accurate measurements. A measuring tape is necessary to measure the height and width of the door frame, as well as the length of the casing needed. Additionally, a level will ensure that the casing is installed straight and level.
Saw and Miter Box
A saw and miter box are necessary for cutting the casing to the correct length and creating the proper angles for corners. A miter box helps in making precise cuts at specific angles, ensuring a clean and professional finish.
Nail Gun or Hammer
Securing the casing to the door frame requires nails. A nail gun can save time and effort, making the installation process quicker. However, if you don’t have access to a nail gun, a hammer can be used to drive nails into place. Be sure to use finish nails that are long enough to secure the casing firmly.
Wood Putty and Sandpaper
After the casing is installed, any gaps or nail holes will need to be filled. Wood putty is used to fill these imperfections, creating a smooth surface. Sandpaper is then used to sand down the putty once it has dried, ensuring a seamless and polished look.
Primer and Paint

Once the casing is installed, priming and painting will give it a finished appearance. Primer helps to seal the wood and create a smooth surface for paint adhesion. Choose a paint color that complements your door and interior design.
With the right tools and materials at your disposal, installing door casing can be a straightforward and rewarding project. Remember to measure accurately, make precise cuts, secure the casing firmly, and finish with wood putty and paint for a professional look.
Removing The Old Door Casing
When it comes to updating the look of your home, installing new door casing can make a significant difference. However, before you can start the installation process, you need to remove the old door casing. This step is crucial to ensure a smooth and seamless transition to your new trim. In this section, we will cover the necessary steps to safely remove the existing trim and prepare the door frame for the installation of your new door casing.
Safely Removing Existing Trim
Before starting the removal process, it’s essential to gather the necessary tools to avoid any interruptions. Here’s a list of tools you’ll need:
| Tools | Description |
|---|---|
| Utility knife | To cut any caulking or paint seals |
| Crowbar | To pry the trim away from the wall |
| Hammer | To help with the removal process |
| Pliers | To remove any nails or staples |
Once you have your tools ready, follow these steps to safely remove the existing door casing:
- Using the utility knife, carefully cut through any caulking or paint seals along the edges of the door casing. This will prevent any damage to the wall when removing the trim.
- Next, take the crowbar and insert it between the trim and the wall. Gently pry the trim away from the wall, ensuring not to apply excessive force that may damage the surrounding areas.
- As you pry the trim, you may encounter nails or staples holding it in place. Use the pliers to remove these fasteners, taking care not to splinter the wood or leave any marks on the wall.
- Continue the removal process until all the old door casing has been detached from the wall. Set aside the old trim for disposal or repurposing, depending on its condition.
Preparing the Door Frame for Installation
With the old door casing successfully removed, it’s time to prepare the door frame for the installation of your new trim. Follow these steps to ensure a clean and sturdy base for your new door casing:
- Inspect the door frame for any damage or loose elements. If you notice any issues, address them before proceeding further to guarantee a stable installation.
- Remove any remaining caulking or paint residue from the door frame using a putty knife or sandpaper. This step will provide a smooth surface for the adhesion of the new door casing.
- Measure the dimensions of the door frame and trim pieces to ensure accurate cutting and fitting of the new casing. Double-check your measurements for precision.
- Finally, clean the area around the door frame to remove any debris or dust particles that may interfere with the installation process.
By following these steps, you can safely remove the old door casing and prepare the door frame for the installation of your new trim. With the proper preparation, your door frame will be ready for the next stage of the installation process, bringing you one step closer to enhancing the overall aesthetic of your home.
Measuring And Cutting The Casing Pieces
When installing door casing, one of the key steps is measuring and cutting the casing pieces to fit perfectly around your door frame. This ensures a seamless and professional-looking installation. In this section, we will guide you through the process of measuring the door frame and cutting the casing pieces to size.
Measuring the Door Frame
Before you start cutting the casing pieces, it’s important to accurately measure the dimensions of your door frame. This will ensure that the casing fits snugly and provides a polished finish. Follow these steps to measure your door frame:
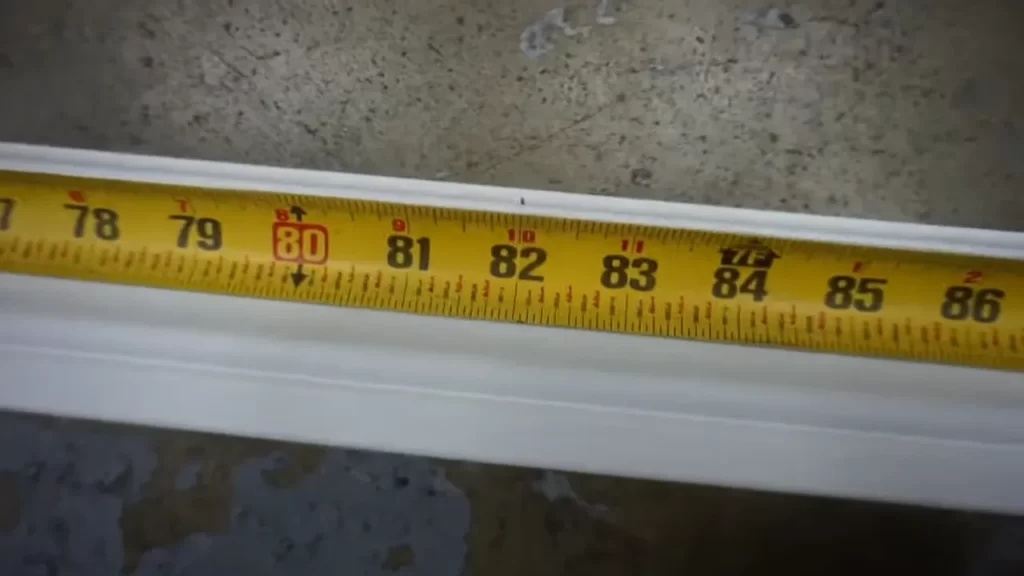
- Start by measuring the width of the door frame. Use a measuring tape to measure from one side of the frame to the other, ensuring you measure the width at the top, middle, and bottom of the frame. Take note of the largest measurement, as this will be the width of your casing piece.
- Next, measure the height of the door frame. Again, use a measuring tape and measure from the floor to the top of the frame, recording the height.
- Repeat the width and height measurement process for any additional door frames, if applicable.
By measuring your door frame accurately, you’ll have the correct dimensions for cutting your casing pieces to size.
Cutting the Casing Pieces to Size
Once you have your measurements, it’s time to cut the casing pieces to the appropriate size. Follow these steps for precise cutting:
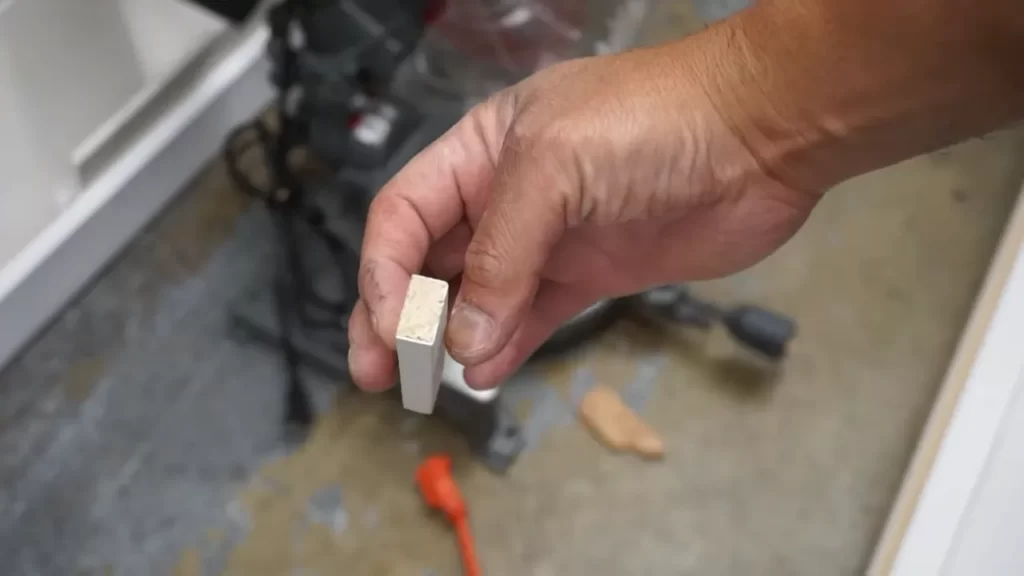
- Start by selecting the casing material. Common options include wood, MDF, or PVC.
- Using your measurements, mark the length and width of the casing piece on the material. Make sure to leave enough space for any desired reveals or overlaps.
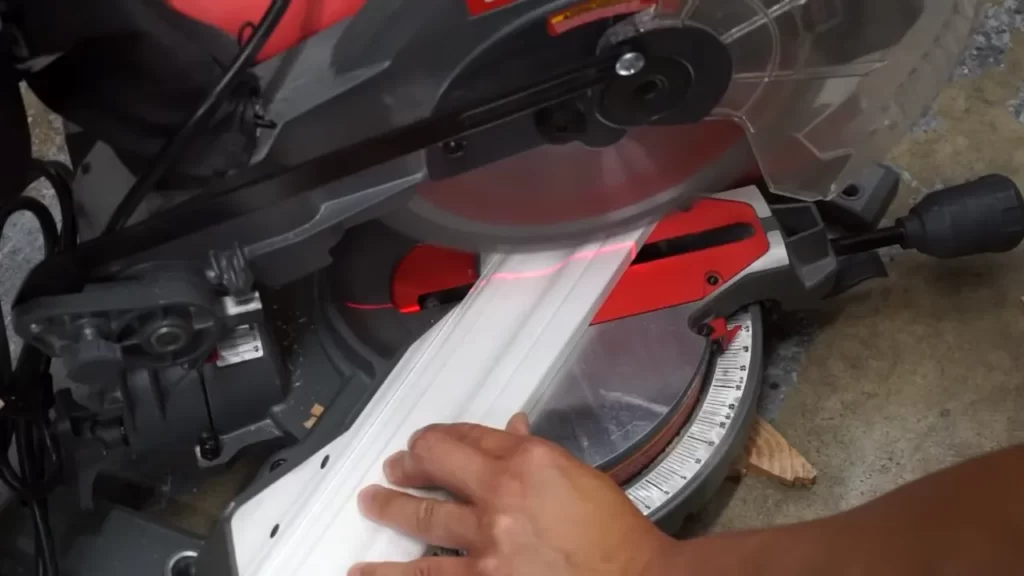
- Securely support the casing material on a stable surface, such as a workbench or cutting table.
- Using a saw appropriate for your chosen material, carefully cut along the marked lines. Take your time and ensure straight and accurate cuts.
- After cutting the first casing piece, double-check the measurements and test the fit around the door frame. If adjustments are needed, carefully trim the casing piece accordingly.
- Repeat the cutting process for each additional casing piece needed for your door frame.
Remember, accurate measurements and precise cutting are essential for a professional installation of door casing. Taking the time to measure carefully and cut accurately will ensure a flawless finish that enhances the overall aesthetics of your space.
Attaching The Casing To The Door Frame
When it comes to installing door casing, attaching it to the door frame is a crucial step that ensures a secure and polished finish. By following these steps, you can easily attach the casing and enhance the overall appearance of your door.
Positioning the First Casing Piece
The first step in attaching the casing to the door frame is positioning the first piece correctly. Start by measuring the height of the door frame from the floor to the top. Then, mark the length on your casing and cut it accordingly. Place the casing against the door frame, ensuring it aligns perfectly with the top edge of the door frame. Use a level to ensure it’s perfectly plumb or vertically straight.
Nailing or Gluing the Casing in Place
Once you’ve positioned the first casing piece, it’s time to secure it to the door frame. There are two common options for attaching the casing: nailing or gluing. Here’s how you can do both:
Nailing:
- Using a nail gun or a hammer and nails, place the first nail near the top of the casing and into the door frame. Make sure to keep the nail about an inch from the edge to prevent splitting the wood.
- Continue nailing down the casing, spacing the nails evenly along the length. Aim to place a nail every 12 to 16 inches for a secure hold.
- Repeat the process for the opposite side and bottom of the casing, making sure it remains plumb throughout the installation.
Gluing:
- Apply a thin, even layer of wood glue to the backside of the casing.
- Press the casing firmly against the door frame, ensuring it’s still plumb.
- Hold the casing in place for a few minutes to allow the glue to bond.
- Alternatively, you can use clamps or tape to hold the casing in place until the glue dries completely.
Regardless of the method you choose, remember to wipe off any excess glue or fill in nail holes with wood putty for a seamless finish. Additionally, it’s important to double-check the alignment and shape of the casing before moving on to installing the remaining pieces.
By following these steps, you can attach the casing securely to the door frame and give your door a professional and finished look. Whether you opt for nailing or gluing, ensure that the casing remains plumb throughout the installation process for a flawless result.
Filling And Finishing The Casing
Once you have successfully installed the door casing, it’s time to move on to the next crucial step: filling and finishing the casing. This step helps achieve a polished and professional look for your door casing installation. In this section, we will guide you through how to fill nail holes and gaps with wood putty and how to sand the casing for a smooth finish.
Filling Nail Holes and Gaps with Wood Putty
To ensure a seamless and flawless appearance, it’s important to fill any visible nail holes and gaps in the door casing. Wood putty is a versatile material that can be used for this purpose. Follow these steps to fill nail holes and gaps:
- Gather the necessary materials, including wood putty, a putty knife, and sandpaper. Ensure that the wood putty matches the color of the door casing for a cohesive finish.
- Take a small amount of wood putty on the putty knife and press it into the nail holes or gaps. Make sure to fill them completely without overfilling.
- Smooth the surface of the filled areas using the putty knife. This helps level the putty with the surrounding casing.
- Allow the wood putty to dry according to the manufacturer’s instructions. This usually takes a few hours.
- Once the wood putty is dry, use fine-grit sandpaper to gently sand the filled areas. This will create a smooth and flush surface.
Sanding the Casing for a Smooth Finish
Sanding the door casing is a crucial step to achieve a smooth and flawless finish. Follow these steps to sand the casing:
- Gather the necessary materials, including sandpaper of varying grits (such as 120 and 220), a sanding block, and a dust mask.
- Start with the coarsest grit of sandpaper (e.g., 120) and use the sanding block to sand the entire surface of the door casing. Sand with the grain of the wood in smooth, even strokes.
- Continue sanding with progressively finer grits of sandpaper (e.g., 220) to achieve a smoother finish. This helps remove any rough patches or imperfections.
- Take breaks in between sanding and use a dust mask to protect yourself from inhaling fine particles.
- After sanding, wipe the casing with a damp cloth to remove any dust or debris.
By following these steps to fill nail holes and gaps with wood putty and sand the casing, you can achieve a beautifully finished door casing that adds elegance and charm to your space.
Ensuring Proper Alignment And Leveling
When it comes to installing door casing, ensuring proper alignment and leveling is crucial. This ensures that the door frame will not only look aesthetically pleasing but also function optimally. In this section, we will focus on how to check for level and plumb and make adjustments as necessary to achieve the perfect alignment.
Checking for Level and Plumb
The first step in ensuring proper alignment is to check for level and plumb. Level refers to the horizontal alignment of the door casing, while plumb refers to the vertical alignment. Both aspects are equally important for a professional and polished installation.
To check for level, use a spirit level. Place it horizontally on top of the door casing and check if the bubble stays centered. If it does, your casing is level. If the bubble shifts to one side, you need to make adjustments.
For checking plumb, use the same method but position the spirit level vertically against the side of the door casing. Again, ensure that the bubble remains in the center. If it deviates, adjustments will be necessary to achieve plumb alignment.
Making Adjustments as Necessary
If the door casing is not level or plumb, making adjustments is the key to achieving the desired alignment. Here are some adjustments you can make:
- Insert shims behind the door casing to adjust the level or plumb. Shims are thin wedges that can be placed easily behind the casing to correct any unevenness.
- Tap the casing gently with a hammer to realign it.
- Use a pry bar to adjust the positioning of the casing if needed.
Make adjustments gradually and recheck the level and plumb after each adjustment to ensure accuracy. It may take a few attempts to achieve the perfect alignment, so be patient and persistent in your efforts.
Applying Primer And Paint
When it comes to installing door casing, applying primer and paint is the final step that enhances the overall appearance of your door. This step not only provides a protective layer but also adds a touch of style to your door casing. Properly priming and painting the casing is essential to ensure a smooth and long-lasting finish. In this section, we will discuss the importance of choosing the right paint for your door casing and provide a step-by-step guide on how to properly prime and paint.
Choosing the Right Paint for Your Door Casing
Choosing the right paint for your door casing is crucial in achieving a professional and durable finish. Here are a few factors to consider when selecting the paint:
| Factors to Consider | Important Points |
|---|---|
| 1. Type of Paint | Opt for a high-quality latex or oil-based paint that is specifically formulated for trim and doors. These types of paints provide excellent durability and are easy to clean. |
| 2. Finish | Choose a finish that suits your preference and complements your interior design. Satin and semi-gloss finishes are commonly used for door casings as they offer a smooth and shiny surface. |
| 3. Color | Select a color that matches or contrasts well with your walls and overall aesthetic. Consider factors such as lighting and room decor while choosing the color for your door casing. |
Properly Priming and Painting the Casing

Now that you have selected the right paint, it’s time to proceed with priming and painting your door casing. Follow these step-by-step instructions to ensure a flawless finish:
- Clean the surface: Before applying primer, make sure to clean the door casing thoroughly. Remove any dust, dirt, or debris using a mild detergent and a damp cloth. Allow the surface to dry completely.
- Prepare the primer: Choose a high-quality primer that is suitable for your chosen paint type. Follow the instructions provided on the primer container to mix it properly.
- Apply the primer: Use a paintbrush or a foam roller to apply the primer evenly on the door casing. Start from the top and work your way down, ensuring full coverage. Allow the primer to dry as per the manufacturer’s instructions.
- Inspect the primer: Once the primer is dry, carefully inspect the surface for any imperfections. Sand down any rough areas using fine-grit sandpaper and wipe away the dust.
- Prepare the paint: Stir the paint thoroughly to ensure an even consistency. Use a paint tray for easy access.
- Apply the paint: Using a paintbrush or foam roller, apply the paint in smooth, even strokes. Start from the top and work your way down, covering the entire door casing. Apply multiple coats if necessary, allowing each coat to dry fully before applying the next.
- Final touches: Once the paint is dry, inspect the casing for any touch-ups or areas that may require additional paint. Use a small brush to carefully address any imperfections.
- Clean up: Dispose of any used brushes, rollers, or paint trays properly. Clean all your painting tools immediately to prevent the paint from hardening.
By following these steps and taking your time, you can achieve a professional and flawless finish for your door casing. Properly priming and painting not only protects your casing but also adds a stylish touch to your interior. Now that you know how to apply primer and paint, you’re ready to enjoy your beautifully finished door casing!
Adding Decorative Touches
Adding decorative touches to your door casing can take your installation to the next level. These small details can make a big impact on the overall aesthetic of your space. In this section, we will explore two ways to enhance your door casing: installing trim moldings or rosettes, and enhancing the casing with stain or varnish.
Installing Trim Moldings or Rosettes
If you want to give your door casing a more intricate and decorative look, trim moldings or rosettes are a great option. Trim moldings are decorative strips of wood that can be attached to the door casing to add visual interest and depth. Rosettes, on the other hand, are decorative accents that are placed in the corners of the door casing. They can be simple or intricate in design, depending on your preference.
To install trim moldings, follow these steps:
- Measure and cut the trim molding to the desired length, making sure to miter the corners for a seamless look.
- Apply a thin layer of adhesive to the back of the molding.
- Press the molding onto the door casing, ensuring it is level and aligned properly.
- Secure the molding in place with finishing nails, making sure to countersink them for a smooth finish.
- Fill any nail holes with wood filler, sand, and touch up with paint or stain.
For rosettes, follow these steps:
- Measure and mark the placement of the rosettes on the door casing.
- Apply a thin layer of adhesive to the back of the rosettes.
- Press the rosettes onto the door casing, ensuring they are level and aligned properly.
- Secure the rosettes in place with finishing nails, making sure to countersink them for a seamless finish.
- Fill any nail holes with wood filler, sand, and touch up with paint or stain.
Enhancing the Casing with Stain or Varnish
If you want to highlight the natural beauty of the wood or add a touch of color to your door casing, consider enhancing it with stain or varnish. This can create a rich and polished look that complements the overall style of your space.
To enhance your door casing with stain or varnish, follow these steps:
- Ensure that your door casing is clean, dry, and free of any dust or debris.
- Sand the surface of the casing with a fine-grit sandpaper to create a smooth and even surface.
- Use a paintbrush or rag to apply the stain or varnish evenly to the door casing, following the manufacturer’s instructions.
- Allow the stain or varnish to dry completely before applying additional coats, if desired.
Keep in mind that stain and varnish can darken the color of the wood, so it’s a good idea to test the product on a small, inconspicuous area before applying it to the entire casing.
Disclaimer: Always follow manufacturer instructions and safety precautions when using tools and materials.
Frequently Asked Questions For How To Install Door Casing
How Do You Install Casing Around A Door?
To install casing around a door, follow these steps: 1. Measure and cut the casing to size. 2. Attach the top piece first, using a level for straightness. 3. Install the side pieces, ensuring they are plumb. 4. Add the bottom piece, making sure it’s level.
5. Secure the casing with nails.
Do You Install Door Casing Before Baseboard?
Yes, it is recommended to install door casing before baseboard as it provides a clean and finished look to the doorway. The casing creates a frame around the door, while the baseboard covers the gap between the wall and the floor.
Installing the casing first ensures a seamless transition between the two.
Where Do You Nail A Door Casing?
Nail a door casing directly into the wall studs for stability and support. Use a level to ensure it’s straight. Nail the top piece first, then the side pieces, and finally the bottom piece. Fill any nail holes with putty and paint to finish.
Should Door Casing Be Thicker Than Baseboard?
Yes, door casing should generally be thicker than the baseboard. Door casings provide a decorative frame around the door, while baseboards serve as a transition between the wall and floor. Thicker casing adds visual appeal and complements the overall design.
How Do You Measure For Door Casing?
To measure for door casing, measure the width, height, and depth of the door frame using a tape measure.
What Tools Do You Need To Install Door Casing?
To install door casing, you will need a miter saw, a coping saw, a tape measure, a hammer, a nail set, and a level.
Conclusion
Installing door casing may seem like a daunting task, but by following these simple steps, you can easily achieve a professional look. Remember to measure twice and cut once, ensuring a precise fit. Take your time to sand, prime, and paint the casing to match your desired aesthetic.
With a little patience and attention to detail, you’ll have beautiful door casings that enhance the overall look of your space. Happy installing!