To install a door closer on a storm door, attach the closer bracket to the door frame and the closer arm to the door. Now, let’s dive into the details of how to properly install a door closer on a storm door.
A door closer is an essential component for ensuring that your storm door closes smoothly and securely. It prevents the door from slamming shut, protects against the wind blowing it open, and enhances both safety and energy efficiency. Installing a door closer is a straightforward process that requires a basic understanding of tools and some patience.
In this guide, we will provide step-by-step instructions to help you install a door closer on your storm door correctly. So, let’s get started and make your storm door more functional and secure.
Understanding The Function Of A Door Closer
Understanding the Function of a Door Closer When it comes to installing a door closer on a storm door, it’s important to understand its function and why it plays a crucial role. A door closer is a device that ensures a door automatically closes after it has been opened, providing convenience, safety, and peace of mind. In this section, we will delve deeper into what a door closer is, how it works, and the benefits you can expect from installing one on your storm door. HTML Response:
What is a door closer and why is it important for a storm door?
A door closer is an essential component to have on a storm door. It is designed to control the closing speed of the door, preventing it from slamming shut or being left wide open. This not only helps to maintain the security of your home but also protects your storm door from potential damage caused by sudden gusts of wind or accidental slams. By ensuring that the door closes gently and securely, a door closer enhances the durability and longevity of your storm door, offering a significant return on investment.
How does a door closer work?
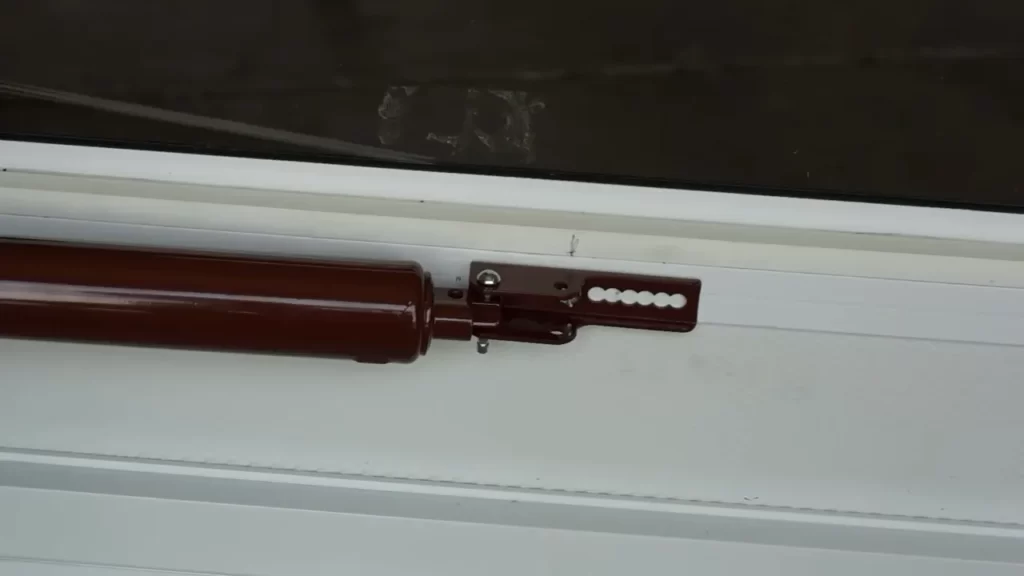
To understand how a door closer works, let’s break down its components and mechanism. A typical door closer consists of a hydraulic cylinder, a control valve, and a spring. When the door is open, the hydraulic cylinder is compressed, storing energy in the spring. As the door starts to close, the stored energy is released, controlling the closing speed and preventing the door from slamming shut. The control valve regulates the flow of hydraulic fluid, allowing for adjustments in the closing speed and force depending on your preference and the weight of the storm door.
Benefits of installing a door closer on a storm door
There are several benefits to installing a door closer on your storm door. Here are the key advantages:
- Convenience: With a door closer, you no longer have to worry about manually closing the storm door each time you enter or exit your home. It automatically takes care of the door closing for you, making your life easier and more convenient.
- Safety: A door closer ensures that your storm door closes securely, reducing the risk of unwanted entry or accidental injuries. It eliminates the chance of strong winds blowing the door open, preventing damage to the door and potentially keeping out insects and pests.
- Energy Efficiency: By effectively sealing the storm door, a door closer helps to improve energy efficiency within your home. It minimizes drafts, keeping warm or cool air inside, depending on the season, and helps reduce your heating and cooling costs.
- Durability: A storm door equipped with a door closer is better protected against sudden impacts and heavy winds. This helps to extend the lifespan of your storm door and reduces the need for costly repairs or replacements.
In conclusion, understanding the function of a door closer is essential when installing one on your storm door. It not only enhances convenience and safety but also offers energy efficiency and increases the longevity of your storm door. By familiarizing yourself with how a door closer works and the numerous benefits it provides, you can make an informed decision to install one and enjoy the advantages it brings to your home.
Preparing For Door Closer Installation
Installing a door closer on your storm door is essential for ensuring the door closes smoothly and securely. This not only enhances the overall functionality of the door but also provides added safety and protection. To make the installation process a breeze, it is important to prepare both yourself and the storm door beforehand. This involves gathering the necessary tools and materials, measuring and selecting the appropriate door closer, and preparing the storm door for installation.
Gathering the necessary tools and materials
Before starting the installation process, gathering the necessary tools and materials is crucial to ensure a smooth and efficient process. Here is a list of items you will need:
| Tools | Materials |
|---|---|
| ScrewdriverTape measureDrillHammerLevel | Door closerMounting bracketScrewsAnchor bolts |
Measuring and selecting the appropriate door closer
Measuring and selecting the appropriate door closer is essential for ensuring optimal functionality and performance. Start by measuring the size and weight of your storm door, as door closers come in different sizes and have weight specifications. This will help you choose a door closer that can support the weight of your door and provide the necessary closing force. Additionally, consider the type of door closer that suits your specific needs, whether it be a surface-mounted closer or a concealed closer.
Preparing the storm door for installation
Before installing the door closer, it is important to prepare the storm door to ensure a secure and long-lasting installation. Begin by cleaning the door surface and removing any debris or dirt that may interfere with the installation process. Next, position the mounting bracket on the storm door according to the manufacturer’s instructions and mark the screw hole locations. Afterward, use a drill to create pilot holes for the screws and insert anchor bolts if necessary. Finally, attach the mounting bracket securely to the storm door using the provided screws, ensuring it is level and aligned properly.
By preparing for door closer installation in this manner, you’ll lay a solid foundation for an effective and hassle-free installation process. Remember to take your time and carefully follow the manufacturer’s instructions to achieve the best results.
Step-By-Step Door Closer Installation Process
When it comes to storm doors, having a door closer is essential for smooth and controlled closing. Installing a door closer on a storm door may seem like a daunting task, but with the right knowledge and step-by-step process, it can be a straightforward DIY project. In this guide, we will walk you through each step of the door closer installation process, from removing the old door closer (if applicable) to adjusting the tension and speed of the new one. So let’s get started!
Removing the old door closer (if applicable)
If you already have a door closer installed on your storm door and it needs to be replaced, you’ll need to start by removing the old one. Here’s how you can do it:
- Begin by fully opening the storm door.
- Locate the door closer on the inside of the door, usually attached near the top.
- Using a screwdriver or a wrench, remove the screws or bolts that secure the door closer to the door frame.
- Once the screws or bolts are removed, gently pull the old door closer away from the door frame.
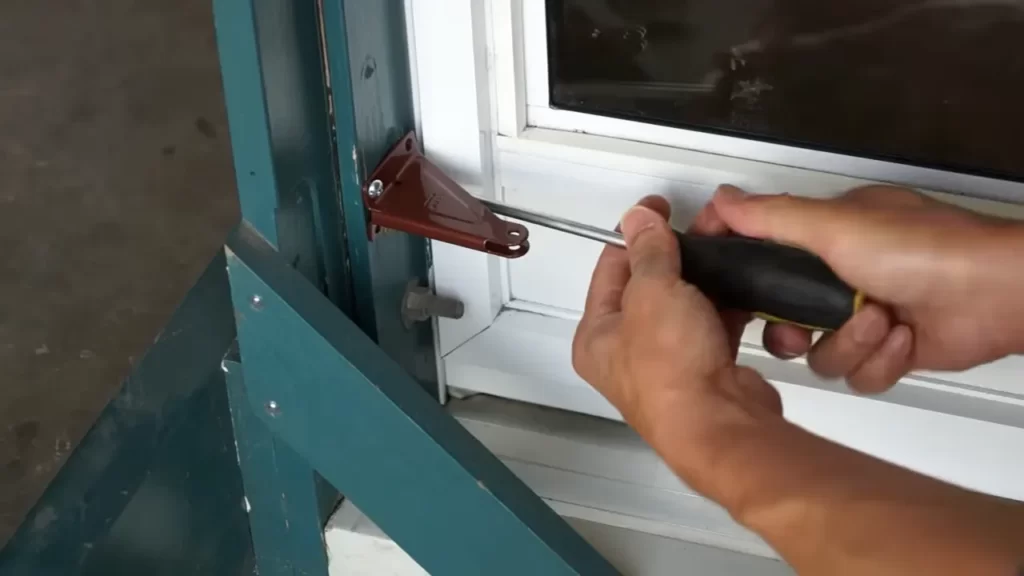
Attaching the mounting bracket to the storm door
Now that you’ve removed the old door closer, it’s time to attach the mounting bracket for the new one. Here are the steps:
- Position the mounting bracket on the inside of the storm door, aligning it with the existing holes or markings.
- Secure the mounting bracket in place using screws or bolts that are provided with the door closer. Be sure to tighten them securely but not overly tight to avoid damaging the storm door.
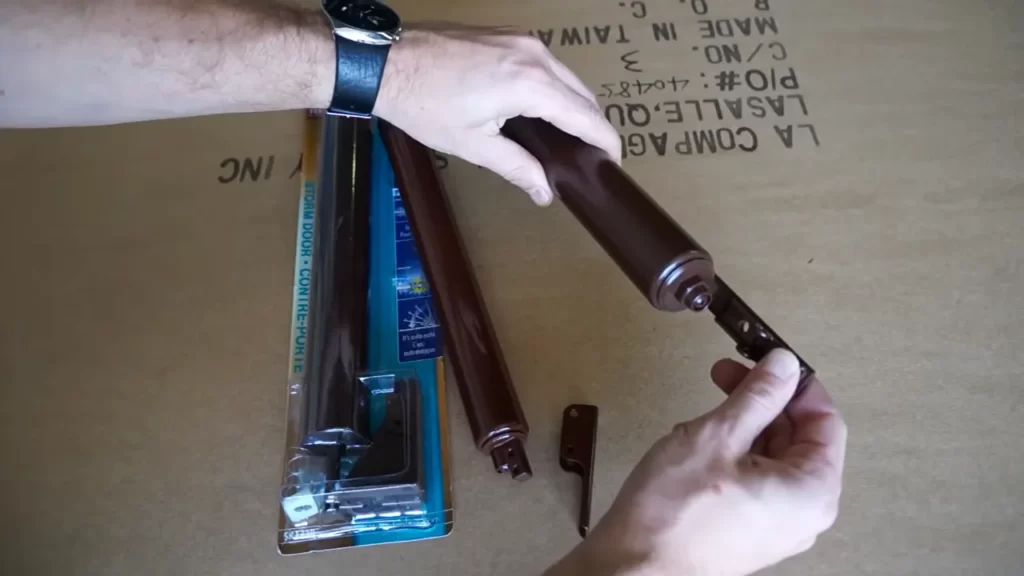
Installing the door closer on the mounting bracket
With the mounting bracket securely attached, it’s time to install the door closer. Follow these steps:
- Hold the door closer against the mounting bracket, making sure it aligns with the pre-drilled holes or slots.
- Insert the provided screws or bolts through the holes on the door closer and into the corresponding holes on the mounting bracket.
- Tighten the screws or bolts to firmly secure the door closer to the mounting bracket.
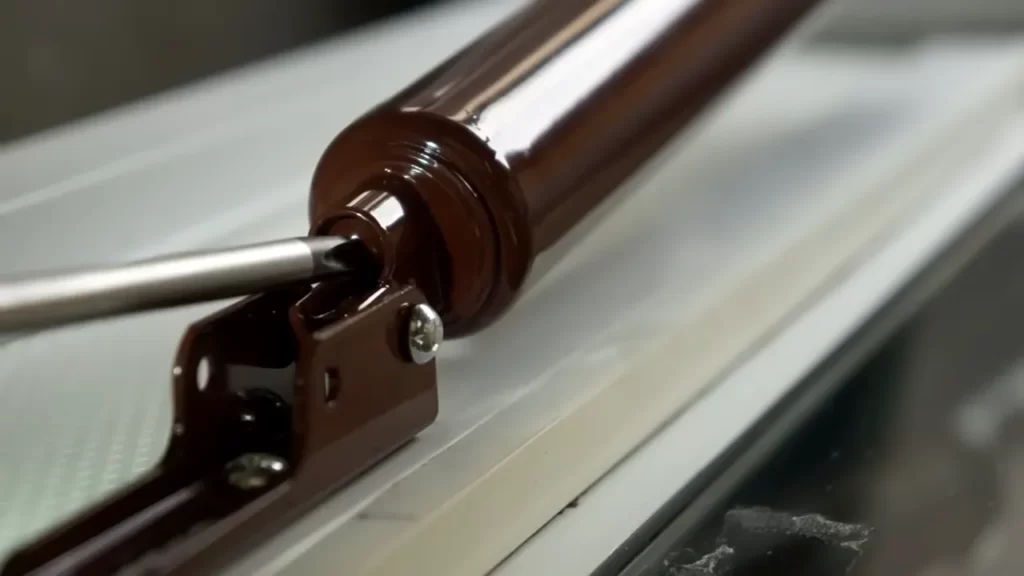
Adjusting the tension and speed of the door closer
Once the door closer is installed, you’ll need to adjust the tension and speed to ensure smooth operation. Here’s how:
- Locate the adjustment screws on the door closer. These are usually located on the end of the closer body.
- Using a screwdriver, turn the tension adjustment screw clockwise to increase the tension or counterclockwise to decrease it. Adjusting the tension will affect how hard or soft the door closes.
- To adjust the closing speed, locate the speed adjustment screw and turn it clockwise to slow down the door or counterclockwise to speed it up.
- Make small adjustments and test the door’s closing action after each adjustment until you achieve the desired tension and speed.
Testing the door closer for proper functionality
Lastly, before considering the installation process complete, it’s crucial to test the door closer for proper functionality. Here’s what you need to do:
- Open the storm door fully and release it. The door closer should engage and begin to close the door on its own.
- Observe the closing action and ensure that the door closes smoothly, without slamming or bouncing.
- If necessary, make further adjustments to the tension and speed until the door closes as desired.
By following these step-by-step instructions, you’ll be able to install a door closer on your storm door in no time. Remember to always refer to the manufacturer’s instructions for specific details and guidelines. Installing a door closer not only enhances the safety and convenience of your storm door but also adds to the overall functionality and longevity of the door.
Troubleshooting Common Door Closer Issues
Installing a door closer on a storm door is a great way to enhance security and convenience. However, like any mechanical component, door closers can sometimes experience issues that affect their performance. In this section, we will discuss some common door closer issues and how to troubleshoot them.
Door not closing properly
One of the most common problems with door closers is when the door doesn’t close properly. This can be caused by a few different factors:
- Misalignment: Check if the door and the door frame are properly aligned. If not, adjust the placement of the door closer.
- Spring tension: The tension of the door closer’s spring may need to be adjusted. Start by locating the adjustment screws on the closer and tighten or loosen them accordingly.
- Obstructions: Inspect the door and the closer for any obstructions that might be preventing smooth closing. Remove any debris or objects that are impeding the door’s movement.
Door slamming shut or closing too slowly
Another common issue with door closers is when the door slams shut or closes too slowly. Here are a few troubleshooting steps to address this problem:
- Speed adjustment: Most door closers have a speed adjustment valve or screw that controls the closing speed. Experiment with adjusting the valve or screw to find the optimal speed for your door.
- Spring tension: If the door slams shut, the tension may be too high. Decrease the tension by adjusting the closer’s adjustment screws.
- Oil viscosity: Check the viscosity of the oil inside the closer. If the oil is too thick, it can cause the door to close slowly. Consider replacing the oil with a lighter-grade lubricant.
Door closer making unusual noises
If you notice that your door closer is making strange noises, it could indicate a problem. Here’s what you can do:
- Lubrication: Regularly lubricate the moving parts of the door closer with a silicone-based lubricant. This helps reduce friction and noise.
- Tighten loose screws: Inspect the closer for any loose screws or bolts. Tighten them to ensure that all parts are securely fastened.
Maintaining and lubricating the door closer for optimal performance
To keep your door closer in top condition, proper maintenance and lubrication are essential. Follow these tips:
- Regular inspection: Periodically inspect the door closer for any signs of wear and tear or damage. Replace any worn or damaged parts as necessary.
- Cleaning: Keep the door closer and its components clean from dirt, dust, and debris. Use a mild household cleaner and a soft cloth to wipe away any grime.
- Lubrication: Apply a silicone-based lubricant to the moving parts of the door closer, including the arm, spring, and hinges. This helps maintain smooth operation.
By troubleshooting common door closer issues and maintaining it properly, you can ensure that your storm door functions smoothly and efficiently for years to come.
Enhancing The Security And Efficiency Of Your Storm Door
Installing a door closer on your storm door is an excellent way to enhance both the security and efficiency of your home. A door closer ensures that your storm door is always properly closed, providing an additional layer of protection against intruders. Additionally, a well-functioning door closer prevents drafts and air leaks, allowing you to maintain a comfortable temperature inside your home while also saving on energy costs.
Additional security measures to consider
While a door closer is a great step towards improving the security of your storm door, there are other measures you can take to further reinforce its safety. Here are a few options:
- Install a deadbolt lock on your storm door for added protection.
- Consider adding security screens to your storm door. These screens are designed to be highly resistant to forced entry.
- Ensure the quality of your storm door hinges. Loose or damaged hinges can compromise the overall security of your door.
Energy-saving tips for storm door usage
Your storm door can also play a significant role in improving the energy efficiency of your home. Here are some energy-saving tips to keep in mind:
- Ensure your storm door is properly installed and sealed. Check for any gaps or cracks that may be allowing drafts to sneak in.
- Consider using weatherstripping around the edges of your storm door for added insulation.
- During the colder months, open your storm door to allow sunlight in and warm up your home, then close it to retain the heat.
Regular maintenance to prolong the lifespan of your door closer
To ensure your door closer performs optimally and lasts for years to come, regular maintenance is essential. Here are a few maintenance tips:
- Periodically lubricate the hinges and moving parts of your door closer to prevent friction and ensure smooth operation.
- Inspect the door closer for any signs of damage or wear and tear. Replace any worn-out parts promptly.
- Keep the area around your door closer clean and free from debris.
By taking these security and efficiency-enhancing measures, you can make the most of your storm door, enjoying a safer and more energy-efficient home.
Frequently Asked Questions On How To Install Door Closer On Storm Door
How Do You Install The Closure On A Storm Door?
To install a closure on a storm door: 1. Close the storm door and measure the distance from the bottom to the desired position of the closer. 2. Attach the closer bracket to the door frame using the provided screws. 3.
Attach the closer arm to the bracket using the included pin or screw. 4. Adjust the closer tension as needed. 5. Test the door to ensure proper closing and latching.
What Is The Proper Way To Install A Door Closer?
To install a door closer properly, follow these steps: 1. Start by measuring the door closer’s placement location. 2. Mark the drill holes on the doorframe and door accordingly. 3. Drill the holes and attach the closer using screws. 4.
Adjust the tension and speed settings as needed. 5. Test the door closer to ensure it works smoothly.
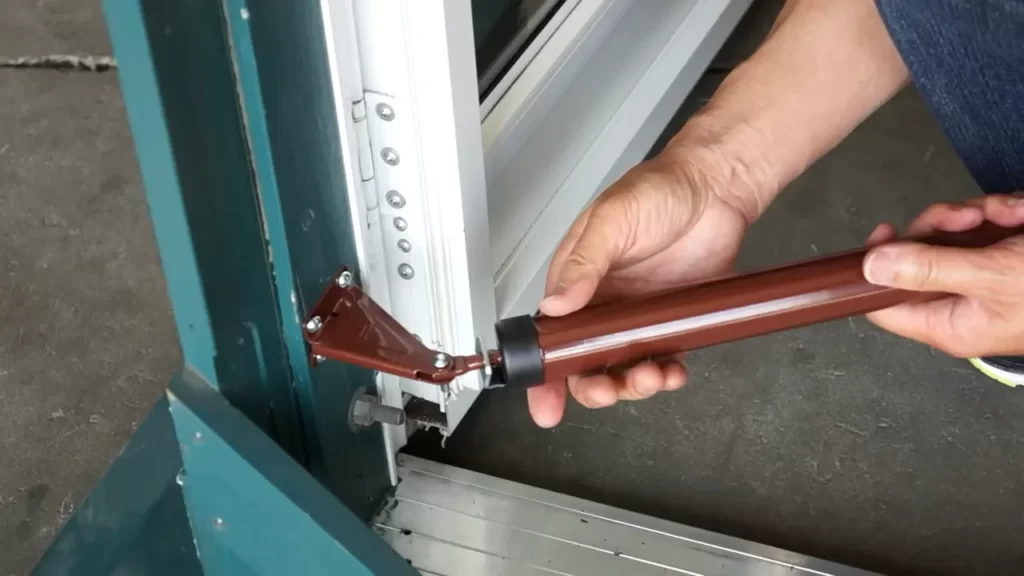
How Do You Install A Pneumatic Closer On A Screen Door?
To install a pneumatic closer on a screen door, follow these steps: 1. Close the door and hold the closer against the frame, aligning it with the jamb bracket. 2. Mark the holes for the screws and drill pilot holes. 3.
Attach the jamb bracket and the closer with screws. 4. Adjust the closer tension to your preference. 5. Test the door to ensure it closes smoothly.
How To Install A Larson Door Closer?
To install a Larson door closer, follow these steps: 1. Start by reading the manufacturer’s instructions thoroughly. 2. Gather the necessary tools, including a drill, screwdriver, and measuring tape. 3. Attach the closer bracket to the door frame using screws and a drill.
4. Attach the closer arm to the closer bracket and the door using the provided screws. 5. Adjust the tension and speed of the door closer according to your preference.
Conclusion
Installing a door closer on your storm door can greatly enhance its functionality and security. By following the step-by-step guide provided in this blog post, you can easily ensure a smooth and efficient installation process. With the right tools and a little bit of patience, you’ll have your storm door equipped with a reliable door closer in no time.
Don’t wait any longer – make your home safer and more convenient today!