o install a door jamb kit, start by measuring the width and height of the door frame. Then, use a saw to trim the kit to the appropriate size.
Next, position the kit in the door frame and secure it with screws or nails. Finally, attach the door hinges and hardware according to the manufacturer’s instructions.
Tools And Materials Needed
Installing a door jamb kit is a great way to freshen up the appearance of your door and improve its functionality. To successfully complete this project, you will need a variety of tools and materials. Below is a list of the essential items you’ll need before starting the installation process.
List of tools required for the installation
In order to properly install a door jamb kit, it is important to have the following tools on hand:
- Measuring tape: Accurate measurements are crucial for a proper fit.
- Pencil: Use a pencil to mark the desired placement of the door jamb kit.
- Saw: A saw will be needed to trim the door jamb kit to fit the height and width of your door.
- Miter box: A miter box is essential for cutting precise angles on the trim pieces.
- Screwdriver: A screwdriver will be used to secure the door jamb kit and attach any hardware.
- Level: A level is necessary to ensure that the door jamb kit is installed straight and level.
- Chisel: A chisel is useful for making any necessary adjustments or modifications.
- Hammer: A hammer can be used to gently tap the door jamb kit into place.
Necessary materials for the project
In addition to the necessary tools, you will also need the following materials to complete the installation:
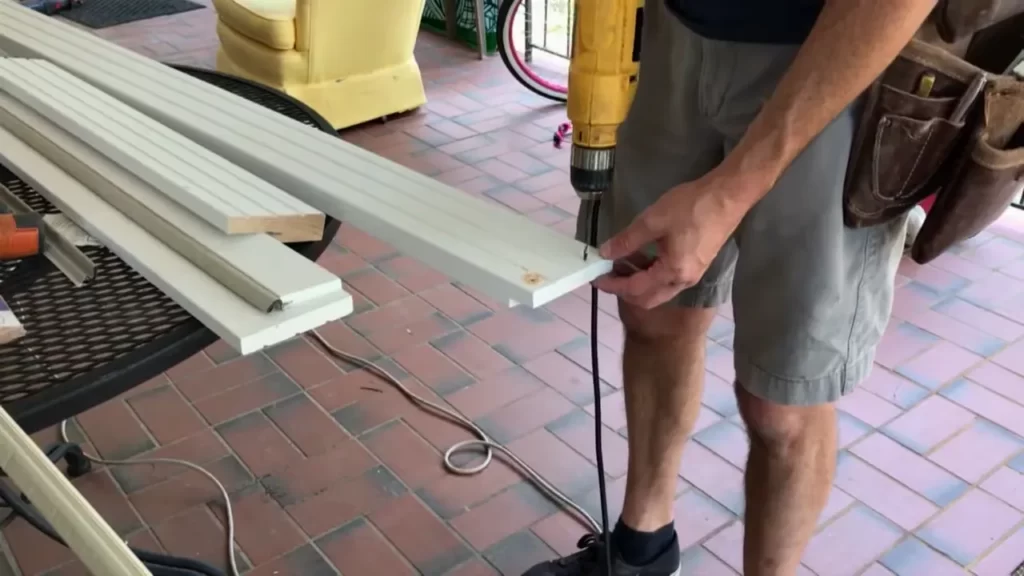
- Door jamb kit: Choose a door jamb kit that is suitable for the size and style of your door.
- Trim: Select trim pieces that match the style of your door and desired aesthetic.
- Screws: Use screws to secure the door jamb kit and attach any hardware.
- Wood glue: Wood glue can be used to reinforce the joints and ensure a strong bond.
- Paint or stain: Choose a paint or stain color that complements your door and overall decor.
- Spackle or wood filler: Spackle or wood filler will be needed to fill any holes or gaps.
- Sandpaper: Sandpaper is necessary for smoothing any rough edges or surfaces.
With the right tools and materials, installing a door jamb kit can be a rewarding and relatively straightforward DIY project. By following the installation instructions carefully and using high-quality tools and materials, you can enhance the appearance and functionality of your door.
Preparing The Door Frame
Before installing a new door jamb kit, it is important to properly prepare the door frame. This involves measuring and marking the door frame, removing the old door frame if applicable, and cleaning and sanding the door frame surface. By following these steps, you can ensure a smooth and successful installation.
Measuring and Marking the Door Frame
The first step in preparing the door frame is to accurately measure and mark the area where the new jamb kit will be installed. Start by measuring the height and width of the door frame using a tape measure. Make sure to measure from the top of the door frame to the floor for the height, and from one side of the frame to the other for the width. Write down these measurements for reference.
Next, use a pencil to mark the height and width measurements on the door frame. This will serve as a guide when installing the new jamb kit.
Removing the Old Door Frame (if applicable)
If you are replacing an existing door frame, you will need to remove it before installing the new jamb kit. Start by carefully removing any trim or molding around the door frame using a pry bar or a hammer and chisel. Be sure to set aside any salvaged trim for later use.
Once the trim is removed, use a reciprocating saw to cut through any nails or screws holding the old frame in place. Carefully remove the old frame from the doorway, taking care not to damage the surrounding walls or flooring. Dispose of the old frame properly.
Cleaning and Sanding the Door Frame Surface
After removing the old door frame, it’s important to clean and sand the surface of the door frame to ensure a proper fit for the new jamb kit. Start by using a vacuum or a brush to remove any dirt, dust, or debris from the surface. This will create a clean and smooth base for the installation.
Next, use sandpaper or a sanding block to lightly sand the door frame surface. This will help remove any rough edges or imperfections, making it easier for the new jamb kit to adhere properly. After sanding, wipe down the surface with a damp cloth to remove any sanding residue.
By implementing these steps, you can effectively prepare the door frame for the installation of a new jamb kit. Taking the time to measure and mark the frame, remove any old components, and clean and sand the surface will ensure a seamless and secure installation. Now that the door frame is ready, you can proceed with the installation of the new jamb kit, bringing a fresh and updated look to your doorway.
Installing The Door Jamb Kit
Installing a door jamb kit is a crucial step in ensuring proper alignment and functionality of your door. A door jamb kit, consisting of the vertical side jambs and the horizontal header jamb, provides structural support and helps in maintaining the integrity of the door frame. In this section, we will walk you through the step-by-step process of installing a door jamb kit to help you achieve a professional-looking finish. Read on to learn more about positioning the jamb kit on the door frame, securing it with screws, and checking for proper alignment and adjustments.
Positioning the jamb kit on the door frame
Before you start installing the door jamb kit, it is important to ensure that the frame is clear of any obstructions and debris. Begin by measuring the height and width of the door opening to determine the appropriate size of the jamb kit. Once you have selected the correct size, place the vertical side jambs on either side of the door opening, ensuring that they are plumb and flush with the wall. It is recommended to use a level to ensure accurate positioning. Align the horizontal header jamb at the top of the door opening, making sure it sits level and flush with the side jambs. Ensure that all joints are tight and secure.
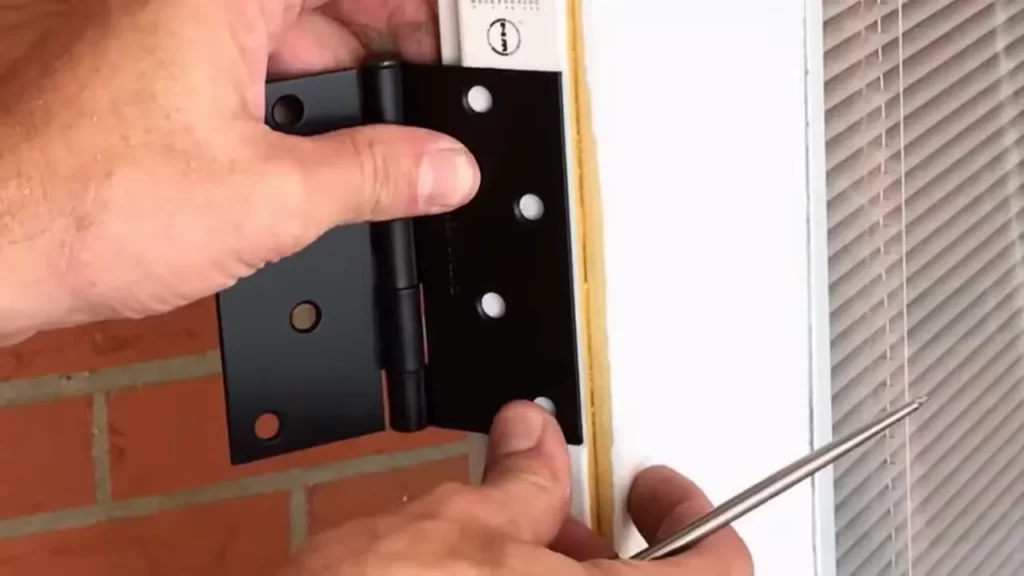
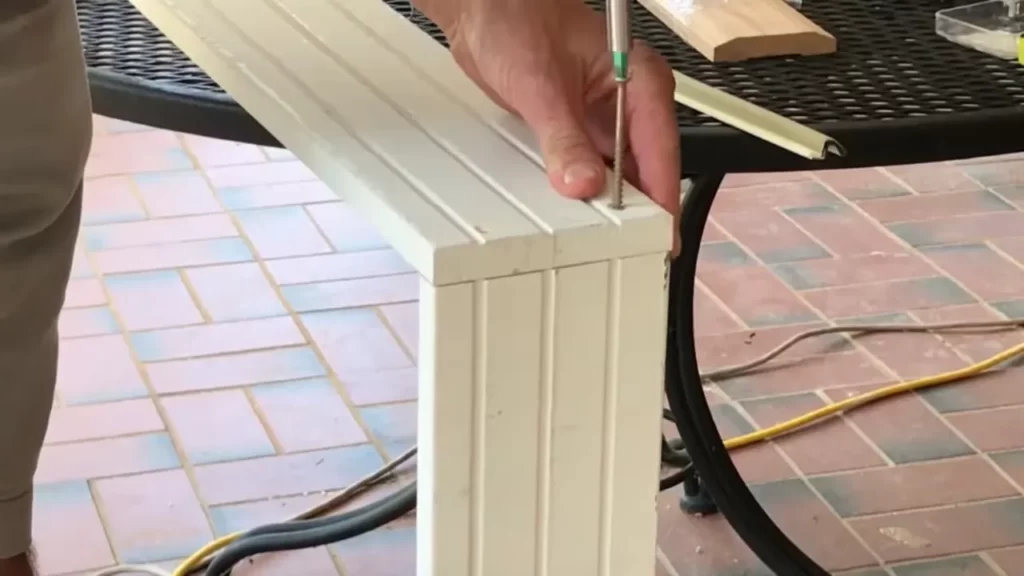
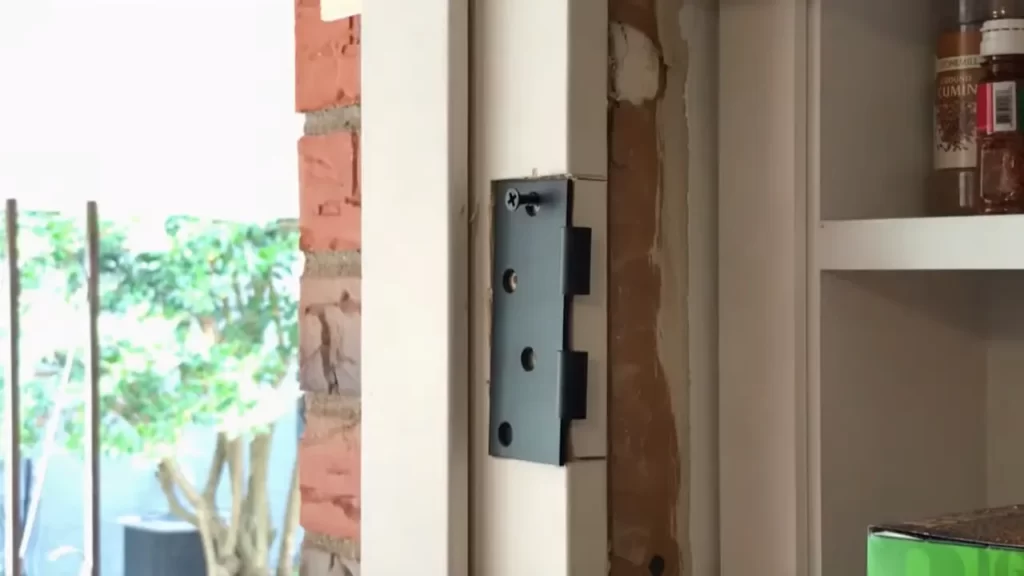
Securing the jamb kit with screws
After positioning the jamb kit on the door frame, the next step is to secure it in place using screws. To do this, first, pre-drill pilot holes into the door frame at regular intervals along the length of the jamb components. This will help prevent any splitting or cracking of the wood. Then, using appropriate screws, attach the jamb components to the door frame firmly. Be sure to countersink the screws, so they do not stick out and interfere with the door closing properly. Repeat this process for all sides of the door jamb kit, ensuring a solid and secure installation.
Checking for proper alignment and adjustments
Once the jamb kit is securely attached, it is crucial to check for proper alignment and make any necessary adjustments. Using a level, ensure that the side jambs are plumb and straight. Check that the header jamb is level and aligned with the side jambs. Make any adjustments as needed to achieve a proper fit. Additionally, test the door’s operation by opening and closing it to ensure smooth movement without any sticking or rubbing against the jamb. If adjustments are required, it might be necessary to remove the screws and reposition the jamb components before securing them again.
By following these steps for installing a door jamb kit, you will be on your way to achieving a professionally installed and functional door frame. Take your time during the installation process to ensure accuracy, and don’t hesitate to seek professional assistance if needed. With a properly installed door jamb kit, you can enjoy a well-fitting door that enhances the overall aesthetic and functionality of your space.
Adding The Door
Installing a door jamb kit is crucial for ensuring proper installation of your new door. Once you have successfully installed the door jamb kit as outlined in the previous steps, it’s time to add the door itself. This step requires careful attention to detail to ensure a seamless installation. Follow the steps below to add the door onto the jamb kit.
Placing the door onto the jamb kit
- Carefully lift the door and position it in front of the door opening.
- Ensure that the top of the door aligns with the top of the jamb.
- Slowly tilt the door into the opening, allowing the bottom of the door to rest on the floor.
- Check that the door is centered within the opening and is sitting flush against the jamb on both sides.
Checking for smooth operation and clearance
Once the door is in place, it’s important to check for smooth operation and proper clearance. This will ensure that the door opens and closes without any issues. Follow the steps below to check for smooth operation and clearance:
- Open and close the door several times to determine if it moves smoothly along the hinges.
- Listen for any unusual sounds, such as scraping or rubbing, which could indicate improper alignment.
- Check for any gaps between the door and the jamb. There should be a consistent gap around the entire door.
- Use a level to make sure the door is plumb (vertical) and level (horizontal) within the opening.
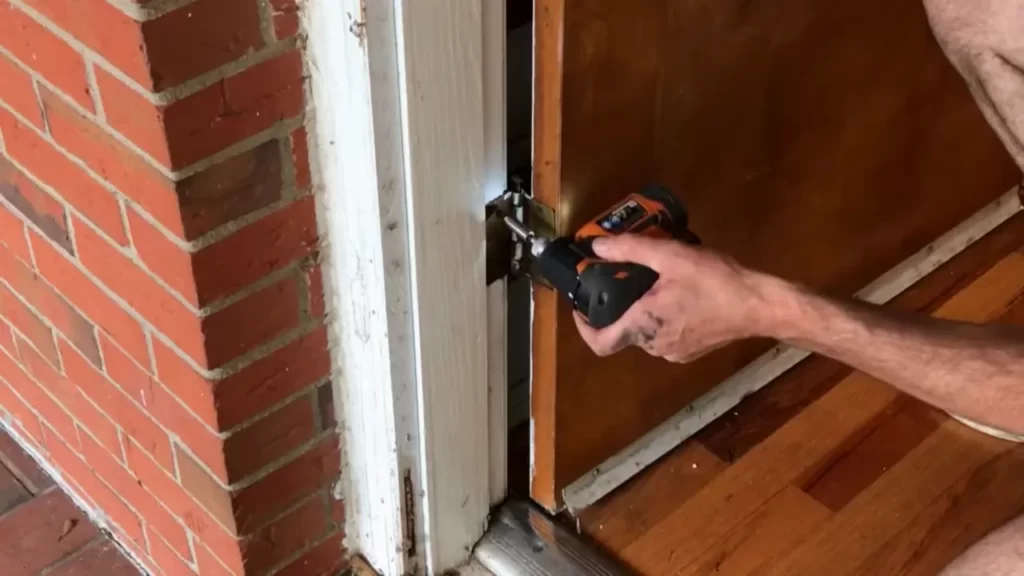
Adjusting the hinges and strike plate if needed
If you notice any issues with the door’s operation or clearance, adjustments may be necessary. Follow the steps below to adjust the hinges and strike plate if needed:
- First, ensure that all screws on the hinges and strike plate are securely tightened.
- If the door rubs against the jamb or floor, loosen the hinge screws slightly and adjust the door’s position until it moves freely without rubbing.
- If the door does not close properly or does not align with the strike plate, you may need to adjust the strike plate by loosening the screws and repositioning it as necessary.
- After making adjustments, test the door’s operation and clearance again to ensure a proper fit.
By following these steps, you can add the door onto the jamb kit and ensure a successful installation. Taking the time to check for smooth operation and make any necessary adjustments will guarantee a functional and secure door for years to come.
Final Touches And Finishing
Filling any gaps or cracks with wood filler or caulk
Before finishing your door jamb kit installation, it’s important to check for any gaps or cracks in the wood that may compromise the appearance or function of your door frame. To ensure a smooth and seamless finish, it’s necessary to fill these imperfections.
1. Wood filler: If you come across any small or medium-sized gaps or cracks, an appropriate solution would be to use wood filler. Wood fillers are easy to apply and are available in various shades to match your door jamb kit. Simply follow the manufacturer’s instructions to fill in the gaps, ensuring the filler is evenly spread and flush with the surrounding wood surface.
2. Caulk: When dealing with narrower gaps or cracks, caulking is the go-to solution. Choose a high-quality caulk that is suitable for both interior and exterior use. Apply the caulk directly into the gaps, making sure to fill them completely. Use a caulk tool or your finger to smooth and level the caulk for a professional finish.
Sanding and smoothing the door and jamb kit
Once you have filled any gaps or cracks, the next step is to sand and smooth the door and jamb kit. This process will not only improve the overall appearance but also create a flawless surface for paint or stain.
1. Sandpaper: To achieve a smooth finish, start by selecting the appropriate grit of sandpaper. A medium-grit sandpaper (around 120-150) is generally suitable for this job. Gently sand the entire surface of the door jamb kit, focusing on the areas where filler or caulk was applied. Sanding in the direction of the wood grain is recommended to avoid damaging the surface.
2. Smooth out rough edges: Pay extra attention to the corners and edges of the door jamb kit. Sand these areas with a fine-grit sandpaper (around 220-240) to remove any roughness and create a seamless transition between the door and the frame.
3. Remove dust: After sanding, it’s important to remove all dust particles from the surface before applying paint or stain. Wipe down the door jamb kit with a damp cloth or use a vacuum with a brush attachment to ensure a clean and dust-free surface.
Applying paint or stain for a finished look
Now that your door jamb kit is seamlessly filled and sanded, it’s time to give it a finished look with paint or stain. Applying paint or stain not only enhances the appearance but also provides necessary protection against wear and tear.
1. Primer: Before applying paint or stain, it’s recommended to use a primer. A primer will provide an extra layer of protection and help the paint or stain adhere better to the wood surface. Follow the manufacturer’s instructions for applying the primer and allow it to dry completely.
2. Paint or stain: Choose a paint or stain that suits your style and matches the overall aesthetic of your space. Apply the paint or stain evenly, using a brush or roller, and follow the recommended drying times between coats. Depending on the product, you may need multiple coats for optimal coverage and durability.
3. Finishing touches: Once the final coat of paint or stain has dried, inspect the door jamb kit for any areas that may need touch-ups. Use a small brush or sponge to apply paint or stain in these spots and allow it to dry completely. This step ensures a polished and seamless finish.
Congratulations! You have successfully installed your door jamb kit and completed the final touches and finishing steps for a professional and visually appealing result. Your newly installed door frame is now ready to enhance the overall beauty and functionality of your space.
Troubleshooting And Tips
In this section, we will explore common issues that may arise during the installation of a door jamb kit and provide you with effective solutions. We will also share some handy tips to ensure a successful installation.
Common issues and how to address them
During the installation process, you may encounter a few hiccups that can be easily resolved with the right approach. Here are some common issues you may face and the steps to address them:
- Uneven or misaligned jamb: If you notice that the door jamb is not level or properly aligned, it can affect the smooth operation of the door. To address this issue, check the frame for any irregularities or warping. If necessary, remove the jamb and use shims or sandpaper to adjust the alignment. Make sure to carefully reattach the jamb, ensuring it is level and secure.
- Difficulty fitting the jamb: Sometimes, the door jamb may not fit perfectly into the existing frame. This can occur due to variations in door sizes or improper measurements. If you encounter this issue, carefully trim the jamb to fit the desired dimensions using a saw or a jamb saw. Take accurate measurements and follow the manufacturer’s instructions to ensure a precise fit.
- Lack of stability: A door jamb that lacks stability can cause the door to sag or not close properly. To enhance the stability, reinforce the jamb by adding additional screws or nails. This will help secure the jamb to the wall and provide better support. Additionally, ensure that all the joints are tightly sealed with adhesive or caulk to prevent any movement and improve overall stability.
Tips for a successful installation
To ensure a successful installation of your door jamb kit, consider the following tips:
- Measure accurately: Take precise measurements of your door frame to ensure that the jamb fits perfectly. Double-check your measurements before making any cuts.
- Follow instructions: Carefully read and follow the manufacturer’s instructions provided with the door jamb kit. Each kit may vary, so be sure to understand the specific steps for your particular product.
- Use quality materials: Invest in high-quality materials, such as sturdy screws and nails, to enhance the durability and longevity of your door jamb installation.
- Take your time: Rushing through the installation process can lead to mistakes. Set aside sufficient time for the installation and work patiently to ensure accuracy.
- Seek professional help, if needed: If you feel unsure or overwhelmed by the installation process, it’s best to seek assistance from a professional carpenter or handyman. They can ensure a flawless installation and offer valuable advice.
Frequently asked questions and answers
Here are some frequently asked questions that homeowners often have when installing a door jamb kit:
| Question | Answer |
|---|---|
| Q: Can I install a door jamb kit without prior experience? | A: While prior experience can be helpful, most door jamb kits come with detailed instructions that make the installation process relatively straightforward. With careful attention to detail and following the provided instructions, even a DIY enthusiast can successfully install a door jamb kit. |
| Q: Do I need special tools to install a door jamb kit? | A: Basic tools such as a saw, drill, level, and measuring tape are usually sufficient for installing a door jamb kit. However, it is always a good idea to check the manufacturer’s recommendations for any specific tools that may be required. |
| Q: Can I paint or stain the door jamb after installation? | A: Yes, you can paint or stain the door jamb to match your desired aesthetic. Make sure to use appropriate primer and paint or stain that is suitable for the type of material used in your door jamb kit. |
By following these troubleshooting tips, useful installation tips, and addressing frequently asked questions, you can ensure a smooth and successful installation of your door jamb kit.
Frequently Asked Questions On How To Install Door Jamb Kit
Where Do You Screw In A Door Jamb?
You screw in a door jamb at the hinge locations and on the side where the strike plate will be installed. Make sure to align the holes in the jamb with the corresponding holes in the door frame for a secure attachment.
How Do You Hang A Door Jamb?
To hang a door jamb, follow these steps: 1. Measure and mark the placement of the jamb on the wall. 2. Attach the hinges to the door and jamb. 3. Secure the jamb in the opening using shims and screws.
4. Install the door and make any necessary adjustments. 5. Test the door for proper function.
Do You Nail Door Jamb?
Yes, we nail door jambs professionally for proper installation and stability. Our skilled team ensures precise and secure attachment, ensuring your door functions properly. Experience the peace of mind that comes with expertly nailed door jambs.
How Do You Install A Pocket Door Jamb Kit?
Installing a pocket door jamb kit is a straightforward process. First, assemble the jamb kit according to the manufacturer’s instructions. Then, secure the track to the top of the doorway and attach the jamb legs to the sides. Finally, install the door into the track and adjust the rollers for smooth operation.
How Do You Install A Door Jamb Kit?
To install a door jamb kit, start by measuring and marking the desired height and width on the door frame. Then, attach the side jambs and top jamb using screws. Finally, install the door casing and hinges to complete the installation.
What Tools Do You Need To Install A Door Jamb Kit?
To install a door jamb kit, you will need the following tools: tape measure, level, screwdriver, drill, screws, miter saw, chisel, hammer, and a pencil.
Conclusion
Installing a door jamb kit may seem daunting, but with the right tools and guidance, it can be a straightforward process. By following the step-by-step instructions outlined in this blog, you can achieve professional results. Remember to measure accurately, use the recommended tools, and take your time to ensure a secure and level fit.
With a little patience and attention to detail, you can transform your doorframe and enhance the functionality and aesthetics of your space.