o install a door lock actuator, start by removing the door panel and disconnecting the wiring. Then, unbolt the old actuator and bolt in the new one, connecting the wiring before reattaching the panel.
Unlocking or locking your car’s doors is made possible by the door lock actuator. Over time, these actuators may fail due to wear and tear or damage. When this happens, it is necessary to replace the actuator to ensure proper functioning of the door locks.
We will guide you through the installation process for a door lock actuator. By following these steps, you can easily replace a faulty actuator and restore the normal operation of your car’s door locks. Let’s get started!
Common Signs Of A Faulty Door Lock Actuator
If you’re experiencing issues with your car door lock, it may be due to a faulty door lock actuator. The door lock actuator is a crucial component responsible for the locking and unlocking mechanism of your car’s doors. When it malfunctions, you may encounter several warning signs that point towards a problem.
Difficulty locking or unlocking the door
If you find it increasingly difficult to lock or unlock your car door, it is likely that your door lock actuator needs attention. You may notice resistance or a complete lack of response when trying to engage the lock or unlock button.
This issue can be frustrating and inconvenient, especially when you’re in a hurry or dealing with bad weather conditions. It’s important not to ignore this problem, as it can lead to a complete malfunction, leaving you locked out of your vehicle.
Unusual noises when using the lock/unlock button
Another indication of a faulty door lock actuator is the presence of unusual noises when you use the lock or unlock button. You may hear grinding, buzzing, or clicking sounds coming from within the door panel. These noises are a clear sign that the actuator is struggling to perform its intended function.
If left unaddressed, these noises may worsen over time, and the actuator may eventually cease to work altogether. It’s essential to take action as soon as you notice these sounds to prevent further damage and avoid potential lockouts.
Inconsistent response from the actuator
If you notice that your door lock actuator is responding inconsistently when you operate the lock or unlock button, it’s a strong indication of a problem. For example, sometimes it may work perfectly fine, while other times it may fail to engage or disengage the lock mechanism.
This inconsistency is a clear sign of an underlying issue with the actuator, which can worsen over time if not addressed promptly. Ignoring it may lead to more severe problems and potentially costly repairs down the road.
In conclusion, being aware of the common signs of a faulty door lock actuator is crucial for maintaining the security and convenience of your vehicle. If you experience difficulty locking or unlocking your door, hear unusual noises when using the lock/unlock button, or notice inconsistent responses from the actuator, it’s essential to take action immediately. Addressing these issues promptly can help prevent further damage and ensure the smooth operation of your car’s door lock system.
Tools And Materials Needed For The Installation
Before you begin installing the door lock actuator, it is essential to gather all the necessary tools and materials to ensure a smooth and successful installation. Having these items readily available will save you time and frustration during the process. Below are the tools and materials you will need:
Screwdriver
A screwdriver is the primary tool you will require for installing the door lock actuator. It helps you remove screws that secure the door panel and the old actuator. Make sure you have a suitable screwdriver that fits the screws properly, allowing you to easily unscrew and tighten them.
Pliers
Pliers come in handy when dealing with wires during the installation process. They help you grip, hold, and manipulate the wiring connectors securely. Pliers ensure a tight and secure connection, preventing any loose wiring which could disrupt the functionality of the actuator. Having a pair of pliers with a comfortable grip will make your job easier.
New door lock actuator
The most important item needed for the installation is the door lock actuator itself. This component is responsible for controlling the locking and unlocking mechanism of your door. Ensure you have a new, high-quality door lock actuator that is compatible with your vehicle’s make and model. It is essential to have a reliable and durable actuator to ensure proper functioning of your door lock system.
Wiring connectors
Lastly, you will need wiring connectors to connect the electrical wiring of the new actuator to your vehicle’s existing wiring system. These connectors provide a secure and efficient electrical connection, ensuring the actuator receives the necessary power and signals to function optimally. Make sure you have the appropriate wiring connectors that fit your actuator and vehicle specifications.
By gathering all these necessary tools and materials before starting the installation, you can streamline the process and avoid any unnecessary delays or complications. Being prepared will enable you to complete the installation of the door lock actuator efficiently and effectively, ensuring your door lock system functions smoothly.
Assessing The Actuator Location And Access Points
Before you can install a door lock actuator, it is crucial to assess its location in the door and determine the access points for removal and installation. This step-by-step guide will walk you through the process, ensuring a smooth and hassle-free installation.
Identifying the Actuator’s Location in the Door
The first step in installing a door lock actuator is identifying its location within the door. Different vehicle models may have slight variations in actuator placement, so it’s essential to consult your vehicle’s manual or online resources for accurate information.
To confirm the actuator’s location, follow these steps:
- Begin by removing the interior door panel. This typically involves unscrewing visible screws and gently prying off any clips holding the panel in place.
- Once the door panel is removed, visually inspect the interior of the door. Look for the mechanical linkage of the door lock mechanism that connects to the actuator. This linkage will guide you to the actuator’s location.
- Take note of the actuator’s position relative to other components within the door, such as the latch assembly or wiring harnesses. This will be important information during the installation process.
Determining the Access Points for Removal and Installation
After identifying the actuator’s location, the next step is determining the access points for its removal and installation. This will vary depending on the specific vehicle make and model. Here are some general guidelines:
- Examine the actuator for any visible screws or bolts securing it to the door frame or latch assembly. These screws or bolts may need to be removed to access the actuator.
- Carefully disconnect any electrical connectors or wiring harnesses attached to the actuator. Take note of their positions and any color-coded markings, as this will help with reinstallation.
- Once the actuator is disconnected and any securing screws or bolts are removed, you should be able to remove it from the door. Take caution not to damage any surrounding components in the process.
When installing the new actuator, the access points will be the reverse of the removal process. Ensure proper alignment and secure the actuator in place before reconnecting any electrical connectors.
By accurately assessing the actuator’s location and determining the access points for removal and installation, you’ll be well-prepared to successfully install a door lock actuator. Remember to refer to your vehicle’s manual or seek professional guidance if you encounter any difficulties during the process.
Removing The Door Panel
When it’s time to install a new door lock actuator, the first step is removing the door panel. This process might seem daunting at first, but with the right tools and a little patience, it can be done smoothly. In this section, we will guide you through the steps for removing the door panel to access the actuator.
Tools And Materials Needed For The Installation
The first step in removing the door panel is to locate and remove the screws or clips that secure it in place. These screws or clips are often found on the bottom and sides of the panel. To remove them, you will need a screwdriver or a trim removal tool.
| Steps | Tools needed |
|---|---|
| 1. Locate the screws or clips | Screwdriver or trim removal tool |
| 2. Use the screwdriver or trim removal tool to carefully unscrew or pry off the clips | Screwdriver or trim removal tool |
| 3. Keep the screws or clips in a safe place for reinstallation later | – |
Using a trim removal tool to gently pry the panel off
Once the screws or clips are removed, it’s time to gently pry the door panel off using a trim removal tool. This tool is designed to help prevent damage to the panel and ensure a smooth removal process.
- Locate the edges of the door panel.
- Insert the trim removal tool between the panel and the door’s frame.
- Gently pry the panel away from the frame, working your way around the edges.
- Continue this process until the panel is loosened and can be lifted off.
Disconnecting any electrical connections
Before fully removing the door panel, it’s important to disconnect any electrical connections that may be attached to it. These connections could include wiring for power windows, mirrors, or speakers. Follow these steps to ensure a safe disconnection:
- Identify any electrical connections attached to the door panel.
- Gently unplug each electrical connection, taking care not to damage the wiring.
- If necessary, use a small screwdriver to release any locking tabs or clips holding the connectors in place.
- Once all connections are unplugged, the door panel can be fully removed.
By following these steps, you will be able to remove the door panel efficiently while minimizing the risk of damage. This will allow you to proceed with the installation of your new door lock actuator.
Locating The Existing Actuator

Before you can install a new door lock actuator, the first step is to locate the existing actuator in your vehicle. The actuator is responsible for controlling the locking and unlocking of your car’s doors, ensuring the security and convenience of your vehicle.
Identifying the Position of the Old Door Lock Actuator
The exact position of the door lock actuator may vary depending on the make and model of your vehicle. However, it is commonly found inside the door panel, next to the door latch mechanism.
To locate the actuator, you will need to:
- Begin by removing the inner door panel. Refer to your vehicle’s manual for specific instructions on how to remove the panel.
- Once the panel is removed, visually inspect the components inside the door. Look for a small, rectangular-shaped object with wires connected to it.
- This is likely the door lock actuator. Take note of its position and how it is connected to the door mechanism. Understanding its connection will help you when it comes time to install the new actuator.
Understanding How It Connects to the Door Mechanism
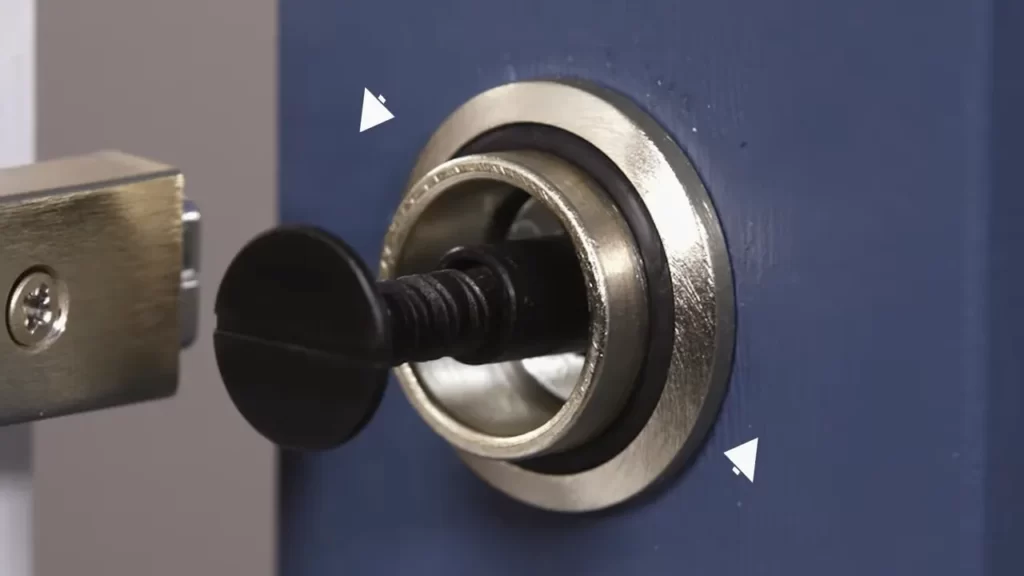
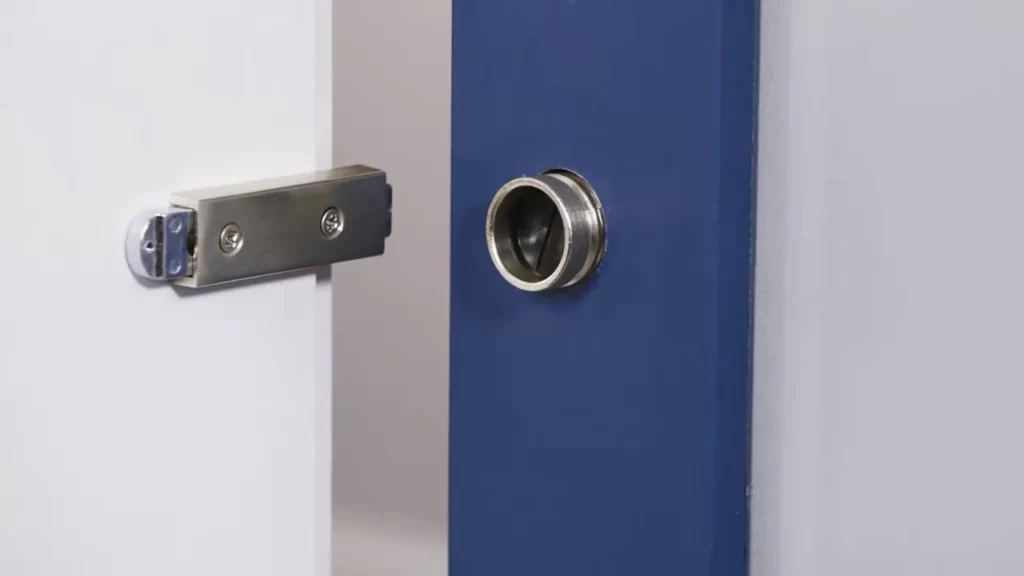
The door lock actuator is an integral part of the door locking system and is responsible for the mechanical functions of locking and unlocking your car’s doors. It is typically connected to the door latch mechanism and operates through a series of rods and levers.
By understanding how the actuator connects to the door mechanism, you will be better equipped to properly install the new actuator. Take note of how the actuator is secured in place and any specific connections or attachments it has to other components.
Once you have a clear understanding of the actuator’s position and connection to the door mechanism, you can move on to the next steps of the installation process, ensuring a smooth and successful replacement of your door lock actuator.
Disconnecting The Actuator From The Door Latch Assembly
Disconnecting the actuator from the door latch assembly is a crucial step in the process of installing a door lock actuator. By following the proper procedure, you can ensure a smooth and hassle-free installation. This section will guide you through the steps involved in disconnecting the actuator from the door latch assembly, allowing you to proceed with confidence.
Removing any clips or screws securing the actuator
Before detaching the actuator from the door latch assembly, it’s important to remove any clips or screws that are securing it in place. These clips or screws may vary depending on the specific make and model of your vehicle. To identify and remove them:
- Inspect the actuator: Thoroughly examine the actuator to locate any visible clips or screws that are holding it in position. These might be located on the side or back of the actuator.
- Use appropriate tools: Once you have identified the clips or screws, use the appropriate tools, such as a screwdriver or pliers, to remove them. Take caution not to damage any surrounding components during this process.
- Place screws or clips in a safe location: As you remove the screws or clips, make sure to place them in a safe location to avoid misplacing or losing them.
Detaching the actuator from the door latch
Once you have successfully removed any clips or screws securing the actuator, it’s time to detach it from the door latch assembly. Here’s how you can do it:
- Locate the connection point: Identify the connection point between the actuator and the door latch assembly. This may be a series of rods or cables connecting the two components.
- Disengage the connection: Carefully disengage the connection between the actuator and the door latch assembly. This can usually be done by sliding or twisting the rods or cables out of their respective slots or attachment points.
- Handle with care: As you detach the actuator, be mindful of the surrounding components and wiring to avoid causing any damage. Take note of how the actuator is positioned before fully detaching it.
By following these steps, you can smoothly disconnect the actuator from the door latch assembly. This will allow you to proceed with the installation of the new door lock actuator, ensuring the proper functioning of your vehicle’s door lock system.
Disconnecting Electrical Connections
Identifying the wiring connectors
Before you begin disconnecting the electrical connections on your door lock actuator, it’s important to first identify the various wiring connectors that are involved. This will help ensure a smooth and hassle-free disconnection process.
Start by locating the actuator itself, typically found within the door panel. Take a moment to familiarize yourself with the different connectors that are attached to it. There may be multiple connectors, each serving a specific purpose. Look for any labels or markings on the connectors that might indicate their function.
Disconnecting them from the actuator
Once you have identified the wiring connectors, it’s time to disconnect them from the actuator. Before you proceed, it’s crucial to take some safety precautions. Ensure that the vehicle’s ignition is turned off and the keys are removed to prevent any accidental electrical shocks.
One by one, carefully locate the wiring connectors that are attached to the actuator. In some cases, they may be secured by small clips or fasteners. Use a small tool or your fingers to gently release these fasteners and separate the connectors from the actuator. Take note of the shape and orientation of the connectors as you disconnect them, as this will be handy during the installation process later on.
| Steps to disconnect wiring connectors |
|---|
| Turn off the vehicle’s ignition and remove the keys. |
| Locate the wiring connectors attached to the actuator. |
| Release any clips or fasteners securing the connectors. |
| Gently separate the connectors from the actuator. |
It’s important to handle the connectors with care, as they can be delicate. Avoid applying excessive force or pulling on the wires themselves. Instead, focus on disconnecting them smoothly and securely.
By following these steps and taking the necessary precautions, you can successfully disconnect the electrical connections from your door lock actuator. This will allow you to proceed with the installation process smoothly and efficiently.
Attaching The New Actuator To The Door Latch Assembly
Aligning the Actuator with the Door Latch
Before securing the new door lock actuator to the door latch assembly, it is important to align it properly. Proper alignment ensures smooth operation and prevents any issues down the line. Here’s how to align the actuator with the door latch:
- Start by examining the new actuator and identifying the specific points where it needs to align with the door latch assembly.
- Compare the new actuator’s design to the old one to ensure that they match.
- If necessary, consult the manufacturer’s instructions to understand the correct alignment position.
- Once you have a clear understanding of the alignment points, position the actuator accordingly, making sure it rests snugly against the door latch assembly.
- Take your time with this step to ensure accuracy; a precise alignment will prevent any installation issues and ensure optimal performance.
Securing the Actuator with Clips or Screws
After aligning the actuator with the door latch assembly, the next step is to secure it firmly in place. The exact method of securing the actuator may vary depending on the specific model and manufacturer’s instructions. Here are two common methods:
Using Clips:
- Identify the clips provided with the new actuator. These clips are designed to attach the actuator securely to the door latch assembly.
- Position the clips accordingly, ensuring they align with the designated attachment points on both the actuator and the door latch assembly.
- Gently press the clips into place, making sure they are firmly secured.
- Double-check the clips’ placement to ensure they are tightly locked and providing a secure connection between the actuator and the door latch assembly.
Using Screws:
- Verify the number and size of screws needed to secure the actuator. Typically, these screws are included with the new actuator or mentioned in the manufacturer’s instructions.
- Align the actuator with the door latch assembly and position it correctly.
- Using the specified screws, carefully insert them into the provided screw holes, making sure they are aligned with the actuator and the door latch assembly.
- Tighten the screws until they are firmly secured, but be cautious not to overtighten and damage the actuator or the door latch assembly.
- Do a final check to ensure all screws are tightened and the actuator is securely attached to the door latch assembly.
By following these steps, you will successfully attach the new door lock actuator to the door latch assembly. This installation process ensures a reliable and functional door lock mechanism, providing you with peace of mind and enhanced security.
Connecting Electrical Connections
Matching the wiring connectors to the new actuator
Before connecting the electrical connections, it is crucial to match the wiring connectors on the new door lock actuator with the connectors on the existing wiring harness. These connectors may vary depending on the make and model of your vehicle, so it is essential to ensure a proper match.
To do this, start by examining the connectors on the existing actuator and the new one. Take note of the size, shape, and number of pins in each connector. You can refer to the vehicle’s service manual or the manufacturer’s instructions for guidance on identifying the correct connectors.
Ensuring a secure connection
Once you have identified the matching connectors, it is time to establish a secure connection between them. This step is crucial for the proper functioning of the door lock actuator.
- Prepare the connectors: Ensure that the wiring connectors are clean and free from any dirt or debris. You can use a small brush or compressed air to remove any particles that may hinder the connection.
- Line up the connectors: Align the pins on the wiring connector of the new actuator with the corresponding slots on the harness connector. Make sure that they are properly lined up and in the correct orientation.
- Insert the connectors: Gently push the connectors together, ensuring that they are fully seated. You may hear a click or feel a slight resistance when the connectors are properly engaged.
- Check the connection: Give the connectors a gentle tug to ensure they are securely locked in place. If they come loose easily, try reseating them or inspecting for any obstructions that could prevent a secure connection.
It is important to note that some connectors may have locking tabs or clips that need to be properly engaged. These tabs or clips ensure a more secure connection and prevent accidental disconnection. Be sure to check for these and ensure they are properly engaged before completing the installation.
By following these steps, you can confidently connect the electrical connections of your new door lock actuator. Remember, a secure and proper connection is crucial for the smooth operation of your vehicle’s lock system. Now that you have successfully connected the wiring, you are one step closer to completing the installation process.
Reassembling The Door Panel

Placing the panel back onto the door
After successfully replacing the faulty door lock actuator, it’s time to reassemble the door panel. Placing the panel back onto the door might seem like a simple task, but it requires careful attention to ensure everything fits correctly. To start, locate the slots or hooks on the door frame where the panel will secure. Align the panel accordingly, making sure it fits snugly into place. Gently press the panel against the door, ensuring that all the clips or tabs are properly engaged. Take your time and double-check to ensure an accurate fit.
Reconnecting any electrical connections
Once the panel is securely in place, it’s time to reconnect any electrical connections that were detached during the disassembly process. These connections could include power windows, door locks, speakers, or any other electrical components present in your door panel. Carefully locate the corresponding connectors on the door panel and the main electrical harness. Match the connectors and insert them firmly until you hear a click, indicating a proper connection. Be mindful not to force any connections, as this could lead to damage or malfunctioning.
Securing the panel with screws or clips
To ensure the door panel remains securely in place, it’s essential to secure it with screws or clips. Refer to your vehicle’s manual or the notes you took during the removal process to identify the specific locations for screws or clips. Insert the screws into their designated holes and tighten them using the appropriate tool. If your door panel uses clips, carefully align them with their corresponding holes on the door frame. Apply gentle pressure and hear for a click, indicating the clips have securely engaged. By adhering to these steps, you can confidently reassemble the door panel after installing a new door lock actuator. Properly placing the panel back onto the door, reconnecting all electrical connections, and securing it with screws or clips will result in a well-functioning and aesthetically pleasing door panel. Remember to test the power windows, door locks, and any other electrical components to ensure they are working correctly before considering the job complete. A carefully executed reassembly will not only provide functionality but also give you peace of mind knowing your door panel is intact and secure.
Testing The Actuator’S Functionality
Locking and unlocking the door multiple times
One of the first steps in testing the functionality of your door lock actuator is to perform a locking and unlocking test. This test will help you determine if the actuator is working properly and responding to your commands. To begin, simply lock and unlock the door multiple times using your key or the door lock button, depending on your vehicle’s configuration.
While performing this test, pay close attention to any unusual sounds or movements coming from the door. A properly functioning actuator should operate smoothly and quietly, without any grinding or jerking motions. If you notice any abnormal behavior, it could be an indication that the actuator needs further inspection or replacement.
Verifying if the actuator responds consistently
After completing the locking and unlocking test, it is essential to verify if the door lock actuator responds consistently each time. This step ensures that the actuator is reliable and can be trusted to secure and release the door as needed.
To perform this verification, repeat the locking and unlocking process several times, paying attention to any variations in the actuator’s response. If the actuator consistently locks and unlocks the door with each attempt, you can have confidence in its functionality. However, if you notice any inconsistencies, such as the door failing to lock or unlock at times, it may indicate a potential issue with the actuator.
It is important to note that intermittent problems with the actuator’s functionality could be caused by various factors, such as wiring or electrical issues. In such cases, it is recommended to consult a professional mechanic or technician for further diagnosis and repair.
Frequently Asked Questions Of How To Install Door Lock Actuator
How Much Is Labor To Replace Door Lock Actuator?
The labor cost for replacing a door lock actuator varies, but it typically ranges from $100 to $300.
What Are The Symptoms Of A Bad Door Lock Actuator?
Symptoms of a bad door lock actuator include difficulty or inability to lock/unlock the door, unusual noises, and a malfunctioning or nonresponsive power door lock system.
Where Does The Door Lock Actuator Go?
The door lock actuator is typically located inside the door panel and is responsible for locking and unlocking the door electronically. It is connected to the locking mechanism and operates when the door lock button is pressed or the key is used to lock or unlock the door.
Can You Drive With A Broken Door Actuator?
Yes, you can drive with a broken door actuator. However, it may affect your ability to lock or unlock the door electronically.
How Do You Install A Door Lock Actuator?
To install a door lock actuator, start by removing the door panel, disconnecting the old actuator, and connecting the new one. Then, reassemble the door panel.
What Tools Do You Need To Install A Door Lock Actuator?
To install a door lock actuator, you’ll typically need a screwdriver, a trim panel removal tool, pliers, and a socket wrench set.
Conclusion
Installing a door lock actuator is a simple yet important task for maintaining the security and functionality of your vehicle. By following the step-by-step instructions provided in this blog post, you can confidently tackle this process on your own. Remember to gather all the necessary tools and take your time to ensure a successful installation.
With the right knowledge and a little patience, you can have your door lock actuator functioning smoothly in no time. So, why wait? Get started and enjoy the convenience and peace of mind that a properly working door lock actuator provides.