To install a door peephole, first measure the height of your door, then mark the desired location for the peephole. Using a drill bit and drill, create a hole at the marked spot.
Insert the peephole lens into the hole from the outside, and screw on the backside of the lens from the inside to secure it in place.
Tools And Materials Needed
Before you can install a door peephole, make sure you have the right tools and materials at hand. Here is a list of everything you will need:
Door peephole kit
A door peephole kit contains all the necessary components for installing a peephole, including the peephole lens, housing, and fasteners. These kits are readily available at most hardware stores and online.
Measuring tape
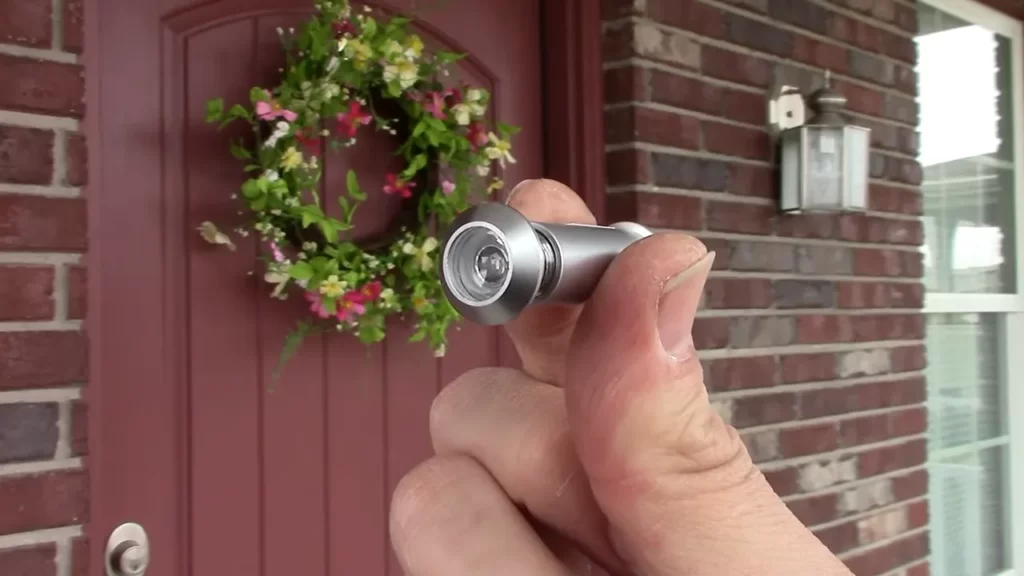
Accuracy is key when installing a door peephole, and a measuring tape will help you get the right dimensions. Make sure to measure both the thickness of your door and the diameter of the peephole lens to ensure a proper fit.
Pencil
A pencil is an essential tool for marking the spot where you’ll be installing the peephole. Use a sharp pencil to make clear, visible marks on your door.
Drill
To create the hole for your peephole, you will need a drill. Choose a drill bit that matches the diameter of the peephole lens and ensure the drill is powerful enough to penetrate the door.
Screwdriver
Once the hole is drilled, you will need a screwdriver to attach the peephole housing securely to your door. Make sure you have a screwdriver that fits the fasteners included in your peephole kit.
Sandpaper
Depending on the quality of your drill, you may need to use sandpaper to smooth out any rough edges around the hole. This will ensure a clean and professional-looking installation.
Having the right tools and materials is crucial for a successful door peephole installation. Gather everything you need before you begin, ensuring a smooth and efficient installation process.
Preparing The Door
Before you can install a door peephole, you need to prepare the door for the installation process. This involves assessing the door thickness for suitable peephole length and determining the optimal height for the peephole installation. By following these steps, you can ensure a successful and secure installation.
Assessing the Door Thickness for Suitable Peephole Length
One of the first steps in preparing the door for a peephole installation is to assess its thickness. This is crucial because it determines the length of the peephole needed. Measure the door’s thickness using a standard tape measure, making sure to take accurate measurements in inches or millimeters.
In order to select the suitable peephole length, you should keep in mind that the peephole should be long enough to provide a clear and wide view of the area outside the door. Ideally, the peephole should extend through both sides of the door to ensure maximum visibility.
Once you have determined the door’s thickness, consult the manufacturer’s specifications when selecting a peephole. These specifications will typically indicate the suitable door thickness range for each peephole model. Ensure that the peephole you choose falls within this range to ensure a proper fit.
Determining the Optimal Height for the Peephole Installation
Along with the door thickness, the height at which the peephole is installed is also crucial. This ensures that individuals of varying heights, including children and people in wheelchairs, can comfortably use the peephole to view the outside.
To determine the optimal height for the installation of the peephole, consider the average height of the people who will be using the door. The standard height range for peephole installation is typically between 58 and 64 inches from the floor. However, you can place it slightly higher or lower based on personal preference.
Additionally, you should consider the presence of any obstructions, such as molding or decorative elements, that may affect the positioning of the peephole. Aim to position it in a spot that provides a clear view without any obstructions in the line of sight.
By carefully assessing the door’s thickness and determining the optimal height for peephole installation, you can ensure that the installation process goes smoothly and that the peephole provides a clear and convenient view outside.
Marking And Drilling
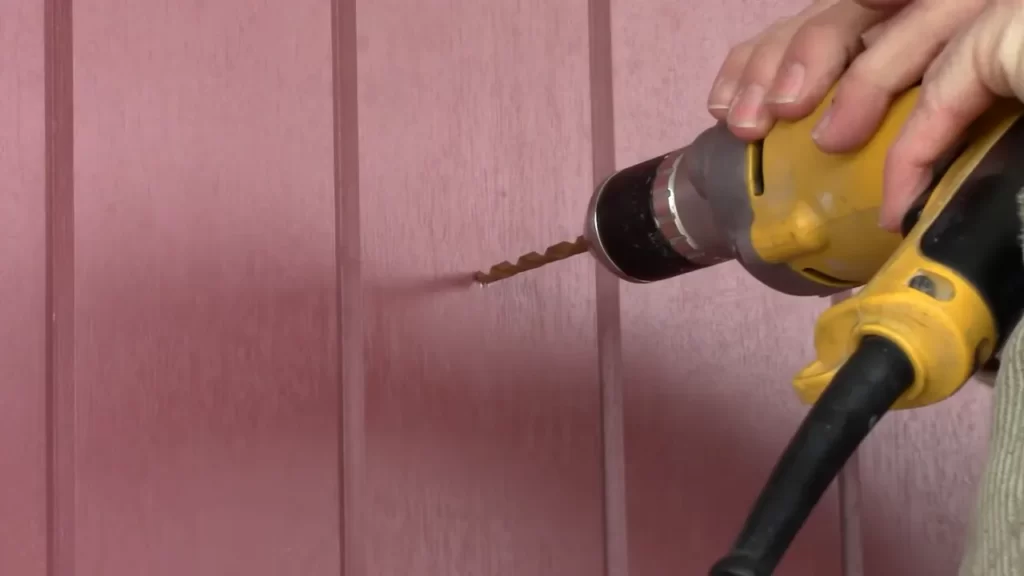
Marking and Drilling:
Installing a door peephole not only enhances your home security but also gives you the peace of mind knowing who is at your door before opening it. The process involves a few simple steps, starting with marking and drilling. In this section, we will guide you through the process of accurately marking the center point for the peephole on the door, measuring and marking the drilling depth, and finally, drilling a pilot hole and enlarging it to the required size.
<h3>Marking the center point for the peephole on the door</h3>
Before you begin, make sure you have chosen the ideal location for your peephole. Consider the height of the door and the average height of the people in your household to determine the proper placement. Once you have decided, take the following steps to mark the center point:
- Close the door and stand inside to ensure you have a clear view of the exterior.
- Using a measuring tape or ruler, find the exact center of the door’s width and mark it with a small pencil dot.
- If the door has a decorative panel or molding, make sure to center the peephole within the area where you will be able to see through.
<h3>Measuring and marking the drilling depth</h3>
Now that you have marked the center point, it’s time to determine the drilling depth. The drilling depth refers to the distance the drill bit needs to penetrate the door. To measure and mark the drilling depth, follow these steps:
- Measure the thickness of your door. Use a tape measure to get an accurate reading.
- Subtract the length of the peephole from the door’s thickness. This will give you the drilling depth.
- Mark the drilling depth on the drill bit using a piece of painter’s tape. Wrap the tape around the bit at the desired length.
- Having a marked drilling depth ensures that you don’t drill too far into the door, which could damage the interior surface.
<h3>Drilling a pilot hole and enlarging it to the required size</h3>
With the center point marked and the drilling depth determined, it’s time to start drilling. Follow these steps to safely and accurately drill the peephole:
- Attach an appropriate drill bit to your drill. It’s recommended to start with a small-sized drill bit, such as 1/8 inch, to create a pilot hole.
- Align the drill bit with the center point you marked earlier and slowly start drilling. Apply gentle pressure and maintain a steady hand.
- Once the pilot hole is created, switch to a larger-sized drill bit, such as 1/4 inch or 3/8 inch, depending on the size of your peephole.
- Enlarge the pilot hole to the required size by carefully drilling around the edges. Take your time and ensure the hole is smooth and free from any obstructions.
- After drilling, clean the hole and remove any wood chips or debris.
By following these steps to mark and drill the peephole, you are well on your way to increasing the security of your home. The next section will cover how to properly install the peephole, so stay tuned!
Installing The Peephole
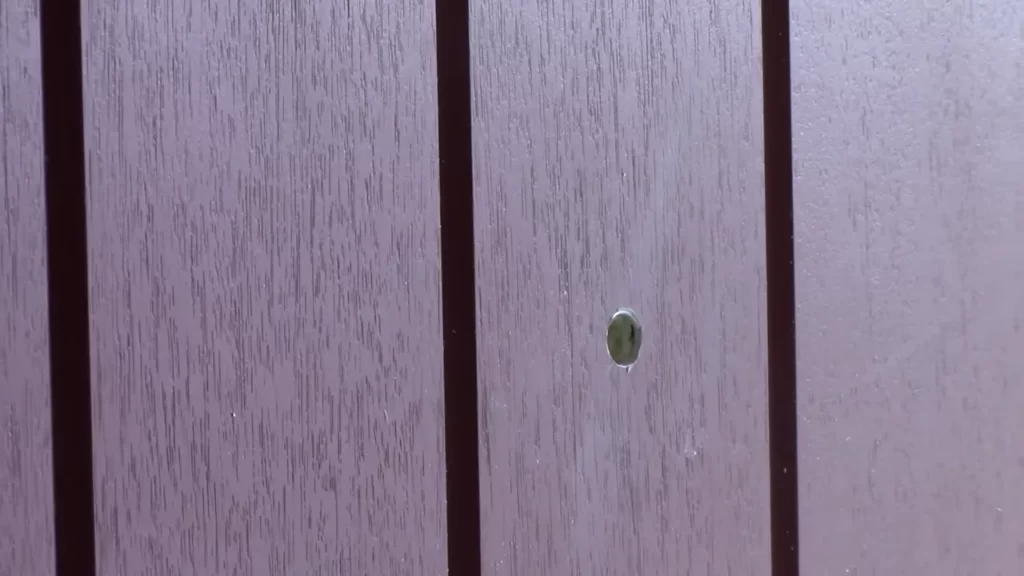
Inserting the lens into the hole from the front
To start installing your door peephole, carefully insert the lens into the hole from the front of the door. Make sure the lens fits snugly into the hole, allowing for proper visibility from the inside. Hold the lens in place while you move on to the next step.
Securing the lens from the interior side of the door
Once the lens is inserted, move to the interior side of the door. Take the securing ring that came with the peephole and place it around the lens. This ring will help keep the lens securely in place, preventing it from moving or falling out over time.
Aligning and attaching the barrel and viewer on both sides of the door
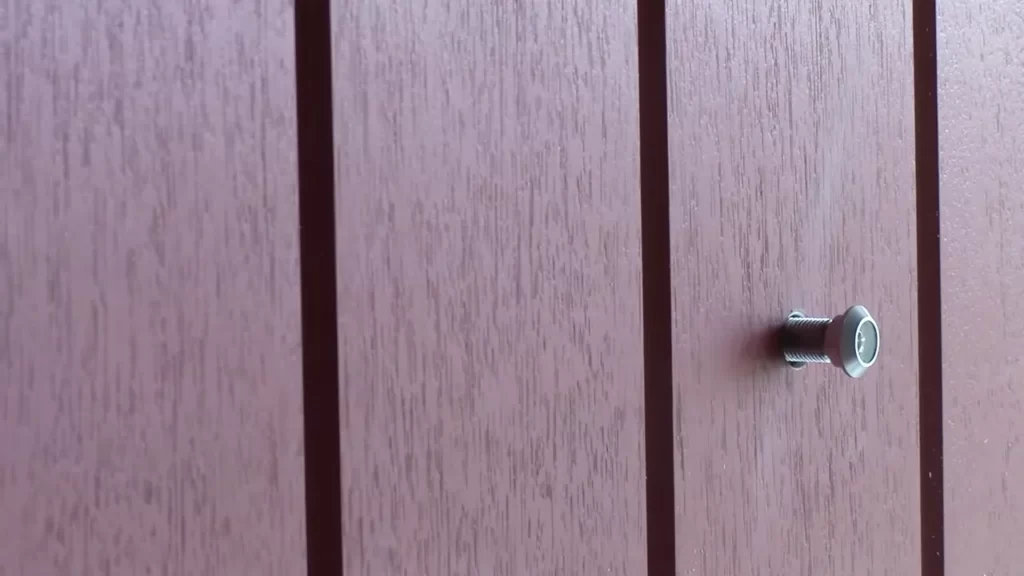
Now, it’s time to align and attach the barrel and viewer on both sides of the door. Carefully align the holes on the barrel and viewer with the lens and the securing ring already in place. Once aligned, push the barrel and viewer together, making sure they fit securely against the door.
Fastening the peephole with screws tightly
With the barrel and viewer properly aligned and attached, it’s time to fasten the peephole to the door. Take the screws provided with the peephole and insert them through the holes on the barrel and viewer. Use a screwdriver to tighten the screws, ensuring they are firmly secured to the door. This will help prevent any movement or looseness of the peephole over time.
Testing the peephole for proper functionality
Once the peephole is securely fastened, it’s important to test it for proper functionality. Look through the peephole from both the inside and outside of the door to ensure clear visibility. Check that there are no obstructions and that the lens provides a wide and clear view of the area outside the door. This step ensures that your peephole is working effectively and provides you with the necessary security and peace of mind.
Finishing Touches
Once you have successfully installed your door peephole, there are a few final steps you can take to ensure that it not only functions properly but also looks visually appealing. Paying attention to the finishing touches will not only enhance the overall appearance of your door peephole but also improve its longevity. In this section, we will discuss two important steps: smoothing any rough edges with sandpaper and cleaning the peephole lens for clear visibility.
Smoothing any rough edges with sandpaper
After installing the door peephole, you may notice some rough edges around the hole. These rough edges can not only make the peephole look untidy but can also potentially cause harm if left unattended. Smoothing the edges using sandpaper will not only improve the aesthetics but also make it safer to use. Follow these simple steps to smooth out any rough edges:
- Gently remove any excess debris or dust around the peephole using a clean, dry cloth.
- Wrap a small piece of fine-grit sandpaper around your finger.
- Using a circular motion, gently sand down the edges of the peephole.
- Continue sanding until you feel the edges become smooth to touch.
- Wipe away any residual dust with a clean cloth.
Remember, using a fine-grit sandpaper is crucial to avoid scratching or damaging the door’s surface. By taking this extra step, you will not only ensure a neat and polished appearance but also create a convenient and safe viewing experience.
Cleaning the peephole lens for clear visibility
Over time, the peephole lens may accumulate dirt, smudges, or smears, hindering its clarity and visibility. It is essential to clean the lens regularly to ensure a clear sightline. Follow these steps to clean your peephole lens:
- Prepare a gentle cleaning solution by mixing warm water with a small amount of mild liquid soap.
- Dampen a soft, lint-free cloth with the cleaning solution.
- Gently wipe the lens in a circular motion, ensuring you remove any dirt or smudges.
- For stubborn stains, you can use a cotton swab dipped in the cleaning solution to carefully target the affected area.
- Once the lens is clean, use a dry cloth to remove any excess moisture.
Regularly cleaning the peephole lens will not only enhance its performance but also provide a clear and uninterrupted view of the outside. It is advisable to clean the lens at least once a month or more frequently if necessary.
Tips For Troubleshooting
Installing a door peephole is a simple and effective way to enhance your home’s security. However, like any other home improvement project, you may encounter a few hiccups along the way. In this section, we will discuss some useful tips for troubleshooting common issues that may arise when installing a door peephole. By following these tips, you can ensure that your peephole is functioning properly and provides you with a clear view of your doorstep.
Ensuring proper alignment of the peephole components
One common problem that you may encounter when installing a door peephole is misalignment of the components. This misalignment can result in a distorted or blurry view, making it difficult to identify individuals at your door. To ensure proper alignment, follow these steps:
- Step 1: Begin by loosening the screws that hold the peephole components together.
- Step 2: Gently rotate the peephole lens until you achieve a clear view of the area outside your door.
- Step 3: Once you have the desired view, tighten the screws to secure the components in place.
- Step 4: Test the peephole by looking through it to ensure that the alignment is satisfactory.
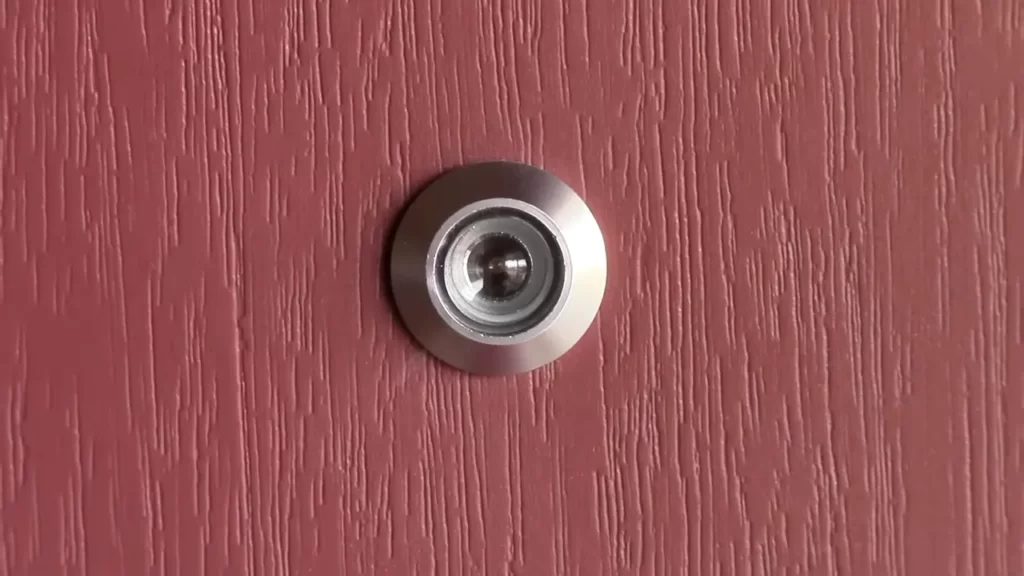
By carefully aligning the peephole components, you can ensure that you have a clear and accurate view of the outside.
Adjusting the lens focus if necessary
In some cases, you may find that the lens of your door peephole is not focused properly, resulting in a blurry or distorted image. To address this issue, follow these steps:
- Step 1: Loosen the screws that hold the peephole components together.
- Step 2: Gently rotate the lens in either direction to adjust the focus.
- Step 3: Tighten the screws once you have achieved the desired focus.
- Step 4: Test the peephole by looking through it to ensure that the focus is clear.
By adjusting the lens focus, you can ensure that your door peephole provides a clear and detailed view of anyone at your doorstep.
Handling any issues with the peephole’s functionality
If you encounter any issues with the functionality of your door peephole, such as difficulty rotating the lens or a loose fit, follow these steps:
- Step 1: Inspect the peephole components to ensure that they are properly aligned and secure.
- Step 2: If the lens is difficult to rotate, try applying a small amount of lubricant to the rotating mechanism.
- Step 3: If the peephole fit is loose, you may need to use additional washers or shims to secure it more tightly to the door.
- Step 4: Test the peephole by rotating the lens and ensuring that it moves smoothly and provides a clear view.
By addressing any issues with the peephole’s functionality promptly, you can ensure that it operates smoothly and provides you with the security you need.
Frequently Asked Questions Of How To Install Door Peephole
How Do I Install Peephole Viewer?
To install a peephole viewer, start by measuring the door’s thickness and door hole size. Choose a suitable viewer for your door and mark the drilling position. Drill a hole at the marked spot and insert the viewer, tightening it with a wrench.
Finally, test the viewer for clear visibility.
How Much Does It Cost To Put In A Peephole?
The cost to install a peephole is usually around $50 to $100.
How High Should A Door Peephole Be?
Door peepholes should be installed at a height that allows someone of average height to easily look through it. Generally, the height should be around 58 to 60 inches from the ground.
Can You See Through Both Sides Of A Peephole?
Yes, you can see through both sides of a peephole. This allows you to view both the inside and outside of a door without having to open it. The design of a peephole allows for a clear, wide-angle view for added security.
Conclusion
Installing a door peephole is a simple and effective way to enhance the security of your home. By following the step-by-step instructions in this guide, you can easily install a door peephole without any professional assistance. Remember to choose the right peephole, measure accurately, and take necessary safety precautions.
With a door peephole in place, you can gain peace of mind knowing who is at your door before opening it. Stay safe and secure with a door peephole installation.
