To install a door stop, measure and mark the desired position on the baseboard. Then, align the door stop with the mark and screw it into place using a drill or screwdriver.
Door stops are essential accessories that prevent doors from hitting walls, furniture, or other objects. Installing them is a quick and simple process that can be done by anyone with basic DIY skills. In this guide, we will explain how to install a door stop in just a few easy steps.
By following these instructions, you can ensure that your doors remain protected and prevent any potential damage. So, let’s dive in and learn how to install a door stop effectively.
Protect Your Walls And Furniture
Installing a door stop is a simple yet effective way to protect your walls and furniture from the constant impact of doorknobs. Whether you have children running around or just want to maintain the integrity of your home, a door stop serves as a buffer between your doorknob and the surrounding surfaces. By taking the proactive step to install door stops, you can prevent unsightly dings and dents on your walls while ensuring that your furniture remains unscathed.
Prevents damage from doorknob impact
One of the main benefits of using a door stop is that it effectively prevents damage caused by doorknob impact. Without a door stop in place, every time you open a door, the doorknob can collide with the wall or nearby furniture. Over time, this repeated impact can result in unsightly chips, scuffs, and marks on your walls. Not to mention the potential for damage to your precious furniture. By installing a door stop, you create a protective barrier that absorbs the impact of the doorknob, sparing your walls and furniture from unnecessary wear and tear.
Reduces noise and vibrations
Another advantage of having a door stop is that it reduces noise and vibrations. When you close a door forcefully, it can create a loud banging noise that can be disruptive to the peace and quiet of your home. Additionally, the vibrations produced by this impact can be felt throughout the room, potentially causing delicate items on nearby furniture to shift or even fall. By installing a door stop, you can minimize the noise and vibrations generated by closing doors, creating a more serene environment in your home.
Overall, installing a door stop is a small investment that offers significant benefits. Not only does it protect your walls and furniture from doorknob impact, but it also reduces noise and vibrations. By taking this simple step, you can ensure the longevity and aesthetics of your home while enjoying a quieter and more peaceful living space. Don’t delay any longer – install a door stop today!
Enhance Safety And Security
Installing a door stop is a simple yet effective way to enhance safety and security in your home or office. By preventing doors from slamming shut, a door stop helps to prevent accidents and injuries. It provides an extra layer of security against forced entry, making it more difficult for intruders to break in. In this blog post, we will discuss the benefits of installing a door stop and provide a step-by-step guide on how to install one.
Prevents doors from slamming shut
One of the primary benefits of installing a door stop is its ability to prevent doors from slamming shut. Whether you have kids running around, pets playing nearby, or simply want to avoid the annoyance of a slamming door, a door stop can be a real lifesaver. By holding the door in place when it is open, it eliminates the risk of doors closing unexpectedly and causing injuries. It is especially useful in gusty areas where strong winds or sudden drafts can slam doors shut forcefully.
Moreover, by preventing doors from slamming shut, a door stop can also protect your walls and furniture from damage. It avoids those unsightly dents, scratches, and scuff marks that often occur when doors are slammed shut. So, not only does a door stop help improve safety, but it also keeps your living or working space looking neat and well-maintained.
Provides an extra layer of security against forced entry
Aside from preventing doors from slamming shut, a door stop can provide an additional layer of security against forced entry. Intruders commonly use brute force or tools to kick open doors, but a properly installed door stop can make their job much more challenging. It creates resistance and effectively reinforces the door, making it harder to break in.
Installing a door stop is a cost-effective way to enhance the security of your home or office. It adds an extra barrier that intruders must overcome, buying you precious time to contact authorities or find a safer place. Whether you have a wooden or metal door, a door stop can be installed on any type of door, significantly reducing the risk of a forced entry.
In conclusion, installing a door stop is a practical and affordable solution that can greatly enhance safety and security in your home or office. It prevents doors from slamming shut, protecting against accidents and damage. Additionally, it provides an extra layer of security against forced entry, making it more challenging for intruders to break in. Invest in a door stop today and enjoy the peace of mind that comes with knowing your space is protected.
Tools Needed
When it comes to installing a door stop, having the right tools is essential. This ensures that the installation process is smooth and successful. In this section, we will discuss the tools needed for installing a door stop.
Screwdriver
A screwdriver is a basic tool that is necessary for installing a door stop. It is used to secure the screws that hold the door stop in place. Make sure to choose the appropriate type of screwdriver based on the type of screwhead.
Drill
A drill is another important tool that is often required for installing a door stop. It can be used to create pilot holes in the door or the wall, making it easier to install the screws. Ensure that your drill is charged or has a power supply before starting the installation process.

Level
A level is a tool used to ensure that the door stop is installed in a straight and level position. This prevents the door from swinging open or closed on its own. Place the level on top of the door stop to check if it is aligned properly. Adjust if necessary.
Measuring Tape
Using a measuring tape is vital for accurate installation of the door stop. It helps in measuring the precise distance between the door and the wall or floor. This measurement is crucial to determine the appropriate placement of the door stop.
When installing a door stop, it is essential to have these tools ready. Using a screwdriver, drill, level, and measuring tape will make the installation process easier and ensure that the door stop functions properly.
Materials Required
Before you start installing a door stop, make sure you have all the necessary materials handy. Having the right tools and materials will ensure a smooth installation process. Here are the materials you will need:
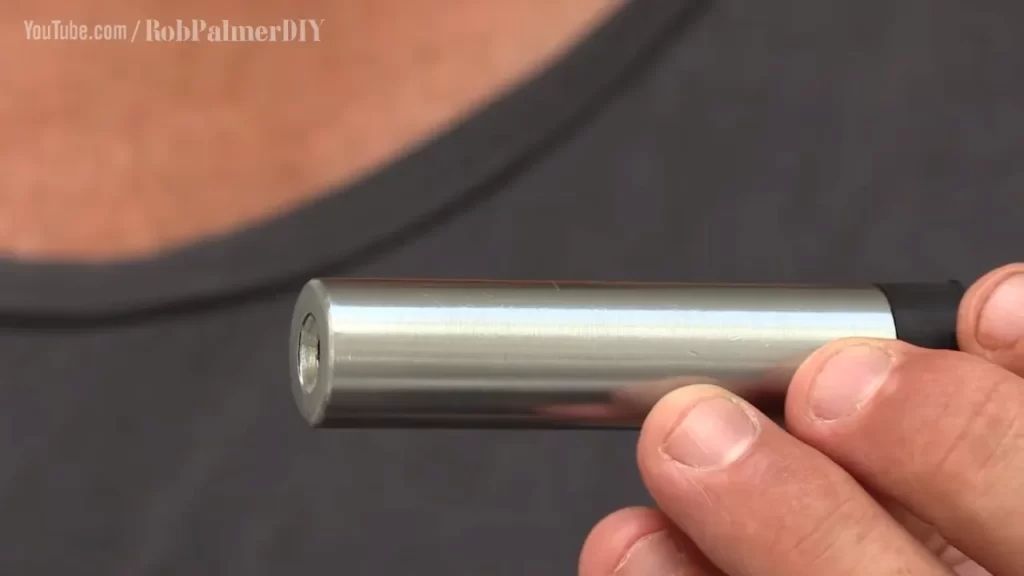
Door stop
The door stop itself is the main component you’ll need for this installation. It is a small device that prevents a door from swinging too far open and damaging nearby walls or furniture. You can choose from various types of door stops such as floor-mounted, wall-mounted, or hinge-pin door stops. Select a door stop that suits your needs and preferences.
Screws
Screws are an important component for installing a door stop. Make sure you have screws that are suitable for the type of door stop you are installing. Door stops typically come with screws, but if they don’t, ensure you have screws that are the right size and length to securely fasten the door stop to the wall or floor.
Wall anchors (if needed)
If you are installing a wall-mounted door stop on a plasterboard or drywall surface, you may need wall anchors to provide additional support and prevent the screws from pulling out. Wall anchors are especially useful for heavy-duty door stops or installations in high-traffic areas. Ensure you have the appropriate wall anchors that match the size and weight requirement of your door stop.
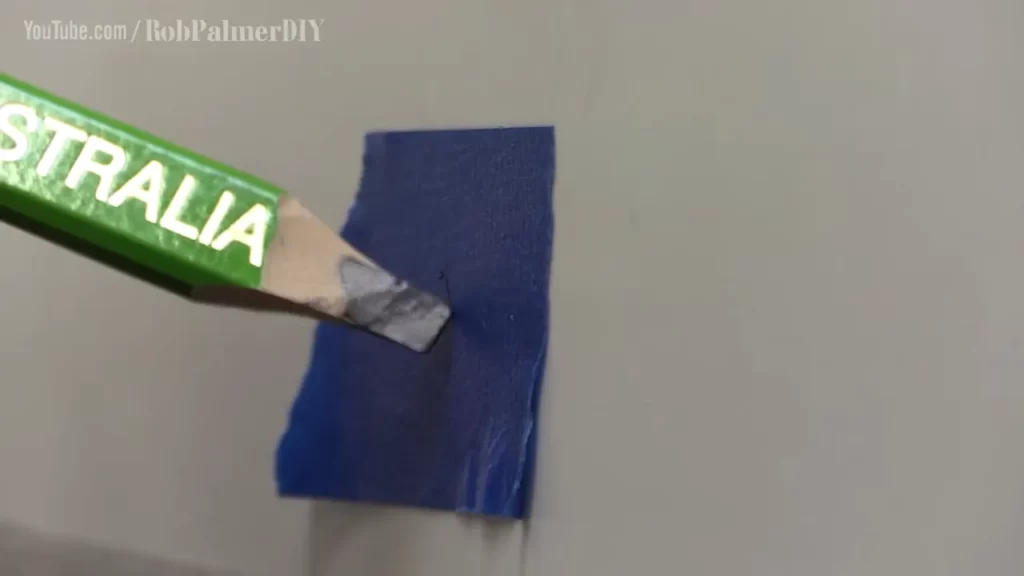
Pencil (for marking)
A pencil will be required to mark the position where you will be installing the door stop. This marking helps ensure accurate placement and alignment before drilling or attaching the door stop. A pencil mark acts as a guide, allowing you to position the door stop precisely to meet your functional and aesthetic preferences.
Now that you know all the materials required, let’s move on to the next step of the door stop installation process.
Step 1: Choose The Appropriate Door Stop Style
Choosing the right door stop is an essential step in improving the functionality and longevity of your doors. With various styles available in the market, it’s important to consider the different types of door stops before making a decision. By selecting the one that best suits your preferences and needs, you can ensure that your doors are protected and maintained properly.
Consider the different types of door stops available
Before diving into the installation process, familiarize yourself with the different door stop styles that are available. Each style serves a specific purpose and has its own unique features.
1. Floor-mounted door stops
Floor-mounted door stops are a popular choice for households. These door stops are installed directly on the floor, providing a sturdy barrier that prevents your doors from swinging past their intended opening point. This type of door stop is particularly useful when you need to keep your doors open for extended periods, enabling better airflow and creating a more open space.
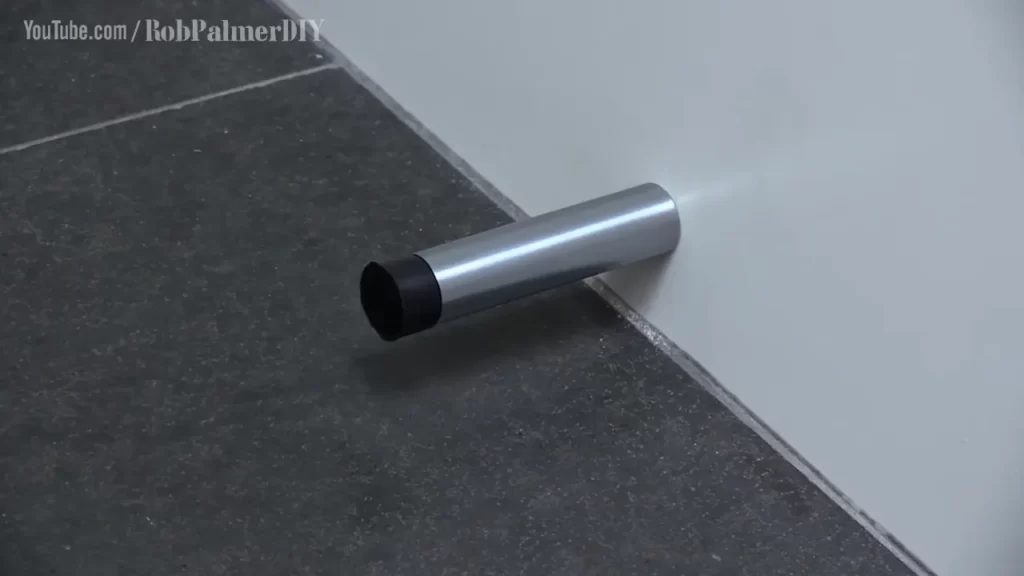
2. Wall-mounted door stops
Wall-mounted door stops are another common option. As the name suggests, these door stops are mounted on the wall behind the door. They feature a rubber or metal bumper to absorb impact when the door is opened. Wall-mounted door stops are ideal for preventing doorknob damage to walls and maintaining a clean and scratch-free appearance.
3. Magnetic door stops
If you prefer a more discreet option, magnetic door stops are worth considering. These door stops utilize a strong magnet to hold the door in place when opened. Magnetic door stops are typically mounted either on the floor or on the wall. They provide a sleek and unobtrusive solution while still offering dependable door control.
4. Kickdown door stops
Do you find it frustrating when your doors keep closing on their own? Kickdown door stops are designed to address this issue. With a foot-operated mechanism, kickdown door stops allow you to keep your doors open at an angle when needed. This type of door stop is particularly useful in high-traffic areas or when moving heavy items in and out of a room.
Select the one that suits your preferences and needs
After considering the various types of door stops, it’s time to choose the one that best suits your preferences and needs. Consider the following factors:
- Do you need the door to stay open at a specific angle?
- How much clearance is available between the door and the floor or wall?
- Is aesthetics important to you? Choose a style that complements the overall look and feel of your space.
- Consider the material of the door stop. Rubber or silicone bumpers are popular for their ability to absorb impact and protect your door and walls.
Once you have chosen the appropriate door stop style that aligns with your preferences and needs, you’re ready to move on to the next step of the installation process.
Step 2: Determine The Ideal Placement For The Door
Stop
Now that you’ve identified the type of door stop you need, it’s time to determine the ideal placement for it. This step is crucial as it ensures maximum effectiveness and prevents any potential damage to your door and surrounding area. To do this, you need to analyze the door’s swing and the area it could potentially damage, allowing you to identify the best location to install the door stop.
Analyze the door’s swing and the area it could potentially damage
Begin by carefully observing how your door swings when opening and closing. Take note of any furniture, walls, or objects near the door that could be at risk of being damaged. It’s important to consider both the door’s swing radius as well as the potential force it exerts when opened and closed. By analyzing the door’s swing and the area it could potentially damage, you gain valuable insight into where the door stop should be placed to provide the most effective protection.
Identify where to install the door stop for maximum effectiveness
Once you have analyzed the door’s swing and the potential damage area, you can now determine where to install the door stop for maximum effectiveness. Consider installing the door stop at a point where it will prevent the door from opening too far, hitting furniture or walls. This will prevent any unnecessary damage, while still allowing ample room for comfortable access through the doorway.
Remember to choose a location that is sturdy and can withstand the force exerted by the door. Typically, this would be a solid, flat wall or baseboard that can support the door stop securely. Avoid placing the door stop too close to the hinges, as this may not provide enough stopping power and can potentially damage the hinges themselves.
Once you have identified the ideal placement for the door stop, mark the spot using a pencil or masking tape. This will ensure that you install the door stop correctly and at the desired location.
By carefully analyzing the door’s swing and considering the potential damage area, you can determine where to install the door stop for maximum effectiveness. This will help protect your door and surrounding area, ensuring long-lasting durability and improved convenience in your day-to-day life.
Step 3: Prepare The Door And Wall
Before installing a door stop, it is essential to prepare both the door and the wall to ensure a secure and effective installation. Proper preparation will not only make the installation process easier but also enhance the longevity and functionality of your door stop. This step-by-step guide will walk you through the necessary preparations to ensure a successful installation of your door stop.
Clean the surface where the door stop will be installed
Cleaning the surface where you intend to install the door stop is crucial for optimal adhesion. Dust, dirt, or other debris can hinder the adhesive’s effectiveness, and it may not adhere properly to a dirty surface. To ensure a clean installation, follow these steps:
- Gather the necessary cleaning supplies: You will need a mild detergent, warm water, and a clean cloth or sponge.
- Dilute the detergent: Mix a small amount of mild detergent with warm water in a bucket or container.
- Dampen the cloth or sponge: Dip the cloth or sponge into the soapy mixture and wring out any excess liquid.
- Clean the surface: Gently wipe the surface where the door stop will be installed, removing any dirt, grease, or residue. Pay special attention to ensure there are no traces of oil, as it can prevent proper adhesion.
- Rinse and dry: After cleaning, rinse the surface with clean water and pat it dry with a clean cloth or allow it to air dry completely.
Mark the drilling points on both the door and the wall
Accurately marking the drilling points is crucial to ensure the door stop is properly aligned and securely installed. Follow these steps to mark the drilling points:
- Gather the necessary tools: You will need a pencil or marker, a tape measure or ruler, and a level.
- Measure and mark: Using the tape measure or ruler, determine the desired height for your door stop. Make a small mark on the door and the wall at the same height using a pencil or marker.
- Align and level: Place a level against the door and adjust the position until it is perfectly vertical. Make another mark on the door and the wall at the desired distance from the edge of the door. Repeat this process for the second drilling point.
- Double-check and finalize: Ensure that the marked points are level and aligned properly. Make any necessary adjustments before proceeding to the next step.
By following these steps to prepare the door and wall for the installation of your door stop, you can ensure a clean surface and accurately marked drilling points. These preparations lay the foundation for a successful installation, allowing your door stop to function effectively and provide the desired protection and convenience.
Step 4: Attach The Door Stop To The Wall
Now that you have prepared the door and marked the spot where the door stop will be installed, it’s time to attach it to the wall. This step is crucial as it ensures that your door will be protected from slamming into the wall, preventing any damage to both the door and the wall itself.
Use the drill to make pilot holes for the screws
Grab your drill and the appropriate drill bit size for the screws that came with your door stop. The pilot holes will make it easier for you to screw in the screws later on. Place the drill bit in the chuck and tighten it securely.
- Start by positioning the door stop against the wall at the desired height and location.
- Use the drill to make pilot holes by gently drilling into the wall at the marked spots.
- Make sure the holes are deep enough to accommodate the screws that will secure the door stop.
Securely fasten the door stop to the wall using the screws

Now that you have the pilot holes ready, it’s time to securely fasten the door stop to the wall. This step ensures that the door stop remains in place and functions effectively.
- Take the screws provided with the door stop and insert them into the pilot holes.
- Using a screwdriver or a drill with a screwdriver bit, tighten the screws until the door stop feels secure against the wall.
- Make sure not to overtighten the screws, as this may damage the door stop or the wall.
- Check that the door stop is level and aligned properly. Adjust if necessary.
By following these steps, you have successfully attached the door stop to the wall. Now, your door can open and close without any worries of it slamming into the wall and causing damage. Remember to test the door stop by gently opening and closing the door to ensure its functionality. Enjoy the added protection and peace of mind knowing that your door and walls are safe!
Step 5: Attach The Door Stop To The Door
Now that you have carefully marked the points on the door where you want the door stop to be attached, it’s time to move on to the actual installation process. This step will ensure that the door stop is securely and correctly positioned to effectively prevent the door from damaging the wall or other surfaces it opens against. Follow the instructions below to effortlessly attach the door stop to the door.
Align the door stop with the marked points on the door
Take the door stop and ensure proper alignment with the marked points on the door. This will ensure that the door stop is centered and properly positioned to perform its function effectively. Ensure that the door stop is straight and level, as this will impact its performance and prevent any unnecessary friction with the wall or other surfaces.
Screw it into place using the appropriate screws
Once the door stop is properly aligned, securely fasten it to the door by using the appropriate screws. Ensure that you are using the correct type and size of screws that are suitable for the material of your door. Using screws that are too long or too short may result in an insecure installation. Consider consulting the instructions provided by the door stop manufacturer or seek professional advice if you are unsure about the appropriate screw size.
Insert the screwdriver into the screw head and firmly tighten the screws, taking care not to over-tighten and risk damaging the door or the door stop. Always refer to the instructions or recommendations provided by the manufacturer to ensure the door stop is securely attached and functioning optimally.
Remember to install the screws at the marked points to ensure accurate placement of the door stop. This will provide the necessary support and reinforcement to prevent the door from hitting the wall or adjacent surfaces too forcefully.
Once you have attached the door stop securely, give it a thorough inspection to ensure it is properly in place and aligned. Test the door to see if it stops at the desired distance from the wall or other surfaces. If necessary, make any adjustments to the alignment or position of the door stop.
By following these simple steps, you can successfully attach the door stop to your door, protecting it from potential damage and keeping your walls and furniture safe. Now you can enjoy the peace of mind that comes with having a reliable door stop in place.
Step 6: Test The Door Stop
Step 6: Test the Door Stop Once you have successfully installed the door stop, it’s essential to test its functionality to ensure it will perform its intended purpose. Follow these simple steps to effectively test your door stop and make any necessary adjustments if needed. 1. Open and close the door: To test the door stop, open and close the door a few times to observe its interaction with the stopper. Pay close attention to any abnormalities or resistance during the process. 2. Check for smooth operation: As you open and close the door, make sure the door stop allows the door to open and close smoothly without any hindrance. It should not hinder the door’s movement nor cause any unusual noise or friction. 3. Inspect the door stop’s positioning: While testing, check the positioning of the door stop. Ensure it is aligned correctly, preventing the door from swinging too wide or too far in the opposite direction. It should provide the desired level of door opening while effectively preventing damage to the wall or surrounding furniture. 4. Test stability and durability: Your door stop should be stable and hold up to regular use. Apply some pressure to the door against the door stop and verify that it remains securely in place. It shouldn’t shift or move when subjected to force. Additionally, examine the durability of the door stop material to ensure its long-lasting performance. 5. Make necessary adjustments or tighten screws: If you encounter any issues during the testing phase, it may be necessary to make some adjustments or tighten screws. Check if the door stop is securely fastened to the wall or floor. If any screws are loose, tighten them using a screwdriver to ensure a stable and effective door stop. Remember, the purpose of testing the door stop is to guarantee its functionality and avoid any future problems. By thoroughly testing the door stop, you can rest assured that it will effectively serve its purpose in protecting your door, wall, and furniture. Take the time to make any necessary adjustments or tighten screws if needed, ensuring a seamless and trouble-free experience. In conclusion, follow these steps above to test your door stop’s efficacy, stability, and durability. By doing so, you will not only protect your door and surrounding areas but also ensure that your door stop will continue to serve its purpose effectively.
Consider The Aesthetics
A door stop may seem like a small detail in your home, but it actually plays an essential role in protecting your walls, furniture, and other belongings from accidental damage caused by swinging doors. While functionality is important, it’s also crucial to consider the aesthetics when choosing a door stop. After all, you want it to seamlessly blend into your overall interior design, enhancing the beauty of your space rather than detracting from it. In this section, we’ll explore some key considerations and tips to help you choose a door stop that matches your interior design perfectly.
Choose a door stop that matches your interior design
When selecting a door stop, it’s crucial to take into account the style and theme of your home’s interior design. You wouldn’t want a door stop that sticks out like a sore thumb or clashes with your overall decor, would you? So, consider the following factors to ensure a harmonious blend.
- Material: Opt for materials that align with your interior design style. For example, if your home has a rustic charm, a door stop made of distressed wood or wrought iron could be a perfect choice. On the other hand, if you have a modern and sleek aesthetic, a door stop crafted from polished metal or acrylic may be more appropriate.
- Shape and Design: Pay attention to the shape and design of the door stop. If your interior design leans towards minimalism, a simple and clean-lined door stop would complement it beautifully. Conversely, if your space includes lots of intricate patterns and detailing, a door stop with ornate motifs or decorative elements could be an eye-catching addition.
- Color: Consider the color scheme of your interiors when choosing a door stop. You can opt for a door stop that blends in with the color palette of the room or go for a contrasting shade that adds a pop of interest. Either way, ensure that the color of the door stop complements the surroundings.
Opt for finishes that complement your door and surrounding
decor
In addition to considering the overall interior design, it’s crucial to think about how the door stop will integrate with your specific door and surrounding decor elements. Here are a few essential tips:
- Door Finish: Take into account the finish of your door. If your door has a natural wood finish, you might want to choose a door stop that complements the wood tone. On the other hand, if your door has a painted finish, you could coordinate the door stop color with the paint color for a cohesive look.
- Surrounding Decor: Think about the adjacent decor elements near the door. Consider the finishes of nearby furniture, wall accents, and fixtures. Ensure that the door stop finish complements these elements, creating a harmonious flow throughout the space.
By considering the aesthetics and selecting a door stop that matches your interior design and complements your door and surrounding decor, you can ensure that your door stop not only serves its practical purpose but also adds to the overall visual appeal of your home. Now that you’re equipped with these tips, go ahead and choose the perfect door stop for your space!
Use Wall Anchors For Added Stability
If installing on a hollow or thin wall, use wall anchors for better support
When it comes to installing a door stop, ensuring a secure and sturdy installation is of utmost importance. If you are mounting the door stop on a hollow or thin wall, it is essential to use wall anchors for added stability.
Wall anchors are small devices designed to provide extra support when attaching objects to surfaces that may not have enough structural integrity to hold the weight on their own. By using wall anchors, you can prevent your door stop from becoming loose or damaged over time.
To ensure a reliable and long-lasting installation, follow these steps to use wall anchors:
Step 1: Choose the right type of wall anchor
It is essential to select the appropriate wall anchor for your specific wall material. There are various types of wall anchors available, including plastic expansion anchors, toggle bolts, and self-drilling anchors. Refer to the package instructions or consult a hardware professional to determine which type is best suited for your wall.
Step 2: Mark the spot for installation
Using a pencil or a marker, mark the spot where you want to install the door stop. Ensure that it is at a suitable height and position to prevent the door from hitting nearby objects or walls when it opens.
Step 3: Pre-drill the hole
If necessary, pre-drill a hole slightly smaller than the diameter of the wall anchor. This will make it easier to insert the anchor and provide a snug fit.
Step 4: Insert the wall anchor
Insert the wall anchor into the pre-drilled hole, ensuring that it sits flush with the wall surface. Use gentle pressure to push it in, being careful not to damage the anchor or the wall.
Step 5: Tighten the screw
If your wall anchor has a screw, insert it into the anchor and tighten it until it is secure. This will expand the anchor, creating a tight grip within the wall.
Step 6: Attach the door stop
Finally, attach the door stop to the wall by screwing it into the wall anchor. Ensure that it is tightly secured and doesn’t wiggle or move when pressure is applied.
By following these simple steps and using wall anchors, you can ensure that your door stop is installed securely, even on hollow or thin walls. This added stability will prevent the door from damaging your walls and keep the door stop in place for years to come.
Maintain And Clean Your Door Stop
Regularly dust and clean your door stop to prevent buildup and maintain functionality
Maintaining and cleaning your door stop is essential to ensure its longevity and functionality. Through regular maintenance, you can prevent the accumulation of dirt, dust, and debris, which can hinder its performance. Furthermore, cleaning your door stop periodically allows you to inspect for any damages or loose screws that may require attention.
Inspect for any damage or loose screws periodically
Inspecting your door stop regularly is crucial to identify any potential issues that may affect its functionality. Take a moment to examine the condition of the door stop, paying close attention to any visible damages such as scratches or dents. Additionally, check for loose screws that may have come undone over time.
If you notice any damages or loose screws, it’s important to address them promptly. Tighten any loose screws using a screwdriver or replace damaged parts as needed. This will help maintain the door stop’s stability and ensure it continues to effectively hold your door in place.
Implementing cleaning methods for your door stop
Cleaning your door stop is a straightforward process that can be done using simple household items. To keep your door stop free from dust and grime, follow these steps:
- Start by removing the door stop from its place. This will allow you to clean it more effectively and ensure all areas are accessible.
- Use a soft cloth or sponge to wipe away any visible dirt or debris from the surface of the door stop.
- If the dirt is stubborn, you can moisten the cloth or sponge with a mild detergent diluted in water. Gently scrub the affected areas to remove the buildup.
- Rinse the door stop with clean water to remove any residual soap or cleaning solution.
- Wipe the door stop dry with a clean cloth to prevent water spots or streaks.
- Finally, reattach the door stop to its original position, ensuring that all screws are secure.
By following these simple steps, you can keep your door stop clean and well-maintained, allowing it to function properly for years to come.
Frequently Asked Questions On How To Install Door Stop
Where Should A Door Stop Be Installed?
A door stop should be installed on the floor, near the bottom of the door. It helps prevent the door from swinging too far open or closed, protecting the door and surrounding walls. Place the door stop on the side where the door handle is not located.
How Do I Install A Hinge Pin Door Stop?
To install a hinge pin door stop, follow these steps: 1. Open the door to a 90-degree angle. 2. Remove the hinge pin from the top hinge. 3. Slide the hinge pin door stop onto the hinge pin. 4. Reinsert the hinge pin into the hinge.
5. Adjust the door stop to the desired position.
How Do You Install Floor Door Stops?
To install floor door stops, follow these steps: 1. Measure and mark the desired location on the floor. 2. Use a drill to create a hole for the anchor. 3. Insert the anchor into the hole and tap it gently.
4. Screw the door stop into the anchor until it is secure. 5. Test the door stop to ensure it functions properly.
How Much Does It Cost To Install A Door Stop?
Installing a door stop typically costs around $10 to $20, depending on the type and complexity of the installation. The cost may vary based on location and additional factors.
How Do You Install A Door Stop?
To install a door stop, first, mark the position on the wall, then drill holes and insert the anchors. Finally, attach the door stop using screws.
Why Should You Install A Door Stop?
Installing a door stop prevents damage to the wall and keeps the doorknob and handle from hitting the wall, ensuring a longer lifespan for both.
Conclusion
Installing a door stop is a simple yet effective way to protect your walls and doors from damage. By following the step-by-step guide outlined in this blog post, you can easily install a door stop in no time. Remember to choose the right type of door stop and gather the necessary tools before starting the installation process.
With a little effort and proper installation, you can ensure the longevity of your doors and walls. Enhance the functionality and appearance of your home with this easy DIY project.