To install door trim molding, measure and cut the molding to fit the door frame, and then attach it using nails or adhesive. It is important to accurately measure and cut the molding to ensure a proper fit before attaching it securely to the door frame.
Installing door trim molding is a simple and effective way to enhance the appearance of your doors. Door trim molding not only adds a decorative touch but also helps to hide any gaps or imperfections between the door frame and the wall.
Whether you’re updating the trim on a new door or replacing old molding, this step-by-step guide will walk you through the process of how to install door trim molding. By following these instructions, you’ll be able to achieve a professional-looking result that will transform the look of your doors.
Choosing The Right Door Trim Molding
When it comes to enhancing the overall aesthetic appeal of your interior doors, choosing the right door trim molding is essential. Not only does it provide a finishing touch to the door, but it also helps in hiding any gaps and imperfections between the door frame and the wall. Here are some factors to consider when selecting door trim molding, along with information on different types available in the market and popular styles and designs to suit your preferences.
Factors to consider when selecting door trim molding
When selecting door trim molding, there are several factors to consider that will help ensure you make the right choice for your specific needs:
- Style and Design: The style and design of the door trim molding should complement the overall theme and decor of your room. Whether you prefer a classic, traditional look or a more modern and contemporary style, there is a wide range of options available to suit different tastes.
- Material: Door trim moldings can be made from various materials, including wood, MDF (medium-density fiberboard), polyurethane, or PVC. Each material has its own advantages and disadvantages, so it’s important to consider factors such as durability, maintenance requirements, and cost when making your decision.
- Size and Proportions: The size and proportions of the door trim molding should be in harmony with the size of the door and the surrounding space. It’s important to choose a size that doesn’t overwhelm the door or the room but still provides the desired visual impact.
- Budget: Determine your budget for the door trim molding project and find options that fit within that range. Keep in mind that while certain materials may be more expensive upfront, they may offer long-term durability and aesthetics, making them a worthwhile investment.
Different types of door trim molding available in the market
Door trim moldings come in a variety of types, each with its own unique characteristics and benefits. Here are some of the most common types you can find in the market:
| Type | Description |
|---|---|
| Baseboard Molding | Installed at the bottom of the wall, this type of molding covers the joint between the wall and the floor, adding a graceful transition. |
| Casing Molding | Used to frame doorways and windows, casing molding adds a decorative element and helps create a polished look. |
| Crown Molding | Known for its elegant appearance, crown molding is installed where the wall meets the ceiling, adding a touch of sophistication to any space. |
| Chair Rail Molding | Typically installed at the height of a chairback, chair rail molding serves both as a decorative element and as protection for the wall against scuffs and scratches. |
Popular styles and designs for door trim molding
When it comes to the style and design of door trim molding, there are a plethora of options available to suit every taste and preference. Here are some popular styles and designs that you can consider:
- Traditional: This style features intricate details and ornate designs, often mimicking historical architectural elements.
- Modern: With clean lines and minimalistic profiles, modern door trim molding is perfect for contemporary and minimalist interiors.
- Craftsman: Inspired by the Arts and Crafts movement, craftsman-style molding focuses on simplicity and natural materials.
- Farmhouse: Rustic and charming, farmhouse-style molding is characterized by its distressed finishes and reclaimed wood elements.
By carefully considering the factors mentioned above, exploring different types of door trim molding available in the market, and selecting a style and design that aligns with your preferences, you can easily find the perfect door trim molding to add that extra touch of elegance and sophistication to your doors.
Measuring And Preparing The Door Frame
Accurately measuring and preparing the door frame is an essential step when installing door trim molding. By taking proper measurements and ensuring the door frame is properly prepared, you can ensure a seamless installation process and achieve a professional finish. Here are some tips and techniques to help you measure the dimensions of the door frame and properly prepare it before installing trim molding.
Accurately measuring the dimensions of the door frame
Before you begin installing door trim molding, it is crucial to measure the dimensions of the door frame accurately. This step will help you determine the amount of trim you will need and ensure a precise fit. Follow these steps to measure the door frame accurately:
- Start by measuring the height of the door frame from the top to the bottom. Use a tape measure and take note of the measurement.
- Next, measure the width of the door frame from one side to the other. Again, use a tape measure and record the measurement.
- Measure the thickness of the door frame. This measurement is essential to select the right trim molding size that fits your door frame perfectly.
By accurately measuring the dimensions of the door frame, you can ensure that the trim molding will fit snugly and enhance the overall aesthetics of your door.
Tips for properly preparing the door frame before installing trim molding
Properly preparing the door frame is crucial to ensure a smooth installation of trim molding. Here are some tips and techniques to help you prepare the door frame effectively:
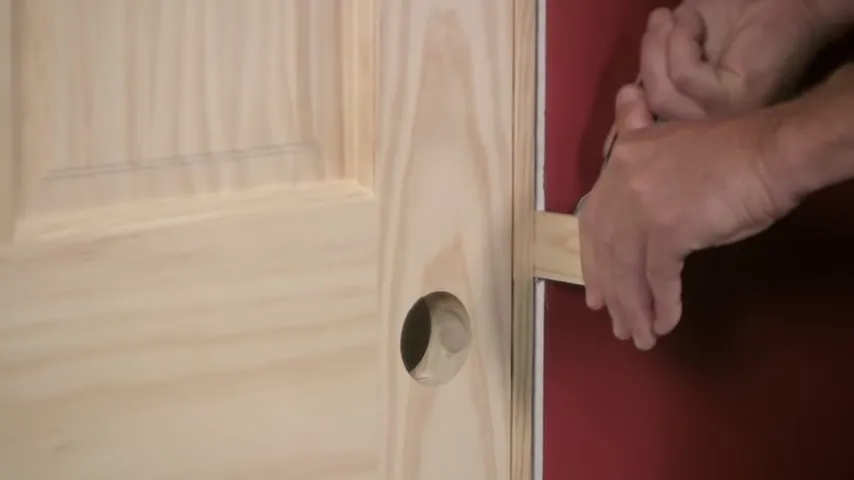
- Start by removing any existing trim or caulk from the door frame. Use a putty knife or a pry bar to carefully remove the trim, taking care not to damage the frame.
- Clean the door frame thoroughly to remove any dirt or debris. Use a damp cloth or a mild detergent solution to wipe down the surface and ensure a clean and smooth surface for the trim molding.
- Inspect the door frame for any imperfections or damages. Fill in any holes or gaps with wood filler and sand the surface to achieve a smooth finish. This step is crucial for achieving a polished look after installing the trim molding.
- Ensure that the door frame is level and plumb. Use a level to check for any unevenness or misalignment. If necessary, adjust the frame using shims or other leveling techniques to ensure a straight and even installation of the trim molding.
By following these tips and properly preparing the door frame, you can create a solid foundation for installing door trim molding and achieve a professional and high-quality finish.
Essential Tools And Materials For Installation
Installing door trim molding can instantly elevate the look of any space, adding a touch of elegance and sophistication. However, to ensure a seamless installation process, you will need the right tools and materials at your disposal. Whether you are a seasoned DIY enthusiast or a beginner tackling your first trim molding project, having the necessary tools and materials is crucial to achieving professional-looking results. In this section, we will cover the list of tools required for easy installation, the recommended materials and supplies, and important safety precautions to keep in mind.
List of tools required for easy installation of door trim molding
Before you embark on your door trim molding project, it is essential to gather the necessary tools for a smooth installation process. Below is a comprehensive list of tools you will need:
| Tools | Description |
| Measuring tape | To accurately measure the length and width of the trim pieces |
| Miter saw | For precise and clean angled cuts |
| Utility knife | To score and trim the trim pieces |
| Coping saw | To make intricate cuts for corners and angles |
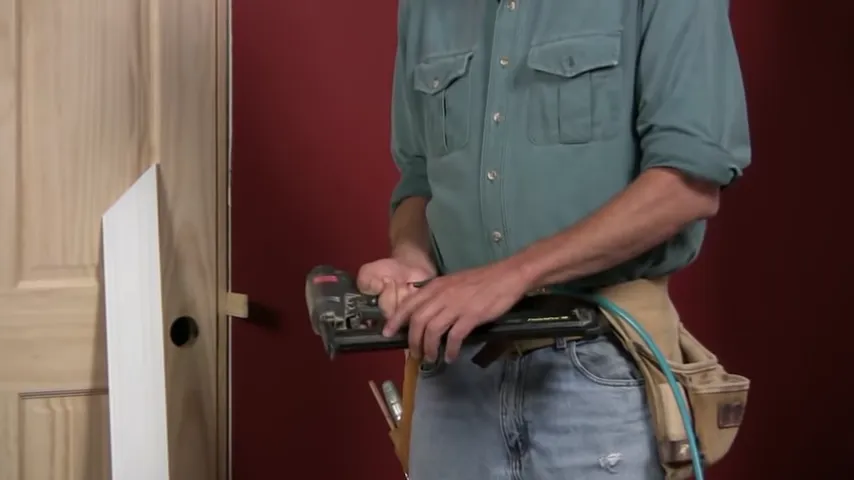
| Brad nailer | To securely attach the trim pieces to the wall or door frame |
| Sanding block | To smooth any rough edges or imperfections |
| Caulk gun | To apply caulk for a seamless finish |
| Level | To ensure the trim is straight and level |
| Putty knife | To apply wood filler or putty for filling nail holes |
Recommended materials and supplies for a smooth installation process
Aside from the tools, you will also need the right materials and supplies to facilitate a successful installation. Here are some recommended options:
- Trim molding: Choose from a variety of materials such as wood, MDF, or PVC, based on your preferences and budget.
- Construction adhesive: Use adhesive to bond the trim pieces to the wall in addition to nailing for extra stability.
- Nails: Opt for finishing nails or brad nails, depending on the thickness of the trim and the surface you are attaching it to.
- Spackle or wood filler: Use spackle or wood filler to fill any gaps, cracks, or nail holes before painting or staining the trim.
- Paint or stain: Choose a color or stain that complements your overall design scheme.
- Sandpaper: Have different grits of sandpaper on hand to smooth the wood surface and remove any imperfections.
- Caulk: Use caulk to fill any visible gaps between the trim and the wall or door frame, creating a seamless finish.
- Painter’s tape: Use painter’s tape to protect adjacent surfaces from accidental paint or caulk stains.
Important safety precautions to keep in mind during

installation
Prioritizing safety is crucial during any DIY project. When installing door trim molding, keep the following safety precautions in mind:
- Protective gear: Wear safety glasses, gloves, and a dust mask to shield yourself from flying debris and dust.
- Secure work area: Ensure the area where you are working is properly lit and free from any obstructions or hazards.
- Use caution with power tools: Follow the manufacturer’s instructions when operating power tools and always unplug them when not in use.
- Work from a stable platform: Use a ladder or step stool that is stable and secure to reach higher areas for installation.
- Properly dispose of waste: Handle and dispose of any waste materials, such as sawdust or trim scraps, safely and responsibly.
By equipping yourself with the necessary tools, materials, and safety precautions, you can confidently tackle the installation of door trim molding and achieve professional-looking results. Now that you have the foundation in place, let’s move on to the actual installation process!
Step-By-Step Guide For Door Trim Molding Installation
Installing door trim molding is a great way to add a touch of elegance and sophistication to any room. With the right tools and a little bit of patience, you can achieve a seamless and professional-looking installation. In this step-by-step guide, we will walk you through the process of properly cutting the door trim molding to the correct length, mitering the corners for a seamless finish, and securing the trim molding to the door frame. Let’s get started!
Properly Cutting the Door Trim Molding to the Correct Length
Before you begin cutting the door trim molding, measure the length of the door frame accurately. It’s always better to measure twice and cut once to avoid any wastage or mistakes. Follow these steps to ensure a precise cut:
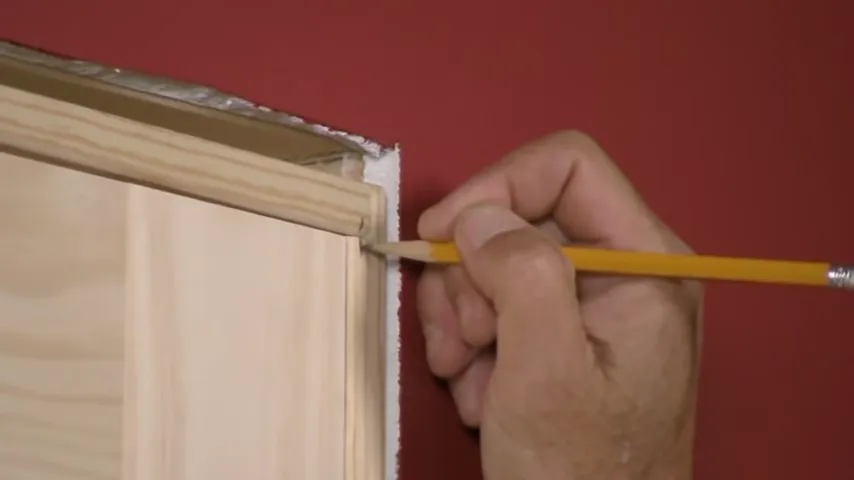
- Mark the measurement on the trim molding using a pencil or a marker.
- Using a miter saw or a miter box and a hand saw, carefully cut the trim molding at a 45-degree angle. Ensure that you are cutting the correct ends of the molding.
- Remember to cut the correct angles to achieve a seamless corner joint when installing the trim molding.
How to Miter the Corners for Seamless Installation
Mitering the corners allows for a professional-looking finish when installing the door trim molding. Follow these steps to achieve seamless corners:
- Measure the length needed for the molding on one side of the door frame and mark it accordingly.
- Using a miter saw or a miter box, cut the molding at a 45-degree angle.
- Repeat the process for the other side of the door frame, ensuring that the angles are cut in the opposite direction to form a perfect corner joint.
- Place the two pieces of molding together to check if the corners match perfectly. Make any necessary adjustments.
Securing the Trim Molding to the Door Frame using Nails or Adhesive
After cutting and mitering the door trim molding, it’s time to secure it to the door frame. You can choose between using nails or adhesive, depending on your preference and the materials you are working with. Follow these steps for a secure installation:
Using Nails:
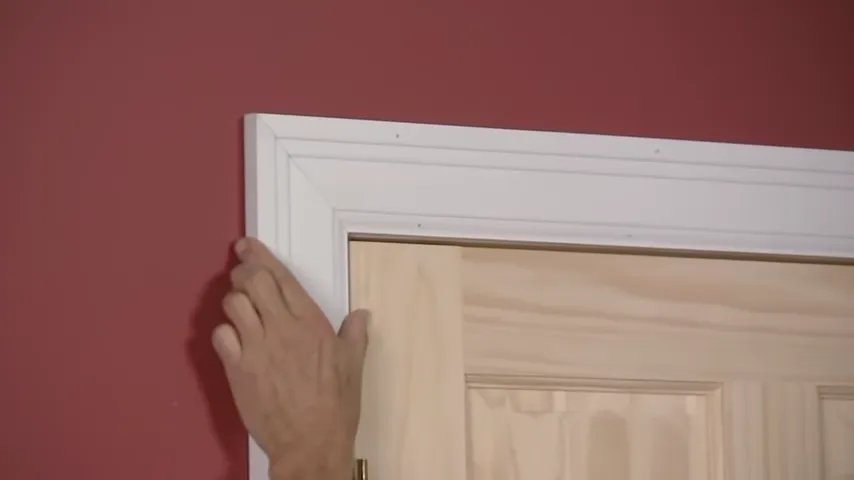
- Align the molding with the door frame and ensure it fits perfectly.
- Using a nail gun or a hammer, gently nail the molding into place. Be careful not to damage the molding or the door frame.
- Space the nails evenly along the length of the molding to provide adequate support.
- Fill in the nail holes with wood filler and sand it down for a smooth finish.
Using Adhesive:
- Clean the door frame thoroughly to ensure proper adhesion.
- Apply a bead of construction adhesive along the back of the molding.
- Press the molding firmly against the door frame, ensuring it is aligned correctly.
- Use clamps or tapes to hold the molding securely in place until the adhesive dries.
And there you have it! By following these step-by-step instructions, you can achieve a seamless and professional door trim molding installation. Remember to measure accurately, miter the corners carefully, and secure the molding using either nails or adhesive. Enjoy the transformed look of your doors!
Achieving A Professional Finish
When it comes to installing door trim molding, achieving a professional finish is essential for enhancing the overall appearance of the space. A well-executed installation not only adds style and sophistication but also elevates the aesthetic value of the room. In this section, we will explore the key steps to achieve a flawless finish that will leave your guests in awe.
Sanding and filling any gaps or imperfections in the trim molding
Before painting or staining your door trim molding, it’s crucial to prepare the surface by sanding and filling any gaps or imperfections. Start by using a fine-grit sandpaper to smooth out any rough edges or uneven surfaces. Pay extra attention to corners and intricate details, ensuring a seamless and polished appearance.
If there are any visible gaps or cracks in the trim molding, it’s essential to fill them in using a high-quality wood filler. Apply the filler using a putty knife, making sure to press it firmly into the gaps. Once the filler is dry, lightly sand the area to smooth it out, creating a seamless transition between the molding and the wall or door.
Applying a primer and paint or stain for a polished look
After sanding and filling, the next step is to apply a primer to the trim molding. The primer helps the paint or stain adhere better to the surface, ensuring a long-lasting and polished finish. Choose a primer that is suitable for your chosen paint or stain, and apply it evenly using a brush or a roller. Allow the primer to dry completely before moving on to the next step.
Once the primer is dry, it’s time to apply the paint or stain. Select a color that complements the overall design of the room or matches the existing trim. Use a high-quality brush or roller to apply a smooth and even coat, working with the natural grain of the wood. Apply multiple coats if necessary, allowing each coat to dry between applications. This will ensure a rich and vibrant finish that truly brings out the beauty of your door trim molding.
Adding any additional decorative elements to enhance the appearance
To take your door trim molding installation to the next level, consider adding some additional decorative elements. Whether it’s decorative rosettes, crown molding, or other ornate details, these enhancements can elevate the overall appearance and make your trim molding stand out.
If you choose to add decorative elements, ensure they are properly measured and cut to fit seamlessly with the existing trim. Use a strong adhesive or nails to secure them in place, paying attention to the alignment and symmetry. The additional decorative elements should enhance the beauty of the door trim molding without overwhelming the design.
By following these steps, you can achieve a professional finish when installing door trim molding. From sanding and filling to applying primer and paint or stain, each step plays a vital role in creating a flawless and impactful result. Don’t be afraid to add extra decorative elements to enhance the overall appearance, taking your door trim molding installation to new heights.
Maintenance And Care For Door Trim Molding
Maintenance and care for door trim molding is crucial to ensure its longevity and preserve the aesthetic appeal of your doors. By regularly cleaning and maintaining the trim molding, you can prevent damage, repair or replace any broken pieces, and take preventative measures to protect it from everyday wear and tear.
Cleaning and maintaining the trim molding to prolong its lifespan
Cleaning the door trim molding is a simple yet important step in its maintenance routine. Dust, dirt, and grime can accumulate on the surface of the molding, making it appear dull and worn. To clean it effectively, follow these steps:
- Start by removing any loose dust or dirt with a soft-bristle brush or a vacuum cleaner attachment.
- Prepare a solution of mild soap and water in a bucket.
- Dip a soft cloth or sponge into the soapy solution and wring out any excess liquid.
- Gently wipe the trim molding, making sure to remove any stains or sticky residue.
- Rinse the cloth or sponge with clean water and wipe away any soap residue.
- Dry the trim molding thoroughly with a clean, soft cloth.
In addition to regular cleaning, it is essential to maintain the trim molding by keeping an eye out for any signs of damage or wear. By addressing these issues promptly, you can prevent further deterioration and potential costly repairs.
Tips for repairing or replacing damaged trim molding
If you notice any dents, cracks, or other damages in the door trim molding, taking immediate action is crucial to prevent the problem from escalating. Here are a few tips to help you repair or replace damaged trim molding:
- If the damage is minor, such as a small dent or scratch, you can often fix it by using wood putty or filler. Apply the filler to the damaged area, smooth it out, and sand it gently until it matches the surrounding surface.
- In the case of more significant damage or if the molding is beyond repair, you may need to replace it entirely. Carefully remove the damaged molding, taking care not to damage the surrounding wall or door frame.
- Measure the dimensions of the molding and purchase a suitable replacement from a local hardware store or online retailer. Install the new trim molding by following the manufacturer’s instructions or seeking professional assistance if needed.
Preventative measures to protect the trim molding from wear and tear
Preventing damage to the door trim molding is key to maintaining its longevity and appearance. Here are a few preventative measures you can take:
- Avoid slamming doors forcefully, as this can cause the trim molding to loosen or break.
- Regularly inspect the molding for any signs of wear or damage and address them promptly.
- Avoid using harsh chemical cleaners or abrasive materials that can damage the finish or paint of the molding.
- Consider applying a protective finish or sealant to the trim molding to enhance its durability and resistance to scratches or dents.
By following these maintenance and care tips, you can ensure that your door trim molding remains in excellent condition for years to come.
Frequently Asked Questions Of How To Install Door Trim Molding
Do You Nail Or Glue Door Trim?
Door trim is typically both nailed and glued in place for a secure installation. Nails are used to hold the trim in position, while glue is applied to provide additional strength and stability. This combination ensures that the trim stays firmly in place, making it a durable and long-lasting solution for your door.
How Do You Attach Trim To A Door?
Attach trim to a door by following these steps: 1. Measure and cut the trim to fit the door. 2. Use a level to ensure straight alignment of the trim. 3. Apply adhesive or nails to secure the trim in place.
4. Fill any gaps or holes with wood filler for a smooth finish. 5. Sand and paint the trim as desired for a polished look.
What Do You Use To Attach Door Trim?
Attach door trim using finishing nails or brad nails with a nail gun. Ensure the trim is aligned correctly and secure it by driving the nails into the door frame or wall studs. Carefully fill any nail holes and sand the trim for a smooth finish.
How Do You Fasten Exterior Door Trim?
To fasten exterior door trim, follow these steps: 1. Measure and cut the trim to fit your door frame accurately. 2. Apply a waterproof adhesive or exterior-grade construction adhesive to the back of the trim. 3. Position the trim onto the door frame and firmly press it in place.
4. Use finishing nails or screws to secure the trim further. 5. Fill any nail holes or gaps with wood filler, then sand and paint the trim for a finished look.
Conclusion
Installing door trim molding can be a simple and rewarding DIY project that can transform the look of your home. By following the step-by-step guide outlined in this blog post, you can achieve professional-looking results. From measuring and cutting the molding to attaching it to the door frame, each step is explained in detail to ensure success.
With a little time and effort, you can add a touch of elegance and sophistication to any room. So go ahead, give it a try and enjoy the beauty of your newly installed door trim molding.