To install a garage door seal, measure the length of the bottom of the door and cut the seal to size. Then, attach the seal to the bottom of the door using adhesive or screws.
An effective garage door seal plays a crucial role in sealing gaps and preventing unwanted elements from entering the garage. By properly installing a garage door seal, you can improve energy efficiency and reduce noise levels. In this guide, we will walk you through the steps to successfully install a garage door seal, ensuring a tight and secure seal along the bottom of your door.
Follow these instructions to efficiently install a garage door seal and enjoy the benefits it provides.
Gathering The Necessary Tools And Materials
Before you begin installing a garage door seal, it’s important to gather all the necessary tools and materials. Having everything at hand will make the installation process smoother and more efficient. In this section, we will provide you with a comprehensive list of the tools and materials you will need to successfully install your garage door seal.
List of tools required for the installation
Here are the essential tools you’ll need:
- Measuring tape
- Carbide-tipped scraper or wire brush
- Screwdriver (flathead and Phillips)
- Utility knife
- Heavy-duty adhesive
- Caulking gun
- Power drill
- Hacksaw or tin snips
- Clamps or vice grips
List of materials required for the installation
To successfully install your garage door seal, you’ll need the following materials:
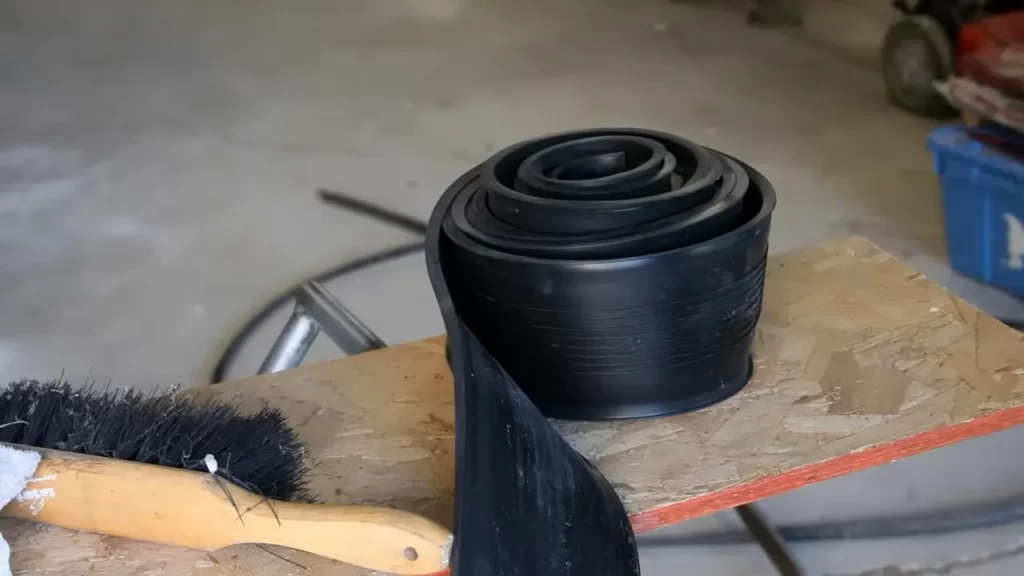
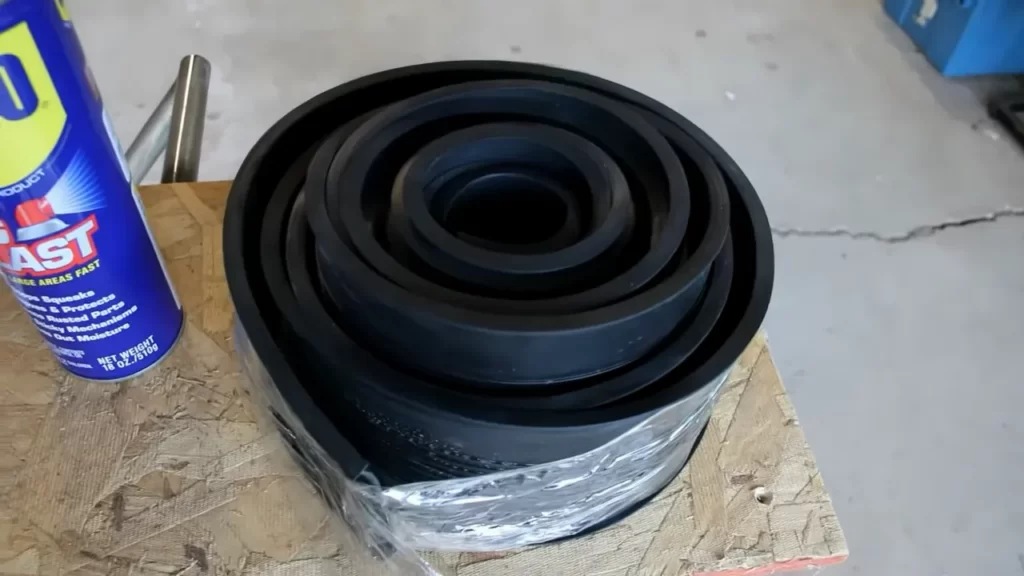
- Garage door seal kit: Make sure to purchase a kit that is compatible with the size and type of your garage door. The kit should include the seal itself, as well as any necessary mounting hardware.
- Weatherstripping: This will help improve the seal between the garage door and the frame, preventing drafts and keeping out pests and debris.
- Cleaning solution: Before installing the seal, it’s important to clean the area thoroughly to ensure proper adhesion. Use a gentle cleaning solution and a cloth or sponge to remove any dirt, dust, or grease.
- Rag or towel: Keep a rag or towel handy to wipe away any excess adhesive or clean up any spills during the installation process.
Measuring The Garage Door
Determining the size of the garage door
Before you can install a garage door seal, you need to determine the size of your garage door. This step is crucial to ensure that the seal fits properly and effectively keeps out drafts, pests, and debris. Measuring your garage door may seem like a simple task, but it requires accuracy and attention to detail. Here’s how you can easily determine the size of your garage door:
Taking accurate measurements for the seal installation
When it comes to installing a garage door seal, taking accurate measurements is key. You want to make sure that the seal fits snugly and tightly along the bottom of the door, leaving no gaps for air or water to seep through. To ensure accurate measurements, follow these steps:
- Use a tape measure to measure the width of the garage door from one side to the other. Start at the left edge of the door and measure all the way to the right edge. Write down this measurement.
- Next, measure the height of the garage door from the bottom to the top. Begin from the inside of the door, where it meets the ground, and measure all the way up to the highest point of the door. Note this measurement as well.
- It’s also important to measure the thickness of the bottom edge of the garage door. This measurement will help you determine the type of seal you need, as there are various options available for different door thicknesses. Use a caliper or measuring tape to measure the thickness and write it down.
By taking these accurate measurements, you can ensure that the garage door seal you choose is the right size for your door and provides a proper seal when installed. Once you have these measurements, you can confidently proceed with the installation process knowing that the seal will effectively keep out unwanted elements.
Inspecting The Existing Seal
Inspecting the Existing Seal is an essential step before installing a new garage door seal. The condition of the existing seal can affect the effectiveness of the new seal and ensure a proper fit. It is important to check for any damage or wear in the existing seal and assess its overall condition. Let’s dive deeper into these steps and understand how to inspect the existing seal.
Checking for any damage or wear
Begin the inspection process by carefully examining the existing garage door seal for any signs of damage or wear. Look for any cracks, tears, or breaks in the seal that may compromise its ability to keep out external elements such as dust, water, or drafts. Pay close attention to the bottom edge of the seal, as this area often experiences the most wear due to frequent contact with the ground and movement of the garage door.
If you notice any damage, it is crucial to replace the seal as soon as possible. Damaged seals not only fail to effectively seal your garage door but can also lead to energy loss, reduced insulation, and increased risk of pests infiltrating your space.
Assessing the condition of the seal
Once you have checked for damage, take a closer look at the overall condition of the existing seal. Evaluate its flexibility and elasticity by gently pulling and stretching it. A well-maintained garage door seal should still retain its flexibility, allowing it to conform to the movements of the garage door as it opens and closes.
If the seal feels stiff, brittle, or shows signs of cracking when stretched, it is a clear indicator that it has reached the end of its lifespan. In such cases, replacing the seal is necessary to ensure optimal performance and protection.
You should also inspect the seal for any discoloration or signs of deterioration. Exposure to sunlight, extreme temperatures, and other environmental factors can cause the seal to deteriorate over time. Discoloration may indicate that the seal’s material has degraded, making it less effective at creating a tight barrier against external elements. In these instances, replacing the seal is highly recommended to maintain the integrity and functionality of your garage door.
Inspecting the existing seal is a crucial step in the process of installing a new garage door seal. By carefully checking for any damage or wear and assessing the overall condition of the seal, you can ensure that your new seal will provide maximum protection and energy efficiency for your garage space.
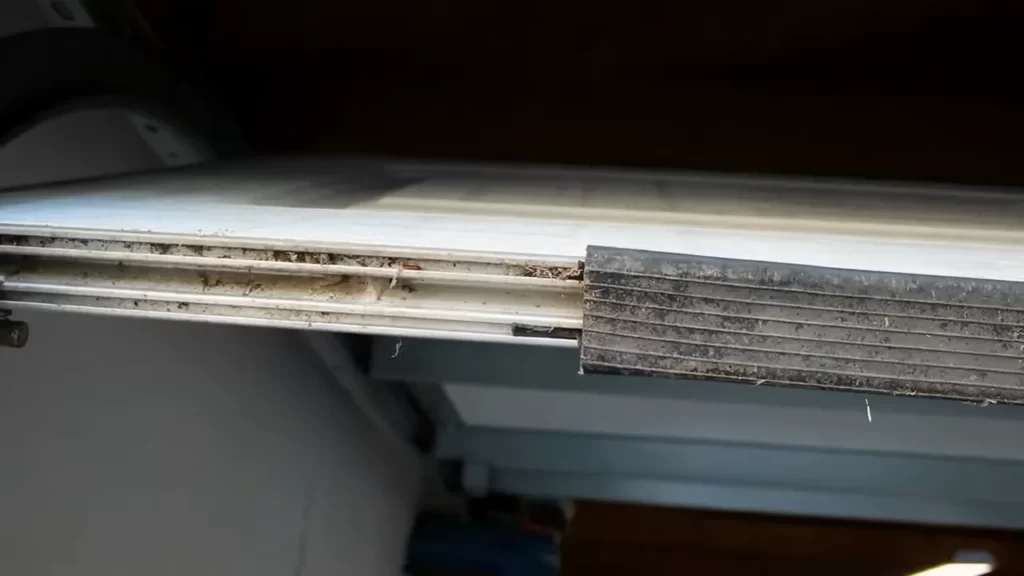
Removing The Old Seal
Before installing a new garage door seal, you’ll need to remove the old one. This step-by-step process will guide you through the removal without causing any damage to your door.
Step-by-step process for removing the old seal
- Gather the necessary tools: Before getting started, make sure you have the right tools on hand. You’ll typically need a utility knife, pliers, and a screwdriver.
- Identify the type of seal: Inspect the seal on your garage door to determine its type. Depending on the model, it might use a bottom seal, weatherstripping, or threshold seal. Knowing this will help you proceed with the removal process.
- Clean the area: Before removing the old seal, it’s essential to clean the area thoroughly. Use a brush or vacuum to remove any dirt, debris, or adhesive residue that may have accumulated over time.
- Start from one end: Beginning at one end of the door, use a utility knife to carefully cut the seal. If it’s a bottom seal or weatherstripping, cut along the bottom edge of the door. For threshold seals, cut along the sides and bottom.
- Remove the seal: Once you’ve made the initial cut, grab pliers and gently pull the seal away from the door. Take your time and proceed slowly to avoid causing any damage to the door or frame.
- Inspect for remaining adhesive: After removing the seal, check the door’s surface for any remaining adhesive. If you spot any, use a solvent or adhesive remover to eliminate it. This will ensure a clean surface for installing the new seal.
Tips for easy removal without damaging the door
- Be cautious with your utility knife: Take care when using a utility knife to cut the seal, making sure not to apply excessive pressure that could damage the door. A gentle and steady approach is key.
- Apply heat if needed: If your seal has hardened or is challenging to remove, applying heat with a hairdryer can help soften the material and make removal easier.
- Use pliers as needed: Pliers can be handy in gripping and pulling the seal away from the door. However, use them cautiously and avoid using excessive force that may cause damage.
- Protect the door’s finish: To prevent any accidental scratches or marks, consider placing a cloth or piece of cardboard between the pliers and the door’s surface when removing the seal.
- Take your time: Rushing the removal process may lead to unintended damage. Take your time and proceed methodically, applying gentle pressure and giving the adhesive time to release.
By following these step-by-step instructions and using these tips, you can safely and effectively remove the old seal from your garage door. Once the old seal is removed, you’ll be ready to install a new one that will provide enhanced insulation and weather protection.
Understanding The Different Types Of Seals
Exploring the Various Types of Garage Door Seals Available
When it comes to installing a garage door seal, it’s essential to understand the different types available in order to make an informed decision. Garage door seals are designed to keep out the elements and prevent unwanted intrusions. They not only help maintain the temperature inside the garage but also prevent dust, debris, pests, and even water from entering. In this section, we will explore the various types of garage door seals and their features, allowing you to choose the right one for your needs. Let’s dive in!
Comparing the Features and Benefits of Each Type
There are several types of garage door seals available on the market, each with its own set of features and benefits. Let’s take a closer look at each type:
Silicone-based Seals
- Material: Silicone-based seals are typically made from a durable and flexible silicone material.
- Installation: These seals are usually easy to install and can be applied directly to the bottom of the garage door.
- Features: Silicone-based seals offer excellent resistance to extreme temperatures, making them ideal for areas with harsh weather conditions.
- Benefits: They provide a tight seal that effectively blocks out drafts, noise, and pests.
PVC-based Seals
- Material: PVC-based seals are made from a resilient PVC material that offers durability.
- Installation: These seals can be installed to the bottom of the garage door using adhesive or screws.
- Features: PVC-based seals provide good insulation and noise reduction, making them suitable for residential or commercial garages.
- Benefits: They effectively keep out dust, debris, and pests, while also reducing energy consumption.
Rubber-based Seals
- Material: Rubber-based seals are crafted from high-quality rubber, known for its flexibility and durability.
- Installation: Rubber-based seals can be attached to the bottom of the garage door using adhesive or screws.
- Features: These seals offer excellent resistance to weather elements, including sunlight and extreme temperatures.
- Benefits: They effectively block out drafts, reduce noise, and keep out pests and debris.
Brush-based Seals
- Material: Brush-based seals consist of long, bristle-like materials attached to an aluminum or PVC base.
- Installation: These seals can be easily attached to the sides and top of the garage door, creating a barrier against drafts and pests.
- Features: Brush-based seals allow for smooth movement of the garage door and effectively seal gaps between the door panels.
- Benefits: They provide reliable protection against cold drafts, dust, pests, and noise infiltration.
Now that you have explored the various types of garage door seals and their features, you are equipped with the knowledge to choose the right seal for your garage. Consider your specific needs and the climate in your area to make an informed decision. Remember, a properly installed garage door seal not only enhances the functionality and energy efficiency of your garage but also provides added comfort and protection for your belongings.
Selecting The Suitable Seal For Your Garage Door
Choosing the right garage door seal is an essential step in ensuring the effectiveness and durability of your garage door. It plays a crucial role in preventing dust, dirt, pests, and drafts from entering your garage while keeping it well-insulated. With a wide range of options available in the market, it can be overwhelming to determine which seal is the most suitable for your specific needs. In this section, we will discuss the factors to consider when choosing a seal and provide some useful tips on finding the right one for your garage door.
Factors to consider when choosing a seal
Before selecting a garage door seal, it’s important to consider a few factors to ensure you make an informed decision:
- Durability: You want a seal that will withstand daily use and last for years to come. Look for seals made from high-quality materials that are known for their durability, such as rubber or vinyl.
- Size: Measure the width of your garage door opening to determine the size of the seal you need. It’s important to choose a seal that fits snugly against the sides and bottom of your garage door to provide maximum protection.
- Weather resistance: Consider the climate in your area. If you live in an area with extreme weather conditions, such as heavy rain or snow, choose a seal that is specifically designed to withstand these elements.
- Noise reduction: If you want to minimize noise from the outside, look for a seal that has noise-reduction properties. This can be especially beneficial if you use your garage as a workshop or living space.
- Easy installation: Some seals require professional installation, while others can be easily installed by homeowners. Consider your DIY skills and choose a seal that you feel comfortable installing.
How to find the right seal for your specific needs
Once you’ve considered the factors mentioned above, follow these steps to find the perfect seal for your garage door:
- Research: Conduct a thorough research to explore the different types of garage door seals available in the market. Read product descriptions, reviews, and customer feedback to get an idea of their performance.
- Consult an expert: If you’re unsure about which seal to choose, seek advice from a garage door professional. They can assess your specific needs and recommend the most suitable seal for you.
- Consider your budget: Determine your budget for the seal and look for options that fit within that range. Remember that investing in a high-quality seal may save you money in the long run as it will likely require less maintenance and replacement.
- Compare features: Compare the features of different seals, such as insulation properties, ease of installation, and weather resistance. Choose the one that offers the most benefits for your specific requirements.
- Check compatibility: Ensure that the seal you choose is compatible with your garage door material, such as metal or wood. You can usually find this information in the product description or consult the manufacturer.
- Purchase and install: Once you’ve found the perfect seal, make your purchase from a reliable supplier. Follow the installation instructions carefully or hire a professional if needed to ensure proper installation.
Cleaning And Preparing The Garage Door
Welcome back to our step-by-step guide on how to install a garage door seal. In this section, we will focus on the crucial step of cleaning and preparing the garage door before installing the seal. Ensuring thorough cleaning and proper preparation of the surface will help optimize the adhesion of the seal and contribute to its long-lasting performance.
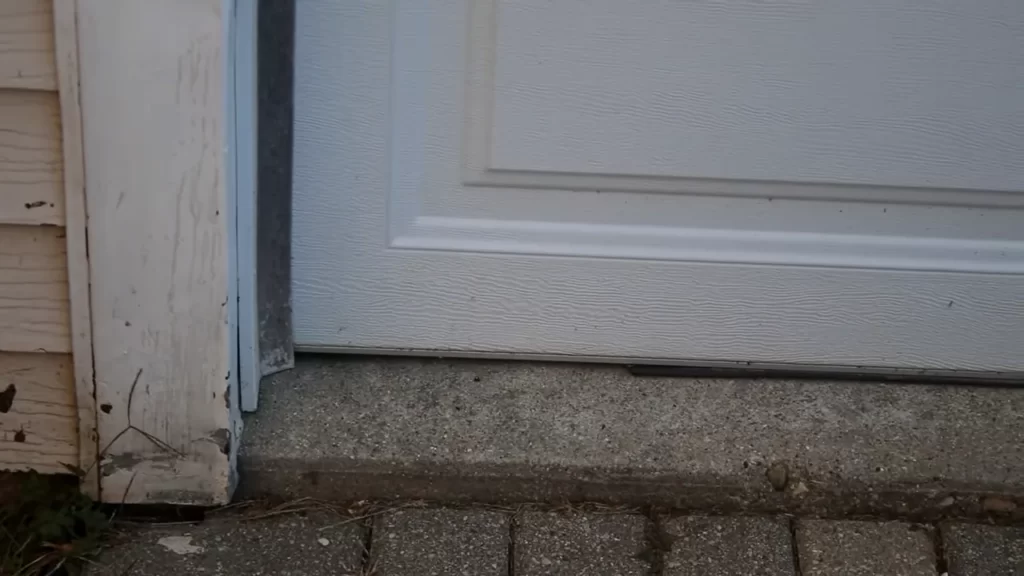
Cleaning the surface for better seal adhesion
Attaching The Seal To The Bottom Of The Garage Door
Step-by-step guide for attaching the seal
Attaching a seal to the bottom of your garage door is a simple yet crucial step in order to keep dust, dirt, and pests out of your garage. Follow these steps to properly attach the seal:
- Measure the length of your garage door: Start by measuring the length of your garage door to determine the amount of seal you’ll need. Make sure to account for any sloping or uneven surfaces.
- Cut the seal to size: Using a pair of scissors or a utility knife, cut the seal to the measured length, ensuring a clean and straight edge.
- Clean the bottom of the garage door: Before attaching the seal, it’s important to clean the bottom of the garage door thoroughly. Remove any dirt, debris, or old sealant that may prevent the new seal from adhering properly.
- Apply adhesive or sealant: Depending on the type of seal you have, you’ll either apply adhesive or sealant to the bottom of the garage door. Follow the manufacturer’s instructions for the specific product you’re using.
- Attach the seal: Starting from one end of the garage door, press the seal firmly onto the adhesive or sealant. Ensure that it is aligned straight and follows the contour of the door. Continue attaching the seal along the entire length of the door.
- Secure the seal: Once the seal is attached, use a rubber mallet or a block of wood to tap it gently, ensuring a secure bond with the adhesive or sealant.
- Allow it to cure: Depending on the adhesive or sealant used, allow the seal to cure for the recommended amount of time before operating the garage door. This will ensure a proper and long-lasting seal.
Tips for ensuring a secure and proper fit
To ensure a secure and proper fit of the garage door seal, consider the following tips:
- Choose the right type of seal: There are various types of seals available in the market, including rubber, vinyl, and brush seals. Choose a seal that is suitable for your specific garage door and weather conditions.
- Inspect the garage door bottom: Before attaching the seal, thoroughly inspect the bottom of the garage door for any damage or irregularities. Repair or replace any worn-out parts before installing the seal.
- Follow the manufacturer’s instructions: Each seal may have specific instructions for installation. Make sure to read and follow the manufacturer’s guidelines to ensure a proper fit.
- Apply the seal in the correct position: The seal should be attached to the bottom of the garage door, with the sealing part facing outward. This will effectively prevent water, drafts, and pests from entering your garage.
- Regularly maintain and replace the seal: Over time, the seal may wear out or become damaged. Regularly inspect the seal and replace it if necessary to maintain an effective barrier.
By following this step-by-step guide and applying these tips, you can effectively install a garage door seal that will help keep your garage clean, secure, and well-insulated.
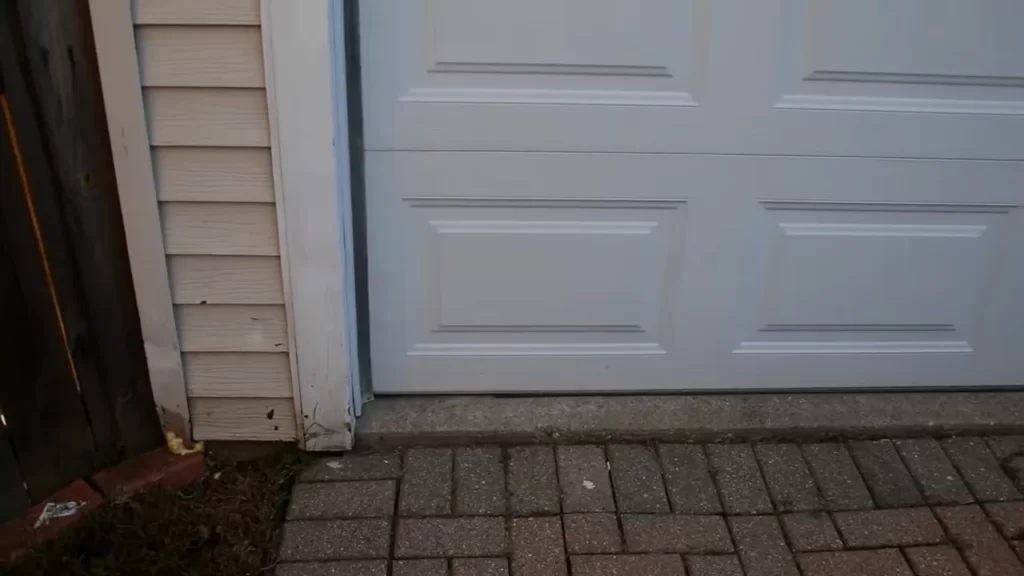
Adjusting And Aligning The Garage Door
Adjusting and Aligning the Garage Door:
After you have successfully installed the garage door seal, it is crucial to check the alignment of the door to ensure its proper functioning. Proper alignment will not only make the door function smoothly but also prevent any unnecessary wear and tear on the seal. In this section, we will discuss how to check the door’s alignment and make necessary adjustments for a seamless operation.
Checking the alignment of the door after seal installation
Once the garage door seal is installed, it’s important to inspect the door’s alignment. An improperly aligned garage door can cause issues such as uneven wear on the seal, gaps allowing unwanted pests or cold air to enter, and even difficulty in opening and closing the door. To check the alignment, follow these simple steps:
- Close the garage door completely.
- Stand back and visually inspect the door from both the outside and inside. Look for any noticeable gaps, misalignments, or crookedness.
- Check the seal’s contact with the ground and the sides of the door. Ensure there are no visible gaps or irregularities.
- Pay close attention to any areas where the seal may appear to be compressed or damaged.
If you notice any misalignment or issues with the garage door’s contact with the seal, it’s essential to make the necessary adjustments to ensure proper operation and optimal seal performance.
Making necessary adjustments for smooth operation
Adjusting the garage door to align properly with the seal is relatively simple and can greatly improve its functionality. To make these adjustments, follow these steps:
- Identify the problem area. This could be a gap, a misalignment, or any other visible issue.
- Tighten or loosen the screws or bolts responsible for securing the affected parts. Use a wrench or screwdriver as necessary.
- Gradually make the necessary adjustments, testing the door’s movement after each adjustment to ensure it aligns correctly and operates smoothly.
- Continue adjusting until the door’s alignment is satisfactory and the seal is properly engaged.
Remember to lubricate hinges, rollers, and other moving parts regularly for smooth operation and also to prevent excessive wear on the seal. Additionally, check the condition of the garage door seal periodically and replace it if necessary.
Testing The Seal For Proper Functionality
Once you have successfully installed a garage door seal, it is important to test its effectiveness to ensure that it is working properly. By checking for any gaps or leaks and assessing the seal’s ability to prevent drafts and pests, you can ensure that your garage remains well-insulated and free from unwanted intruders.
Checking for any gaps or leaks
To begin testing the garage door seal, carefully inspect the perimeter of the door for any visible gaps or leaks. These gaps can occur where the seal meets the ground or sides of the garage door. Make sure to pay close attention to areas where the seal might be worn or damaged.
If you spot any gaps or leaks, you will need to address them as soon as possible to maintain the seal’s effectiveness. This could involve replacing damaged sections of the seal or adjusting its positioning to create a more secure fit.
Assessing the seal’s effectiveness in preventing drafts and pests
Another important aspect of testing the garage door seal is assessing its ability to prevent drafts and pests from entering your garage. Stand inside the garage while the door is closed and carefully feel for any cold air or drafts. If you detect any air movement, it is likely that the seal is not properly preventing drafts from entering.
In addition to drafts, pests can also be a concern. Look for any signs of insect or rodent activity, such as droppings or chew marks, which could indicate that the seal is not effectively keeping pests out. Remember that even a small gap or hole can provide an entry point for unwanted critters.
To enhance the seal’s effectiveness in preventing drafts and pests, make sure the seal is securely attached and making full contact with the garage floor. This will help ensure that no gaps are present and that the seal forms a tight barrier against outside elements.
Conclusion
Regularly testing the functionality of your garage door seal is essential for maintaining its effectiveness. By checking for gaps or leaks and assessing its ability to prevent drafts and pests, you can ensure that your garage remains well-insulated, free from pests, and protected from the elements. Performing these simple tests will help guarantee a properly functioning garage door seal that provides optimal insulation and peace of mind.
Regular Maintenance And Care For The Garage Door Seal
Tips for keeping the seal in good condition
Regular maintenance and care are key to ensuring the longevity and effectiveness of your garage door seal. By following a few simple tips, you can keep your seal in good condition and prevent any potential damage. Here are some helpful suggestions:
- Inspect the seal regularly: Regularly inspect the garage door seal for any signs of wear and tear. Look out for cracks, gaps, or any damage that could compromise its effectiveness. Detecting and addressing these issues early on can prevent further damage and extend the lifespan of your seal.
- Clean the seal: Dirt, debris, and other contaminants can accumulate on the garage door seal over time, affecting its performance. Clean the seal periodically using a mild detergent and a soft brush. Gently scrub the seal to remove any buildup of dirt and grime.
- Apply lubrication: Lubricating the seal can help maintain its flexibility and prevent it from drying out or cracking. Use a silicone-based lubricant or a recommended garage door seal lubricant. Apply a thin layer of lubricant along the entire length of the seal, ensuring it is evenly distributed.
- Avoid harsh chemicals: Harsh chemicals, such as bleach or solvents, can damage the garage door seal. Avoid using these substances when cleaning the seal or the surrounding areas. Stick to mild detergents and water for safe and effective cleaning.
- Keep the seal protected: Exposure to extreme weather conditions can deteriorate the garage door seal. Protect the seal by installing a weather seal or using a sealant to shield it from direct sunlight, moisture, and temperature fluctuations.
Maintaining the longevity of the seal with simple upkeep
Maintaining the longevity of your garage door seal doesn’t have to be a complicated task. With simple upkeep and regular inspections, you can ensure that your seal remains in optimal condition for years to come. Follow these essential maintenance steps:
- Inspect and clean the seal regularly: Check the garage door seal for any signs of damage, such as cracks or gaps, and clean it using a mild detergent and a soft brush.
- Apply lubrication: Lubricate the seal with a silicone-based lubricant to maintain its flexibility and prevent drying out.
- Avoid harsh chemicals: Refrain from using harsh chemicals that can harm the seal’s material. Stick to mild detergents when cleaning.
- Protect against extreme weather: Shield the seal from direct sunlight, moisture, and temperature fluctuations by using a weather seal or applying a sealant.
By following these tips and incorporating them into your regular maintenance routine, you can ensure the longevity of your garage door seal and keep it in excellent condition. Regular inspections and simple upkeep will go a long way in preventing any issues that could lead to costly repairs or replacements. Take care of your garage door seal, and it will continue to serve its purpose effectively, keeping your garage protected from the elements.
Frequently Asked Questions For How To Install Garage Door Seal
How Do You Install A Rubber Seal On A Garage Door?
To install a rubber seal on a garage door, start by cleaning the bottom edge of the door. Next, measure the length and cut the rubber seal to fit. Use adhesive to attach the seal securely, making sure it is aligned and flush with the door.
Repeat for all sides, and allow time for the adhesive to dry.
How Do You Install A Garage Side Seal?
To install a garage side seal, follow these steps: 1. Measure the length of the garage side and cut the seal to fit. 2. Clean the area where the seal will be installed. 3. Apply adhesive to the back of the seal and press it firmly against the garage side.
4. Allow the adhesive to dry completely. 5. Test the seal by opening and closing the garage door.
How Do You Install Garage Door Seal Trim?
To install a garage door seal trim, follow these steps: 1. Measure the length of the seal needed for your garage door. 2. Cut the seal to the correct length using a sharp utility knife. 3. Clean the bottom of the garage door thoroughly.
4. Adhere the seal to the bottom of the garage door using adhesive or screws, depending on the type of seal. 5. Make sure the seal is securely attached and provides a tight seal against drafts and weather elements.
How Do You Install A Bottom Seal Retainer On A Garage Door?
To install a bottom seal retainer on a garage door, follow these steps: 1. Clean the bottom edge of the garage door to ensure a smooth surface. 2. Attach the seal retainer with screws or clips, making sure it is aligned evenly along the door.
3. Slide the bottom seal into the retainer, ensuring a snug fit. 4. Trim any excess seal length if necessary. 5. Test the door to ensure a proper seal.
Q: How To Measure The Garage Door Seal Size?
A: Measure the length and width of the bottom of your garage door to determine the correct seal size.
Q: What Tools Do I Need To Install A Garage Door Seal?
A: You will need a tape measure, a hacksaw or utility knife, a drill, screws, and a screwdriver.
Conclusion
In this blog post, we have learned how to install a garage door seal with easy, step-by-step instructions. With just a few tools and some time, you can ensure that your garage is well-sealed and protected from the elements. By following these techniques, you can improve energy efficiency, prevent pests from entering, and reduce noise levels.
Don’t overlook the importance of a properly installed garage door seal – it’s a small step that can make a big difference in the overall functionality and comfort of your garage. So, get started today and enjoy the benefits of a well-sealed garage.