To install Google Nest Doorbell, check if your existing doorbell system is compatible. If it is, you can easily replace the old doorbell with a wired Nest Doorbell.
If not, you have the option to install a battery-powered Nest Doorbell or use an indoor power adapter to connect the Nest Doorbell to a power outlet. Ensure to follow the instructions provided by Google for a successful installation.
Checking Compatibility And Requirements
Before installing your Google Nest Doorbell, it is important to check the compatibility and requirements to ensure a smooth installation process. This will help you determine if your existing doorbell system is compatible or if you need to consider purchasing a battery-operated model. Additionally, you will need to determine if your doorbell system requires additional wiring or if an indoor power adapter is needed.
Ensure you have a compatible existing doorbell system or consider purchasing a battery-operated model
If you already have a wired doorbell system in place, you can easily install a Google Nest Doorbell by replacing your old doorbell. However, it is crucial to check the compatibility of your existing doorbell system before proceeding with the installation. If your current system is incompatible, you may need to explore other options.
Alternatively, if your home does not have a doorbell system or if your current system is not compatible with the Nest Doorbell, you have the option to purchase a battery-operated model.
Determine if your doorbell system requires additional wiring or if an indoor power adapter is needed
While installing a Google Nest Doorbell, it is essential to determine if your doorbell system requires additional wiring or if you can use an indoor power adapter. This will depend on the configuration of your current setup.
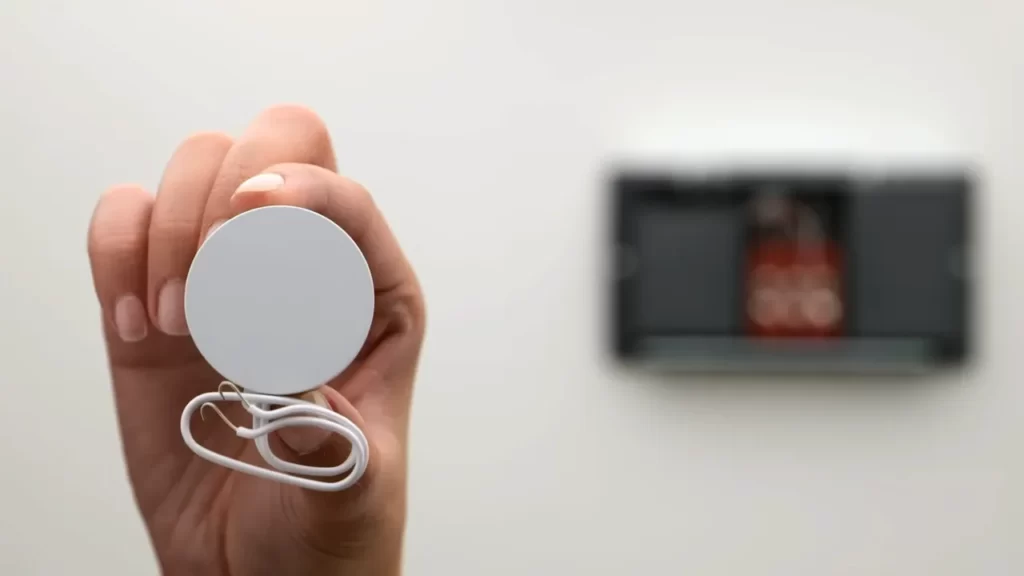
If you have existing wiring behind your doorbell, you can connect your Nest Doorbell to the system wires. However, if there are no wires available, you can opt for a battery-powered Nest Doorbell or utilize the indoor power adapter. The indoor power adapter allows you to plug your doorbell into an indoor power outlet, providing the necessary power for its functionality.
It is important to note that the indoor power adapter is sold separately from the Google Nest Doorbell, so ensure you have the necessary adapter before starting the installation process.
Summary
In summary, before proceeding with the installation of your Google Nest Doorbell, check the compatibility of your existing doorbell system or consider purchasing a battery-operated model. Additionally, determine if your doorbell system requires additional wiring or if an indoor power adapter is needed. By ensuring these compatibility and requirements, you can proceed with the installation process smoothly and enjoy the benefits of your new Nest Doorbell.
Preparing For Installation
Before you start installing your Google Nest Doorbell, it’s important to prepare yourself with the necessary tools and materials. Additionally, taking the time to familiarize yourself with the Nest Doorbell components and their functions will ensure a smooth installation process. Lastly, ensure that you turn off power to your existing doorbell system to prevent any accidents or mishaps during installation.
Gather the necessary tools and materials
To successfully install your Google Nest Doorbell, you will need the following tools and materials:
- A screwdriver (Phillips or flathead, depending on the screws)
- Electrical tape
- A wire stripper
- Wire nuts (if necessary)
- A level
- A pencil
Familiarize yourself with the Nest Doorbell components and their functions
Before diving into the installation process, it’s essential to understand the different components of your Google Nest Doorbell and their respective functions. This knowledge will help you troubleshoot any issues that may arise and ensure a successful installation.
The main components of the Nest Doorbell include:
| Component | Function |
|---|---|
| Doorbell | Allows you to hear and answer the doorbell from anywhere using your smartphone or smart device. |
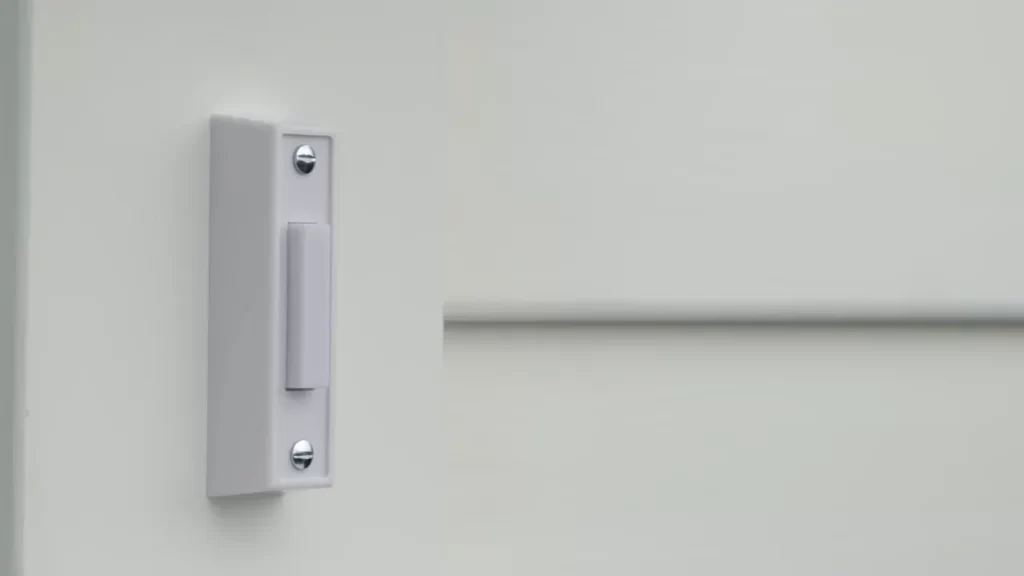
| Chime | Produces a sound alert when someone presses the doorbell button. |
| Battery | Provides power to the doorbell, especially if you opt for a battery-operated model. |
Turn off power to your existing doorbell system
Prior to installation, it’s crucial to turn off the power to your existing doorbell system to ensure your safety and prevent any electrical mishaps. To do this, locate the circuit breaker box in your house and find the breaker corresponding to the doorbell system. Flip the switch to the OFF position to cut off the power supply.
Additionally, you can double-check if the power is off by ringing the doorbell. If it doesn’t make any sound or trigger any lights, you can be certain that the power is indeed off.
By following these steps and adequately preparing for installation, you will be ready to seamlessly install your Google Nest Doorbell and enjoy its advanced features and functionalities.
Installing The Google Nest Doorbell
If you’re looking to enhance the security of your home and keep a closer eye on who’s at your front door, installing the Google Nest Doorbell is a great choice. With its sleek design and advanced features, this smart doorbell will provide you with peace of mind and convenience. In this guide, we will walk you through the installation process step by step, ensuring that you can enjoy all the benefits of your new Google Nest Doorbell in no time.
Remove your existing doorbell
The first step in installing your Google Nest Doorbell is to remove your existing doorbell. This is an important step to ensure a smooth installation process. To remove your existing doorbell:
- Locate the doorbell wiring and turn off the power supply.
- Using a screwdriver, remove the screws attaching the doorbell to the wall.
- Carefully disconnect the wiring from the back of the doorbell.
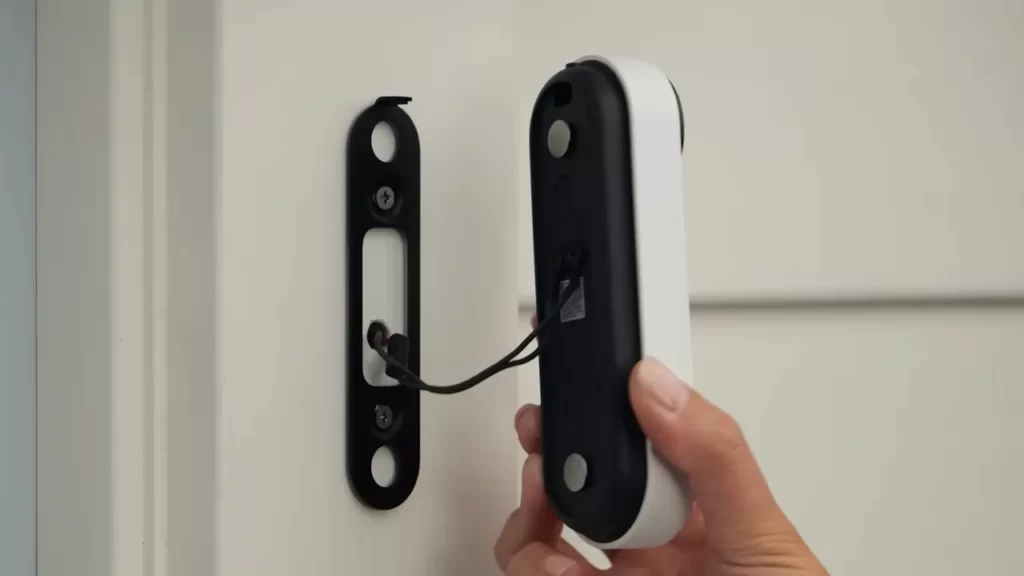
Install the Nest Doorbell mounting bracket
Once you have removed your existing doorbell, it’s time to install the Nest Doorbell mounting bracket. Follow these steps:
- Choose the ideal location for your Nest Doorbell. It should be at a height where it can capture clear footage and within reach of your Wi-Fi signal.
- Hold the mounting bracket against the wall and mark the position of the screw holes with a pencil.
- Drill holes at the marked positions using an appropriate drill bit.
- Insert wall anchors into the drilled holes.
- Align the mounting bracket with the wall anchors and secure it using the provided screws.
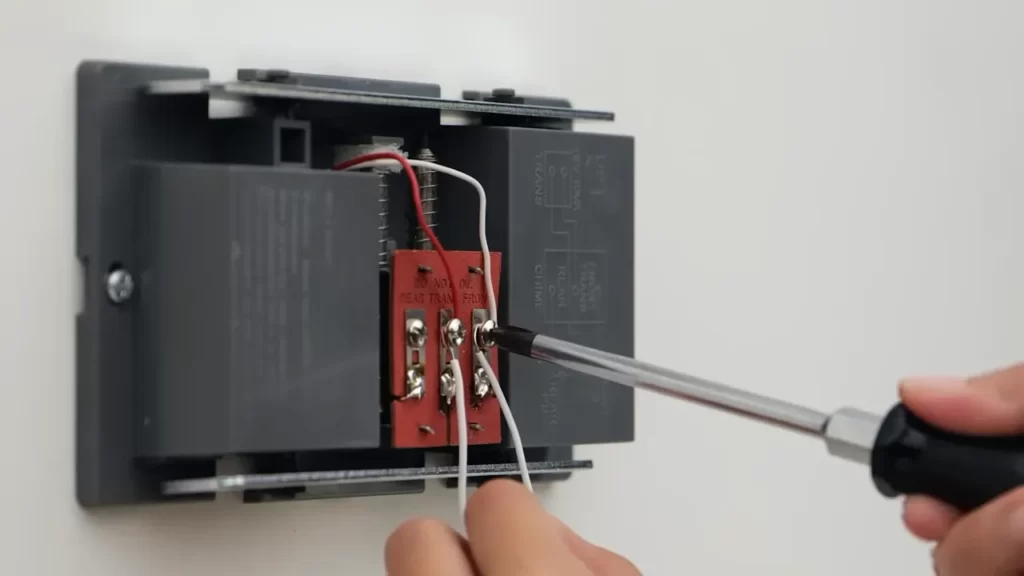
Connect the wiring or insert the battery
Depending on the model of your Google Nest Doorbell, you will either need to connect it to your existing doorbell wiring or insert the battery. Follow the corresponding steps below:
If connecting the wiring:
- Remove the cover of your doorbell chime and locate the wiring terminals.
- Connect the wires from your Nest Doorbell to the corresponding terminals on your doorbell chime.
If inserting the battery:
- Open the battery compartment on the back of your Nest Doorbell.
- Insert the provided battery into the compartment and close the cover securely.
Attach the Nest Doorbell to the mounting bracket
Now that you have connected the wiring or inserted the battery, it’s time to attach your Nest Doorbell to the mounting bracket. Follow these steps:
- Align the back of your Nest Doorbell with the mounting bracket.
- Slide the doorbell down until it clicks into place.
Check the functionality and adjust settings
Once your Nest Doorbell is securely attached to the mounting bracket, it’s time to check its functionality and adjust the settings to your preference. Follow these steps:
- Power on the doorbell by turning on the power supply or ensuring the battery is inserted correctly.
- Download and open the Google Nest app on your smartphone or tablet.
- Follow the on-screen instructions to add your Nest Doorbell to the app and connect it to your Wi-Fi network.
- Once connected, test the doorbell by pressing the button and ensure that you receive notifications on your device.
- Explore the app settings to adjust features such as motion detection sensitivity, video quality, and notification preferences.
By following these simple steps, you can successfully install your Google Nest Doorbell and start enjoying the convenience and security it brings to your home. Remember to always refer to the official installation guide provided by Google for detailed instructions specific to your doorbell model.
Troubleshooting And Faqs
Common issues during installation and how to troubleshoot them
Installing the Google Nest Doorbell is a relatively simple process, but like any home improvement project, you may encounter some common issues along the way. Here are a few troubleshooting tips to help you navigate any challenges you may face:
- No power to the doorbell: If your doorbell doesn’t power on after installation, first ensure that the wires are properly connected. Double-check that the circuit breaker is not tripped and that the transformer is providing enough voltage. If needed, consult a professional electrician.
- Weak Wi-Fi signal: If you’re experiencing a weak Wi-Fi signal, try moving your router closer to the doorbell or consider installing a Wi-Fi range extender. Additionally, ensure that your Wi-Fi network has a strong and secure password.
- Incompatible doorbell system: Before installing the Nest Doorbell, it’s essential to check if your current doorbell system is compatible. If it’s not, you may need to install an indoor power adapter or opt for a battery-powered model instead.
- Chime not working: If you can’t hear the chime inside, make sure the wires are securely connected to the chime box. Also, check the volume settings in the Nest app and ensure that the chime is not muted or set to a low volume.
Frequently asked questions about Nest Doorbell installation and setup
If you’re still unsure about certain aspects of installing and setting up your Google Nest Doorbell, take a look at these frequently asked questions:
| Q: How do I install Google Nest wireless doorbell? | Q: Can I install Nest doorbell myself? | Q: Does Nest doorbell need to be hardwired? |
| If your home doesn’t have a doorbell, or if your current doorbell system is incompatible with Nest doorbells, you can use an indoor power adapter to install a Nest doorbell instead. | Google Nest Doorbell installation is straightforward enough to do yourself if you already have a wired doorbell in place, or if you purchase a battery-operated model. | If there are no wires behind the chime, there are a couple of options: Install a battery-powered Nest doorbell so that you don’t need to connect it to the system wires. Install the Nest doorbell with the optional indoor power adapter, which lets you plug your doorbell into an indoor power outlet. |
| Q: How do I install Google nest without existing doorbell? | Q: What if my Nest doorbell doesn’t power on after installation? | Q: How can I fix weak Wi-Fi signal for my Nest Doorbell? |
| If your home doesn’t have a doorbell, or if your current doorbell system is incompatible with Nest doorbells, you can use an indoor power adapter to install a Nest doorbell instead. | Ensure that the wires are properly connected, check the circuit breaker, and confirm that the transformer is providing enough voltage. If the issue persists, consult a professional electrician. | Try moving your router closer to the doorbell or consider installing a Wi-Fi range extender. Also, make sure your Wi-Fi network has a strong and secure password. |
Frequently Asked Questions On How To Install Google Nest Doorbell
How Do I Install Google Nest Wireless Doorbell?
To install the Google Nest wireless doorbell, follow these steps: 1. Make sure you have a wired doorbell or purchase a battery-operated model. 2. Check if your current doorbell system is compatible with Nest doorbells. 3. If no wires behind the chime, use a battery-powered doorbell or an indoor power adapter to connect your Nest doorbell.
4. Install the doorbell according to the instructions provided. 5. Set up and finish the installation process using the Nest app. (Note: Indoor power adapter sold separately)
Can I Install Nest Doorbell Myself?
Yes, you can install a Nest doorbell yourself. If you have an existing wired doorbell, simply replace it with a wired Nest doorbell. Ensure compatibility before installation. Alternatively, you can purchase a battery-operated model. If you don’t have a doorbell or if your system is incompatible, use an indoor power adapter.
Does Nest Doorbell Need To Be Hardwired?
No, the Nest doorbell does not need to be hardwired. If there are no existing wires, you have two options: install a battery-powered Nest doorbell or use the optional indoor power adapter to plug it into an indoor power outlet.
How Do I Install Google Nest Without Existing Doorbell?
To install a Google Nest doorbell without an existing doorbell, you can use an indoor power adapter. This adapter is sold separately from the doorbell itself. Simply connect the doorbell to the power adapter and plug it into an indoor power outlet.
It’s a convenient solution if you don’t have a doorbell system or if your current system is incompatible with Nest doorbells.
Conclusion
Installing the Google Nest Doorbell is a breeze, whether you have a wired or battery-operated model. Before replacing your old doorbell, ensure compatibility with your current system. If you don’t have an existing doorbell, an indoor power adapter is available for installation.
With the step-by-step instructions provided, you’ll have your Google Nest Doorbell up and running in no time, adding convenience and security to your home. Trust in the ease and effectiveness of the Google Nest Doorbell installation process.