To install hidden hinges on old cabinets, start by measuring and marking the desired hinge placement. Then, pre-drill holes for the screws and attach the hinges using a screwdriver.
Choosing The Right Hinges For Your Cabinets
When it comes to upgrading your old cabinets with hidden hinges, choosing the right hinges is crucial. Not only do they provide a sleek and modern look, but they also ensure smooth movement and durability. In this section, we will explore the factors to consider when selecting hidden hinges, the different types available, as well as the features and benefits of each type.
Factors to consider when choosing hidden hinges
Before diving into the different types of hidden hinges, it’s important to consider a few key factors. These factors will help you make a more informed decision and ensure that the hinges you choose are suitable for your cabinets. Here are three factors to keep in mind:
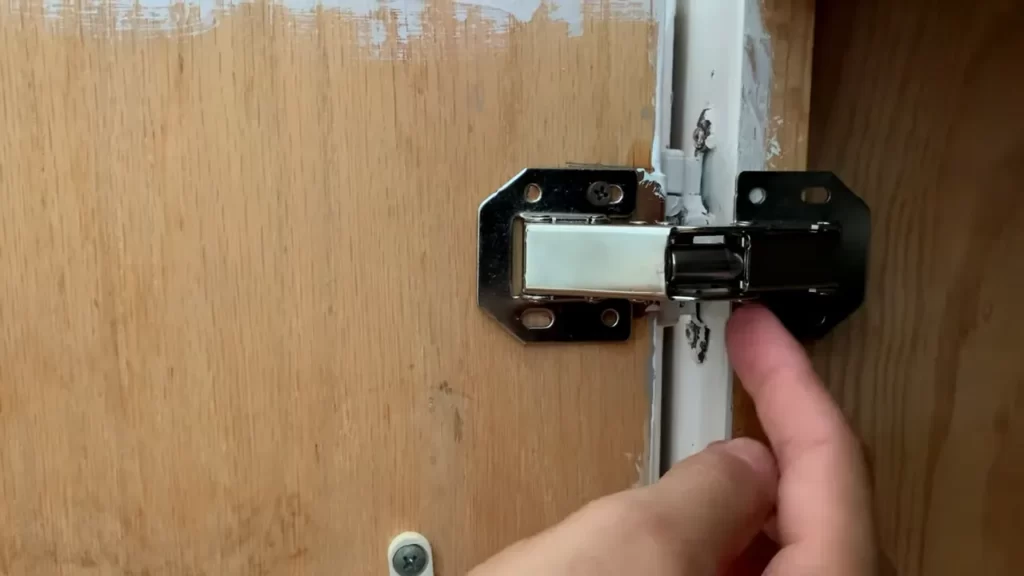
- Size of the cabinet doors: Measure the height, width, and thickness of your cabinet doors. Knowing these measurements will help you choose hinges that can support the weight and size of your doors.
- Overlay: Determine the type of door overlay you have. This refers to how much the door covers the cabinet frame when closed. There are three main types of overlays: full overlay, half overlay, and inset. The overlay type will affect the type of hinge you need.
- Door material and weight: Consider the material of your cabinet doors, whether it’s wood, laminate, or another type. Additionally, take note of the weight of the doors, as this will influence the hinge strength required.
Different types of hinges available
Now that you have a better understanding of the factors to consider, let’s explore the different types of hidden hinges available:
| Hinge Type | Description |
|---|---|
| Concealed European Hinges | These hinges are popular for their simplicity and functionality. They are typically adjustable and provide a clean, streamlined look when the doors are closed. |
| Overlay Hinges | Overlay hinges are ideal for cabinets with a full or half overlay. They are easy to install and offer a wide range of adjustability. |
| Face Frame Hinges | Designed specifically for cabinets with a face frame, these hinges offer stability and strength. They are available in various styles and configurations. |
Features and benefits of each type of hinge
Each type of hinge comes with its own set of features and benefits. Let’s take a closer look:
- Concealed European Hinges:
- Adjustable for precise alignment
- Smooth and silent operation
- Easy installation and removal
- Overlay Hinges:
- Provides a wide range of adjustability for different door overlays
- Allows doors to close completely flush
- Simple installation and integration
- Face Frame Hinges:
- Sturdy and durable design
- Allows for easy adjustment and alignment
- Comes in various styles and configurations to suit different cabinet types
By considering the factors mentioned earlier and understanding the features and benefits of each hinge type, you can confidently choose the right hinges for your cabinets. Upgrading to hidden hinges will not only enhance the appearance of your cabinets but also improve their functionality and overall longevity.
Measuring And Preparing Your Cabinets For Installation
`
Tools and Materials Needed for the Installation
` Before you can begin installing hidden hinges on your old cabinets, gather these essential tools and materials: – Screwdriver (make sure you have the appropriate heads for your screws) – Drill with a pilot hole drill bit – Measuring tape or ruler – Pencil or marker – Hidden hinge set (including hinges, mounting plates, and screws) – Safety glasses (always prioritize eye protection during installations) – Level (to ensure your cabinets are straight) `
Measuring the Cabinet Doors and Determining Hinge Placement
` The first step in installing hidden hinges is to accurately measure your cabinet doors. Taking precise measurements helps determine the appropriate hinge placement and ensures a smooth installation process. Follow these steps:
- Using a measuring tape or ruler, measure the width and height of each cabinet door.
- Make note of these measurements, ensuring accuracy.
- With your measurements in hand, determine the appropriate hinge placement.
`
Marking and drilling pilot holes for the hinges
` The next step is to mark and drill pilot holes for the hinges. This step ensures that you have a guide for placing the hinges accurately. Follow these steps:
- Position the hinge onto the edge of the cabinet door in the desired location.
- Using a pencil or marker, mark the screw hole locations on the door while holding the hinge firmly in place.
- Repeat this process for each hinge and door on your cabinet.
- Once marked, set the hinges aside and grab your drill with the appropriate pilot hole drill bit.
- Align the drill bit with each marked spot and carefully drill pilot holes to prevent splitting or damaging the wood.
Ensure each H3 heading adheres to HTML syntax by including the appropriate tags. Use `` tags to highlight specific instructions, and `` tags to emphasize important points. Remember, measuring and preparing your cabinets for Hidden Hinge installation is crucial for a successful outcome. With these steps completed, you are now ready to proceed to the installation process.
Installing The Hidden Hinges On Your Cabinets
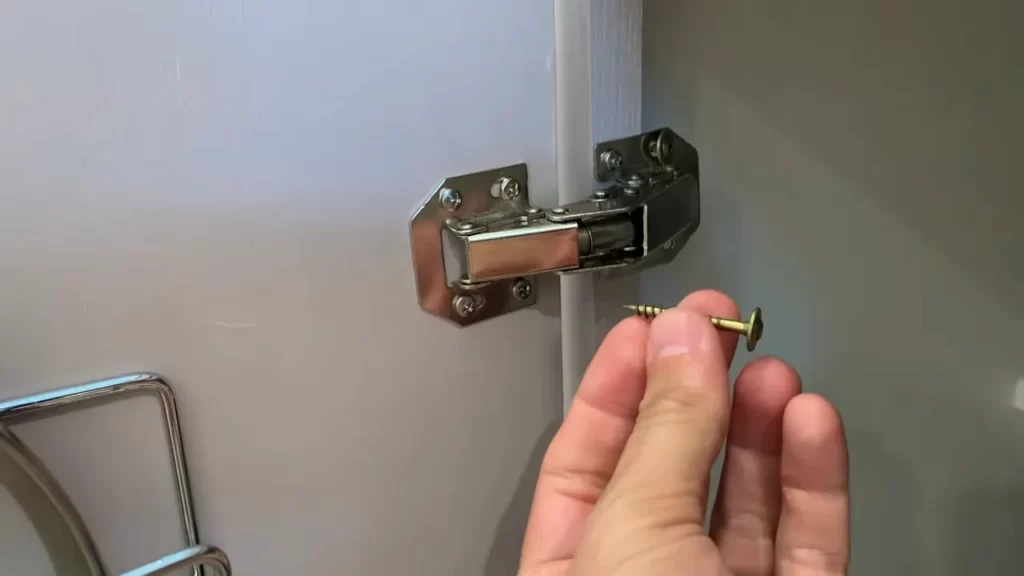
Step-by-step guide to installing concealed hinges
If you’re looking to give your old cabinets a fresh new look, installing hidden hinges can provide a seamless and modern touch. These hinges are designed to be concealed, leaving no visible hardware on the exterior of your cabinets. In this step-by-step guide, we’ll walk you through the process of installing hidden hinges on your cabinets, ensuring a professional and polished finish.
- Prepare your cabinetsBefore you begin installing the hidden hinges, it’s crucial to prepare your cabinets. Remove the cabinet doors and lay them flat on a clean, stable surface. Take this opportunity to clean and sand the surfaces to ensure a smooth finish. If your cabinets have existing hinges, use a screwdriver to carefully remove them.
- Measure and markWith your cabinet doors ready, grab a tape measure and a pencil. Position the hinge on the back of the cabinet door, ensuring it is flush against the edge. Mark the screw hole locations with a pencil. Repeat this process for each hinge, making sure they are evenly spaced.
- Drill pilot holesTo ensure easy installation and prevent any splitting, it’s important to drill pilot holes for the screws. Use an appropriately sized drill bit and make a small hole at each marked location. Be careful not to drill too deep, as this can damage the cabinet door.
- Attach the hingesNow it’s time to attach the hinges to the cabinet doors. Take the first hinge and align it with the pilot holes. Secure it in place by driving the screws through the holes. Ensure the hinge is straight and tightly fastened. Repeat this process for the remaining hinges on each cabinet door.
- Install hinge platesTo complete the installation process, you’ll need to install hinge plates on the cabinet frame. Position the hinge plates in the desired locations, ensuring they align with the hinges on the doors. Secure them in place using screws, making sure they are flush against the frame.
Ensuring proper alignment and stability
Once you’ve installed the hidden hinges on your cabinets, it’s important to ensure proper alignment and stability for a seamless appearance and smooth operation. Follow these tips:
- Check alignmentAfter attaching the hinge plates, close the cabinet doors to check their alignment. Make any necessary adjustments to ensure they are level and properly aligned with each other and the cabinet frame. This will ensure a clean and symmetrical look.
- Tighten screwsEnsure all screws on the hinges and hinge plates are tightly secured. Loose screws can cause misalignment and instability. Use a screwdriver to carefully tighten any screws that may have come loose during the installation process.
- Test stabilityTo ensure the stability of the hidden hinges, gently open and close the cabinet doors. Pay attention to any wobbling or instability. If you notice any issues, double-check the alignment and tightness of the screws. Making necessary adjustments will ensure a sturdy and secure installation.
Adjusting the hinges for smooth operation
Once your hidden hinges are installed and properly aligned, you may need to make adjustments for smooth operation. Here’s how:
- Check clearanceOpen your cabinet doors and check for proper clearance between them and adjacent cabinets or walls. If there is not enough clearance, you may need to adjust the position of the hinges or make modifications to the cabinet frame to provide adequate space for the doors to open and close smoothly.
- Adjust tensionIf your cabinet doors don’t open or close smoothly, you can adjust the tension of the hidden hinges. Most concealed hinges have adjustment screws that allow you to increase or decrease the tension. Experiment with these screws until you achieve the desired smoothness and ease of operation.
- Final checksAfter making adjustments, test the cabinet doors again to ensure they open and close smoothly without any sticking or resistance. Make any additional tweaks as needed until the hinges operate flawlessly.
By following this step-by-step guide and implementing the necessary adjustments, you can successfully install hidden hinges on your old cabinets, giving them a fresh and stylish look. Enjoy the seamless appearance and smooth operation of your newly upgraded cabinets!
Concealing The Hinges For A Seamless Look
How to hide the hinges completely within the cabinet doors
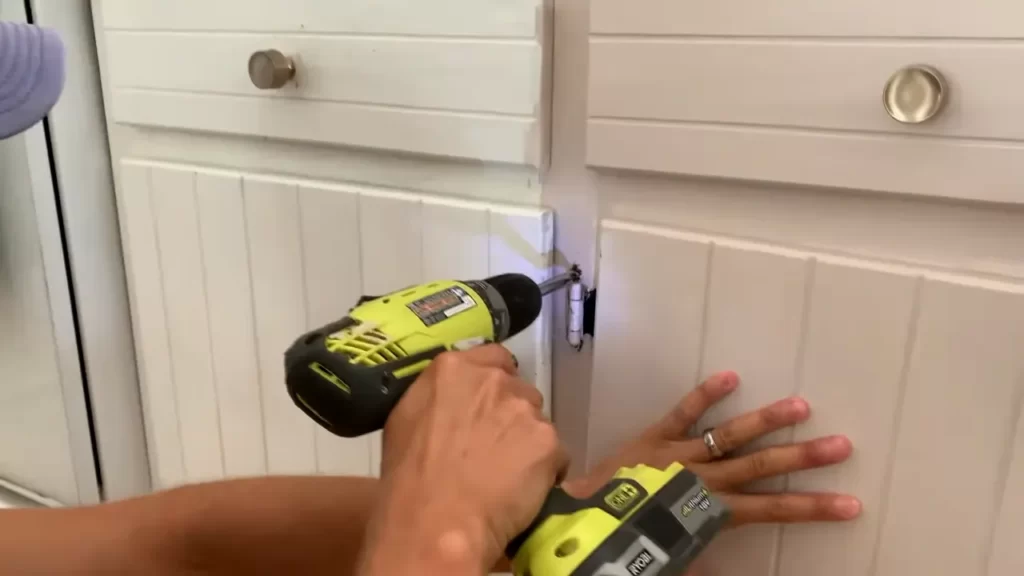
When it comes to achieving a seamless look for your old cabinets, hiding the hinges completely within the cabinet doors is essential. This not only enhances the aesthetic appeal of your cabinets but also gives them a modern and polished look. Here are some techniques to help you achieve this:
- Remove the existing hinges: Start by removing the old hinges from the cabinet doors using a screwdriver.
- Measure and mark the hinge placement: Using a measuring tape and a pencil, carefully measure and mark the desired placement of the hidden hinges on both the cabinet doors and the cabinet frames. Ensure that the placement is consistent across all the doors.
- Pre-drill hinge holes: Use a drill to pre-drill holes for the hinges according to the marked placements. Make sure the holes are deep enough to accommodate the hinges.
- Attach the hinges: Attach the hidden hinges to the cabinet doors and frames using screws provided with the hinges. Ensure they are secure and aligned properly.
- Check the door movement: With the hinges in place, carefully test the movement of the cabinet doors to ensure they open and close smoothly.
Following these steps will help you hide the hinges completely within the cabinet doors, giving your cabinets a seamless and elegant appearance.
Techniques for concealing the hinges using different materials
To achieve a seamless look, you can experiment with different materials to conceal the hinges. Here are a few techniques you can try:
- Wooden cover plates: Create custom cover plates using a piece of wood that matches the color and finish of your cabinets. Cut the wood into the desired shape and size, and attach it over the hinges to conceal them.
- Self-adhesive veneer: Using self-adhesive veneer, cover the hinges completely to blend them with the surrounding cabinets. This technique works well for cabinets with a glossy or matte finish.
- Concealing strips: Install concealing strips made of plastic or metal over the hinges to hide them. These strips can be painted or stained to match the color of your cabinets.
By using these techniques, you can seamlessly conceal the hinges and achieve a cohesive look for your old cabinets.
Finishing touches to make the hinges blend seamlessly with the cabinets
Once you have hidden the hinges using the techniques mentioned above, adding some finishing touches can further enhance their seamless blend with the cabinets. Here are some ideas:
- Painting or staining: Apply paint or stain to the concealed hinges to match the color of your cabinets. This will make them virtually invisible and ensure a cohesive appearance.
- Sanding and smoothing: Ensure that the hinges are smooth to the touch by sanding any rough edges. This will give them a professional finish.
- Adding decorative elements: If desired, you can add decorative elements such as trim or molding around the concealed hinges to further integrate them with the overall cabinet design.
By implementing these finishing touches, you can ensure that the hinges blend seamlessly with your cabinets, creating a polished and cohesive look.
Troubleshooting Common Issues With Hidden Hinges
While installing hidden hinges on old cabinets can give them a modern and sleek look, it is not uncommon to encounter certain problems during the installation process. In this section, we will discuss some of the common issues that may arise and provide you with solutions to tackle them effectively.
Common problems that may arise during the installation process
Installing hidden hinges can sometimes be a challenging task, especially when dealing with old cabinets that may have structural issues. Here are some of the common problems you may encounter:
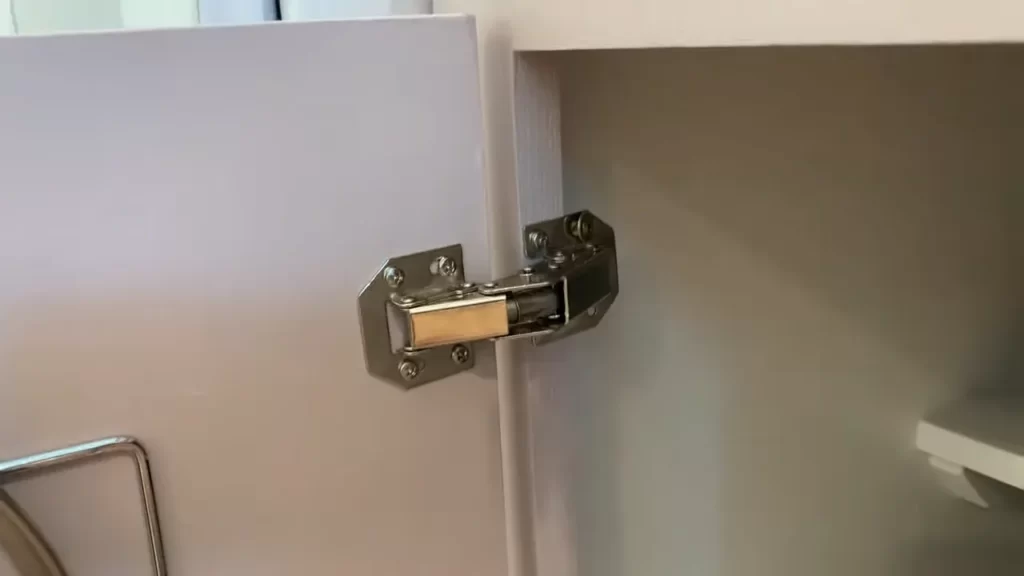
- Hinge misalignment: When the hinges are not properly aligned, it can result in difficulty opening or closing the cabinet doors smoothly.
- Door sagging: Over time, cabinet doors may sag due to wear and tear, causing them to not align properly with the cabinet frame.
- Inadequate door clearance: If the doors are not properly aligned with the hinges, there may not be enough clearance between the door and the cabinet frame, making it difficult to open or close the doors.
- Pocket hole alignment: Hidden hinges often require pocket holes to be drilled into the cabinet frame. If these pocket holes are not accurately aligned, it can affect the installation and functionality of the hinges.
Solutions for hinge misalignment, door sagging, and other
issues
To address these common issues, here are some solutions you can try:
Hinge misalignment:
- Double-check the placement of the hinges and ensure they are properly aligned with the cabinet frame. Make adjustments as needed.
- Tighten the hinge screws securely to ensure the hinges are firmly in place.
- If the misalignment persists, consider using shims to adjust the position of the hinges.
Door sagging:
- If the door is sagging, try adjusting the hinge screws to bring the door back into alignment with the cabinet frame.
- You may also need to reinforce the hinge side of the cabinet or use hinge adjustment plates to provide additional support to the door.
Inadequate door clearance:
- Check if the hinges are positioned correctly on the door and the cabinet frame. Make adjustments as necessary to ensure proper clearance.
- Consider using hinge spacers or adjusting the position of the hinges to increase the door clearance.
Pocket hole alignment:
- Ensure that the pocket holes are accurately drilled into the cabinet frame by using a measuring tool or a template specifically designed for hidden hinges.
- If the pocket holes are misaligned, redrill them in the correct position or use a plug cutter to fill the existing holes and create new ones.
Tips for troubleshooting and adjusting hidden hinges
Here are some additional tips to help you troubleshoot and adjust hidden hinges:
- Before installing the hinges, check the manufacturer’s instructions and guidelines to ensure you have the necessary tools and materials.
- Take your time to carefully align and level the hinges before securing them in place.
- Consider using a spirit level or a carpenter’s square to ensure accurate alignment.
- If you encounter any difficulties, consult online tutorials or seek advice from professionals to ensure a successful installation process.
By following these troubleshooting tips and solutions, you can overcome common issues that may arise during the installation of hidden hinges on old cabinets. With patience and attention to detail, you will soon have beautifully functional cabinets that add a touch of modernity to your space.
Maintaining And Keeping Your Hidden Hinges In Good Condition
Regular Maintenance Tips to Extend the Lifespan of Hidden Hinges
Regular maintenance is crucial for keeping your hidden hinges in good condition and extending their lifespan. By following these simple tips, you can ensure that your hinges continue to function smoothly for years to come.
Clean and lubricate the hinges for smooth operation
Cleaning and lubricating your hidden hinges are essential steps in maintaining their performance and preventing any unnecessary wear and tear. Here’s how you can do it:
- Start by removing any dirt or debris from the hinges using a soft brush or cloth. Pay special attention to the crevices and corners where dirt tends to accumulate.
- Next, apply a small amount of mild detergent or dish soap to a damp cloth and gently wipe down the surface of the hinges.
- Rinse the hinges with clean water to remove any residue from the cleaning solution.
- Once the hinges are clean and dry, apply a thin layer of lubricant to the moving parts to ensure smooth operation. Silicone-based lubricants or specially formulated hinge lubricants work best for this purpose.
Remember to avoid using harsh chemicals or abrasive cleaners, as they can damage the finish of the hinges. Additionally, it’s recommended to clean and lubricate your hidden hinges at least once a year or whenever you notice any signs of stiff or squeaky movement.
Signs that Indicate the Need for Hinge Replacement or Adjustment
Over time, hidden hinges may require replacement or adjustment to maintain their optimal performance. Keep an eye out for the following signs, as they indicate it’s time to take action:
- Sagging cabinet doors: If you notice that your cabinet doors are sagging or not closing properly, it may indicate that the hinges are worn out or need adjustment.
- Stiff or squeaky movement: Hinges that are difficult to open or close, or produce squeaking sounds when in use, may be a sign that they need lubrication or replacement.
- Loose screws: If you find that the screws holding the hinges in place are loose or have stripped threads, it’s important to tighten or replace them to ensure stability.
- Visible damage or wear: Cracks, chips, or other visible damage on the hinges are clear indications that replacement is necessary.
By keeping an eye out for these signs and addressing them promptly, you can avoid further damage and maintain the smooth functioning of your hidden hinges. In conclusion, regular maintenance, cleaning, and lubrication are essential for keeping your hidden hinges in good condition. By following these maintenance tips and staying vigilant for signs of wear or damage, you can extend the lifespan of your hinges and ensure that they continue to provide smooth operation for your old cabinets.
Frequently Asked Questions Of How To Install Hidden Hinges On Old Cabinets
Can You Replace Old Cabinet Hinges With Hidden Hinges?
Yes, you can replace old cabinet hinges with hidden hinges. You can easily install hidden hinges to give your cabinets a sleek, modern look.
How Do You Install Hidden Cupboard Hinges?
To install hidden cupboard hinges, begin by removing the old hinges from the cabinet door. Next, position the new hinge in the desired location and mark the screw holes. Then, drill pilot holes and attach the hinge using screws. Finally, repeat this process for the other hinge and adjust as needed for proper alignment.
What Are The Three Types Of Concealed Hinges?
The three types of concealed hinges are overlay, partial inset, and full inset hinges. Overlay hinges are the most common, fitting on top of the cabinet door. Partial inset hinges are recessed into the side of the cabinet, while full inset hinges are completely concealed inside the cabinet frame.
Where Do You Drill For Concealed Hinges?
Drill for concealed hinges in the designated areas specified by the manufacturer. Check the instructions or template provided with the hinges for accurate placement.
How Do You Install Hidden Hinges On Old Cabinets?
To install hidden hinges on old cabinets, follow these simple steps:
1. Remove the old hinges
2. Measure and mark the position for the new hinges
3. Drill pilot holes
4. Screw the new hinges in place
5. Adjust the hinges for the desired fit
6. Attach the cabinet doors and test the movement.
What Are Hidden Hinges For Cabinets?
Hidden hinges, also known as concealed hinges, are a type of hinge that is not visible from the outside when the cabinet door is closed. They offer a sleek and modern look to cabinets while providing smooth functionality.
Conclusion
Installing hidden hinges on old cabinets is a straightforward process that can transform the look and functionality of your kitchen. By following the step-by-step guide provided in this blog post, you can upgrade your cabinets to a more modern and sleek style.
Remember to choose the right type of hidden hinges for your specific cabinet style and take your time during the installation process for optimal results. Don’t let outdated cabinet hinges hold you back from creating a beautiful and functional space in your home.
Get started today and enjoy the benefits of hidden hinges on your old cabinets.
