To install an interior door handle, start by removing the old handle. Then, align the new handle with the screw holes and secure it in place with screws.
Finally, test the handle to ensure it opens and closes smoothly. Introducing a new interior door handle can instantly update the look of a room. Whether you’re replacing a faulty handle or upgrading to a more stylish option, the installation process is relatively simple.
In this guide, we’ll walk you through the step-by-step procedure to install an interior door handle correctly. By following these straightforward instructions, you’ll have a functional and visually appealing door handle in no time. So let’s get started!
Tools And Materials Needed
When it comes to installing an interior door handle, having the right tools and materials is essential. This ensures a smooth and successful installation process. Here are the key items you’ll need:
Screwdriver
A screwdriver is a must-have tool for any DIY installation project. You’ll need it to remove the screws from your old door handle and attach the new one securely. Make sure to choose a screwdriver that matches the type of screws used in your door handle set.
Door handle set
The door handle set is the centerpiece of your interior door, and it’s important to choose one that suits your style and fits the existing door. There are various designs, finishes, and materials available, so take your time to pick the perfect one that complements your interior decor.
Measuring tape
A measuring tape is crucial for getting precise measurements. Before installing the new door handle, you’ll need to measure the distance between the screw holes on your door. This ensures that the new handle aligns perfectly with the existing holes, saving you time and effort.
Pencil
Having a pencil on hand is essential for marking the exact position of the door handle. This helps you make accurate adjustments and prevents any mistakes during installation. Remember to mark both the screw holes and the position of the latch or lock mechanism.
Drill
A drill is necessary for creating pilot holes for the screws. It allows you to easily penetrate the door without damaging it. When using the drill, make sure to choose an appropriate drill bit size that matches the screws you’ll be using.
Chisel
A chisel is needed for creating recesses in the door for the latch or lock mechanism. This ensures that the handle sits flush and operates smoothly. Be sure to use a sharp chisel and take your time to create clean and precise recesses.
Preparing The Door
Before installing an interior door handle, it’s important to properly prepare the door. This involves measuring the door thickness and handle height requirements, marking the spot for the handle, and creating a guideline for drilling. By following these steps, you’ll ensure a seamless installation process and have a functional door handle in no time.
Measure the Door Thickness and Handle Height Requirements
Firstly, you need to measure the thickness of your door. This is important because it determines the length of screws that you’ll need to secure the door handle. Measure the width of the door using a tape measure and make a note of the measurement.
Next, you’ll want to determine the handle height requirement. This refers to the ideal positioning of the handle on the door. To do this, measure and mark the distance from the bottom of the door to the desired height of the handle. This will ensure comfortable usage for everyone.
Mark the Spot for the Door Handle
Once you’ve determined the handle height requirement, it’s time to mark the spot on the door where the handle will be installed. Use a pencil to mark the spot at the desired height. You can use a measuring tape or a level to ensure that the mark is perfectly straight.
Create a Guideline for Drilling
Now that you’ve marked the spot for the door handle, it’s important to create a guideline to ensure accurate drilling. Use a ruler or straightedge to draw a vertical line from the top to the bottom of the door, intersecting the handle spot. This line will serve as a reference for aligning the door handle during installation.
By preparing the door properly, you’ll ensure that the interior door handle is installed securely and at the optimal height for ease of use. Following these steps will help you achieve a professional and flawless installation, leaving you with a functional and aesthetically pleasing door handle.
Drilling Holes For The Door Handle
Choose the Appropriate Drill Bit Size
When it comes to installing an interior door handle, drilling holes is an essential step. To ensure a secure and seamless installation, it’s crucial to choose the appropriate drill bit size. Using the right size will enable the screws to fit perfectly, resulting in a sturdy and functional door handle.
Before you start drilling, take a moment to inspect the door handle and determine the screw size needed. Most interior door handles use standard screw sizes of either #6 or #8. Refer to the manufacturer’s instructions or check the existing door handle to confirm the screw size.
To choose the correct drill bit size, measure the diameter of the screws with a caliper or ruler. You’ll want to select a drill bit that matches this diameter exactly, or slightly smaller if necessary. Using a drill bit that is too large can lead to loose screws, compromising the handle’s stability.
Drill Pilot Holes for the Handle Screws
Once you have selected the proper drill bit size, it’s time to drill pilot holes for the handle screws. Pilot holes are small guide holes that help prevent splitting or cracking when driving the screws into the door.
To drill pilot holes, mark the locations for the handle screws on the door. Use a pencil or tape to ensure accuracy. Then, position the drill bit on each mark and apply gentle pressure. Begin drilling at a slow speed, gradually increasing the speed as the hole deepens. Take care not to drill too far to avoid damaging the opposite side of the door.
Pilot holes should be slightly smaller than the diameter of the screws. This ensures a snug fit and helps avoid any unwanted movement of the door handle over time. While drilling, periodically remove the drill bit to clear away wood chips and maintain a clean work area.
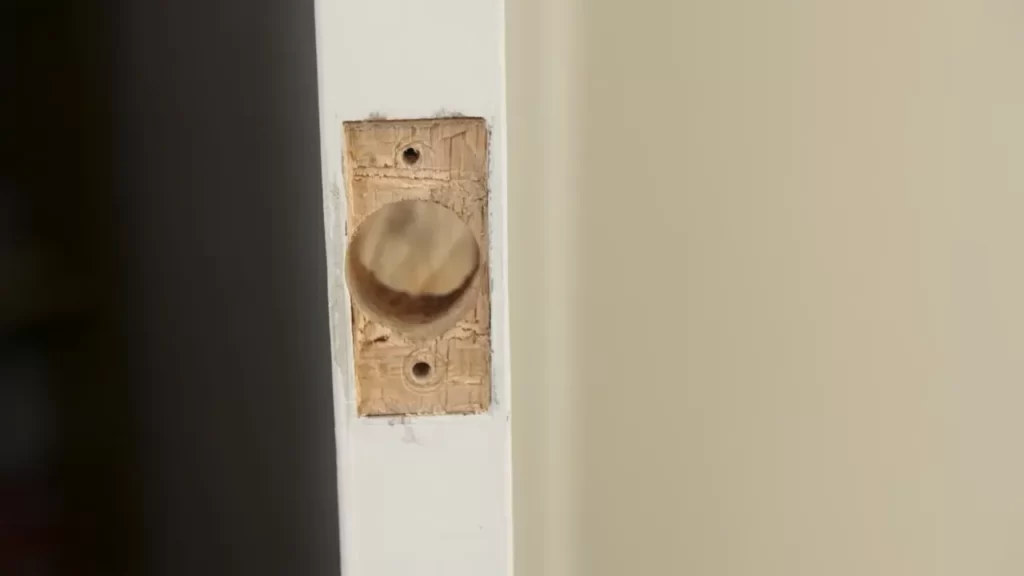
Use a Hole Saw to Create the Mortise for the Latch Plate
To complete the installation of an interior door handle, you will need to create a mortise for the latch plate. This mortise provides a recessed area for the latch, allowing the door to close properly.
Using a hole saw, create a round hole where the latch plate will be installed. The size of the hole saw should match the dimensions provided by the manufacturer or the existing latch plate.
Position the hole saw on the marked spot for the latch plate and secure it firmly. Apply steady pressure as you drill, making sure to maintain a perpendicular angle to the door surface. Keep a firm grip on the drill and hold it steady to avoid any splintering or uneven cuts.
Once the hole is complete, remove the hole saw and use a chisel or utility knife to clean up any rough edges. Take your time during this step to ensure a neat and professional-looking mortise.
By following these simple steps, you can confidently drill appropriate holes for your interior door handle installation. Remember to choose the right drill bit size, drill pilot holes for the screws, and use a hole saw for the mortise. With the holes in place, you’ll be ready to attach your new door handle and enjoy the added convenience and functionality it brings to your home.
Installing The Door Handle Set
After selecting the perfect interior door handle for your space, it’s time to install it and add a touch of elegance to your doors. The process may seem daunting at first, but with a few simple steps, you’ll have your new handle set up in no time. In this guide, we’ll walk you through each step of the installation process, ensuring a secure and functional handle for your interior doors.
Insert the latch plate into the mortise
The first step in installing your door handle set is to insert the latch plate into the mortise. The mortise is the rectangular hole in the edge of the door where the latch will fit. Carefully align the latch plate with the mortise and slide it into place. Ensure that the cutout for the latch faces the edge of the door, allowing for smooth operation. Once the latch plate is positioned correctly, move on to securing it with screws.
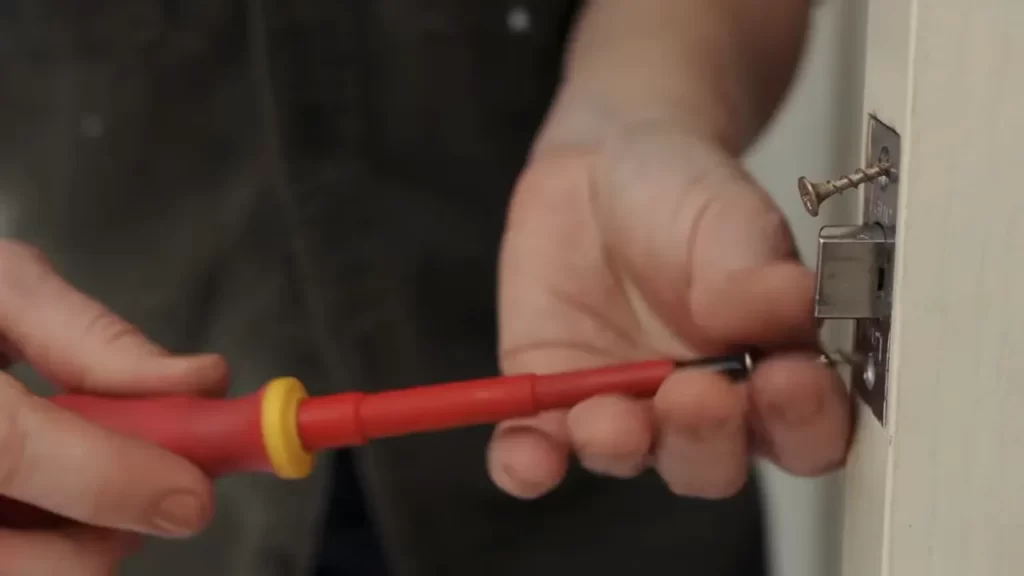
Secure the latch plate with screws
To ensure the latch plate stays in place, secure it with screws. Use the provided screws and a screwdriver to fasten the latch plate to the door. Start by inserting the screws into the pre-drilled holes on the latch plate and tighten them until the plate is securely attached. Be careful not to overtighten, as this may cause damage to the plate or the door. Once the latch plate is securely fastened, you can move on to attaching the handle halves.
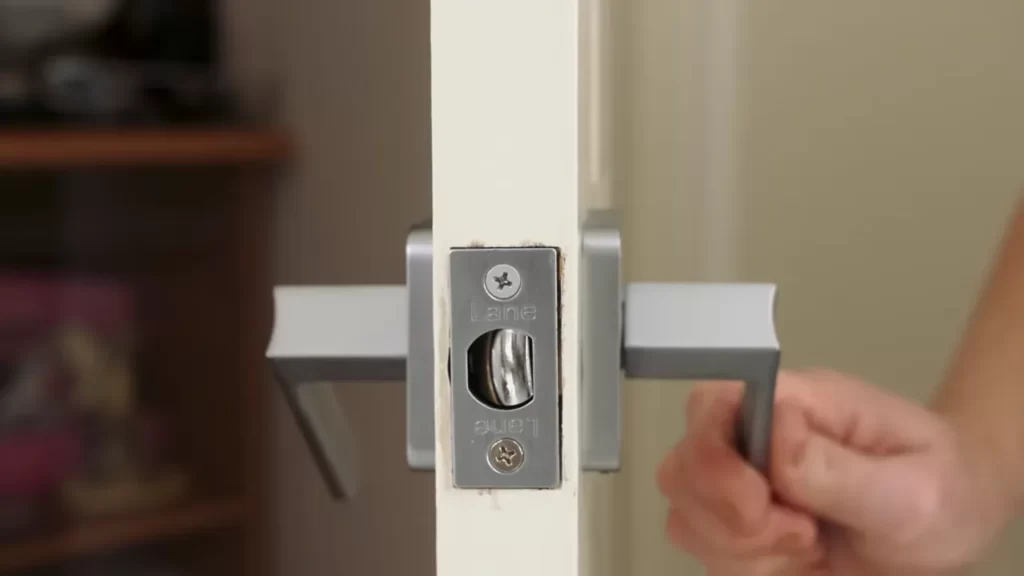
Attach the two handle halves together
Now it’s time to attach the two handle halves together. This step may vary depending on the type of handle you’ve chosen, but most handles will have a screw or concealed bolt that holds the two halves together. Insert the screw or bolt into the designated hole, ensuring that it threads through both handle halves. Using a screwdriver or Allen wrench, tighten the screw or bolt until the handle halves are securely connected. Take care not to overtighten, as this could damage the handle or affect its functionality.
Insert the spindle into the latch mechanism
With the handle halves attached, it’s time to insert the spindle into the latch mechanism. The spindle is a metal rod that connects the handle to the latch, allowing for the door to be opened and closed. Insert one end of the spindle into the hole on the handle’s interior side. Then, align the other end of the spindle with the hole on the latch mechanism. Ensure that the spindle is fully inserted and aligned correctly before proceeding to the final step.
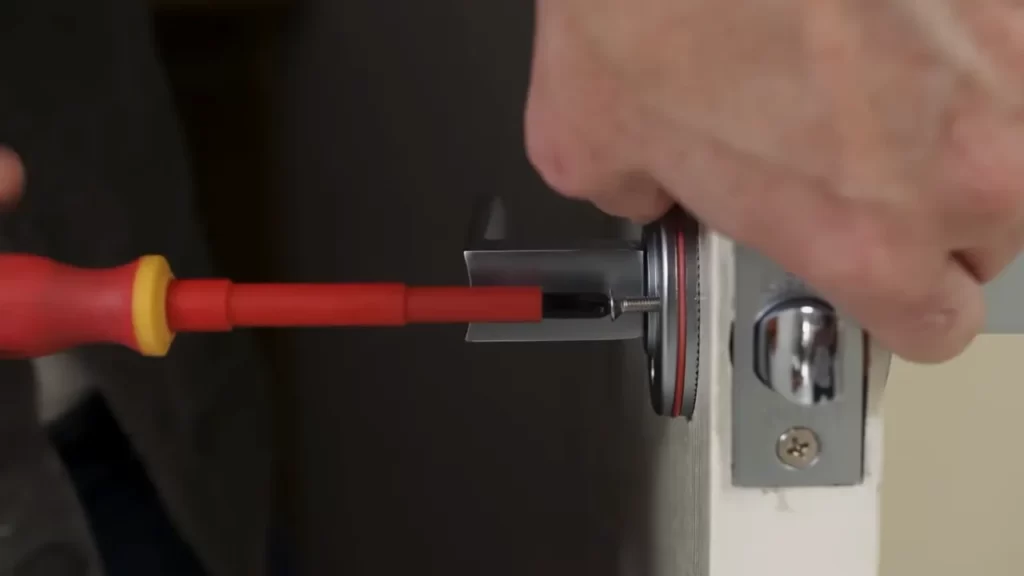
Screw the handle onto the door
The last step is to screw the handle onto the door, securing it in place. Position the handle over the spindle and align it with the pre-drilled holes on the door. Insert the provided screws into the holes and tighten them until the handle is securely fastened. Take care not to overtighten, as this may cause damage to the handle or door. Once the handle is securely attached, give it a test to ensure smooth operation and adjust if necessary. Congratulations, you’ve successfully installed your interior door handle!
Testing And Adjusting The Door Handle
After installing the interior door handle, it is essential to ensure that it works properly. Testing and adjusting the door handle will guarantee that it functions smoothly and provides the security and convenience you expect. In this section, we will guide you through the steps of testing the functionality of the door handle, adjusting the strike plate if necessary, and checking for smooth operation and proper latch alignment.
Test the functionality of the door handle
To begin, test the functionality of the door handle to ensure that it operates correctly. Follow these steps:
- Close the door and turn the handle to engage the latch.
- Try opening the door by turning the handle. Make sure the latch releases smoothly and the door opens without resistance.
- Close the door again and test the handle from both sides. Check for any stiffness, sticking, or unusual sounds.
If you encounter any issues during the testing process, continue reading to learn how to adjust the strike plate and check for proper latch alignment.
Adjust the strike plate if necessary
If the door handle does not operate smoothly or if there is resistance when opening or closing the door, it may be necessary to adjust the strike plate. This step will help to ensure a proper fit between the door latch and strike plate. Follow these steps:
- Start by examining the strike plate. Check if it aligns with the latch and if there are any visible signs of misalignment or wear.
- If the strike plate does not align correctly, use a screwdriver to loosen the screws holding it in place.
- Gently move and adjust the strike plate until it aligns with the latch.
- Once properly aligned, tighten the screws to secure the strike plate in place.
After adjusting the strike plate, test the functionality of the door handle again to see if the adjustments have resolved any previous issues.
Check for smooth operation and proper latch alignment
In addition to testing the handle’s functionality and adjusting the strike plate, it is crucial to check for smooth operation and proper latch alignment. This ensures that the door closes securely and remains in the proper position. Follow these steps:
- Open and close the door multiple times to assess if it moves freely and smoothly.
- Observe the latch alignment to ensure it engages properly with the strike plate.
- Make any necessary adjustments to the strike plate or latch mechanism to achieve proper alignment.
- Repeat the testing process to confirm that the door handle works smoothly and the latch aligns correctly.
By carefully testing, adjusting, and checking the door handle’s functionality, strike plate alignment, and latch operation, you can ensure a properly installed interior door handle. This attention to detail will enhance the functionality and convenience of your door, providing a seamless user experience.
Finishing Touches
Once you have successfully installed the interior door handle, it’s time to add the finishing touches that will ensure a polished and professional look. These final steps include filling any visible screw holes with wood filler, sanding and painting the door if needed, and cleaning up any excess debris. By following these simple steps, you can truly complete the installation process and elevate the appearance of your interior door.
Fill any visible screw holes with wood filler
After installing the interior door handle, you may notice unsightly screw holes that detract from the overall aesthetics. Don’t fret! There’s a simple solution for this. Begin by prepping the surface around the screw holes – make sure it’s clean and free from any lingering dust or debris. Then, take your wood filler and carefully fill each hole, ensuring it’s flush with the door’s surface. Pro tip: Use a putty knife to smoothen the filler, creating a seamless finish. Allow the filler to dry according to the manufacturer’s instructions before moving on to the next step.
Sand and paint the door if needed
Once the wood filler is completely dry, it’s time to assess whether your interior door needs any sanding or painting. If you notice any imperfections, such as rough edges or scratches, grab a fine-grit sandpaper and gently sand the affected areas until smooth. Remember to wipe away any residual dust using a clean cloth. If you decide to paint the door, choose a color that complements your interior decor and grab a high-quality paintbrush or roller. Apply the paint evenly and in thin coats, allowing each layer to dry before adding another. This will ensure a flawless and durable finish.
Clean up any excess debris
Lastly, take a moment to give your newly installed interior door handle and door a thorough clean-up. Use a damp cloth or sponge to wipe away any excess wood filler, dust, or paint splatters. Pay attention to the finer details, such as the handle itself and any crevices where debris might accumulate. By doing this final step, you’ll not only make your door look pristine, but you’ll also remove any potential hazards that could damage or hinder the functionality of your newly installed interior door handle.
There you have it! By diligently following these finishing touches, you can ensure that your interior door handle installation project is a success. Remember, paying attention to the details is what sets apart a good job from a great one. So take your time, be patient, and enjoy the satisfaction of completing a task that enhances both the function and aesthetics of your door
Frequently Asked Questions For How To Install Interior Door Handle
Is Installing A Door Handle Hard?
Installing a door handle is not difficult. It can be done easily by following simple instructions. Begin by removing the old handle, then align the new one and screw it in place. Finally, test the handle to ensure it functions properly.
Can You Install A Door Handle Yourself?
Yes, you can install a door handle yourself. It’s a simple process that doesn’t require professional assistance. Just follow the instructions provided with the handle, and you’ll have it installed in no time.
How Do You Install A Door Lock Handle?
To install a door lock handle, follow these steps: 1. Start by removing the existing handle and latch from the door. 2. Align the new handle with the holes on the door and insert its screws. 3. Attach the latch mechanism onto the door frame.
4. Test the handle to ensure it operates smoothly. 5. Finally, tighten all screws and make any necessary adjustments for a secure fit.
How Do You Put A Handle On An Interior Door?
To put a handle on an interior door, follow these steps: 1. Measure and mark the desired height for the handle. 2. Drill holes for the handle and latch. 3. Attach the latch and handle to the door using screws.
4. Test the handle for functionality. 5. Make any necessary adjustments. Done!
How Do You Install An Interior Door Handle?
Installing an interior door handle is a simple process. Start by removing the old handle, then align and secure the new handle using screws provided. Test the handle for smooth operation.
What Tools Do You Need To Install An Interior Door Handle?
To install an interior door handle, you will need a screwdriver, measuring tape, pencil for marking the location, and a drill to create pilot holes if necessary. Ensure you have the correct size screws.
Conclusion
Installing an interior door handle is a simple task that can greatly enhance the functionality and aesthetic appeal of your doors. By following these step-by-step instructions and using the right tools, you can easily accomplish this project on your own.
Remember to take safety precautions, measure accurately, and ensure a tight fit for a smooth and long-lasting operation. With a little patience and effort, you’ll have stylish and functional door handles in no time. Happy DIYing!