To install MD Top and Sides Door Seal, first remove the old seal, clean the surface, and measure and cut the new seal. Then, position the seal on the door, peel the adhesive backing, and press it firmly into place.
Welcome to our guide on how to install MD Top and Sides Door Seal. If you’re experiencing drafts or leaks around your door, installing a door seal can help improve insulation and energy efficiency. We will take you through the step-by-step process of installing an MD Top and Sides Door Seal.
By following these instructions, you’ll be able to seal your door effectively, ensuring a snug and weather-resistant fit. So, let’s get started with the installation process.
Understanding The Importance Of A Door Seal
When it comes to ensuring the energy efficiency of your home, paying attention to even the smallest details can make a significant difference. One often overlooked but vital component is the door seal. A properly installed door seal not only helps to regulate temperature but also provides numerous other benefits.
Why a Door Seal is Essential for Energy Efficiency
Improving energy efficiency is a concern for many homeowners, and a door seal plays a crucial role in achieving this goal. Here’s why:
- Prevents air leakage: A door seal acts as a barrier against air leakage, ensuring that your home remains well-insulated. Air leaks around doors can result in significant energy loss, leading to higher energy bills. A properly installed door seal eliminates this issue by creating a tight seal, preventing drafts and heat exchange.
- Reduces energy consumption: With an efficient door seal, you can minimize the strain on your heating and cooling systems. By preventing the escape of conditioned air, your HVAC system won’t have to work as hard to maintain the desired temperature. This, in turn, reduces energy consumption and saves you money in the long run.
- Enhances comfort: In addition to energy savings, a properly installed door seal ensures a more comfortable living environment. By eliminating drafts and hot or cold spots around the door, you can enjoy a consistent indoor temperature throughout your home. This not only improves overall comfort but also prevents moisture build-up and condensation.
The Benefits of a Properly Installed Door Seal for Temperature Regulation
Temperature regulation is crucial for maintaining a comfortable and enjoyable living space, and a properly installed door seal provides the following benefits to achieve it:
- Consistent indoor temperature: With an airtight seal around your door, you can maintain a consistent indoor temperature, regardless of external weather conditions. This means no more uncomfortable cold drafts or heat seeping in during summer months.
- Reduced energy waste: By preventing air leakage, a door seal ensures that cool or warm air produced by your HVAC system stays inside your home. This reduces energy waste, as your heating or cooling equipment won’t need to compensate for the loss of air due to leaks.
- Improved climate control: Proper temperature regulation is essential for optimum climate control. Whether you want to keep your home cozy during winters or refreshingly cool in summers, a door seal helps to maintain your desired indoor climate, allowing you to enjoy your living space, no matter the season.
In conclusion, understanding the importance of a door seal is crucial for homeowners who prioritize energy efficiency and optimal temperature regulation. By investing in a high-quality seal and ensuring its proper installation, you can reap the benefits of energy savings, increased comfort, and a well-regulated indoor environment.
Preparing For Installation
Before you begin installing the MD top and sides door seal, there are a few important steps to take to ensure a successful installation. Taking the time to properly prepare will help to ensure that the door seal fits correctly, providing optimal insulation and energy efficiency.
Tools required for the installation process
Having the right tools on hand is crucial for a smooth installation process. Here’s a list of tools you’ll need before you get started:
| Tool | Description |
|---|---|
| Screwdriver | A flat-head or Phillips screwdriver, depending on the type of screws used. |
| Tape Measure | For accurately measuring the dimensions of the door seal. |
| Utility Knife | Used to trim the door seal to the correct length. |
| Drill | If screws are required for installation, a drill will be needed to make pilot holes. |
| Pencil or Marker | Used to mark measurements and reference points on the door frame. |
Measuring the door seal dimensions accurately
Properly measuring the dimensions of the door seal is essential to ensure a precise fit. Follow these steps to measure accurately:
- Clean the door frame thoroughly to remove any dirt or debris.
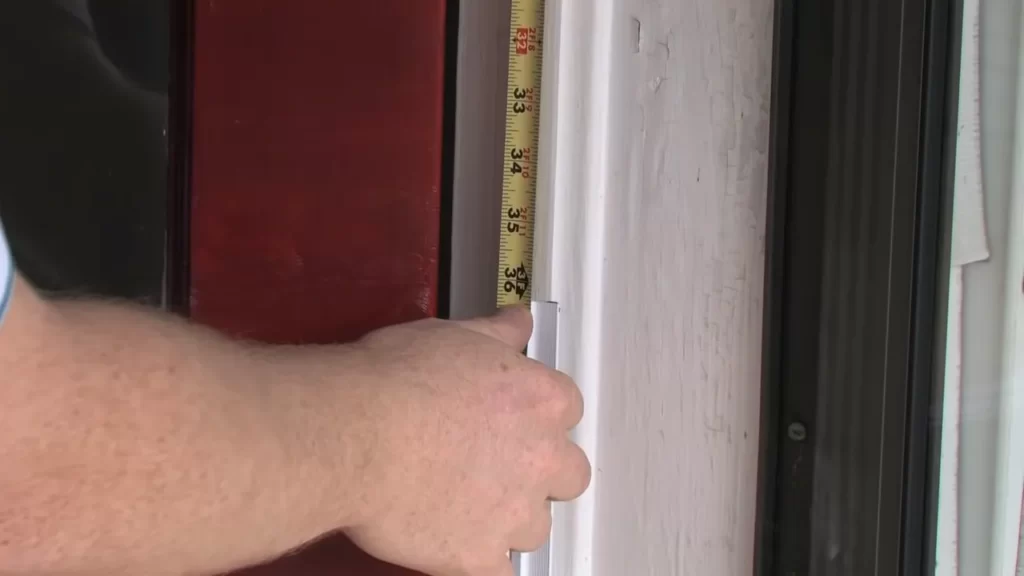
- Using a tape measure, measure the width of the top and sides of the door frame.
- Record the measurements and double-check for accuracy.
- Measure the length of the door seal, ensuring it is the correct length to cover the entire top and sides of the door frame.
- Trim the door seal if necessary, using a utility knife, to match the recorded measurements.
By following these steps and accurately measuring the dimensions, you can ensure a proper fit for the MD top and sides door seal.
Removing The Old Door Seal
Steps to safely remove the existing door seal
When it comes to installing a new door seal, it’s crucial to first remove the old one carefully. By following these steps, you can ensure a smooth transition and avoid any damage to your door or surrounding area.
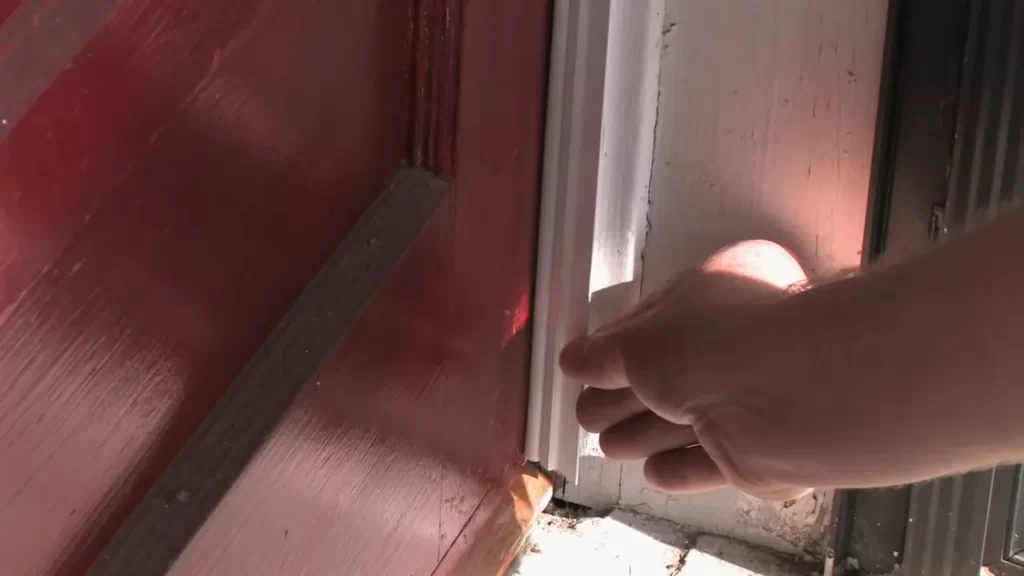
- Step 1: Inspect the door seal
- Step 2: Locate the fixing points
- Step 3: Loosen the fixing points
- Step 4: Remove the old door seal
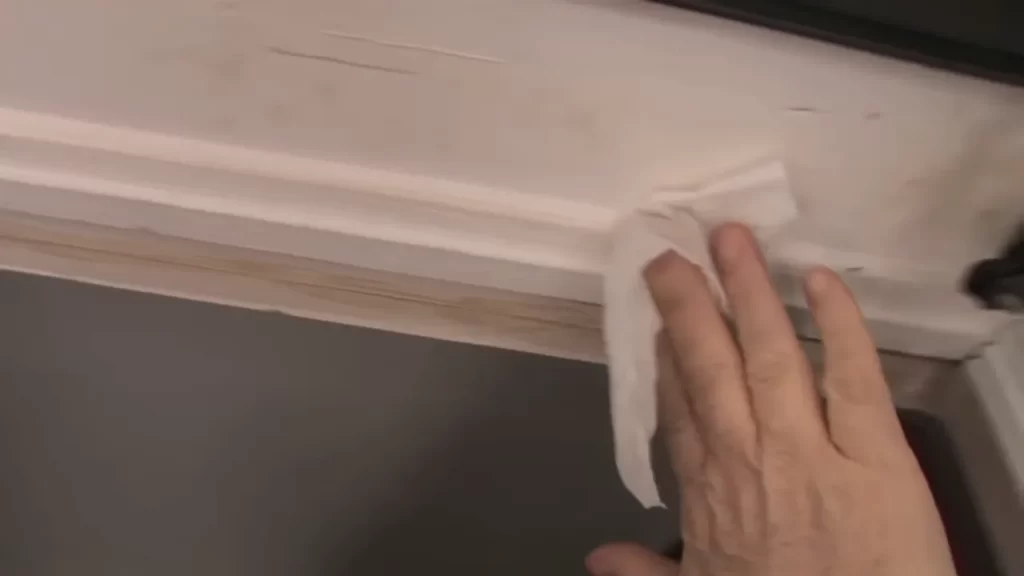
- Step 5: Clean the door surface
Tips for cleaning any residue left behind
In some cases, you may encounter stubborn residue that remains after removing the old door seal. To clean it effectively, consider the following tips:
- Use a mild detergent: Mix a mild detergent with warm water and apply it to the residue using a soft cloth or sponge. Gently scrub the affected area to remove the residue without damaging the door surface.
- Try vinegar: For particularly stubborn residue, vinegar can be an effective solution. Mix equal parts vinegar and water, apply it to the residue, and let it sit for a few minutes before scrubbing with a cloth or sponge.
- Use a plastic scraper: If the residue is still difficult to remove, a plastic scraper can be used. Be cautious not to scratch the door surface while scraping off the residue.
- Rinse and dry: After removing the residue, rinse the door surface with clean water to remove any cleaning solution or remaining residue. Finally, dry the area thoroughly to prepare it for the installation of the new door seal.
By following these steps and tips, you can safely remove the old door seal and ensure a clean and smooth surface for installing the new seal. Taking the time to properly remove the old seal and clean any residue will result in a more secure and efficient installation process.
Choosing The Right Md Top And Sides Door Seal
When it comes to installing a door seal, it is crucial to choose the right one to ensure maximum performance and protection. The MD top and sides door seal is a popular choice for many homeowners due to its effectiveness in preventing drafts, moisture, and noise from entering your home. However, with so many options available, it can be overwhelming to decide which door seal is best suited for your needs. In this section, we will explore the factors to consider when selecting the appropriate MD top and sides door seal, as well as the different types available.
Factors to consider when selecting the appropriate door seal
Before purchasing an MD top and sides door seal, there are a few important factors to keep in mind. These factors will help determine the best seal for your specific door:
- Door Type: Consider the type of door you have. Is it a wooden door, metal door, or glass door? Different materials may require different types of door seals.
- Climate: Think about the climate you live in. Is your area prone to extreme temperatures or high levels of humidity? This will help you choose a door seal that is durable and resistant to weather conditions.
- Level of Protection: Determine the level of protection you need. Are you looking for a door seal that focuses on noise reduction, energy efficiency, or both? This will guide you towards the right type of seal for your specific requirements.
- Installation Process: Consider your capabilities and available tools. Some door seals require professional installation, while others can be easily installed as a DIY project.
Understanding the different types of MD top and sides door seals available
Now that you understand the factors to consider, it’s important to familiarize yourself with the different types of MD top and sides door seals available:
| Door Seal Type | Description |
|---|---|
| Weatherstripping | A popular choice for energy efficiency, weatherstripping is made of durable materials and provides a tight seal to prevent drafts and energy loss. |
| Door Sweeps | Door sweeps are installed on the bottom of the door to prevent drafts, dust, and insects from entering your home. They come in various materials and sizes to fit different doors. |
| Thresholds | Thresholds are installed at the bottom of the door frame to seal the gap between the door and the floor. They provide protection against drafts, water, and pests. |
By understanding the different types of MD top and sides door seals available and considering the factors discussed above, you can confidently choose the right door seal for your home. Proper installation of the seal will not only enhance the comfort of your living space but also save energy and reduce noise levels.
Step-By-Step Installation Guide
Properly installing a door seal is essential for maintaining energy efficiency and preventing drafts in your home. Follow this step-by-step installation guide for installing an MD top and sides door seal to ensure a proper fit and seal. By taking the time to accurately clean and prepare the door surface, apply adhesive correctly, align and secure the seal, and make final adjustments, you can ensure a hassle-free installation process.
Cleaning and preparing the door surface
To start the installation process, you’ll need to thoroughly clean and prepare the door surface. This ensures that the adhesive sticks well and provides a strong bond. Here’s how:
- Use a mild detergent or cleaner to remove any dirt, dust, or debris from the door surface. Wipe it clean using a soft cloth or sponge.
- Dry the surface thoroughly to remove any moisture or residue.
- If necessary, use sandpaper to smooth out any rough areas or imperfections on the door surface.
Applying adhesive to the door seal
Once the door surface is clean and dry, the next step is to apply adhesive to the door seal. This ensures a secure and long-lasting bond. Here’s what you need to do:
- Measure the length of the door seal and cut it to size if needed.
- Apply a continuous bead of adhesive along the back of the door seal. Make sure to evenly distribute the adhesive to ensure a strong bond.
- Allow the adhesive to set according to the manufacturer’s instructions.
Aligning and securing the door seal in place
With the adhesive applied, it’s time to align and secure the door seal in place. This step ensures that the seal creates an airtight barrier. Follow these steps:
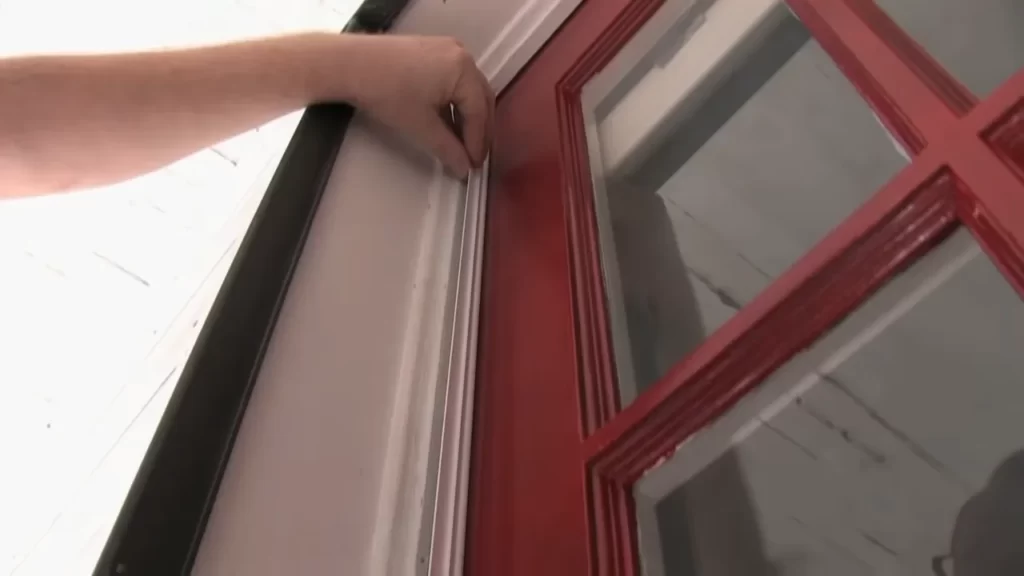
- Starting at either the top or side of the door, gently press the adhesive side of the seal onto the door surface.
- Slowly and carefully align the seal along the edge of the door, making sure it follows the contours and angles of the door.
- Press firmly along the entire length of the seal to ensure a secure bond with the door surface.
- Repeat the process for the remaining sides of the door, making adjustments as needed.
Double-checking the seal’s alignment and presence of gaps
After securing the door seal, it’s crucial to double-check its alignment and ensure there are no gaps. This prevents air leaks and maximizes insulation. Here’s what to do:
- Inspect the seal for any misalignment or gaps along the edges of the door. Use your fingers to press down and adjust as necessary.
- Carefully close the door and check for any light leaks. If you notice any gaps, readjust the seal or trim it if needed.
Final adjustments for a proper fit
Before completing the installation, make any final adjustments to ensure a proper fit. This step ensures the door seal is fully functional and effective. Follow these final steps:
- Check the door’s movement and ensure it opens and closes smoothly without any obstructions or sticking.
- Verify that the seal is properly aligned and not interfering with the door’s closing mechanism.
- If necessary, make additional adjustments to the seal’s position or trim any excess length for a clean and professional appearance.
By following these step-by-step instructions, you can confidently install an MD top and sides door seal with ease. Remember, a properly installed door seal improves energy efficiency, reduces drafts, and enhances the comfort of your home.
Troubleshooting Common Installation Issues
While installing an MD top and sides door seal, it’s important to ensure a proper and secure fit. However, like any installation process, issues may arise. In this section, we will explore common installation issues that could occur and how to troubleshoot them effectively. By addressing these problems promptly, you can ensure a successful installation and enjoy the benefits of a well-sealed door.
Identifying and resolving adhesive-related problems
Adhesive plays a vital role in securing the MD top and sides door seal in place. If you encounter any adhesive-related problems during installation, it’s crucial to resolve them promptly. Here are some common issues you might face and their troubleshooting solutions:
- Adhesive not sticking properly: If you notice that the adhesive is not sticking properly to either the door or the seal, it could be due to dust, oil, or other contaminants on the surface. Clean the surfaces thoroughly using a mild detergent and ensure they are completely dry before reapplying the adhesive.
- Excessive adhesive residue: If you find that there is leftover adhesive residue after the installation, it could be due to the excess use of adhesive. This can be easily resolved by carefully removing the excess residue using a clean cloth or a solvent suitable for the adhesive used.
- Incorrect adhesive selection: Using the wrong type of adhesive can also lead to installation issues. Make sure to choose an adhesive that is specifically recommended for the MD top and sides door seal and follow the manufacturer’s instructions for application.
Dealing with uneven or misaligned door seals
Proper alignment and even placement of the door seal are essential for ensuring its effectiveness. If you encounter any issues with uneven or misaligned door seals, here’s how you can troubleshoot them:
- Inspect for misalignment: Check if the door seal is properly aligned along the top and sides of the door. If you notice any areas where the seal is crooked or uneven, gently remove it and readjust its position.
- Realign and secure: Once you’ve identified any misaligned sections, carefully realign the seal to ensure it fits snugly against the door. Secure it in place using the adhesive, making sure to apply pressure uniformly along the entire length for a secure bond.
- Trimming excess seal: In some cases, if the seal is too long or overlaps significantly, it can cause misalignment. Use a sharp utility knife or scissors to trim the excess length carefully, ensuring a clean and straight cut.
Fixes for gaps or air leaks in the installed seal
While installing the MD top and sides door seal, it’s important to ensure that there are no gaps or air leaks that could compromise its effectiveness. Here are some troubleshooting steps to address these issues:
- Inspect for gaps: Thoroughly examine the installed seal for any visible gaps or areas where it is not properly sealed against the door. These gaps can allow air to leak through, reducing the seal’s efficiency.
- Reapply adhesive: If you find any gaps, carefully remove the seal and apply additional adhesive to the problem areas. Make sure to follow the manufacturer’s instructions for applying the adhesive and press the seal firmly against the door to ensure a tight and secure seal.
- Consider supplemental weatherstripping: In cases where the gaps are too significant or cannot be adequately sealed with the MD top and sides door seal alone, consider using supplemental weatherstripping materials, such as foam tape or door sweeps, to further enhance the seal and prevent air leaks.
By troubleshooting and addressing common installation issues promptly, you can ensure a well-sealed and efficient door. Following the proper installation techniques and taking the time to resolve any problems that arise will help you achieve optimal results with your MD top and sides door seal installation.
Maintenance And Longevity Of The Door Seal
The installation of an MD top and sides door seal is essential for keeping your home energy-efficient and protected from outdoor elements. However, proper maintenance of the door seal is equally important to ensure its longevity and effectiveness. By following a few simple tips and practicing regular inspection and maintenance, you can increase the lifespan of your door seal and enjoy its benefits for years to come.
Tips to increase the lifespan of your door seal
- Inspect the door seal regularly: Regular inspections can help you identify any signs of wear or damage to the door seal. Check for cracks, gaps, or any areas where the seal may have become loose or detached. By detecting these issues early on, you can take necessary measures to repair or replace the seal before further damage occurs.
- Keep the door seal clean: Dirt, dust, and debris can accumulate on the door seal over time, affecting its performance. Regularly clean the seal using a mild detergent, warm water, and a soft cloth. Avoid using abrasive cleaners or brushes, as they can damage the seal. Keeping the seal clean will help maintain its flexibility and prevent any blockage or obstruction.
- Seal any gaps or cracks: If you notice any small gaps or cracks in the door seal, it is important to seal them promptly. You can use a silicone-based caulk or weather-stripping adhesive to fill in these gaps and reinforce the seal’s effectiveness. This will prevent any air or moisture leaks, improving the overall energy efficiency of your home.
- Protect the door seal from extreme temperatures: Exposure to extreme heat or cold can damage the door seal over time. If possible, avoid placing your door in direct sunlight or areas with extreme temperature changes. Consider installing curtains, blinds, or shades to provide additional protection from the elements.
- Consider applying a sealant: To enhance the durability and longevity of your door seal, you may opt to apply a sealant. There are various products available specifically designed to protect door seals from UV rays, moisture, and weathering. Consult a professional or follow the manufacturer’s instructions to ensure proper application.
By following these simple tips and practicing regular inspection and maintenance, you can extend the lifespan of your MD top and sides door seal. Taking proactive measures to care for your door seal will not only help you save energy and reduce utility bills but also contribute to the overall comfort and security of your home.
Testing The Effectiveness Of The Installed Door Seal
Methods to Determine the Door Seal’s Efficiency
After installing the MD Top and Sides Door Seal, it’s crucial to test its effectiveness in sealing your door’s gaps and preventing energy leakage. By conducting a simple energy efficiency audit, you can evaluate how well the door seal performs and identify any potential areas for improvement. Here are some methods to help you determine the door seal’s efficiency:
1. Visual Inspection:
Start by visually inspecting the installed door seal. Look for any visible gaps or openings around the edges of the door. These can allow air drafts and energy leaks, compromising the seal’s effectiveness. If you notice any gaps, consider adjusting or replacing the door seal accordingly.
2. Smoke Test:
A smoke test can help identify any hidden leaks that may not be visible to the naked eye. Light a small incense stick or match and move it slowly around the edges of the door while it’s closed. Observe if the smoke wavers or gets pulled towards the door. If there is a noticeable movement of smoke, it indicates that the door seal might not be completely sealing the gaps.
3. Hand Test:
Using your hand, feel for air drafts around the door when it’s closed. Move your hand along the edges, top, and bottom of the door, paying attention to any variations in temperature or airflow. If you feel cold air entering or warm air escaping, it suggests that the door seal may not be effectively insulating the space.
4. Light Test:
A simple way to check the door seal’s effectiveness is by performing a light test. Close the door and turn off all lights in the room. Stand inside the room and scan the edges of the closed door for any visible light seeping through. If you notice any light leakage, it indicates that the seal may need to be adjusted or reinforced to provide better insulation.
5. Energy Usage Comparison:
Another method to determine the efficiency of the installed door seal is by comparing your energy usage before and after installation. Monitor your energy bills and track any changes in consumption. If you observe a decrease in energy usage or a reduction in heating or cooling costs, it signifies that the door seal is helping to improve energy efficiency.
By employing these methods, you can effectively assess the performance of the MD Top and Sides Door Seal and ensure that it is providing optimal insulation and energy efficiency for your home.
Frequently Asked Questions Of How To Install Md Top And Sides Door Seal
How Do You Seal A Gap At The Top And Sides Of A Door?
To seal a gap at the top and sides of a door, you can use weatherstripping or a door sweep. Apply weatherstripping along the sides and top of the door frame to prevent air leakage. Alternatively, attach a door sweep to the bottom of the door to create a seal against drafts.
How Do You Install An Exterior Door Seal?
To install an exterior door seal, begin by measuring the length needed, remove any existing seal, clean the surface, and cut the seal to fit. Apply adhesive to the seal and press it firmly onto the door, making sure it is centered and secure.
How Do You Seal The Sides Of A Garage Door?
To seal the sides of a garage door, you can use weatherstripping. It is a cost-effective solution to prevent drafts and keep out pests and debris. Simply measure the sides of the door, cut the weatherstripping to fit, and attach it to the door frame.
How Do You Install Exterior Door Corner Seals?
To install exterior door corner seals, follow these steps: 1. Measure the length needed for the seal and cut it accordingly. 2. Clean the area where the seal will be attached. 3. Apply adhesive on the door frame and press the seal firmly into place.
4. Repeat the process for all corners of the door. 5. Allow the adhesive to dry for the recommended time before using the door.
How Do I Install Md Top And Sides Door Seal Correctly?
To install Md Top And Sides Door Seal correctly, start by cleaning the surface and measuring the length needed. Then apply the seal using adhesive and let it dry. Follow the manufacturer’s instructions for best results.
What Tools Do I Need To Install Md Top And Sides Door Seal?
To install Md Top And Sides Door Seal, you will need a measuring tape, a utility knife, adhesive, and a caulking gun.
Conclusion
Installing the MD top and sides door seal is a simple and effective way to improve the energy efficiency and security of your home. By following the step-by-step instructions provided in this guide, you can easily protect your home from drafts, noise, and unwanted pests.
With the MD top and sides door seal, you can create a more comfortable and energy-saving environment for you and your family. Don’t wait any longer, start installing the MD top and sides door seal today and enjoy the benefits it brings to your home.