To install a Nest Doorbell, first, make sure you have a compatible doorbell wiring, then follow the manufacturer’s instructions for installation. Welcome to the world of smart home technology!
If you’re looking to enhance your home security, installing the Nest Doorbell can be a great first step. With its sleek design and advanced features, this smart doorbell allows you to monitor your front door and receive alerts directly to your smartphone.
However, before you get started, make sure you have a compatible doorbell wiring in place. Once you’ve confirmed compatibility, the installation process is straightforward and can be done by following the manufacturer’s instructions. In this guide, we will outline the necessary steps to help you successfully install your Nest Doorbell. So, let’s dive in and get your doorbell up and running!
Choosing The Right Location
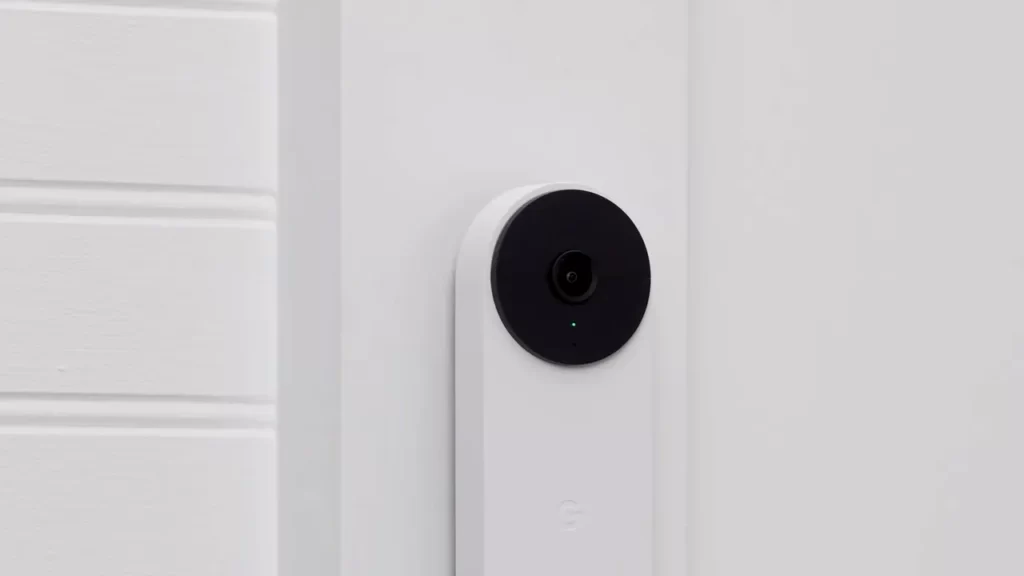
When it comes to installing your Nest Doorbell, one of the most crucial decisions you’ll need to make is choosing the right location. The placement can greatly impact the performance and functionality of your doorbell. To help you with this important decision, here are a few factors to consider.
Factors to consider for optimal placement
Before finalizing the location for your Nest Doorbell, there are a few key factors you should take into account. These factors will help ensure that you optimize the performance and functionality of your doorbell.
Wi-Fi signal strength
Evaluating your Wi-Fi signal strength is a critical step when choosing the location for your Nest Doorbell. Since the doorbell needs a stable and strong connection to communicate with your devices, it’s important to select a spot where the Wi-Fi signal is strong. Consider areas in your home where the signal is typically high, avoiding spots with potential obstructions like thick walls or metallic surfaces.
Accessibility for visitors
Accessibility is another factor that should be taken into consideration. You want to ensure that your doorbell is easily visible and accessible for your visitors. It should be installed at a height that allows everyone, including children and individuals with disabilities, to easily reach and interact with the doorbell. A location near the entrance, at eye level, is usually a good choice.
Camera’s field of view
The field of view of your Nest Doorbell’s camera is crucial for capturing a clear and comprehensive view of your doorstep and surrounding areas. To maximize the effectiveness of the camera, choose a location that offers the widest possible field of view. This will help you monitor and capture any activity or visitors approaching your home. Evaluate the potential blind spots and adjust the angle accordingly to ensure optimal coverage.
By carefully considering these factors, you can ensure that your Nest Doorbell is installed in the best possible location to provide optimal performance, accessibility, and security for your home.
Gathering The Necessary Tools And Material
Before you begin installing your Nest Doorbell, it’s important to gather all the necessary tools and materials. This will ensure a smooth and efficient installation process, allowing you to enjoy the benefits of your new doorbell in no time.
Tools you’ll need for the installation
Here are the essential tools you’ll need to have on-hand:
- A screwdriver
- A drill
- A level
Having these tools ready will make the installation process much easier. A screwdriver will come in handy when attaching the mounting bracket, while a drill will be useful for drilling holes if necessary. And don’t forget the level to ensure that your Nest Doorbell is perfectly straight and aligned.
Materials required
In addition to the tools, you’ll also need the following materials:
- A mounting bracket
- Mounting screws
- Wiring, if required
The mounting bracket is essential as it provides a secure base for your Nest Doorbell. Make sure you have the correct bracket that fits your doorframe. Additionally, you’ll need mounting screws to secure the bracket in place.
If your Nest Doorbell requires wiring, ensure you have the necessary wiring materials. This may include low-voltage wires and connectors. Familiarize yourself with your doorbell’s wiring requirements before starting the installation process.
By gathering all the necessary tools and materials beforehand, you’re setting yourself up for a successful installation. With everything in place, you’ll be ready to move on to the next step and enjoy the convenience and security that comes with your Nest Doorbell.
Preparing The Doorbell And Mounting Bracket
Before you can start enjoying the convenience and security of your Nest Doorbell, it’s important to properly prepare the doorbell and mounting bracket. This crucial step ensures a secure and level installation that will last for years to come. In this guide, we’ll walk you through the process of removing the existing doorbell, attaching the mounting bracket to the wall, and ensuring everything is level and secure.
Removing the existing doorbell
The first step in installing your Nest Doorbell is to remove any existing doorbell that may be in place. This is a simple process that requires a few basic tools:
- A screwdriver
- A drill (if necessary)
Start by locating the screws that hold the existing doorbell in place. Use the screwdriver to carefully remove these screws and gently detach the doorbell from the wall. If there are any wires connected to the doorbell, be sure to disconnect them carefully, noting their placement for future reference.
Attaching the mounting bracket to the wall
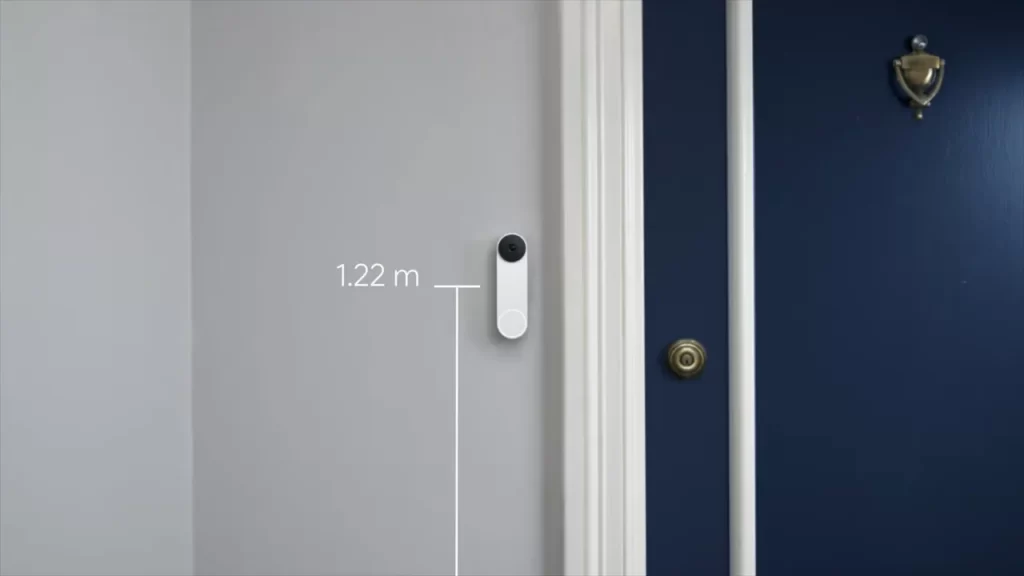
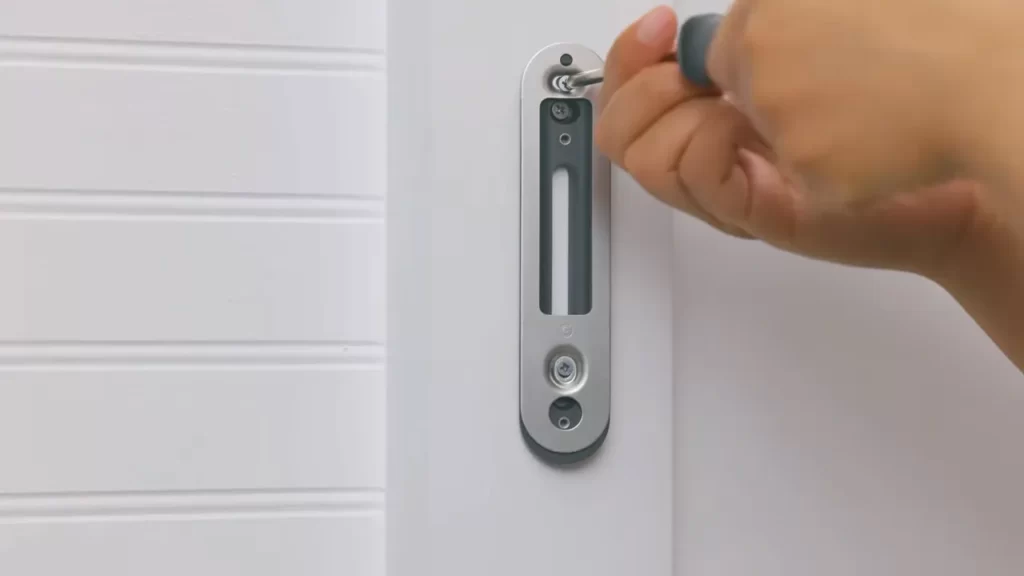
With the existing doorbell removed, it’s time to attach the mounting bracket for your Nest Doorbell. Follow these steps:
- Hold the mounting bracket against the wall where you want to install your doorbell.
- Using a pencil or marker, mark the position of the screw holes on the wall.
- If necessary, use a drill to create pilot holes for the screws.
- Align the bracket with the pilot holes and secure it in place using the screws provided with your Nest Doorbell.
- Ensure the bracket is tightly secured to the wall and flush against the surface.
It’s important to note that the mounting bracket should be installed at a height that allows for optimal field of view while ensuring the doorbell is easily accessible.
Ensuring it is level and secure
Once the mounting bracket is attached to the wall, it’s crucial to ensure it is level and secure before proceeding with the installation of the Nest Doorbell. Follow these steps:
- Use a level to check that the bracket is horizontal.
- Make any necessary adjustments to ensure the bracket is level.
- Tighten the screws on the bracket to securely fasten it to the wall.
By taking these steps, you can ensure that your Nest Doorbell will be properly mounted and provide the best possible performance.
Wiring And Power Setup
Installing a Nest Doorbell requires proper wiring and power setup to ensure the device functions efficiently. In this section, we will guide you through the necessary steps to check the doorbell voltage compatibility, connect the doorbell to the existing wiring, and power it up.
Checking the doorbell voltage compatibility
Before connecting your Nest Doorbell to the existing wiring, it is crucial to check the doorbell voltage compatibility. This ensures that your doorbell receives the appropriate power supply without any issues. Follow these steps:
- Start by turning off the power to your existing doorbell at the circuit breaker.
- Remove the cover of your current doorbell unit to expose the wiring.
- Use a voltage tester to measure the voltage of the existing wiring. Nest Doorbell requires a voltage between 16V and 24V for optimal performance.
- If the voltage falls within the compatible range, you are good to go. However, if the voltage is lower or higher, you may need to install a transformer for proper voltage conversion. Consult an electrician for assistance in this case.
Connecting the doorbell to the existing wiring
Once you have verified that the doorbell voltage is compatible, it’s time to connect your Nest Doorbell to the existing wiring. Follow these steps:
- Make sure the power to the existing doorbell is still turned off.
- Connect the two wires from the Nest Doorbell to the corresponding terminals on your existing doorbell unit. The doorbell wires are typically color-coded, with the red wire connecting to the “Front” terminal and the white wire to the “Transformer” or “Rear” terminal.
- Tighten the screws on the terminals to secure the wires in place.
Powering up the doorbell
After successfully connecting the Nest Doorbell to the existing wiring, it’s time to power it up. Follow these steps:
- Turn the power back on at the circuit breaker.
- Wait for the Nest Doorbell to boot up. This process may take a few moments.
- Once the doorbell is powered up, download the Nest app on your smartphone and follow the on-screen instructions to complete the setup process.
By following these steps, you can easily wire and power up your Nest Doorbell, ensuring it functions seamlessly and provides you with the convenience of a smart doorbell system.
Connecting The Doorbell To Your Smartphone
Downloading and installing the Nest app
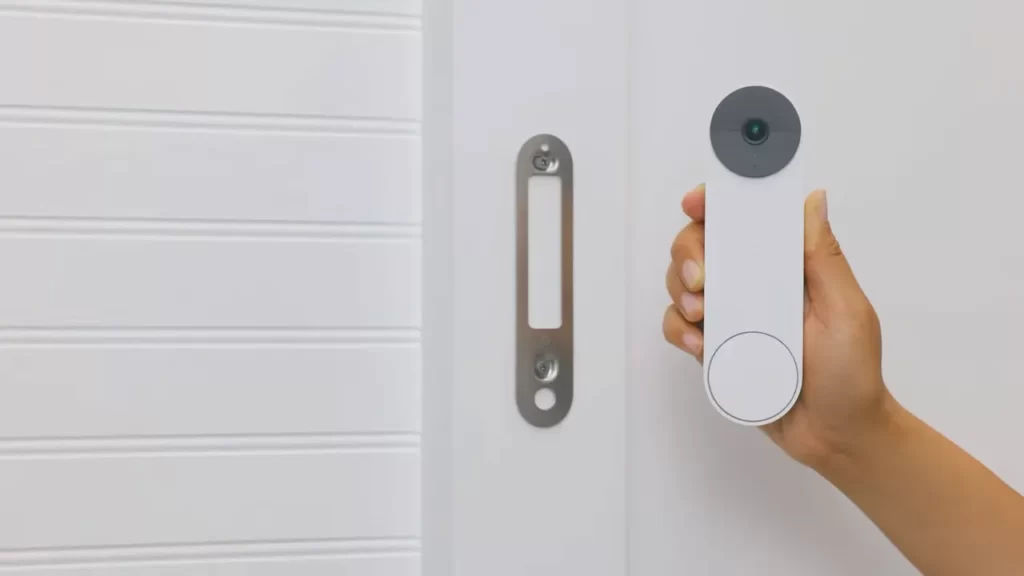
To connect your Nest Doorbell to your smartphone, you’ll first need to download and install the Nest app. The Nest app is available on both iOS and Android devices, making it compatible with most smartphones and tablets. Here’s how you can get started:
- Open the App Store or Google Play Store on your device.
- Search for the Nest app.
- Tap on the “Install” or “Get” button, and wait for the app to download and install on your device.
Once the Nest app is installed, you’re ready to move on to the next step!
Connecting the doorbell to your Wi-Fi network
Now that you have the Nest app installed on your smartphone, it’s time to connect your doorbell to your Wi-Fi network. Follow these steps to ensure a seamless connection:
- Launch the Nest app on your smartphone.
- Tap on the “Add” or “+” button to begin adding a device.
- Select “Nest Doorbell” from the list of available devices.
- Follow the on-screen instructions to connect your doorbell to your Wi-Fi network.
- Be sure to enter your Wi-Fi network’s name and password correctly. Double-check for any typos or errors.
- Wait for the app to confirm that your doorbell is successfully connected to your Wi-Fi network.
Congratulations! Your Nest Doorbell is now connected to your Wi-Fi network.
Setting up notifications and alerts
With your Nest Doorbell connected to your smartphone, you’ll be able to receive notifications and alerts whenever someone rings your doorbell or when motion is detected near your front door. To set up notifications and alerts, follow these simple steps:
- Open the Nest app on your smartphone.
- Navigate to the settings menu, usually represented by a gear icon.
- Look for the “Notifications” or “Alerts” section.
- Toggle on the notifications or alerts for doorbell rings and motion detection, depending on your preferences.
- You may also have the option to customize the type of notifications you receive, such as sound or vibration.
- Once you’ve made your selections, save the changes, and you’re all set!
Now, whenever someone rings your Nest Doorbell or motion is detected near your front door, you’ll receive a notification on your smartphone, ensuring that you never miss a visitor or important activity outside your home. It’s that easy!
Adjusting The Nest Doorbell’S Settings
Welcome to the second part of our guide on how to install the Nest Doorbell. In this section, we will walk you through adjusting the Nest Doorbell’s settings to customize your experience and ensure optimal performance. By fine-tuning features like motion detection zones, sensitivity, night vision, and HDR, you can tailor the doorbell’s functionality to meet your specific needs. Let’s dive in!
Customizing motion detection zones
One of the great features of the Nest Doorbell is the ability to customize motion detection zones. This allows you to focus on the areas that matter most to you and avoid unnecessary notifications. To configure the motion detection zones, follow these steps:
- Launch the Nest app on your smartphone or tablet.
- Select your Nest Doorbell from the list of devices.
- Tap on “Settings” and then choose “Motion settings”.
- In the motion detection settings, you can drag your finger on the screen to define the specific areas you want the Nest Doorbell to monitor.
- Once you’re satisfied with the customization, tap on “Save” to apply the changes.
By customizing the motion detection zones, you can ensure that you only receive notifications when activity occurs in the areas that are most important to you.
Adjusting motion sensitivity
The Nest Doorbell allows you to fine-tune its motion sensitivity level, so you can strike the perfect balance between capturing important events and avoiding false alerts. Here’s how you can adjust the motion sensitivity:
- Launch the Nest app on your smartphone or tablet.
- Select your Nest Doorbell from the list of devices.
- Tap on “Settings” and then choose “Motion settings”.
- Slide the sensitivity bar to the right to increase sensitivity or to the left to decrease sensitivity.
- Tap on “Save” to apply the changes.
By adjusting the motion sensitivity, you can ensure that the Nest Doorbell captures the events that matter to you without being triggered by every little movement.
Enabling night vision and HDR
The Nest Doorbell is equipped with advanced night vision and HDR (High Dynamic Range) technology, allowing you to capture clear and detailed footage even in low-light conditions. To enable these features:
- Launch the Nest app on your smartphone or tablet.
- Select your Nest Doorbell from the list of devices.
- Tap on “Settings” and then choose “Video settings”.
- Toggle the night vision and HDR switches to the “On” position.
- Tap on “Save” to apply the changes.
By enabling night vision and HDR, you can ensure that your Nest Doorbell delivers high-quality footage regardless of the lighting conditions surrounding your doorstep.
Now that you’ve successfully adjusted the Nest Doorbell’s settings, you can feel confident in its ability to deliver personalized notifications, capture important events, and provide clear visuals day or night.
Troubleshooting Common Installation Issues
If you are experiencing any issues while installing your Nest Doorbell, don’t worry. This troubleshooting guide will help you resolve the most common problems encountered during the installation process. Whether you are facing issues with Wi-Fi connectivity, problems with the doorbell’s power supply, or debugging audio and video quality, we have got you covered.
Issues with Wi-Fi Connectivity
If you are unable to connect your Nest Doorbell to your Wi-Fi network, there are a few things you can try:
- Ensure that your Wi-Fi network is working properly and your internet connection is stable.
- Check if the doorbell is within range of your Wi-Fi router. If it is too far away, consider repositioning your router or using a Wi-Fi extender.
- Make sure that the Wi-Fi network you are trying to connect to is not hidden. Nest Doorbell requires a visible network.
Problems with the Doorbell’s Power Supply
If your Nest Doorbell is not receiving power or is experiencing intermittent power supply, consider the following:
- Check if the doorbell’s wiring is properly connected. Ensure that all connections are secure and there are no loose wires.
- Verify if your current doorbell transformer is compatible with the Nest Doorbell. It requires a voltage output of 16V AC to 24V AC.
- If your doorbell wiring does not provide sufficient power, you may need to upgrade your transformer or use a power adapter.
Debugging Audio and Video Quality
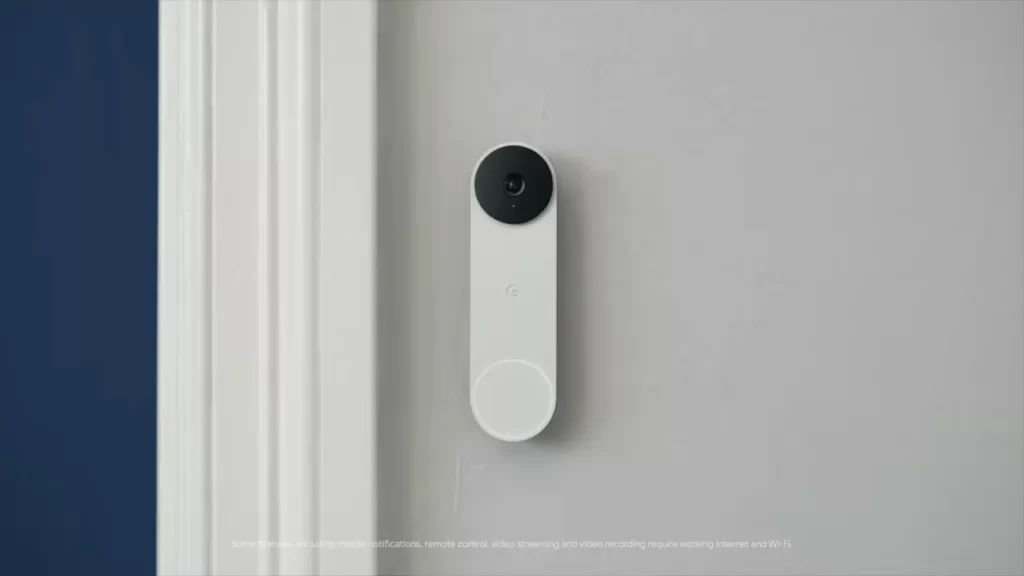
If you are experiencing issues with the audio quality or video streaming of your Nest Doorbell, try the following:
- Check your internet speed. Slow internet connection can affect the audio and video quality.
- Ensure that there are no obstructions around the doorbell that may affect the signal strength.
- If the audio is not clear, make sure that the microphone on the Nest Doorbell is not blocked or covered.
- For video issues, verify if the lens of the camera is clean and free from any dirt or smudges.
Finalizing The Installation
After successfully mounting your Nest Doorbell and connecting it to the power source, you’re almost ready to enjoy the full functionality of your new smart doorbell. In this section, we will guide you through the final steps of the installation process, ensuring the doorbell is fully operational and tamper-proof, and provide some tips for optimal performance.
Testing the doorbell functionality
To make sure your Nest Doorbell is functioning properly, follow these simple steps:
- Press the doorbell button and check if the chime inside your home rings.
- If an existing chime is not present or not working, ensure you’ve followed the necessary steps to set up the chime connector, as mentioned in the installation guide.
- Download the Nest app on your smartphone and connect it to your Nest Doorbell. Use the app to test the live video feed from your doorbell.
- Check the microphone and speaker functionality by having a conversation with someone at your door through the app.
- Make sure you receive motion alerts and notifications on your smartphone when someone is at your door. Adjust the sensitivity settings in the Nest app if necessary.
Securing the doorbell with tamper-proof features
To ensure the security of your Nest Doorbell and prevent any unauthorized tampering, follow these recommendations:
- Ensure that the doorbell is securely fastened to the wall or door frame using the screws provided in the package.
- Consider using a lockable security screw to deter unauthorized removal of the doorbell.
- Enable tamper detection feature in the Nest app, which will send you an alert if the doorbell is tampered with or removed.
- Position the doorbell at a height that is not easily reachable to avoid tampering attempts.
Final tips for optimal performance
To get the most out of your Nest Doorbell and ensure optimal performance, keep these tips in mind:
- Ensure a stable Wi-Fi connection by placing your Wi-Fi router in close proximity to the doorbell or using a Wi-Fi range extender if needed.
- Regularly clean the doorbell lens using a soft cloth to prevent dust or debris from obstructing the camera’s view.
- Consider installing a wedge kit or angle mount if you need to adjust the camera’s viewing angle.
- Periodically check for software updates in the Nest app and install them to benefit from the latest features and improvements.
- If you experience any issues, refer to the troubleshooting section in the Nest app or visit the Nest support website for further assistance.
By following these final steps, your Nest Doorbell installation will be complete, and you can now confidently enjoy the convenience and security that comes with this smart home device.
Frequently Asked Questions Of How To Install Nest Doorbell
Can I Install A Nest Doorbell Myself?
Yes, you can install a Nest doorbell yourself. Just follow the included instructions and use the Nest app for guidance. No professional assistance is required, making it a simple and convenient DIY project.
How Do I Install A Nest Wireless Doorbell?
To install a Nest wireless doorbell, follow these steps: 1. Download the Nest app and create an account. 2. Open the app and select “Add Product” to scan the doorbell’s QR code. 3. Follow the on-screen instructions to connect the doorbell to your Wi-Fi network.
4. Choose a location and use the provided screws to mount the doorbell securely. 5. Test the doorbell to ensure it’s working properly.
Do You Need An Electrician To Install A Nest Doorbell?
No, an electrician is not necessary for installing a Nest doorbell. Instructions provided by Nest make it easy for homeowners to install the doorbell themselves.
How Do You Install A Nest Doorbell If You Don’T Have A Doorbell?
To install a Nest doorbell without an existing doorbell, you’ll need to connect it directly to your home’s electrical system. Follow the provided instructions carefully to install a power adapter in your home’s existing doorbell transformer. Once connected, you can proceed with the installation as normal.
Conclusion
Installing a Nest Doorbell is a simple and efficient way to enhance your home security. By following the step-by-step instructions outlined in this blog post, you can easily set up your Nest Doorbell and start enjoying the benefits it has to offer.
From improved monitoring to convenient recording features, the Nest Doorbell provides peace of mind and added protection to your home. Take the leap and install your Nest Doorbell today!
