To install Nest Doorbell, follow these steps: download the Nest app, create an account, add the doorbell, connect it to your Wi-Fi, and mount it on your desired location. Nest Doorbell installation is a simple process that can be completed in a few easy steps.
With the Nest app, users can set up their doorbell quickly and conveniently. Once installed, the Nest Doorbell provides enhanced security and convenience, allowing homeowners to see who is at the door and communicate with visitors remotely. We will guide you through the step-by-step process of installing and setting up your Nest Doorbell.
So, let’s get started!
Preparing For Installation
Before you jump into the installation process of your Nest Doorbell, it’s crucial to make sure you are adequately prepared. This will help you avoid any last-minute hiccups and ensure a smooth installation experience. In this section, we will cover the essential steps you need to take before getting started.
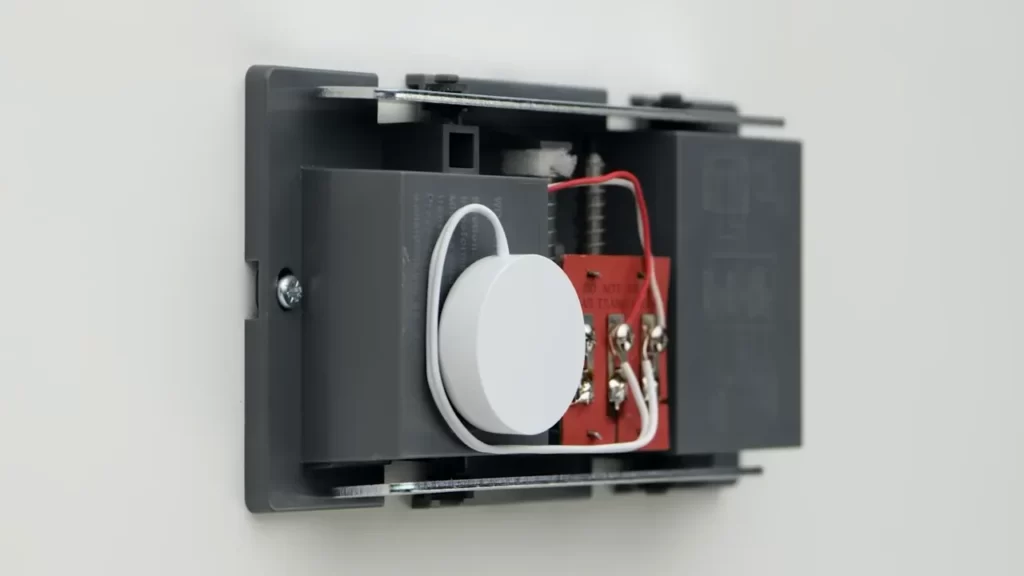
Checking system compatibility
Before you begin the installation process, it’s important to verify that your current system is compatible with the Nest Doorbell. This will save you from any future complications or disappointments. Here’s how you can do it:
- Check your current doorbell wiring: Ensure that you have a compatible low-voltage wired doorbell or transformer. If you have any doubts, you can consult the Nest Doorbell’s compatibility guide for more information.
- Check your Wi-Fi network: Since the Nest Doorbell requires a stable internet connection, make sure you have a strong Wi-Fi network available near your doorbell installation location.
Gathering necessary tools and equipment
Now that you have confirmed your system’s compatibility, it’s time to gather the necessary tools and equipment for the installation process. Here’s a list of what you will need:
| A screwdriver |
| A level |
| Mounting plate and anchors |
| Safety goggles and gloves |
Setting up Nest account and connecting doorbell to Wi-Fi
Before you can start using your Nest Doorbell, you need to create a Nest account and connect the doorbell to your Wi-Fi network. Follow these steps:
- Download the Nest app: Install the Nest app on your smartphone or tablet from the App Store or Google Play Store.
- Create a Nest account: Open the Nest app and create a new account if you don’t have one already. If you have an existing account, simply log in.
- Add your doorbell to the app: Follow the on-screen instructions in the app to add your Nest Doorbell to your account and connect it to your Wi-Fi network.
- Test the connection: Once the setup is complete, verify that your doorbell is successfully connected to your Wi-Fi by testing its functionality through the Nest app.
By following these steps and ensuring that you have checked system compatibility, gathered the necessary tools, and set up your Nest account, you are now ready to proceed with the installation process of your Nest Doorbell. In the next section, we will guide you through the process of physically installing the doorbell.
Mounting The Nest Doorbell
One of the most important steps in installing your Nest Doorbell is mounting it securely. By choosing the right location and correctly attaching the doorbell to the mounting bracket, you can ensure optimal functionality and a clear view of your front door. In this article, we will guide you through the process of mounting your Nest Doorbell step by step.
Choosing the right location for installation
When it comes to choosing the perfect spot for your Nest Doorbell, there are a few things to consider. First and foremost, you need to find a location that provides a clear view of your front doorstep, ensuring the doorbell captures any approaching visitors or packages. Additionally, make sure the area is well-lit and free from obstructions, such as large plants or overhanging structures. This will prevent any obstacles from blocking the camera’s field of view.
Installing the mounting bracket securely
Now that you have identified the ideal location for your Nest Doorbell, it’s time to install the mounting bracket. This bracket serves as the foundation for your doorbell and ensures its stability. To securely install the mounting bracket, follow these steps:
- Using the provided screws and a screwdriver, attach the mounting bracket to the wall or doorframe. Make sure it is level and firmly in place.
- Utilize the included level tool to ensure the bracket is straight. This will help achieve the best possible alignment for the doorbell.
- If you are mounting the bracket onto a brick or stucco surface, you may need to use anchors for added stability. Refer to the manufacturer’s instructions for the appropriate anchoring method.
Attaching the doorbell to the mounting bracket
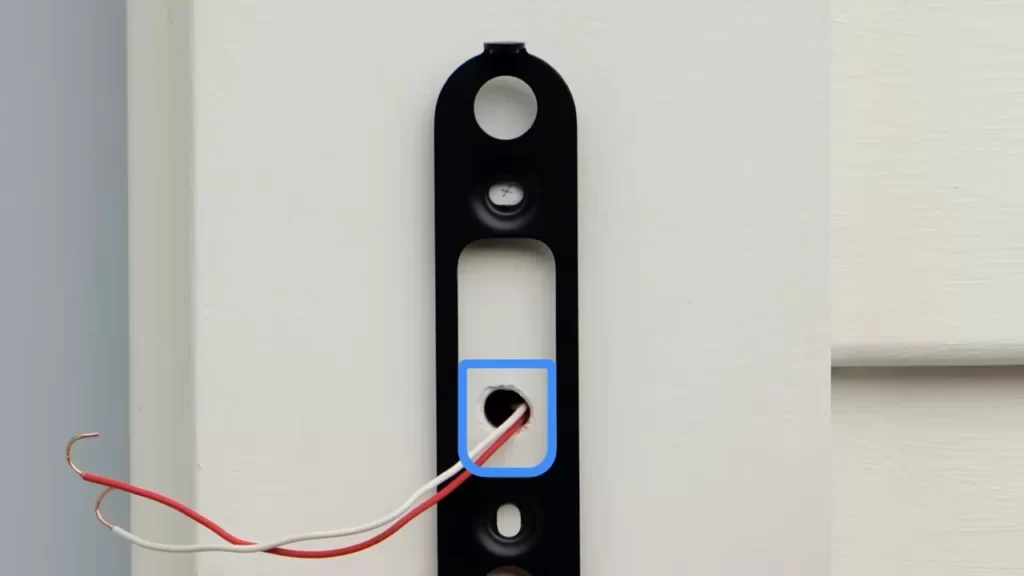
With the mounting bracket securely in place, it’s time to attach the Nest Doorbell itself. Follow these steps for a successful installation:
- Remove the faceplate from the doorbell by pressing the release tab or using a small tool, such as a pin.
- Align the prongs on the back of the doorbell with the corresponding slots on the mounting bracket.
- With a gentle but firm push, snap the doorbell into place, ensuring it is securely attached to the mounting bracket.
- Once attached, test the doorbell by pressing the button to ensure everything is functioning properly.
Congratulations! You have successfully mounted your Nest Doorbell. Now you can enjoy enhanced home security and the convenience of monitoring your front door from anywhere.
Wiring And Power Supply
When it comes to installing the Nest Doorbell, understanding the wiring requirements and power supply options is essential. Properly wiring and configuring the power supply ensures that your doorbell functions smoothly and reliably. In this guide, we will walk you through the necessary steps to connect your Nest Doorbell to the existing wiring or configure power options for battery-powered doorbells. Let’s dive in!
Understanding the wiring requirements
Before we get started, let’s first acquaint ourselves with the wiring requirements for the Nest Doorbell. The Nest Doorbell requires either an existing wired doorbell system or a power source to run. If you do not have an existing wired doorbell system, don’t worry! The Nest Doorbell also offers power options for battery-powered installation. Depending on your specific situation, the wiring and power supply process may slightly differ.
Connecting the doorbell to the existing doorbell wiring
If you have an existing wired doorbell system, connecting your Nest Doorbell to the existing wiring is a straightforward process. To begin, first, ensure that the power to your existing doorbell system is switched off for safety. This can usually be done by turning off the breaker associated with the doorbell circuit.
Once the power is off, carefully remove the cover from your existing doorbell to reveal the wiring. Take note of the wires’ colors and their corresponding terminals. Make sure to also take a snapshot for future reference.
Now, let’s connect the Nest Doorbell to the existing wiring. Start by attaching the corresponding wires from your Nest Doorbell to the corresponding terminals on your existing doorbell unit. Typically, the Nest Doorbell will have labels indicating which wires should be attached to which terminals.
After securely connecting the wires, carefully tuck them back into the wall and mount your Nest Doorbell onto the desired location. Lastly, restore power to your doorbell system by turning on the breaker. Your Nest Doorbell should now be powered and ready to use!
Configuring power options for battery-powered doorbells
If you opt for a battery-powered installation, configuring the power options for your Nest Doorbell is equally important. Battery-powered doorbells offer flexibility and can be installed even in locations without existing doorbell wiring, such as apartments or rentals.
To configure power options for battery-powered doorbells, start by removing the cover from your Nest Doorbell to reveal the battery compartment. Insert fresh batteries into the compartment following the polarity indicated.
Depending on your power preference, you can also connect your Nest Doorbell to a power adapter through the micro USB port for continuous power supply. This option is especially useful if you want to avoid battery replacements down the line.
Once you have installed the batteries or connected the doorbell to a power adapter, reattach the cover and securely mount your Nest Doorbell on the desired location. That’s it! Your Nest Doorbell is now ready to provide you with peace of mind and convenient doorbell functionality.
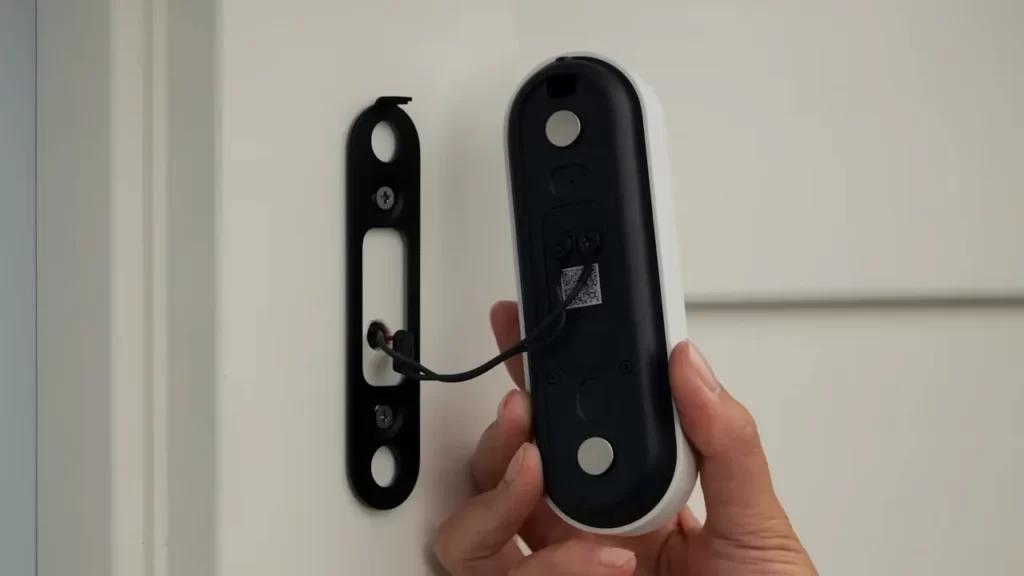
With a solid understanding of the wiring and power supply process for the Nest Doorbell, you are well-equipped to confidently install this smart home device in your own home. Whether you choose to connect it to the existing doorbell wiring or utilize the battery-powered option, the Nest Doorbell is sure to enhance your home’s security and convenience.
Configuring And Testing
Once you have successfully installed your Nest Doorbell, the next step is to configure and test its functionality. Configuring the doorbell involves accessing the Nest app, creating a new home, adding the doorbell to the app, setting up motion detection and notifications, and testing its video quality and functionality.
<h3>Accessing the Nest app and creating a new home</h3>
1. To begin, download and install the Nest app from the App Store or Google Play Store on your smartphone or tablet. 2. Open the Nest app and sign in using your Nest account or create a new account if you don’t have one already. 3. Once logged in, click on the “+” icon in the top left corner of the app to add a new device. 4. Select “Add product” and choose the Nest Doorbell option from the list of available devices. 5. Follow the on-screen instructions to create a new home and provide essential details such as the home’s name and address.
<h3>Adding the Nest Doorbell to the app</h3>
1. After creating a new home, the app will guide you through the process of adding the Nest Doorbell to your home. 2. Ensure that your Nest Doorbell is in setup mode by pressing and releasing the doorbell button until it starts flashing blue. 3. In the Nest app, follow the on-screen instructions to connect the doorbell to your Wi-Fi network. 4. Once connected, the app will prompt you to customize your doorbell’s settings, such as its name and location.
<h3>Setting up motion detection and notifications</h3>
1. To enable motion detection, open the Nest app and select your Nest Doorbell from the home screen. 2. Tap on the gear icon in the top right corner to access the doorbell’s settings. 3. From the settings menu, select “Motion Settings” and adjust the sensitivity and zones according to your preference. 4. To receive notifications for detected motion, make sure the “Motion Alerts” option is toggled on.
<h3>Testing the doorbell’s functionality and video quality</h3>
1. To test the doorbell’s functionality, ring the doorbell or ask someone to ring it for you. 2. You should receive a notification on your smartphone or tablet indicating that someone is at your door. 3. When you tap on the notification, the Nest app will open, and you’ll be able to see a live feed from your Nest Doorbell’s camera. 4. Pay close attention to the video quality, ensuring that the image is clear and the colors are accurate. 5. Additionally, test the doorbell’s two-way audio feature by speaking through your smartphone or tablet and listening for the response through the doorbell’s speaker. By following these steps, you can easily configure and test your Nest Doorbell, ensuring its smooth integration into your home security system.
Troubleshooting Common Issues
Troubleshooting Common Issues
After successfully installing your Nest Doorbell, you may encounter some common issues that can prevent you from getting the best experience out of your device. Don’t worry though, as most of these issues can be easily resolved with a few simple troubleshooting steps. In this section, we will guide you through the process of troubleshooting connectivity problems, addressing audio and video quality issues, as well as fixing motion detection or recording problems.
Dealing with Connectivity Problems
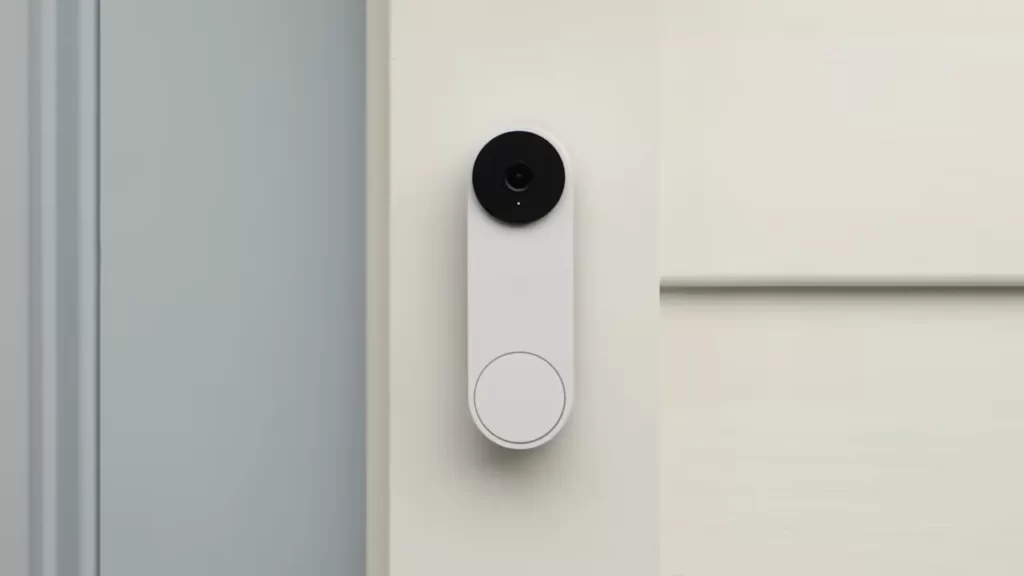
If you’re experiencing connectivity issues with your Nest Doorbell, here are a few steps you can take to resolve the problem:
- Check your Wi-Fi signal and make sure it’s strong enough for the doorbell to connect to.
- Ensure that your Wi-Fi network has sufficient bandwidth to support the streaming of video and audio from the doorbell.
- Try power cycling your Wi-Fi router by unplugging it, waiting for a few seconds, and then plugging it back in.
- Make sure that your doorbell is within the range of your Wi-Fi network and isn’t obstructed by any large objects or walls.
- If none of the above steps work, you may need to reset your Nest Doorbell to factory settings and set it up again from scratch.
Addressing Audio and Video Quality Issues
If you’re encountering issues with the audio or video quality of your Nest Doorbell, try the following troubleshooting steps:
- Ensure that the lens of the doorbell’s camera is clean and free from any dirt or smudges. Use a soft, lint-free cloth to gently clean the lens if necessary.
- Check the Wi-Fi signal strength near the doorbell, as a weak signal can result in poor video quality or audio lag.
- Verify that your internet connection is stable and not experiencing any intermittent disruptions.
- Make sure that your doorbell’s firmware is up to date by checking for any available updates in the Nest app.
- If the issues persist, try moving your Wi-Fi router closer to the doorbell or consider using a Wi-Fi extender to improve signal strength.
Troubleshooting Motion Detection or Recording Problems
If your Nest Doorbell is not detecting motion or recording events properly, follow these troubleshooting steps:
- Check the positioning of your doorbell to ensure that it has a clear view of the area you wish to monitor. Adjust the angle and height if necessary.
- Verify that the motion detection settings in the Nest app are properly configured and set to the desired sensitivity level.
- Make sure that the area you want to monitor is well-lit, as insufficient lighting can impact motion detection capabilities.
- Check if there are any obstructions such as tree branches, plants, or other objects that might interfere with the motion detection sensors. Clear away any potential obstacles.
- If the problem persists, try restarting your Nest Doorbell by disconnecting it from the power source for a few seconds and then reconnecting it.
Enhancing The Nest Doorbell Experience
Installing a Nest Doorbell is just the first step to enhancing your home’s security and convenience. By exploring additional features and settings, integrating with other smart home devices, and maximizing security and convenience with a Nest Aware subscription, you can truly make the most of your Nest Doorbell.
Exploring Additional Features and Settings
Once your Nest Doorbell is successfully installed, it’s time to delve into its array of additional features and settings. These options allow you to customize the doorbell’s functionality to suit your specific needs. To optimize your experience, consider the following:
- Adjusting motion detection sensitivity: Fine-tune your doorbell’s sensitivity to ensure you receive alerts for the events that matter most. Decrease it to avoid unnecessary notifications or increase it to capture more movement.
- Creating activity zones: Define specific areas around your home where the doorbell should focus its detection efforts. This feature is particularly useful if you live in a busy neighborhood or want to avoid capturing movements on the sidewalk.
- Setting up person alerts: Receive notifications when the doorbell detects a person approaching your doorstep, making it easier to differentiate between meaningful events and routine activity.
- Customizing doorbell chimes: Select from an array of different chimes or even upload your own sound to personalize the doorbell’s audible responses.
Integrating with Other Smart Home Devices
The Nest Doorbell seamlessly integrates with various smart home devices, allowing you to create a comprehensive and interconnected ecosystem. By connecting your doorbell with compatible devices, you can enjoy added convenience and control. Here are a few possibilities to explore:
- Smart Locks: Connect your Nest Doorbell with a compatible smart lock to easily grant access to visitors from your phone or receive notifications when someone arrives.
- Smart Lights: Sync your doorbell with smart lights to create visual alerts when the doorbell rings or motion is detected, providing an additional layer of security.
- Voice Assistants: Utilize voice assistants, such as Google Assistant or Amazon Alexa, to command your doorbell hands-free, check the live stream, or ask about recent activity.
Maximizing Security and Convenience with Nest Aware
Subscription
If you truly want to unlock the full potential of your Nest Doorbell, consider subscribing to Nest Aware. This optional subscription service enhances both the security and convenience aspects of your doorbell experience. With Nest Aware, you can:
- Access continuous video recording: Nest Aware allows you to keep a detailed record of all doorbell activity, ensuring you never miss a moment.
- Receive intelligent alerts: Enjoy more advanced notifications that differentiate between a person, package delivery, or unfamiliar face detected by facial recognition technology.
- Review activity history: Gain access to a timeline of events, allowing you to easily review past doorbell activity and identify patterns.
- Store video footage in the cloud: With Nest Aware, you can store video recordings securely in the cloud, eliminating the need for local storage and ensuring your important footage is always protected.
By implementing these strategies and exploring the full potential of your Nest Doorbell, you can significantly enhance your home’s security and convenience while enjoying the peace of mind that comes with a well-connected smart home.
Frequently Asked Questions Of How To Install Nest Doorbell
Can I Install A Nest Doorbell Myself?
Yes, you can install a Nest doorbell yourself. It is a simple process that doesn’t require professional help. Just follow the provided instructions and use the necessary tools.
How Do I Install A Nest Wireless Doorbell?
To install a Nest wireless doorbell, start by downloading the Nest app and creating an account. Connect the doorbell to your Wi-Fi network using the app and mounting plate. Then, attach the doorbell to the mounting plate and adjust its position.
Finally, test the doorbell to ensure it’s working properly.
Do You Need An Electrician To Install A Nest Doorbell?
No, you don’t need an electrician to install a Nest doorbell. It comes with easy installation instructions and can be set up by anyone.
How Do You Install A Nest Doorbell If You Don’T Have A Doorbell?
To install a Nest doorbell without an existing doorbell, you’ll first need to connect the doorbell to a power source. This can be done by using a low voltage transformer or plugging in the included power adapter. Once powered, follow the instructions provided to set up your Nest doorbell.
Conclusion
Installing a Nest Doorbell is a simple yet efficient way to enhance home security. By following the step-by-step guide provided, you can easily set up the doorbell and start monitoring your doorstep. With its advanced features and user-friendly interface, the Nest Doorbell proves to be a valuable addition to any home.
So why wait? Get your Nest Doorbell today and enjoy the peace of mind that comes with optimal security.
