o install a patio sliding door, first measure the area and purchase a suitable door. Then, remove the existing door, prepare the opening, and install the new door following the manufacturer’s instructions.
Understanding The Different Types Of Patio Sliding Doors
When it comes to adding a touch of elegance and functionality to your outdoor living space, patio sliding doors are a popular choice among homeowners. These doors not only allow for easy access to your patio but also offer expansive views and ample natural light. However, with so many different types of patio sliding doors available in the market, it can be overwhelming to choose the right one for your space. In this post, we will provide you with a brief overview of patio sliding doors and guide you on how to choose the right type for your space.
Brief overview of patio sliding doors
Patio sliding doors are a versatile option for enhancing the aesthetics and functionality of your outdoor area. These doors consist of two or more panels, with at least one panel that slides horizontally for opening and closing. The panels are often made of glass, allowing for unobstructed views of your patio or garden while creating a seamless transition between indoor and outdoor living spaces.
There are several types of patio sliding doors available in the market, each with its own unique features and benefits.
How to choose the right type for your space
- Consider the available space: Before choosing a patio sliding door, it’s essential to assess the available space in your patio area. Measure the width and height of the opening to ensure that the door you select fits perfectly.
- Decide on the number of panels: Patio sliding doors can have two or more panels. Determine whether you prefer a two-panel door or a multi-panel door based on the size and layout of your patio area.
- Material: Patio sliding doors are available in various materials, including vinyl, aluminum, wood, and fiberglass. Consider the durability, maintenance requirements, and aesthetic appeal of each material before making your decision.
- Energy efficiency: Look for patio sliding doors with energy-efficient features, such as low-emissivity (low-E) glass and thermal insulation, to prevent heat loss during colder months and reduce energy costs.
- Security features: Ensure that the patio sliding door you choose has adequate security features, such as multi-point locking systems and impact-resistant glass, to keep your home safe and secure.
- Style and design: Lastly, select a patio sliding door that complements the overall style of your home. Whether you prefer a contemporary, traditional, or modern look, there are a variety of design options available to suit your taste.
By considering these factors, you can make an informed decision when choosing the right type of patio sliding door for your space. Remember, investing in high-quality sliding doors will not only enhance the beauty and functionality of your patio but also increase the value of your home.
Measuring For A Perfect Fit
Taking accurate measurements for the door opening
Before you start the installation process for your patio sliding door, it is crucial to take accurate measurements to ensure a perfect fit. Investing time in this step will save you from the hassle of making adjustments later on. The following tips will guide you on how to measure the height and width of your door opening correctly:
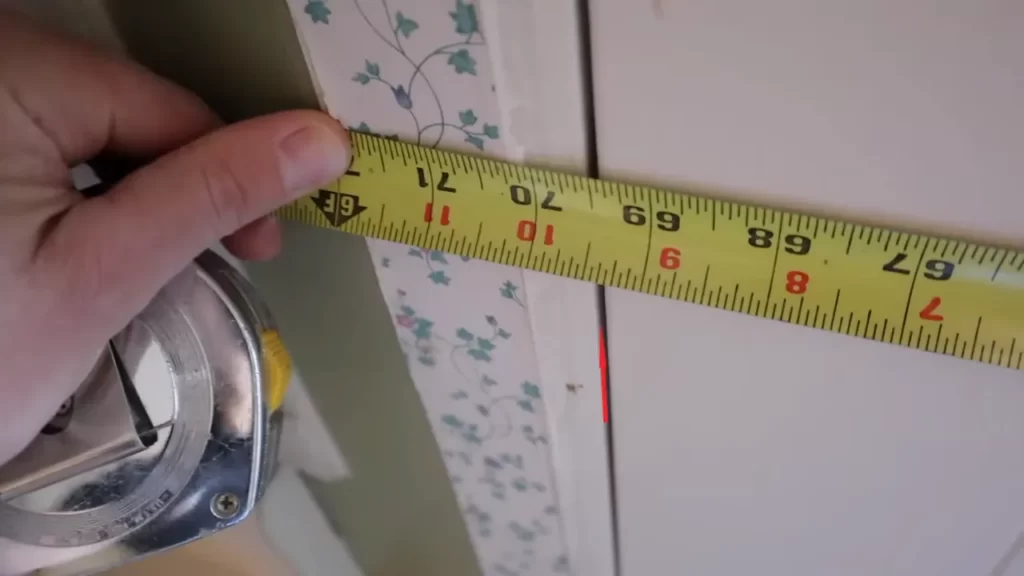
Tips for measuring the height
To measure the height, you should follow these steps:
- Begin by measuring from the top of the door frame to the floor. Make sure to take this measurement from both the left and right side of the opening, as the floor may not be level.
- Record the shortest measurement to ensure that your door will fit without any issues.
- Double-check your measurement to avoid any miscalculations that may result in a door that is too short or too tall for the opening.
Tips for measuring the width
To measure the width, follow these steps:
- Measure the width of the door frame from the inside, ensuring that you measure from the left, middle, and right sides.
- Record the narrowest measurement to ensure that the door fits snugly without any gaps.
- It’s essential to consider the width of the sliding panel frame as well. Take this into account when measuring to avoid any clearance issues.
Remember, having accurate measurements will help you find the perfect size patio sliding door for your opening. If you’re unsure about any of the measurements, it’s always a good idea to consult a professional or refer to the manufacturer’s guidelines to prevent any mistakes from occurring.
Gathering The Necessary Tools And Materials
Gathering the Necessary Tools and Materials
Before you embark on the installation process for your patio sliding door, it’s crucial to gather all the necessary tools and materials. Ensuring you have everything you need beforehand will save you time and make the installation process more efficient. In this section, we’ll outline the essential tools and materials you’ll need to successfully install your patio sliding door.
Essential Tools Needed for the Installation Process
Having the right tools is vital for a smooth and hassle-free installation. Here are the must-have tools you’ll need:
- Measuring Tape: A measuring tape will help you accurately measure the dimensions of the door frame to ensure a proper fit.
- Screwdriver: A screwdriver, preferably a cordless one for convenience, will be essential for removing the old door and installing the new one.
- Level: A level is essential for ensuring that your door is perfectly level and plumb once installed, preventing any issues with opening or closing.
- Masking Tape: Masking tape will come in handy when marking the exact placement for your new door, ensuring it aligns correctly with the frame.
- Drill: A power drill with the appropriate drill bits will be necessary for drilling pilot holes and securing the door frame.
- Hammer: A hammer will be needed for minor adjustments, such as tapping in shims or adjusting the door frame.
- Caulking Gun: To seal any gaps and prevent drafts, a caulking gun and weather-resistant caulk are essential.
- Safety Equipment: Lastly, don’t forget safety glasses and gloves to protect yourself during the installation process.
List of Materials Required for a Successful Installation
Now that you have the necessary tools, let’s take a look at the materials you’ll need:
| Materials | Description |
|---|---|
| Patio Sliding Door | A high-quality patio sliding door that matches the dimensions of your existing opening. |
| Screws | Choose screws that are appropriate for your door frame material and length requirements. |
| Shims | These thin wedges will help you level and plumb the door frame during installation. |
| Insulation | Insulation materials, such as foam or weatherstripping, will help prevent air leaks and improve energy efficiency. |
| Caulk | High-quality, weather-resistant caulk will seal any gaps between the door frame and the wall. |
Make sure you have all the materials listed above before you begin the installation process to avoid any delays or interruptions.
By gathering the necessary tools and materials ahead of time, you’ll be well-prepared to tackle the installation process with confidence. With everything at your disposal, you can proceed to the next steps of removing the old door and installing the new patio sliding door.
Removing The Existing Door (If Applicable)
Before you can install a new patio sliding door, it’s essential to remove the old one first. This process may not be necessary if you’re installing a door for the first time. However, for those looking to upgrade or replace their existing patio door, removing the old one is an important step.
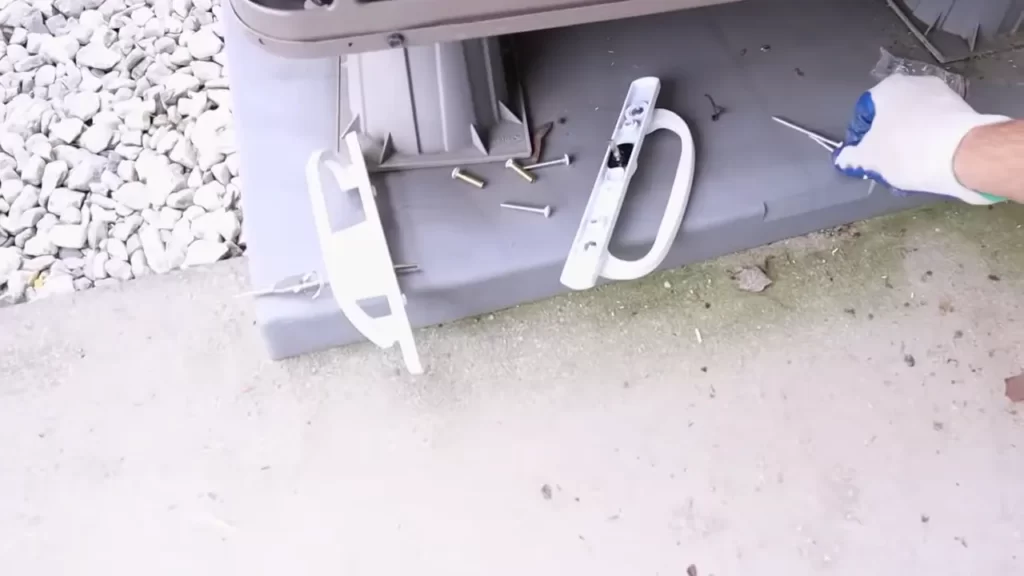
Step-by-step instructions for removing the old door:
- Begin by removing any curtains or blinds from the old door and set them aside.
- Next, locate the screws or nails securing the door frame to the wall. Use a screwdriver or pry bar to carefully remove them.
- Once the frame is free, use a pry bar to gently separate the frame from the wall, starting from the top and working your way down.
- Be cautious while removing the frame as it may still be attached to the door panel.
- If the door is a sliding panel, carefully lift it off the track by applying upward pressure and pulling it towards you.
- In case the door is hinged, remove the hinge pins by tapping them out with a hammer and a nail. Start with the bottom hinge and work your way up.
- With the door panel removed, you can now remove the frame from its location. This may require some careful maneuvering, so take your time.
Proper disposal or recycling of the old door:
When it comes to getting rid of your old patio sliding door, it’s essential to think about proper disposal or recycling methods. By taking responsible steps, you can contribute to reducing waste and minimizing the environmental impact:
- If the old door is still in good condition, consider donating it to a local charity or organization that accepts used building materials.
- Alternatively, you can contact your local recycling center to inquire about their procedures for recycling doors. They may have specific requirements for preparation or drop-off.
- If neither of these options is available, disposing of the door through waste management services is the last resort. However, please check with your local waste disposal provider for specific guidelines on how to do so properly.
By following these steps, you can remove the old patio sliding door efficiently and responsibly dispose of it, making way for the installation of your new door.
Preparing The Door Frame And Surrounding Area
When it comes to installing a patio sliding door, proper preparation of the door frame and the surrounding area is crucial. This step sets the foundation for a successful installation and ensures that the door functions properly and looks aesthetically pleasing. In this guide, we will walk you through the essential steps of preparing the door frame and surrounding area.
Cleaning and prepping the door frame
The first step in preparing the door frame is to thoroughly clean it. Remove any dirt, dust, or debris that may have accumulated over time. Use a damp cloth to wipe down the frame, and if necessary, a mild detergent to remove stubborn stains. Cleaning the door frame not only improves the aesthetic appeal but also ensures that the new door adheres properly.
Next, inspect the door frame for any signs of damage or wear. Look for cracks, rot, or loose materials that may compromise the integrity of the frame. If you notice any issues, it is essential to address them before proceeding with the installation. Repair or replace any damaged sections to ensure a stable base for the new door.
Ensuring a level and square opening for the new door
Achieving a level and square opening is crucial for the smooth operation of your patio sliding door. To do this, measure the width and height of the door frame using a tape measure. Ensure that the opening is square by measuring from corner to corner diagonally. If the measurements are equal, the opening is square. If not, adjustments may be required to achieve a square opening.
Next, check the levelness of the floor and the sides of the door frame. Use a spirit level to make precise measurements. If the floor or the sides are not level, you will need to make adjustments to ensure a level and square opening. This can be done by adding shims or leveling compound to the areas that are uneven. Take your time in this step, as an uneven opening can lead to problems with the door’s functionality.
Once you have established a level and square opening, secure the door frame in place using screws or nails. Make sure that the frame is securely fastened to the surrounding structure to prevent any movement or instability.
Addressing Any Structural Issues
Identifying and Fixing Any Structural Problems
Before you start installing your patio sliding door, it is important to address any structural issues that may affect the installation process. Ignoring these issues can lead to problems down the line and may even compromise the integrity of your door. To ensure a smooth installation and long-lasting functionality, follow these steps to identify and fix any structural problems.
Inspecting the Door Opening
The first step in addressing structural issues is to thoroughly inspect the door opening. Look for any signs of damage or shifting, such as cracks, unevenness, or gaps. Pay close attention to the surrounding walls, floor, and ceiling as well.
If you notice any structural problems, it is crucial to address them before proceeding with the installation. Neglecting these issues can result in improper installation and potential damage to your patio sliding door.
Evaluating the Door Frame
One common structural issue is a damaged or deteriorating door frame. Over time, door frames can be subjected to wear and tear, moisture damage, or even pest infestations. Before installing your new patio sliding door, carefully assess the condition of the frame.
If you observe any rot, cracks, or other signs of damage, it is essential to repair or replace the door frame. Neglecting this step can lead to poor insulation, air leakage, and potential security risks.
Repairing the Door Frame
If the door frame requires repairs, it is important to handle them before proceeding. Depending on the extent of the damage, you may be able to simply patch and repaint the frame. However, if the damage is severe or compromising the structural integrity, it might be necessary to replace the frame entirely.
During the repair process, ensure that the frame is properly aligned, leveled, and securely attached to the surrounding structure. A sturdy and well-maintained door frame is essential for the smooth operation and longevity of your patio sliding door.
By identifying and fixing any structural issues before installing your patio sliding door, you can avoid future complications and ensure a seamless and secure fit. Don’t rush through this step – taking the time to address any problems will contribute to the overall success and functionality of your new door.
Assembling The Door And Frame Components
How to Install a Patio Sliding Door
Assembling the door and frame components of your patio sliding door is an important step in the installation process. By following the manufacturer’s instructions and ensuring that the door panels and frame pieces are connected securely, you can ensure a smooth and successful installation. In this section, we will cover the steps to assemble the door and frame components, providing you with a clear understanding of the process.
Following the Manufacturer’s Instructions for Assembly
Before you begin assembling the door and frame components, it’s crucial to read and understand the manufacturer’s instructions. Each sliding door may have specific requirements and steps that need to be followed. By following these instructions, you can ensure the proper installation and function of your patio sliding door. Make sure to take note of any specific tools or materials mentioned in the instructions before you start.
Connecting the Door Panels and Frame Pieces Securely
Once you have familiarized yourself with the manufacturer’s instructions, it’s time to connect the door panels and frame pieces securely. This step requires attention to detail to ensure the stability and functionality of the sliding door. Here’s a step-by-step guide:
- Verify that all the necessary door panels and frame pieces are present and organized properly.
- Arrange the door panels and frame pieces in the correct order as per the manufacturer’s instructions.
- Insert the door panel into the frame, ensuring a snug fit.
- Secure the door panel to the frame using the provided screws or fasteners. Make sure to tighten them adequately without overtightening.
- Repeat this process for the remaining door panels, ensuring that they align properly and are securely attached to the frame.
By connecting the door panels and frame pieces securely, you can minimize the risk of any future issues such as door misalignment, air leaks, or difficulty in operation.
Remember, the assembly process may vary depending on the specific manufacturer and model of your patio sliding door. In case of any doubts or uncertainties, it’s always a good idea to reach out to the manufacturer’s customer support for additional guidance and assistance.
Now that you have successfully assembled the door and frame components, you are ready for the next steps in the patio sliding door installation process. Stay tuned for our upcoming section on Installing the Door Frame in the Opening, where we will guide you through the process of securely fitting the door frame into your patio opening.
Mounting The Door Frame
Mounting the door frame is an integral part of installing a patio sliding door. Proper alignment and stability are essential to ensure that the door operates smoothly and securely. In this step-by-step guide, we will walk you through the process of mounting the door frame.
Step-by-step guide to mounting the frame
To start, gather all the necessary tools and materials. You will need:
- Door frame
- Screws
- Drill
- Level
- Tape measure
Follow these steps:
- Measure the opening width and height to ensure that the door frame is the correct size.
- Position the vertical door jamb against the side of the opening and use a level to check if it is plumb. Adjust as necessary.
- Secure the vertical door jamb to the wall using screws. Make sure to drive the screws into the stud for maximum stability.
- Repeat steps 2 and 3 for the other side of the opening, ensuring that both vertical door jambs are aligned and level.
- Measure the distance between the top of the door frame and the header of the opening. Cut the header track to the required length.
- Attach the header track to the top of the door frame using screws.
- Place the door frame into the opening, ensuring that it rests securely on the bottom track.
- Adjust the door frame as needed to ensure it is level and plumb. Use shims if necessary.
- Secure the door frame to the wall using screws, making sure to drive them into the stud for added stability.
- Check that the door frame opens and closes smoothly. Make any necessary adjustments to ensure proper operation.
By following these step-by-step instructions, you can successfully mount the door frame of your patio sliding door. Remember to take your time and double-check for proper alignment and stability at each stage of the process. With the frame securely in place, you are one step closer to enjoying your new patio sliding door.
Installing The Door Rollers And Tracks
Attaching the rollers to the bottom of the door panels
When it comes to installing a patio sliding door, one of the crucial steps is attaching the rollers to the bottom of the door panels. These rollers play a vital role in allowing the door to slide smoothly along the tracks. Here’s a step-by-step guide on how to attach the rollers for a seamless installation:
- Start by flipping the door panels upside down, ensuring that both panels are facing the correct direction.
- Locate the pre-drilled holes at the bottom of each door panel, specifically designed for the rollers’ installation.
- Take the rollers out of their packaging and position them over the pre-drilled holes.
- Using screws provided with the roller set, attach the rollers firmly to each of the door panels. Make sure to align the roller properly with the holes, ensuring stability and smooth movement.
- Repeat this process for both door panels, ensuring uniformity and balance for a seamless sliding operation.
Installing the tracks on the door frame
Once the rollers are securely attached to the door panels, the next step is installing the tracks on the door frame. These tracks act as a guide for the door panels to slide open and closed. Here’s a step-by-step guide on how to install the tracks with precision:
- Firstly, ensure that the door frame is clean and free from any debris or obstructions that may hinder the smooth operation of the tracks.
- Measure the length of the door frame to determine the required length of the tracks. Use a measuring tape and mark the needed length on the track’s surface.
- Cut the track precisely along the marked line using a hacksaw or a similar cutting tool, ensuring a clean and straight cut.
- Once the track is cut to the desired length, position it on the bottom of the door frame, aligning it with the sides of the frame.
- Using screws or nails, secure the track in place by attaching it firmly to the door frame. Make sure to space the screws or nails evenly for stability and a secure fit.
- Repeat this process for installing the top track, ensuring it is aligned properly with the bottom track and securely attached to the door frame.
By diligently following these steps, you can successfully install the rollers and tracks for your patio sliding door. These crucial components will ensure the smooth sliding operation of your door, allowing you to enjoy easy access to your outdoor living space while enhancing the aesthetic appeal of your home.
Hanging And Adjusting The Door Panels
Installing a patio sliding door can be a great way to enhance the beauty and functionality of your outdoor space. Once you have successfully assembled the door frame and prepared the opening, the next crucial step is to hang and adjust the door panels. This is where you ensure that the panels are properly positioned in the tracks and adjust their height and level for smooth operation. In this section, we will guide you through the process of hanging and adjusting the door panels, providing you with the necessary steps to complete the installation smoothly.
Properly positioning the door panels in the tracks
The first step in hanging the door panels is to ensure they are properly positioned in the tracks. This will ensure smooth sliding motion and prevent any unnecessary friction. Follow these steps to properly position the door panels:
- Start by carefully placing the bottom edge of the door panels into the lower track.
- Make sure that the top edge of the panels rests against the upper track.
- Gently slide the panels along the track to ensure they move smoothly without any obstruction.
- Check for any gaps or misalignment between the panels and the tracks. If any are present, adjust the position of the panels accordingly.
Adjusting the height and level of the door panels
To ensure proper functionality of the patio sliding door, it is essential to adjust the height and level of the door panels. This adjustment will prevent any binding or dragging of the panels during operation. Follow these steps to adjust the height and level of the door panels:
- Start by locating the adjustment screws at the bottom of the door panels.
- Using a screwdriver, turn the adjustment screws clockwise or counterclockwise to raise or lower the panels respectively.
- Continuously check the level of the panels using a spirit level. Adjust the screws until the panels are perfectly level.
- Slide the door panels back and forth to ensure they move smoothly and effortlessly.
- Make any further adjustments as necessary until the panels are perfectly aligned and operating smoothly in the tracks.
By properly positioning the door panels in the tracks and adjusting their height and level, you can ensure the smooth operation of your patio sliding door. This will not only enhance the aesthetic appeal of your outdoor space but also provide you with a functional and efficient way to access your patio.
Checking For Proper Operation
After successfully installing your patio sliding door, it’s crucial to ensure that it operates smoothly and effortlessly. This step ensures that you enjoy the full benefits of your new door, maximizing convenience and functionality. Here, we will guide you through the essential checks to perform to guarantee a properly operating patio sliding door.
Testing the sliding motion of the door
The first and most important step in checking for proper operation is to test the sliding motion of the door. This will determine whether the door slides effortlessly along its track, ensuring convenient access to your outdoor space. To perform this test, follow the steps below:
- Stand close to the door but not directly in front of it.
- Place your hands on the door handle or grip firmly.
- Apply gentle pressure and push the door open.
- Observe the door as it slides along the track.
If the door glides smoothly and without any resistance, it indicates proper operation. However, if you encounter resistance or the door feels heavy to push, there might be an issue with the alignment or the lubrication of the track. In such cases, it’s recommended to contact a professional installer or follow the manufacturer’s instructions for troubleshooting.
Ensuring smooth and easy operation
Besides the sliding motion, it’s crucial to ensure that the door operates smoothly and with ease in all aspects. This includes checking the door’s ability to lock and unlock efficiently, as well as examining the performance of the handles or grips. Here are some steps to ensure smooth and easy operation:
- Test the lock by inserting the key or engaging the lock mechanism.
- Check if the lock secures firmly and without any difficulties.
- Open and close the door several times to evaluate the handles or grips.
- Ensure that the handles or grips function properly without any wobbling or stiffness.
If you encounter any issues during these checks, it’s advisable to consult the installation manual or contact the manufacturer for assistance. Addressing any problems early on will help maintain the door’s longevity and performance.
Regular maintenance, such as cleaning the tracks and applying lubrication, will also contribute to the smooth operation of your patio sliding door. Following the manufacturer’s guidelines regarding maintenance tasks will help extend the lifespan of your door and enhance its overall functionality.
Sealing And Insulating The Door
In order to maximize the energy efficiency and overall effectiveness of your patio sliding door, sealing and insulating the door is a crucial step. By properly sealing any gaps or drafts and adding weatherstripping, you can create a more comfortable and energy-efficient space. In this section, we will discuss two important aspects of sealing and insulating the door:
Adding weatherstripping to improve energy efficiency
Weatherstripping is a simple yet effective way to prevent drafts and heat loss around the edges of your patio sliding door. By creating a tight seal between the door and the frame, weatherstripping helps to keep the elements outside and your desired indoor temperatures inside. Here’s how you can add weatherstripping to your patio sliding door:
- Start by thoroughly cleaning the edges of the door and the frame to ensure good adhesion.
- Measure the length of each side of the door frame and cut the weatherstripping material to fit.
- Peel off the backing of the weatherstripping and carefully attach it to the door frame, making sure it aligns with the edge of the door.
- Repeat this process for each side of the door, ensuring a consistent and secure seal.
Once the weatherstripping is in place, be sure to test the door by opening and closing it to ensure a proper seal. If you notice any gaps or areas where the weatherstripping is not adhering properly, consider replacing or repositioning it for maximum effectiveness.
Sealing any gaps or drafts around the door frame
In addition to weatherstripping, it’s important to seal any gaps or drafts around the door frame. Even a small gap can cause significant energy loss and discomfort. Here are a few steps to help you seal these areas:
- Inspect the door frame for any visible gaps or cracks.
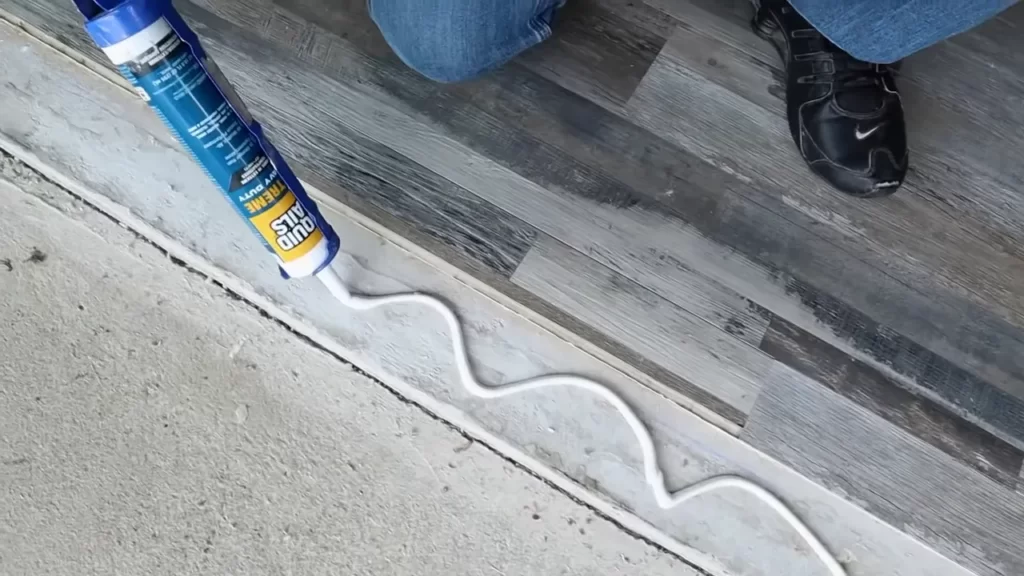
- Using a caulk gun, apply a generous amount of caulk along the gaps and cracks, ensuring a smooth and uniform application.
- Smooth out the caulk using a caulk smoothing tool or a clean, damp cloth.
- Allow the caulk to dry completely before testing the door for any remaining gaps.
By sealing these gaps, you can prevent drafts, reduce energy waste, and create a more comfortable living space.
In conclusion, by properly sealing and insulating your patio sliding door, you can enhance energy efficiency and prevent drafts. By adding weatherstripping and sealing any gaps or cracks, you can create a more comfortable and energy-efficient environment for your home. Take the time to complete these steps, and you will enjoy the benefits of a well-sealed and insulated patio sliding door.
Adding Security Features (Optional)
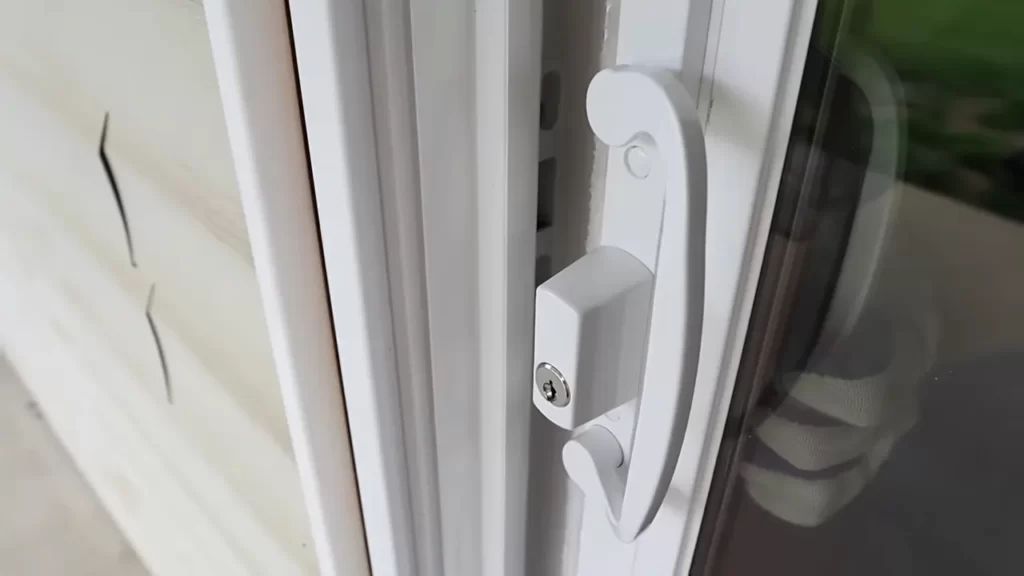
Ensuring the safety of your home and loved ones is always a top priority. When it comes to your patio sliding door, adding security features is an excellent way to provide an added layer of protection. In this section, we will explore two optional security features that you can install to enhance the security of your patio sliding door: a sliding door lock and a security bar or film.
Installing a Sliding Door Lock
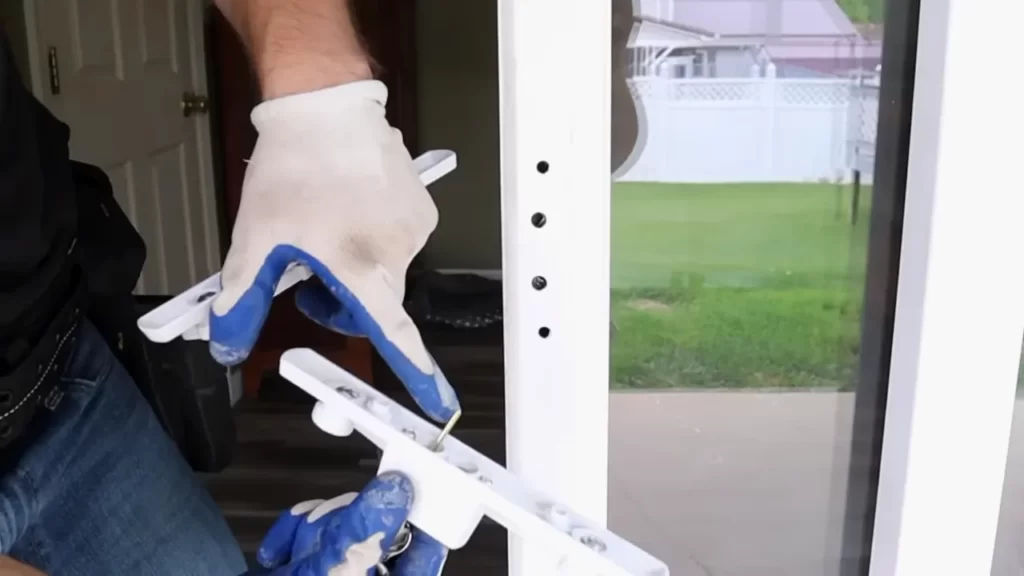
Installing a sliding door lock is a simple yet effective way to secure your patio sliding door. This lock serves as a deterrent to potential intruders and provides peace of mind knowing that your home is better protected. Here’s a step-by-step guide to installing a sliding door lock:
- Begin by measuring the thickness of your sliding door to ensure you purchase a lock that fits correctly.
- Next, position the lock on the door frame, ensuring it aligns properly with the sliding door.
- Using a pencil, mark the spots where the screws will go to secure the lock in place.
- Pre-drill holes on the marked spots, making sure they are wide enough to accommodate the screws.
- Securely attach the lock to the door frame using the provided screws, ensuring it is tightly fastened.
- Test the lock by sliding the door open and closed to ensure it functions properly.
By adding a sliding door lock, you can significantly enhance the security of your patio sliding door, providing you with peace of mind and a greater sense of security.
Enhancing Security with a Security Bar or Film
In addition to a sliding door lock, you can further enhance the security of your patio sliding door by using a security bar or film. These options provide an additional layer of protection and act as a visual deterrent to potential intruders.
A security bar is a sturdy metal bar that you place in the track of your sliding door when it is closed. This bar prevents the door from being forced open, making it difficult for an intruder to gain entry. It is crucial to choose a security bar that is adjustable and fits snugly in the track.
For added protection against break-ins, you can also consider applying a security film to your patio sliding door. This transparent film adheres to the glass surface and reinforces it, making it more difficult to break. The film acts as a barrier, preventing shattered glass from spreading and potentially deterring intruders who may attempt to gain access by breaking the glass.
Remember, while security features such as a sliding door lock, security bar, or film can greatly enhance the security of your patio sliding door, regular maintenance and good habits, such as locking your door when you’re away or at night, are also essential in ensuring the safety of your home.
By taking these steps to add security features to your patio sliding door, you can enjoy an enhanced sense of security, giving you peace of mind knowing that your home and loved ones are better protected.
Frequently Asked Questions On How To Install Patio Sliding Door
Can I Install A Sliding Door Myself?
Yes, you can install a sliding door yourself. It’s important to follow the manufacturer’s instructions and have the necessary tools. Measure the opening, remove the old door, assemble the sliding door frame, install the frame, and hang the door.
Is Installing A Sliding Door Hard?
Installing a sliding door is not hard. It requires basic tools and skills.
How Long Does It Take To Install A Sliding Glass Patio Door?
On average, it takes around 4-6 hours to install a sliding glass patio door. The timeframe may vary depending on the complexity of the project and the experience of the installer.
How Do You Put A Sliding Door Back On Its Track?
To put a sliding door back on its track, follow these steps: 1. Remove the door from the track by lifting it up and tilting it towards you. 2. Clean the track and rollers to ensure they are free of debris or obstructions.
3. Align the rollers with the track and carefully lower the door onto the track. 4. Test the door to ensure it slides smoothly and make any necessary adjustments. 5. Finally, secure the door and check that it is properly in place.
Conclusion
Installing a patio sliding door may seem challenging, but with the right approach, it can be a straightforward process. By following the steps outlined in this blog post, you can successfully install a patio sliding door in your home. Remember, always measure accurately, assemble the necessary tools, and take your time during the installation process.
With proper execution, you’ll be able to enjoy the benefits of a beautiful and functional patio sliding door. Happy installing!