To install a Pella storm door, measure and mark the door frame, drill pilot holes, attach the frame, and secure the door into place. If you’re looking to enhance the appearance and functionality of your home while increasing its security, installing a Pella storm door is a great option.
With its easy-to-follow installation process, you can have a stylish and durable storm door in no time. We will guide you through the steps to successfully install a Pella storm door. By following these instructions, you can enjoy the benefits of a Pella storm door, such as increased energy efficiency and protection against the elements, while also enhancing the curb appeal of your home.
Preparing For Installation
Installing a Pella storm door can be a great way to enhance the security and aesthetic appeal of your home. But before you dive into the installation process, there are a few important steps you need to take to ensure a smooth and successful installation. In this section, we’ll guide you through measuring the opening, gathering the necessary tools and materials, and removing the old door.
Measuring the Opening
The first step in preparing for the installation of your Pella storm door is to measure the opening where the door will be installed. This will help you determine the correct size of door to purchase and ensure a proper fit. To measure the opening, follow these simple steps:
- Measure the width of the opening at the top, center, and bottom. Take the smallest measurement and subtract 1/4 inch to allow for proper clearance.
- Measure the height of the opening on the left, center, and right side. Again, take the smallest measurement and subtract 1/4 inch.
Once you have these measurements, you can consult the Pella storm door installation guide or contact a Pella expert to determine the appropriate door size for your opening.
Gathering Tools and Materials
Before you start the installation process, it’s important to gather all the necessary tools and materials. Having everything you need on hand will help streamline the process and prevent interruptions. Here is a list of the common tools and materials you may need:
| Tools | Materials |
|---|---|
| Screwdriver | Storm door kit |
| Hammer | Shims |
| Level | Silicone caulk |
| Tape measure | Weatherstripping |
Make sure you have these tools and materials ready before you start the installation process. If any additional tools or materials are required, refer to the Pella storm door installation guide for specific recommendations.
Removing the Old Door
Before you can install your new Pella storm door, you’ll need to remove the old door. This process may vary depending on the type of door you currently have, so it’s important to refer to the manufacturer’s instructions or consult a professional if needed. However, here are some general steps to follow when removing an old door:
- Start by removing the old door handle and hardware.
- Use a screwdriver or drill to remove the screws holding the door frame in place.
- Gently pry the old door frame away from the opening, being careful not to damage the surrounding area.
- Once the frame is removed, take out any remaining door components, such as the hinges or threshold.
- Thoroughly clean the opening to remove any debris or adhesive.
By following these steps, you’ll be well-prepared to install your new Pella storm door. Remember to refer to the manufacturer’s instructions for any specific guidelines or recommendations.
Assembling The Door Components
When it comes to installing a Pella storm door, one of the most crucial steps is assembling the door components. This step lays the foundation for a secure and functional storm door. In this section, we will guide you through three essential steps: unboxing and checking for damage, attaching hinges and handles, and installing the door closer.
Unboxing and Checking for Damage
Before diving into the installation process, it is important to unbox your Pella storm door and carefully inspect each component for any signs of damage. Follow these steps:
- Start by removing all packaging materials from the box.
- Place the door on a flat surface and check the frame for any visible damage, such as dents or scratches.
- Inspect the glass panel for cracks or chips.
- Examine the hinges and handles for any signs of misalignment or damage.
- If you notice any damage, contact Pella’s customer service immediately to resolve the issue.
Attaching Hinges and Handles
Once you have successfully checked for any damage, it’s time to attach the hinges and handles to your Pella storm door. Follow these simple steps:
- Identify the hinge and handle locations on the door frame.
- Align the hinges with their corresponding locations and secure them using the provided screws.
- Attach the handles by aligning them with the handle locations.
- Secure the handles using the provided screws, making sure they are firmly attached.
- Double-check the alignment and tightness of the hinges and handles before moving on to the next step.
Installing the Door Closer
The final step in assembling your Pella storm door is installing the door closer, which ensures smooth and controlled closing of the door. Follow these steps:
- Position the door closer on the door frame, making sure it is centered and level.
- Mark the screw hole locations on the frame using a pencil.
- Drill pilot holes on the marked locations.
- Attach the door closer to the frame using the provided screws, ensuring it is securely fastened.
- Adjust the tension of the door closer according to your preference by following the manufacturer’s instructions.
- Open and close the door a few times to test the functionality of the door closer.
By following these steps, you will successfully assemble the components of your Pella storm door, ensuring a secure and functional addition to your home. Now that you have completed the assembly process, you are ready to move on to the next step of the installation: mounting the door frame.
Installing The Door Frame
Installing the door frame is an important step in the process of installing your Pella storm door. This guide will walk you through the necessary steps to ensure that your door frame is properly positioned, leveled, and securely attached to the opening. By following these instructions, you can ensure a successful and sturdy installation for your Pella storm door.
Positioning the Frame in the Opening
To begin the installation process, you need to position the door frame in the opening. Start by placing the frame into the opening, ensuring that it fits securely and snugly. Take your time to adjust the position if necessary, making sure that the frame is centered and aligns properly with the door opening.
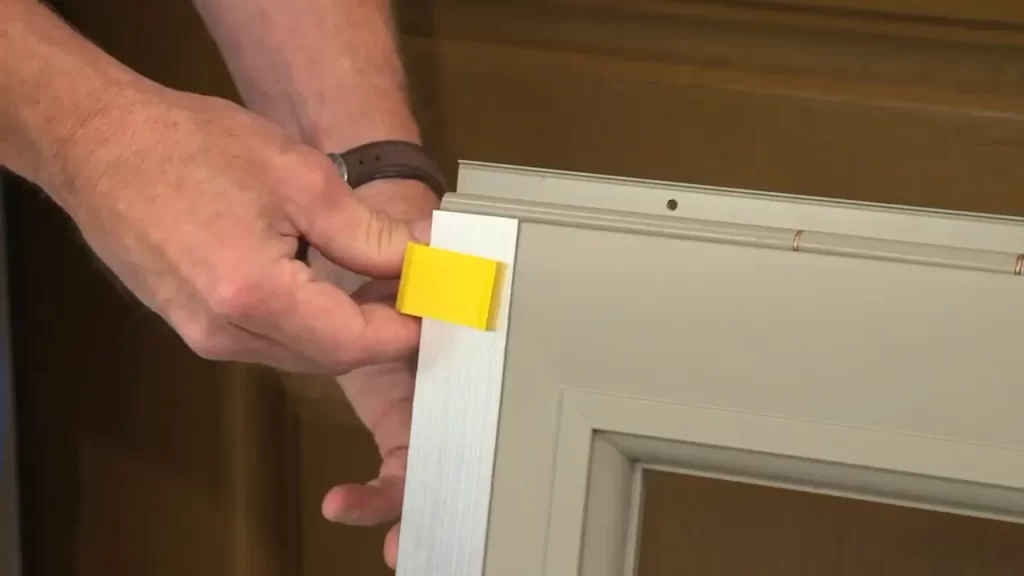
Leveling and Marking the Frame
Once you have positioned the frame, it is essential to ensure that it is level. This step is crucial for the proper functioning of your storm door. To level the frame, use a level tool and adjust the frame accordingly. Pay close attention to both the vertical and horizontal alignment, ensuring that the frame is perfectly level in all directions. After leveling the frame, mark the outline of the frame on the wall or door jamb. This will serve as a guideline when attaching the frame to the opening and help you maintain the proper position during the installation process.
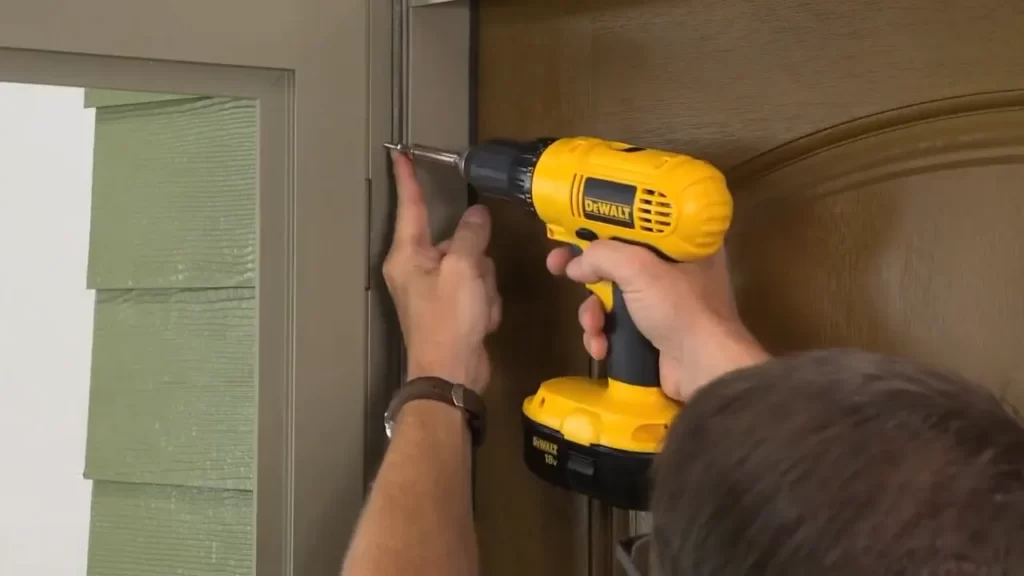
Attaching the Frame to the Opening
Now that the frame is leveled and marked, it’s time to securely attach it to the opening. Start by positioning the frame back into place, aligning it with the marked outline. Use screws or nails to secure the frame to the opening, ensuring that it is firmly fastened. Make sure to attach the frame at multiple points, such as the top, sides, and bottom, to ensure maximum stability. Refer to the manufacturer’s instructions for recommended attachment points and screw sizes for your specific Pella storm door model. When attaching the frame, ensure that it is tightly secured but be careful not to overtighten the screws or nails, as this can cause damage to the frame or opening. Take your time and double-check the alignment and levelness of the frame as you attach it. In conclusion, installing the door frame for your Pella storm door is a critical step in the installation process. By properly positioning, leveling, and securely attaching the frame, you can ensure a strong and durable installation that will enhance both the functionality and appeal of your storm door. So take your time, follow the steps outlined in this guide, and enjoy the benefits of your newly installed Pella storm door.
Hanging The Storm Door
Hanging the Storm Door
When it comes to installing a Pella storm door, one of the most important steps is hanging the door. This is where you align and attach the door to the frame, adjust it for proper fit and function, and secure it in place. In this section, we will guide you through each step with clear instructions and tips.
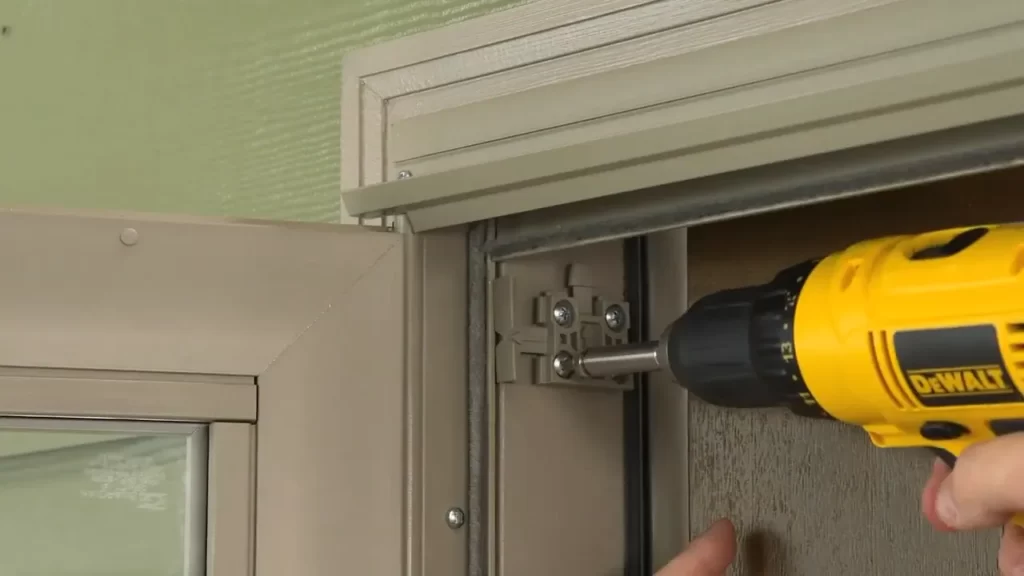
Aligning and Attaching the Door to the Frame
The first step in hanging your Pella storm door is aligning it with the frame. Ensure the door is level and centered within the opening. To achieve this, follow these steps:
- Place shims at the bottom of the door frame to provide stability and an even surface.
- Hold the door in place and use a level to check both the sides and top of the door for alignment.
- If adjustments are needed, gently tap the shims with a mallet to achieve the desired level and alignment.
- Once the door is properly aligned, secure it to the frame using the provided screws. Make sure to drive the screws in straight and avoid overtightening.
Adjusting the Door for Proper Fit and Function
After attaching the door to the frame, it’s essential to adjust it for proper fit and function. Here are the steps to follow:
- Check the gaps around the door to ensure an even and consistent spacing.
- If necessary, adjust the hinge screws to ensure the door remains square within the frame.
- Test the door’s operation by opening and closing it multiple times to verify smooth movement.
- If the door doesn’t close properly, adjust the strike plate to ensure a secure latch.
Securing the Door in Place
Once the door is aligned and adjusted, securing it in place is crucial for optimal performance and safety. Follow these steps:
- Use the provided screws to install the remaining hinge plates and ensure a secure attachment.
- Check the gap between the door and frame to ensure it is consistent along all sides.
- If necessary, add shims or adjust the screws to eliminate any gaps or unevenness.
- Verify that the door opens and closes smoothly without any binding or rubbing.
By following these steps, you can successfully hang your Pella storm door, ensuring a proper fit, smooth operation, and secure installation.
Adjusting And Testing The Door
After installing your Pella Storm Door, it is crucial to properly adjust and test it to ensure optimal performance. This step is essential for the door to function smoothly and provide the desired security. In this section, we will cover two important aspects of adjusting and testing your Pella Storm Door: checking for proper clearances and alignment, and testing the operation of the door.
Checking for Proper Clearances and Alignment
Before proceeding with adjusting your Pella Storm Door, it’s important to verify that it has been installed with correct clearances and alignment. Follow these steps to ensure the door is in the right position:
- Inspect the door frame and hinges to ensure they are properly aligned and securely fastened. If any screws or bolts are loose, tighten them using a screwdriver or wrench.
- Check the top and bottom clearances of the door. Ideally, there should be a consistent gap of about 1/8 inch (3mm) between the door and the frame.
- Ensure the side clearances are also equal, maintaining a uniform gap between the door and the frame.
- If needed, adjust the clearances by turning the adjustment screws on the door’s top and bottom hinges. Clockwise rotation will move the door closer to the frame, while counterclockwise rotation will move it away.
- Use a level to ensure the door is plumb and level. Adjust the hinge screws as necessary to achieve proper alignment.
Testing the Operation of the Door
Now that you’ve checked for proper clearances and alignment, it’s time to test the operation of your Pella Storm Door to ensure it opens, closes, and latches correctly. Follow these steps:
- Open the door fully and then release it. It should close smoothly and latch securely without any resistance.
- If the door doesn’t close properly or drags along the bottom, it may need adjustment. Adjust the door sweep by turning the adjustment screws until the door is level with the floor.
- Test the door’s locking mechanism by engaging and disengaging the latch. Ensure it locks securely and doesn’t wiggle or come loose.
- Check the weatherstripping around the door to ensure it forms a tight seal when closed. If there are gaps, adjust the weatherstripping as needed.
- Verify that the door smoothly operates on its hinges without sticking or rubbing against the frame. If necessary, adjust the hinge screws to achieve a proper fit.
Congratulations! You have successfully adjusted and tested your Pella Storm Door for optimum functionality and security. By following these steps, you can enjoy the benefits of a well-fitted and smoothly-operating storm door for years to come.
Applying Finishing Touches
Installing Weatherstripping and Bottom Sweep
Applying weatherstripping and a bottom sweep to your Pella storm door is an important step in ensuring its energy efficiency and protecting your home from drafts and outside elements. Weatherstripping helps seal any gaps between the door and the frame, while the bottom sweep prevents air, insects, and moisture from entering.
To install weatherstripping, start by measuring the top and sides of the door frame. Cut the weatherstripping to the appropriate length and attach it to the door using nails or adhesive, making sure it creates a tight seal. Repeat this step for the other side as well.
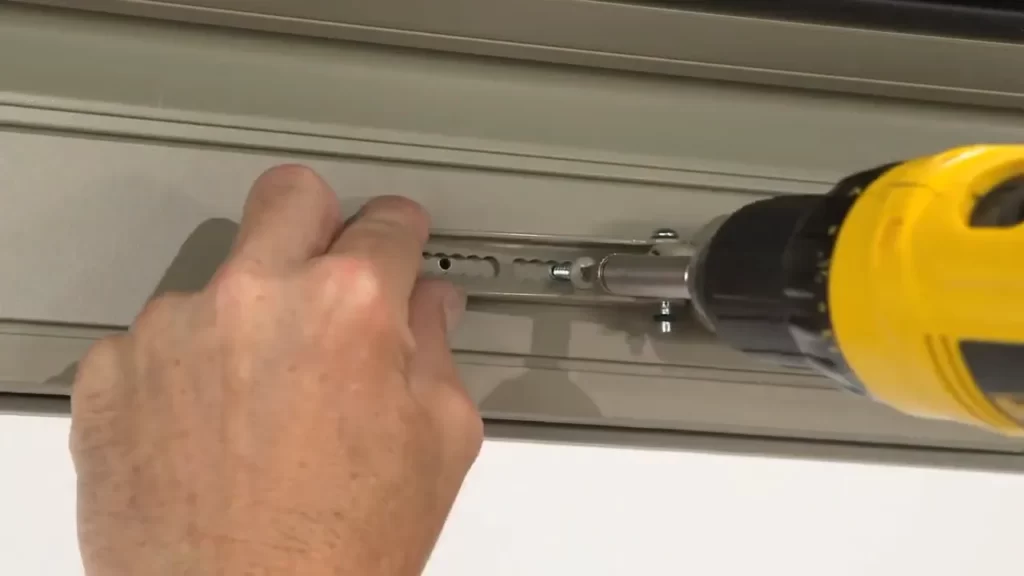
Next, it’s time to add the bottom sweep. Measure the width of the door and cut the sweep accordingly. Attach it to the bottom of the door, ensuring that it extends slightly beyond the edges to seal the gap effectively. Use screws or adhesive to secure it in place.
Adding Decorative Accessories
Now that you’ve installed the essential components of your Pella storm door, it’s time to add some decorative accessories to enhance its appearance and complement your home’s aesthetics. These accessories not only add a touch of style but also provide additional functionalities.
Consider adding a kick plate to protect the lower portion of the door from scratches and damage caused by pets, children, or general wear and tear. Kick plates are available in various finishes and materials, allowing you to choose the one that best suits your preferences.
Another accessory to consider is a decorative handle or knob. This small addition can make a big difference in the overall look of your storm door. Choose a handle or knob that matches your existing hardware or opt for a contrasting color or style to make a statement.
Cleaning and Maintaining the Door
Proper care and maintenance are essential to extend the lifespan of your Pella storm door and ensure its optimal performance. Regular cleaning helps remove dirt, dust, and grime that can accumulate over time.
Use a soft cloth or sponge and a mild detergent mixed with water to clean both the interior and exterior surfaces of the door. Avoid using abrasive cleaners or harsh chemicals that can damage the finish. Rinse thoroughly with clean water and wipe dry.
In addition to regular cleaning, inspect the door’s hardware, such as hinges and handles, for any signs of wear or loose screws. Tighten or replace as necessary to keep the door functioning smoothly.
To maintain the finish of your storm door, avoid exposing it to extreme heat, direct sunlight, or harsh weather conditions whenever possible. Applying a protective coating, such as a clear varnish or sealant, can help preserve the door’s appearance and protect it from fading or peeling.
Troubleshooting And Faqs
Installing a Pella Storm Door can greatly enhance the beauty and security of your home. However, like any home improvement project, you may encounter some common issues during the installation process. To help you through any hiccups, we have compiled a list of frequently asked questions and troubleshooting tips.
Common Installation Issues
If you come across any of the following issues while installing your Pella Storm Door, don’t worry, we have solutions for you:
- Door not aligning properly: If your storm door is not aligning properly with the doorframe, try adjusting the hinges. Loosen the screws and realign the door to ensure a perfect fit.
- Difficulties with mounting brackets: Mounting brackets are essential for a secure installation. If you struggle with mounting them, ensure that they are straight and properly aligned. If the issue persists, consider seeking assistance from a professional.
- Inadequate weatherstripping: Weatherstripping is crucial for preventing drafts. If you notice gaps between the door and the frame, make sure the weatherstripping is securely attached. You may need to replace it if it is worn or damaged.
- Issues with the latch mechanism: If your storm door fails to latch properly, check that the latch plate is correctly positioned and securely fastened. Adjust the strike plate if necessary.
- Doorbells or peepholes interfering: If you have a doorbell or peephole near the installation area, make sure they do not obstruct the storm door’s operation. Relocate or adjust them if needed.
Frequently Asked Questions
Here are some commonly asked questions related to installing a Pella Storm Door:
- Can I install a Pella Storm Door on my own? Yes, many homeowners successfully install Pella Storm Doors themselves. However, if you encounter any difficulties or are unsure about the process, it’s always a good idea to consult a professional.
- What tools do I need for the installation? The tools required for installing a Pella Storm Door may vary depending on the specific model and your existing setup. However, common tools include a tape measure, screwdriver, level, drill, and pry bar.
- Can I install a storm door if I have a sidelight? Yes, it is possible to install a storm door even if you have a sidelight. However, it is essential to measure carefully and select a storm door that accommodates the sidelight dimensions.
- Can I paint my Pella Storm Door? Yes, Pella Storm Doors can be painted to match your preferred color scheme. Ensure that you follow the manufacturer’s instructions and use suitable exterior-grade paint for best results.
- How do I maintain my Pella Storm Door? Regular maintenance is crucial for the longevity of your storm door. Clean the door and its components with a mild soap solution and a soft cloth. Lubricate the hinges and moving parts regularly to ensure smooth operation.
By following these troubleshooting tips and addressing frequently asked questions, you can overcome any obstacles and confidently install your Pella Storm Door, creating an enhanced and beautiful entrance to your home.
Frequently Asked Questions On How To Install Pella Storm Door
How To Install Pella Storm Door Screen?
To install a Pella storm door screen, follow these steps: 1. Open the door and remove the glass panel by sliding it up and out. 2. Attach the screen panel to the frame by aligning the tabs and sliding it down into place.
3. Reinstall the glass panel by sliding it back into the frame. 4. Secure the screen panel using the provided screws. 5. Test the screen by opening and closing the door to ensure proper installation.
Can I Install A Storm Door By Myself?
Yes, you can install a storm door by yourself. Follow the manufacturer’s instructions and use necessary tools. Have patience and take your time during the installation process for best results.
How Do I Adjust My Pella Storm Door?
To adjust your Pella storm door, follow these steps: 1. Close the door and locate the adjustment screws on the top and bottom. 2. Use a screwdriver to loosen or tighten the screws to adjust the door’s height and closing speed.
3. Test the door after each adjustment to ensure it closes properly. 4. Make small adjustments until you achieve the desired fit and function. 5. Tighten all screws once adjustments are complete for a secure fit.
How Do You Remove The Glass Panel From A Pella Storm Door?
To remove the glass panel from a Pella storm door, follow these steps: 1. Open the door fully. 2. Locate the screws or clips holding the frame. 3. Loosen or remove these screws or clips. 4. Carefully lift the frame away from the door.
5. Remove the glass panel, being cautious not to break it.
How Much Does It Cost To Install A Pella Storm Door?
The cost of installing a Pella Storm Door typically ranges from $200 to $500, depending on factors like door size and installation complexity.
Can I Install A Pella Storm Door Myself?
Yes, Pella Storm Doors come with detailed installation instructions and can be installed as a DIY project, provided you have basic carpentry skills and necessary tools.
Conclusion
To sum up, installing a Pella storm door is a relatively simple process that can enhance the security and functionality of your home. By following the step-by-step instructions provided in this blog post, you can confidently approach this DIY project.
Remember to carefully gather the necessary tools, measure correctly, and ensure a precise installation. With a bit of patience and attention to detail, you’ll soon enjoy the benefits of a Pella storm door. So go ahead and give it a try!