To install a Poe camera, connect the camera to a Poe switch using an Ethernet cable and power it up. Now, you are ready to start monitoring your premises and ensuring safety.
Over the past few years, the popularity of Poe (Power over Ethernet) cameras has soared, thanks to their easy installation and seamless integration with existing network infrastructure. These cameras transmit both power and data through a single Ethernet cable, eliminating the need for additional power supply cables.
Whether you own a home or a business, installing a Poe camera allows you to monitor your property, enhance security, and have peace of mind. We will guide you through the simple steps of installing a Poe camera, enabling you to be up and running in no time. So, let’s dive in and learn how to install a Poe camera efficiently and effectively.
Understanding Poe Cameras
A Poe camera, also known as a Power over Ethernet camera, is a type of surveillance camera that allows for both power and data transmission over a single Ethernet cable. This eliminates the need for separate power cables and simplifies the installation process. Understanding the basics of Poe cameras is essential for anyone looking to install a reliable and efficient surveillance system.
What is a Poe Camera?
A Poe camera is a type of IP camera that is powered through an Ethernet cable using Power over Ethernet (PoE) technology. With a Poe camera, you can transmit both power and data over a single cable, simplifying the installation process and saving both time and effort. These cameras are commonly used in both residential and commercial settings for surveillance and security purposes.
Benefits of Poe Cameras
Poe cameras offer several advantages over traditional surveillance cameras:
- Easy Installation: Since Poe cameras only require a single Ethernet cable for power and data transmission, installation is quick and hassle-free. There is no need to run separate power cables, which saves time and reduces clutter.
- Flexibility: Poe cameras can be installed in locations with limited access to power outlets. This flexibility allows for more strategic camera placement to maximize the surveillance coverage.
- Cost-effective: By combining power and data transmission into one cable, Poe cameras can significantly reduce installation and maintenance costs. This makes them an affordable choice for both residential and commercial properties.
- Reliability: Poe cameras are powered by a centralized PoE network switch, ensuring a stable power supply. This reduces the risk of power outages and ensures uninterrupted surveillance, even during emergencies.
- Scalability: Poe camera systems can easily be expanded by adding more cameras to the existing PoE network switch. This scalability allows for a customized surveillance solution that can grow with the needs of the property.
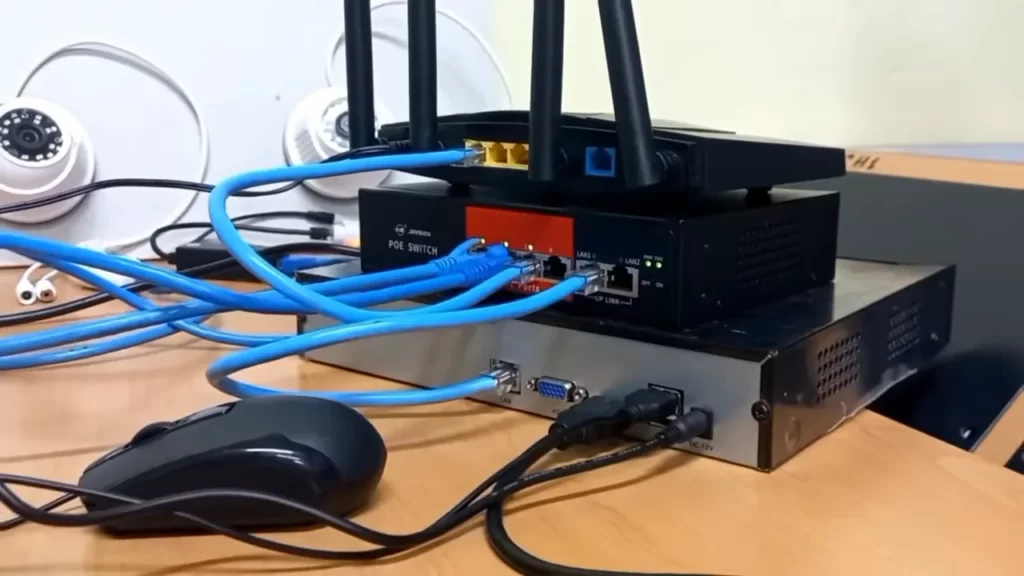
Components of a Poe Camera System
A typical Poe camera system consists of the following components:
| Component | Description |
|---|---|
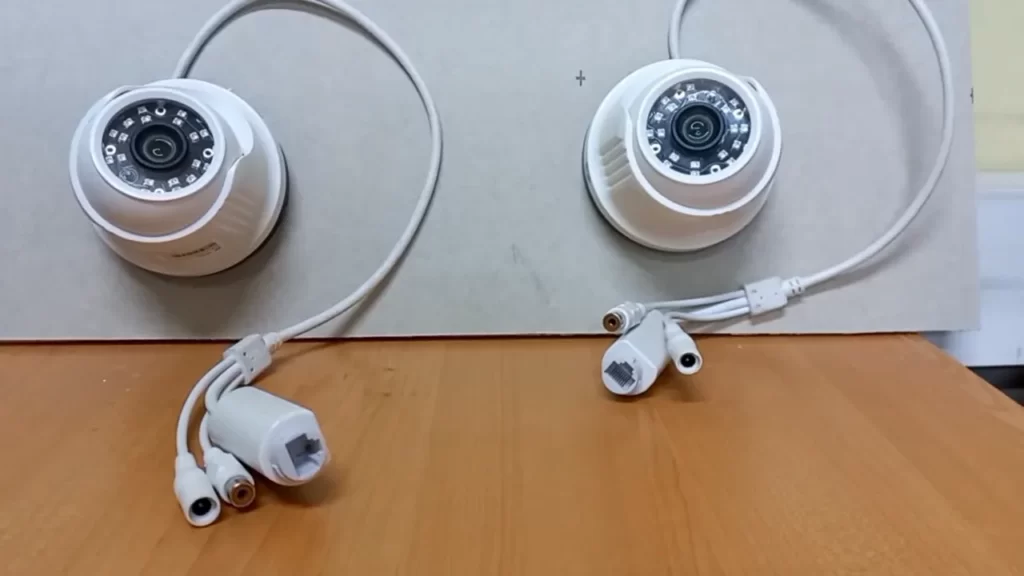
| Poe Cameras | The actual surveillance cameras that capture and transmit video footage over the network. |
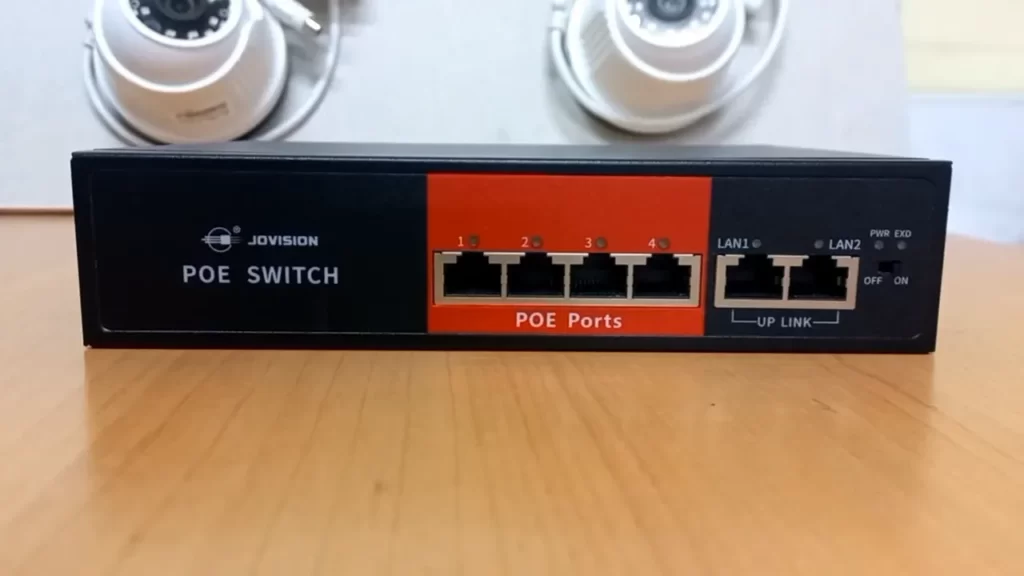
| PoE Network Switch | The central device that provides power and network connectivity to the Poe cameras. It simplifies the installation process by eliminating the need for individual power adapters for each camera. |
| Ethernet Cables | The cables used to connect the Poe cameras to the PoE network switch. These cables transmit both power and data. |
| NVR (Network Video Recorder) | The device that records and stores the video footage captured by the Poe cameras. It allows for remote access and playback of the recorded footage. |
| Monitor | A display device used to view the live or recorded video footage from the NVR. |
By understanding the components of a Poe camera system, you can effectively plan and install a reliable surveillance solution for your property.
Preparing For Installation
If you are planning to install a PoE (Power over Ethernet) camera at your premises, it is essential to follow the proper steps for a successful installation. Preparing for the installation process involves choosing the right location, gathering the necessary tools and equipment, and preparing the network infrastructure. In this section, we will dive into each step, providing you with the information you need to ensure a smooth installation process.
Choosing the Right Location
To get started, it is crucial to identify the ideal location for your PoE camera. Here are some factors to consider when choosing the right spot:
- Camera Coverage: Determine the areas you want the camera to monitor. Consider the camera’s field of view and ensure it can capture the desired areas.
- Height and Angle: Position the camera at an optimal height and angle to obtain clear and comprehensive footage. Avoid placing it too high or too low, as it may impact the camera’s effectiveness.
- Accessibility: Ensure that the camera is easily accessible for maintenance and adjustments. It should be mounted securely to prevent tampering or theft.
- Power Source: Locate a nearby power source to connect the camera. Since PoE cameras run on Ethernet cables, you won’t need a separate power supply.
- Environmental Factors: Consider environmental factors such as weather conditions, lighting, and obstructions that may affect the camera’s performance. Install the camera in a way that minimizes these interferences.
Gathering the Necessary Tools and Equipment
Before you begin the installation process, ensure you have all the essential tools and equipment readily available. Here’s a checklist of what you may need:
| Tools | Equipment |
|---|---|
| Screwdriver | PoE Camera(s) |
| Drill | Mounting Brackets |
| Level | Ethernet Cable(s) |
| Measuring Tape | Power Injector or PoE Switch |
| Cable Crimper | Power Adapter (if required) |
| Network Cable Tester | Expandable Conduit (if needed) |
Having these tools and equipment within reach will make the installation process more efficient and convenient.
Preparing the Network Infrastructure
Before you can connect your PoE camera(s), it is crucial to ensure that your network infrastructure is adequately set up. Here are the steps to follow:
- Check your Network Switch: Verify if your network switch supports Power over Ethernet. If not, consider using a PoE injector or PoE switch to provide power to the cameras.
- Confirm Network Cable Length: Measure the distance between the camera and the network switch to determine the length of Ethernet cable required for each installation.
- Run the Ethernet Cable: Carefully run the Ethernet cable from the camera’s location to the network switch, avoiding any sharp bends or obstructions.
- Test Network Connectivity: Use a network cable tester to ensure proper connectivity between the camera and the network switch. This step helps identify any connectivity issues before the final installation.
By preparing the network infrastructure in advance, you can ensure that the camera(s) will connect seamlessly to your network, providing you with reliable surveillance coverage.
Now that you have chosen the right location, gathered all the necessary tools and equipment, and prepared your network infrastructure, you are ready to proceed with the installation process. In the next section, we will guide you through the actual steps of installing the PoE camera. Stay tuned!
Step-By-Step Installation Process
Connecting the Poe Switch
Before starting the installation of your Poe camera, the first step is to connect the Poe switch to your network. Here is a step-by-step guide to help you with the process:
- First, locate an available Ethernet port on your network switch.
- Next, take the Ethernet cable provided with your Poe camera and connect one end to the Ethernet port on your Poe switch.
- Now, plug the other end of the Ethernet cable into the Ethernet port on the Poe camera.
- Ensure a stable connection by checking that the cables are securely plugged in.
Mounting and Positioning the Camera
Once the Poe switch is connected, the next step is to mount and position the camera in the desired location. Follow these steps to ensure proper installation:
- Choose a suitable mounting location that provides the desired coverage area.
- Using screws or brackets provided in the camera package, securely mount the camera to a sturdy surface such as a wall or ceiling.
- Ensure that the camera is positioned at the desired angle for optimal viewing.
Running the Ethernet Cable
After mounting the camera, the next step is to run the Ethernet cable to connect it to the Poe switch. Follow these steps to properly run the cable:
- Determine the most efficient route for the Ethernet cable to reach the Poe switch.
- Ensure the cable is neatly tucked and secured along the chosen path to avoid any tripping hazards.
- Use cable clips or adhesive keepers to secure and organize the cable along the way.
- Carefully connect one end of the Ethernet cable to the camera and the other end to the Poe switch.
Configuring the Camera and Network Settings
Now that the camera is physically installed and connected, it’s time to configure the camera and network settings. Follow these steps to ensure proper configuration:
- Access the camera’s configuration interface by typing its IP address into a web browser.
- Enter the default username and password provided with the camera to log in.
- Configure the camera settings such as resolution, frame rate, and motion detection according to your preferences.
- Configure the network settings, including assigning a static IP address for the camera, if desired.
Testing the Camera and Troubleshooting
After configuring the camera and network settings, it’s important to test the camera to ensure everything is functioning as expected. Follow these steps to test the camera and troubleshoot any issues:
- Verify that the camera is capturing and transmitting video by checking the live feed on your chosen viewing platform.
- Check the camera’s recording capabilities by initiating a test recording.
- If you encounter any issues, refer to the camera’s user manual or contact technical support for troubleshooting guidance.
- Make sure that all connections are secure, including the Ethernet cables and power supply.
Congratulations! You have successfully completed the step-by-step installation process for your Poe camera. Enjoy the enhanced security and peace of mind provided by your new surveillance system.
Additional Tips And Recommendations
Now that you have successfully installed your PoE (Power over Ethernet) camera system, there are a few additional tips and recommendations to ensure its optimal performance and security. In this section, we will discuss the following:
Securing the Camera System
To enhance the security of your PoE camera system and protect it from unauthorized access, it is crucial to implement effective security measures.
Here are a few tips to secure your camera system:
- Change Default Passwords: As soon as you set up your system, change the default username and password to strengthen security. Be sure to choose a strong password that is not easily guessable.
- Enable Two-Factor Authentication: Activate two-factor authentication on your camera system to add an extra layer of security. This will require users to provide a unique code in addition to their username and password when logging in.
- Limit Access: Only provide access to necessary personnel and ensure that user accounts and permissions are regularly reviewed and updated.
- Regular Firmware Updates: Keep your camera system up to date by installing the latest firmware updates provided by the manufacturer. These updates often include security patches and bug fixes.
Integrating with Other Security Systems
Integrating your PoE camera system with other security systems can greatly enhance its effectiveness and provide comprehensive surveillance coverage.
Consider the following integration options:
- Alarm Systems: Connect your camera system with your alarm system so that any detected motion can trigger an automatic alarm, alerting you or your security team.
- Access Control Systems: Integrate your camera system with access control systems to monitor and record entries and exits from restricted areas.
- Video Management Systems (VMS): Use a VMS to centrally manage and monitor multiple camera systems from a single interface. This allows for easy retrieval and analysis of recorded footage.
Regular Maintenance and Upgrades
Just like any other technology, your PoE camera system will benefit from regular maintenance and occasional upgrades. Neglecting maintenance tasks can lead to subpar performance or even system failure.
Here are a few maintenance tips to keep your camera system running smoothly:
- Keep the Lenses Clean: Regularly clean the camera lenses to ensure clear and sharp image quality. Use a gentle lens-cleaning solution and a microfiber cloth for best results.
- Check Power and Network Connections: Periodically inspect the power and network connections to ensure they are secure and functioning properly.
- Review and Archive Footage: Regularly review recorded footage to identify any unusual activity and ensure proper archival of critical video files.
- Stay Informed about Upgrades: Keep an eye on firmware updates and new software versions released by the manufacturer. Assess whether any upgrades or feature enhancements are suitable for your needs.
By following these additional tips and recommendations, you can not only ensure the security of your PoE camera system but also optimize its performance for reliable surveillance and peace of mind.
Frequently Asked Questions On How To Install Poe Camera
How Do I Connect A Poe Camera?
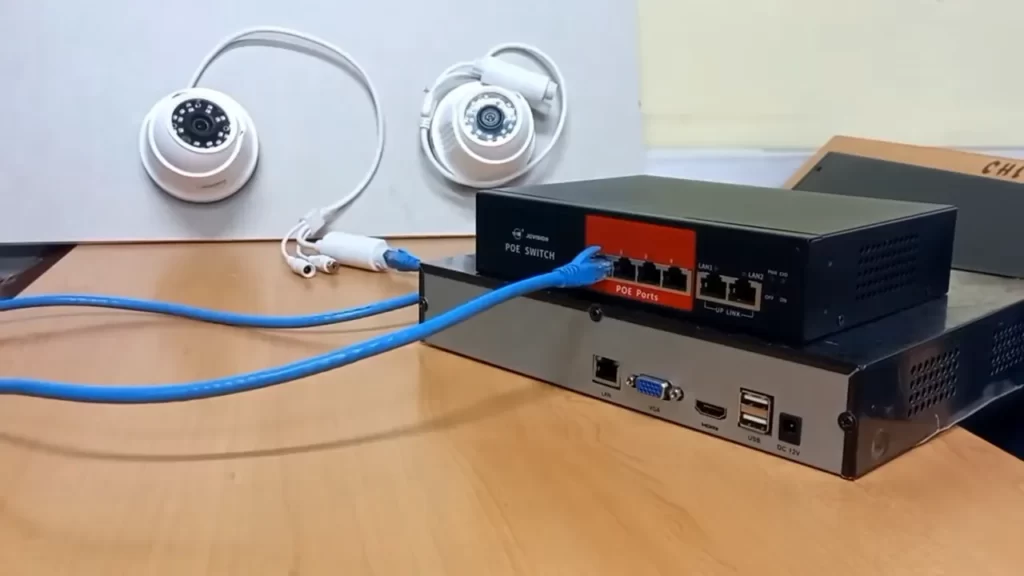
To connect a PoE camera, you need to follow these steps: 1. Plug the IP camera into the PoE switch or injector using an Ethernet cable. 2. Connect the PoE switch or injector to the router or network using another Ethernet cable.
3. Power on the PoE switch or injector. 4. The camera will now be powered and connected to the network. Access it through the IP address assigned to the camera.
What Do I Need To Install Poe Cameras?
To install PoE cameras, follow these guidelines: 1. Select appropriate camera models and features. 2. Ensure your network has PoE support or use PoE adapters. 3. Install the cameras in desired locations. 4. Connect the cameras to a PoE switch or NVR for power and data transmission.
5. Configure the camera settings and monitor the footage.
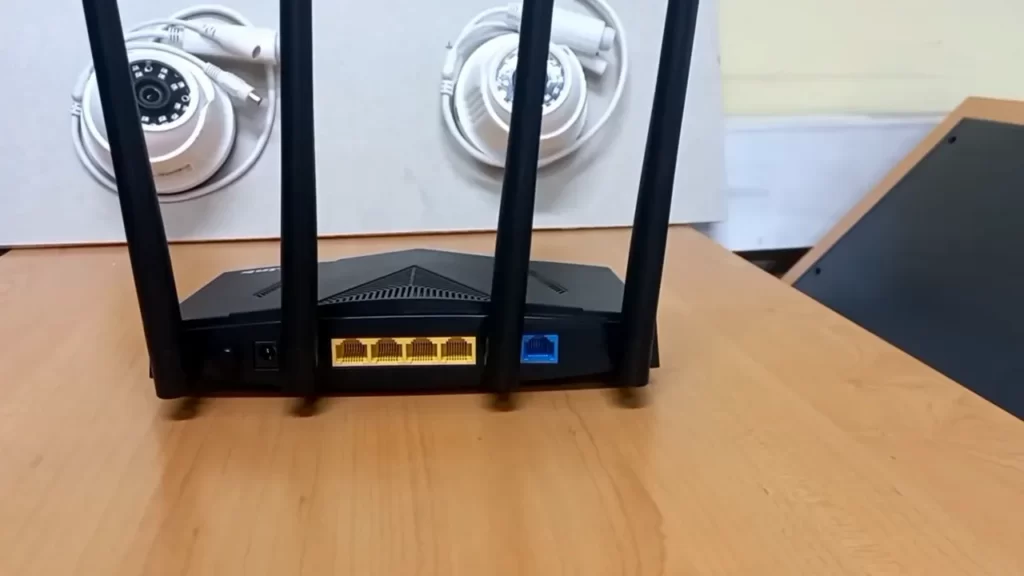
Can I Connect Poe Camera Directly To Router?
Yes, you can connect a PoE camera directly to a router.
How Do I Set Up A Poe System?
To set up a PoE system, follow these steps: 1. Connect the PoE switch to your network router using an Ethernet cable. 2. Plug the PoE-enabled devices, such as IP cameras or VoIP phones, into the PoE switch ports. 3.
Ensure the network cable from the PoE switch to the device is securely connected. 4. Power on the PoE switch and the devices will automatically receive power and network connectivity through the Ethernet cable. 5. Configure the devices’ settings for your specific needs.
How Do I Choose The Right Poe Camera For My Needs?
Choosing the right Poe camera involves considering factors such as resolution, field of view, and night vision capabilities.
Conclusion
To sum up, installing a Poe camera is a straightforward process that can significantly enhance your security measures. By carefully following the steps outlined in this guide, you can seamlessly integrate this advanced surveillance technology into your home or business.
With its power and data transmission capabilities, a Poe camera ensures high-quality video footage and hassle-free installation. Take the necessary steps to protect what matters most and enjoy the peace of mind that comes with a reliable security system.