To install a prehung entry door, first, measure the rough opening, remove the old door and frame, place the new door in the opening, shim the sides and top, check for level and plumb, install the hinges and latch, attach the door trim, and test the door for proper function. Installing a prehung entry door involves measuring the opening, removing the old door and frame, placing the new door, shimming it, installing hinges and latch, adding trim, and testing the door.
Step 1: Preparing The Door Frame
Preparing the door frame is an essential first step in the installation process of a prehung entry door. Before you can begin installing the new door, you must ensure that the frame is ready to receive it. In this step, we will guide you through the measurements and preparation required to ensure a successful installation.
Measure and Prep the Door Frame for Installation

Before you can install a prehung entry door, you need to accurately measure and prepare the door frame. This step will ensure that the new door fits properly and functions as intended. Follow the steps below to complete this crucial stage of the installation process:
- Start by measuring the height and width of the door opening. Use a tape measure to get precise measurements, making sure to account for any irregularities in the frame.
- Once you have the measurements, compare them to the dimensions of the prehung door you purchased. The door should be slightly smaller than the opening to allow for proper alignment and leveling.
- Next, remove any existing door and frame that are currently in place. This step ensures a clean slate for the new prehung door installation.
- Inspect the door frame for any damages or rot. Address any issues before proceeding with the installation.
- Use a level to check if the door frame is plumb and square. Adjust if necessary by shimming or removing material.
- Apply weatherstripping to the door frame to prevent drafts and improve energy efficiency. Ensure all gaps and cracks are sealed properly.
Following these steps will help you properly measure and prepare the door frame for the installation of your new prehung entry door. By taking the time to complete this crucial step, you will ensure a smooth and successful installation process.
Step 2: Positioning The Prehung Door
Once you have prepared the door frame and removed any temporary shipping braces, it’s time to move on to the next crucial step – positioning the prehung door in the frame. This step requires precision and attention to detail to ensure a proper fit and hassle-free installation.
Align and position the prehung entry door in the frame
The first task is to align and position the prehung entry door in the door frame. Start by placing the door unit into the opening, ensuring that it is centered both horizontally and vertically. Check that the door frame aligns properly with the wall and there is consistent spacing between the door frame and the rough opening.
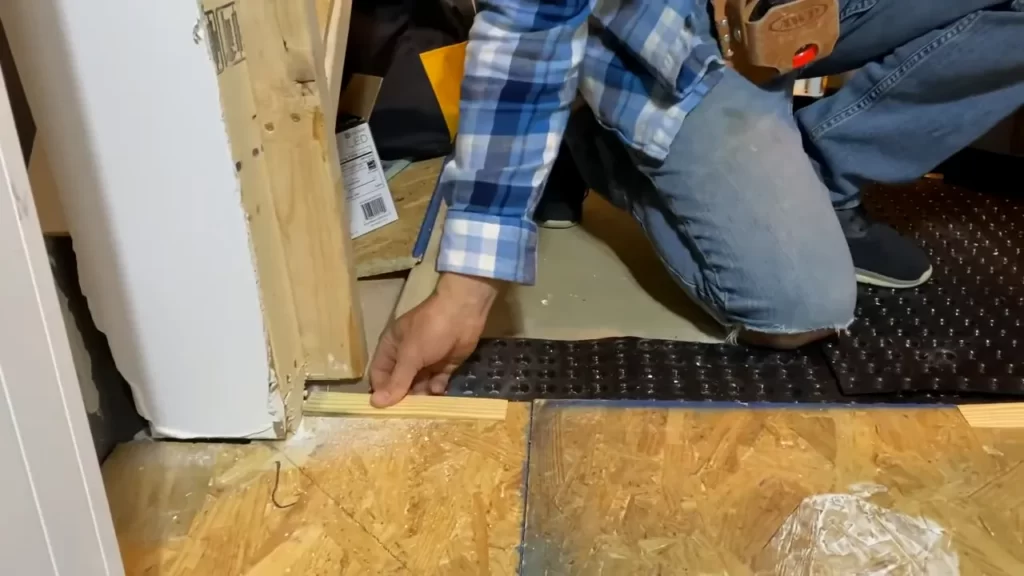
One helpful tip is to use shims at the bottom of the door frame to support its weight and keep it level during the installation process. This will ensure that the door swings open and closes smoothly without any obstructions. Remember to leave a small gap between the frame and the rough opening to allow for adjustments and proper insulation.
Ensure the door is level and plumb
Next, it is important to ensure that the door is level and plumb. Use a level to check both the vertical and horizontal alignment of the door. Adjust the shims as necessary to achieve a level and plumb position. A plumb door is essential for proper operation and preventing any issues such as sticking or dragging.
Additionally, double-check that the gap between the door slab and the frame is consistent all around. This will ensure that the door is properly insulated and sealed. Use a tape measure to measure the gap at various points along the door, making adjustments as needed.
Remember, taking the time to align and position the prehung door accurately will save you headaches down the line and ultimately result in a well-functioning and visually appealing entryway for your home.
Step 3: Securing The Door In Place
After carefully aligning the prehung entry door in the frame and making sure it’s properly leveled in Step 2, it’s time to secure the door in place. This crucial step ensures that your door is stable and that it functions properly. In this step, we’ll cover two important tasks: installing shims and screwing the door jamb to the rough framing.
Install Shims to Secure the Door in the Frame
Now that your prehung door is properly aligned and level, it’s time to install shims. Shims help fill any gaps between the door and the frame, providing stability and ensuring a snug fit. Here’s how you can do it:
- Begin by inserting shims between the jamb and the rough framing on the hinge side. These shims will help align the door properly and prevent it from sagging.
- Continue inserting shims on the latch side, keeping them evenly spaced. Be sure to put a shim near the top hinge and another one near the bottom hinge to maintain stability.
- As you insert the shims, use a level to check if the door remains plumb and to make any necessary adjustments. Remember, a level door is crucial for smooth operation.
- Once you’re satisfied with the placement of the shims, use a utility knife to trim off the excess parts that extend beyond the jamb.
Installing shims provides vital support to your prehung door and ensures that it fits perfectly within the frame. By following these steps, you’ll be able to secure the door and prepare it for the next important task: screwing the door jamb to the rough framing.
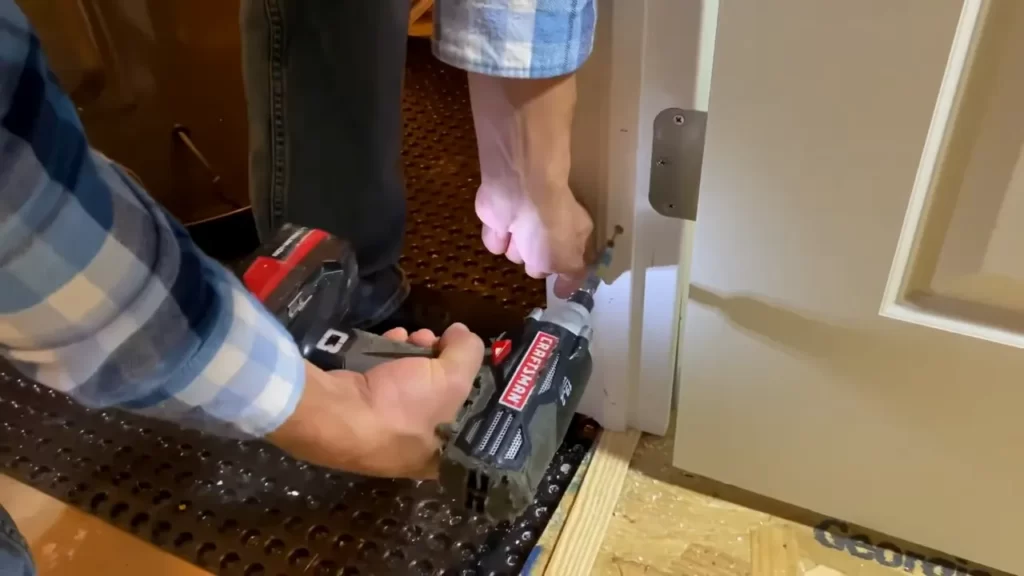
Screw the Door Jamb to the Rough Framing
Securing the door jamb with screws is essential for long-lasting stability. Here’s how you can do it effectively:
- Starting from the hinge side, insert 3-inch screws through the pre-drilled holes in the jamb and into the rough framing. Make sure to position the screws near the top hinge, middle hinge, and bottom hinge.
- Continue screwing the jamb to the rough framing on the latch side, placing screws at regular intervals along the jamb.
- Be careful not to overtighten the screws, as this may cause the door jamb to warp or crack. Tighten them until they are firm, but avoid excessive force.
- After securing the jamb with screws, double-check the door’s alignment and operation to ensure everything is functioning smoothly.
By following these steps, you’ll effectively secure the prehung entry door in place, providing stability, security, and proper functionality. Now that your door is secured, you can move on to the next steps of the installation process, bringing you one step closer to completing your project successfully.
Step 4: Checking For Proper Operation
After successfully installing the prehung entry door, it’s crucial to ensure that it operates smoothly. Testing the door for smooth operation will help you identify any issues that may need addressing. In this step, we will cover how to test the door, adjust hinges, and strike plates as needed to ensure proper functionality.
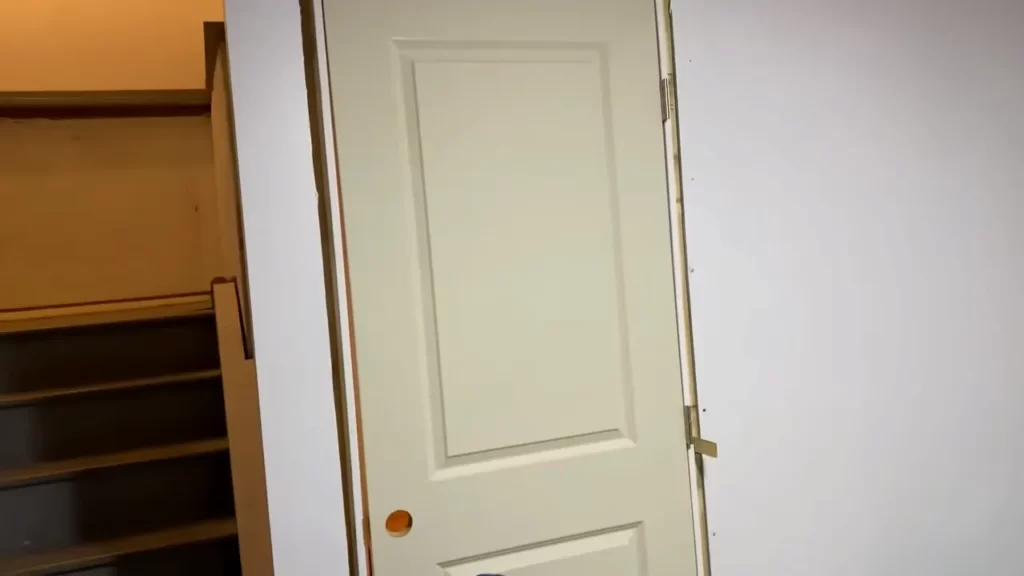
Test the door for smooth operation
To begin, open and close the door multiple times to get a feel for how it moves. Pay attention to any sticking, rubbing, or resistance. A properly installed door should open and close smoothly without any hesitation. If you notice any issues, it’s important to address them to avoid future problems.
Adjust hinges and strike plates as needed
To ensure the door operates smoothly, you may need to make adjustments to the hinges and strike plates. Here’s a step-by-step guide on how to do this:
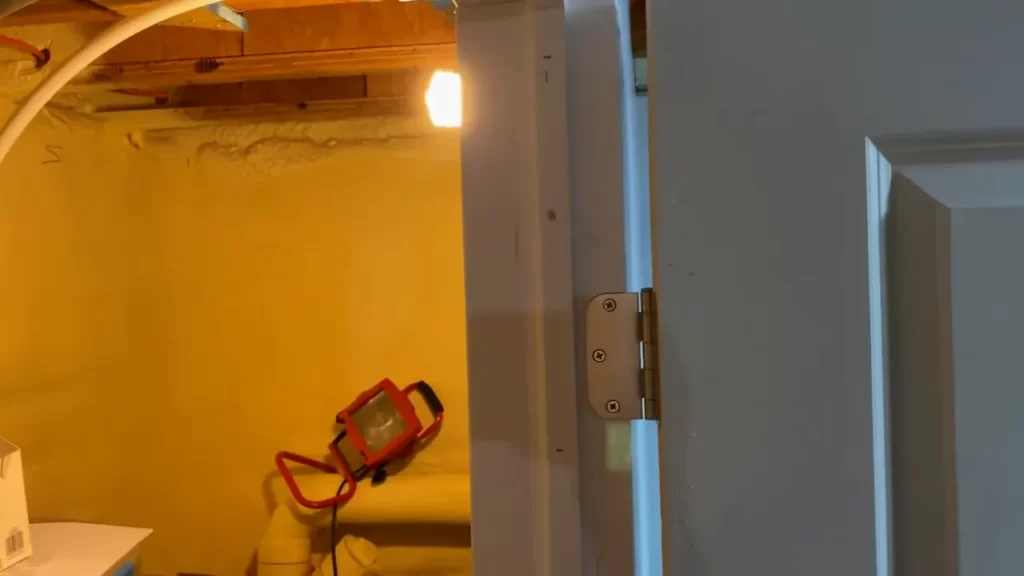
- Check hinge alignment: Examine the gaps between the door and the frame when it’s closed. If the gaps are uneven, you may need to adjust the hinges. Depending on the issue, you may need to tighten or loosen the screws on the hinges to align the gaps.
- Test latch alignment: Close the door and try to turn the handle. If you encounter resistance or the latch doesn’t align properly with the strike plate, adjustments are necessary.
- Adjust the strike plate: Loosen the screws on the strike plate and carefully move it until the latch aligns perfectly when closed. Once in the correct position, tighten the screws firmly.
By making these adjustments, you’ll ensure that the door operates smoothly and securely. Remember, proper operation of your prehung entry door is essential for both convenience and security. Taking the time to test the door and make necessary adjustments will save you potential headaches down the line.
Step 5: Insulating And Weatherproofing
After successfully installing a prehung entry door, the next crucial step is to ensure proper insulation and weatherproofing. This is essential to prevent drafts, improve energy efficiency, and maintain a comfortable indoor environment. In this step, we will focus on two key aspects: applying weatherstripping to prevent drafts and insulating around the door frame for energy efficiency.
Apply weatherstripping to prevent drafts
Weatherstripping plays a vital role in preventing drafts from entering your home through gaps around the door. These gaps can occur due to slight misalignments or inconsistencies in the door frame. By applying weatherstripping, you can effectively seal these gaps, reducing energy loss and increasing the overall comfort of your living space.
Here’s a step-by-step guide on how to apply weatherstripping to your prehung entry door:
- Clean the surface: Before applying weatherstripping, ensure that the surface around the door frame is clean and free from any dirt or debris. Use a mild detergent and water to clean the area thoroughly, and allow it to dry completely.
- Measure and cut the weatherstripping: Take accurate measurements of the gaps around the door frame. Use these measurements to cut the weatherstripping material to the appropriate length, ensuring a snug fit.
- Apply adhesive: Apply a thin layer of adhesive to the back of the weatherstripping material. Be sure to use an adhesive that is suitable for the material of your door frame.
- Attach the weatherstripping: Carefully press the weatherstripping onto the cleaned surface, starting from one end of the frame and working your way around. Make sure to firmly press down on the material to ensure proper adhesion.
- Trim any excess material: Once the weatherstripping is securely in place, use a utility knife or scissors to trim any excess material, ensuring a neat and tidy finish.
- Check for gaps: After applying the weatherstripping, close the door and check for any remaining gaps or spaces where air might still penetrate. Make any necessary adjustments or additions to ensure a tight seal.
Insulate around the door frame for energy efficiency
In addition to weatherstripping, proper insulation around the door frame is crucial for maximizing energy efficiency and reducing heat loss. By insulating this area, you can prevent cold air from seeping in during the winter months and hot air from entering during the summer.
To insulate around the door frame, you can follow these steps:
- Choose suitable insulation material: There are various insulation materials available, such as foam strips or expanding foam. Select the one that best suits your needs and preferences.
- Prepare the area: Clean the gap between the door frame and the wall, ensuring there is no debris or obstacles that may hinder the installation of the insulation.
- Cut the insulation material: Measure the length of the gap and cut the insulation material to the appropriate size.
- Install the insulation: Insert the insulation material into the gap, ensuring a snug fit. Press it firmly to secure it in place.
- Seal any gaps: Inspect the area and seal any remaining gaps or openings with caulk or a suitable sealant, ensuring a seamless finish.
By applying weatherstripping and insulating around the door frame, you can enhance the energy efficiency of your prehung entry door, minimize drafts, and enjoy increased comfort in your home. It’s a small investment of time and effort that yields significant benefits in the long run.
Step 6: Adding Finishing Touches
Now that you have successfully installed your prehung entry door, it’s time to add those final touches that will truly complete the look. This step involves installing trim and molding, as well as applying a coat of paint or stain to enhance the door’s appearance. These finishing touches not only add aesthetic value but also ensure a professional and polished finish.
Install Trim and Molding to Complete the Look
Once the prehung entry door is securely in place, it’s time to install the trim and molding. This step not only covers any gaps between the door frame and the wall but also adds a beautiful frame around the door, giving it a finished and refined appearance.
To install the trim and molding, follow these steps:
- Measure and cut the trim pieces: Start by measuring the dimensions of the door frame, and then cut the trim pieces accordingly. Make sure to miter the corners for a seamless finish.
- Attach the trim: Apply a thin bead of adhesive along the back of the trim pieces and press them firmly onto the door frame. Use finishing nails to secure the trim in place.
- Fill any gaps and nail holes: Use wood filler to fill any visible gaps or nail holes. Afterward, smooth out the filler using sandpaper to create a seamless surface.
- Finish the trim: Depending on your desired look, you can leave the trim as is or paint it to match the door or other elements in your entryway.
Apply a Coat of Paint or Stain to Enhance the Door’s
Appearance
Painting or staining your prehung entry door is the final step in the installation process. This not only protects the door from the elements but also adds a personal touch to complement your home’s exterior.
Follow these steps to apply a coat of paint or stain to your door:
- Prepare the door: Clean the door surface thoroughly, removing any dirt, dust, or debris. Sand any rough areas to create a smooth surface for the paint or stain to adhere to.
- Apply the paint or stain: Use a brush or roller to apply an even coat of paint or stain to the entire surface of the door. Make sure to follow the manufacturer’s instructions for drying time and additional coats, if necessary.
- Allow proper drying time: Once you have finished applying the paint or stain, allow the door to dry completely before reattaching any hardware or closing the door.
By following these simple steps, you can add the finishing touches to your newly installed prehung entry door, transforming it into a focal point that enhances the overall appearance of your home.
Frequently Asked Questions Of How To Install Prehung Entry Door
Is It Hard To Install A Prehung Front Door?
Installing a Prehung front door can be challenging but not overly difficult. It requires careful measurements, proper tools, and following the provided instructions. With some basic DIY skills, you can successfully install it yourself.
Should You Screw Or Nail A Prehung Door?
It is recommended to screw a Prehung door as it provides a more secure installation compared to nails. Screws offer better grip and stability, preventing the door from sagging or becoming loose over time.
How Long Does It Take To Install A Prehung Entry Door?
It typically takes around 2-4 hours to install a Prehung entry door.
Does A Prehung Door Need A Jamb?
Yes, a Prehung door does need a jamb. The jamb serves as the frame for the door, providing support and allowing it to swing open and close properly. It also helps to keep out drafts and provides a finished look to the door installation.
Conclusion
To conclude, the process of installing a prehung entry door may seem intimidating at first, but with the right tools and step-by-step guidance, it can be a manageable DIY project. By following the instructions provided in this blog post, you’ll be able to enhance the security, aesthetics, and energy efficiency of your home.
Remember to take your time, be patient, and seek professional assistance if needed. Now, go forth and enjoy your beautifully installed prehung entry door!