o install a prehung front door, begin by positioning the door frame in the opening and use shims to ensure it is level and plumb. Next, attach the door frame to the wall using screws, making sure it is securely in place.
Installing a prehung front door is a straightforward process that can enhance the appearance and security of your home. Whether you are replacing an old door or installing a new one, this step-by-step guide will help you complete the task efficiently.
From positioning the door frame to attaching it securely, follow these instructions to ensure a proper installation. By the end, you will have a professionally installed prehung front door that enhances your home’s curb appeal and provides added protection.
Preparing For Installation
Before you jump into installing your new prehung front door, it’s important to prepare yourself and gather the necessary tools and materials. This will ensure a smooth and hassle-free installation process. In this post, we will guide you through the steps of preparing for installation, including gathering the necessary tools and materials, measuring the door frame, and removing the old door and hardware.
Gathering the necessary tools and materials
Before you start the installation process, make sure you have all the tools and materials you need. Here’s a list:
- Prehung front door
- Tape measure
- Level
- Screwdriver
- Hammer
- Chisel
- Shims
- Nails/screws
- Paint and brush (if necessary)
Measuring the door frame
Accurate measurements are crucial to ensure that your new prehung front door fits perfectly. Here’s how you can measure your door frame:
- Measure the width of the door frame from the inside edge to the inside edge of the casing on both sides. Take the smaller of the two measurements. Subtract 1/2 inch to allow for clearance.
- Measure the height of the door frame from the top of the sill to the underside of the header. Subtract 1/2 inch to allow for clearance.
These measurements will help you determine the size of the prehung front door you need to purchase. Consider adding an extra inch to the width and height dimensions for easier installation.
Removing the old door and hardware
Before you can install your new prehung front door, you’ll need to remove the old one. Here’s what you need to do:
- Remove the hinge pins from the old door using a screwdriver and hammer. Carefully lift the door off its hinges and set it aside.
- Remove the screws securing the hinges to the door frame. Use a chisel or screwdriver to pry any stubborn screws loose.
- Remove any door hardware, such as the doorknob and latch, using a screwdriver.
- Inspect the door frame for any damaged or rotten wood. Repair or replace as necessary.
By following these steps, you’ll be well-prepared for the installation process. Make sure you have all the necessary tools and materials, take accurate measurements of the door frame, and remove the old door and hardware properly. In the next section, we’ll guide you through the actual installation of your new prehung front door.
Installing The Prehung Door
Once you have prepared the opening and removed the old door, it’s time to install the prehung door. By following these steps, you can ensure a smooth and successful installation process.
Positioning the door in the frame
Before securing the door, it’s essential to position it correctly in the frame. Start by centering the door within the opening and ensuring there is an even gap between the door and the frame on all sides. Use shims to achieve the proper positioning if necessary.
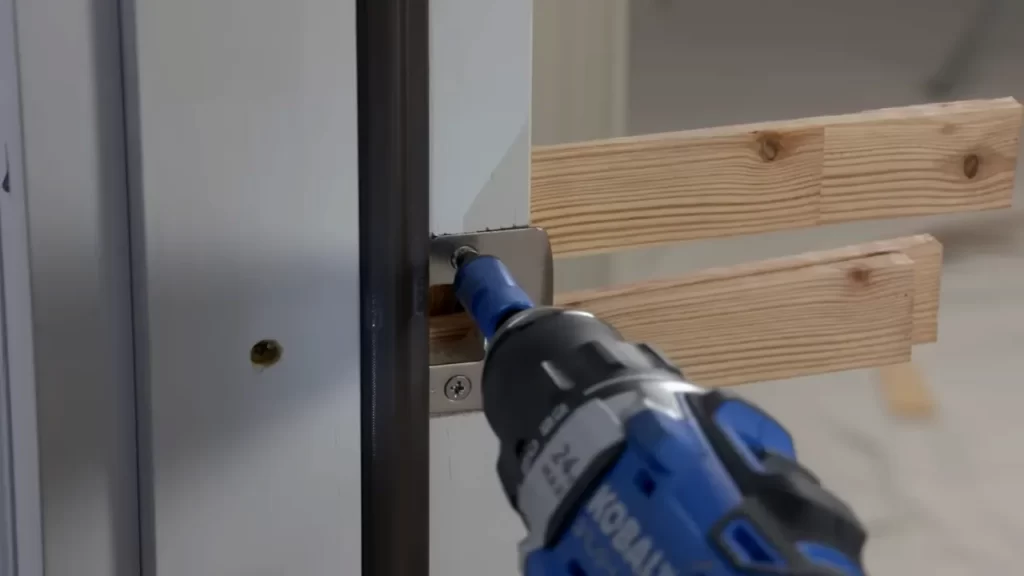
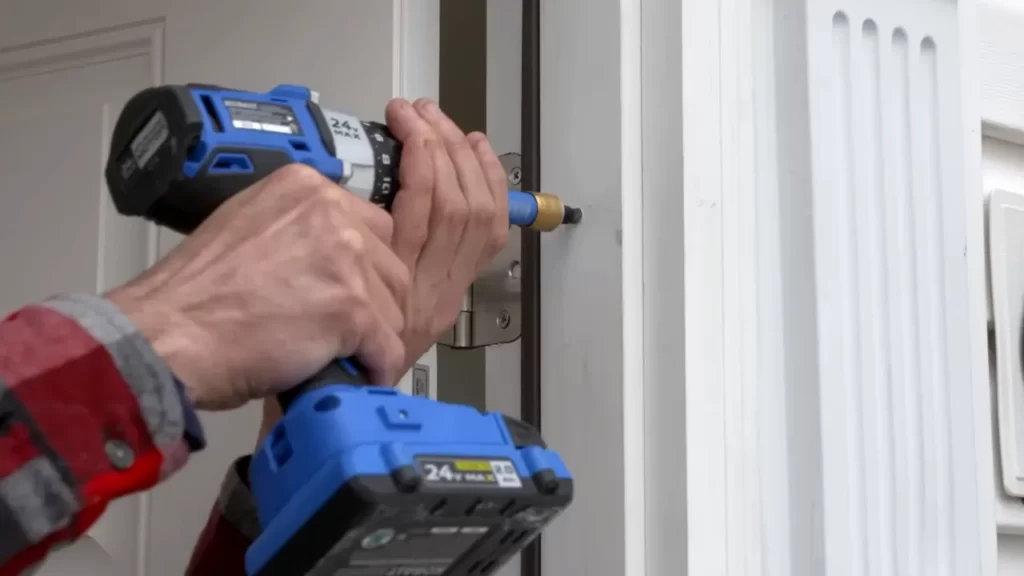
Securing the hinges and screws
Next, fix the door in place by securing the hinges and screws. Begin by attaching the top hinge, then the bottom hinge, and finally the middle hinge. Make sure the hinges are flush with the door and the frame, and tighten the screws using a screwdriver or a drill.
If required, take a look at the following table for screw size recommendations:
| Door Material | Recommended Screw Size |
|---|---|
| Wood | #8 or #9 2.5-inch screws |
| Metal or Fiberglass | #8 or #9 1.5-inch screws |
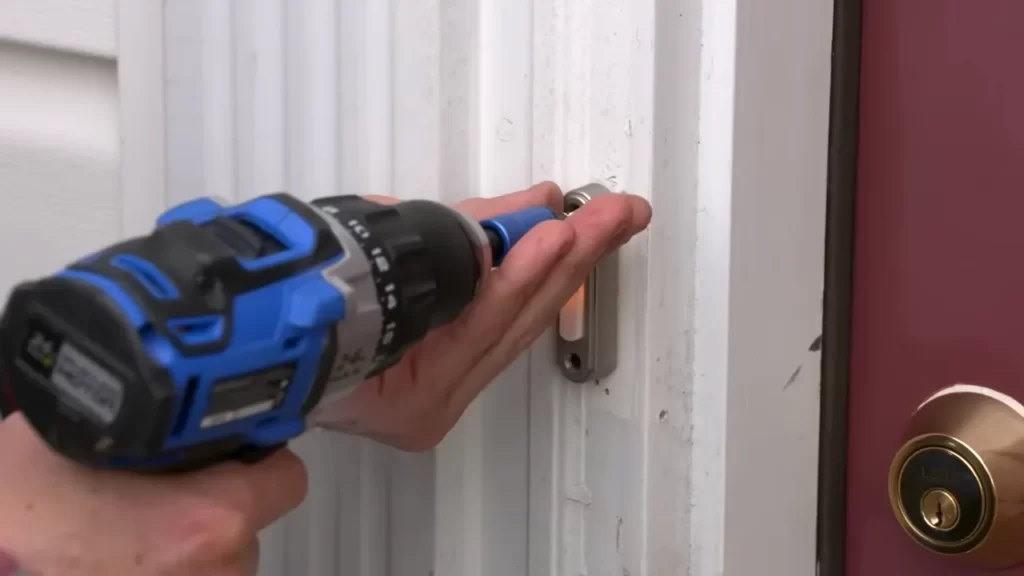
Installing the door handle and lockset
After securing the hinges, it’s time to install the door handle and lockset. Begin by marking the positions for the handle and lockset on the door. Drill the appropriate holes for each component and insert the handles and lockset, ensuring they are aligned properly. Tighten the screws to secure them in place.
Adjusting the door for proper alignment
Now, it’s essential to check the door’s alignment and make any necessary adjustments. Place a level on the door to ensure it is perfectly plumb vertically and leveled horizontally. If the door needs adjustment, use shims to make the necessary changes.
Testing the door’s functionality
Lastly, it’s crucial to test the door’s functionality to ensure it opens, closes, and locks smoothly. Open and close the door multiple times to check for any sticking or misalignment. Test the lockset to ensure it is functioning properly and securely locking the door. Make any final adjustments as needed.
With these steps, you can successfully install a prehung front door. By following the proper procedures and ensuring each step is executed correctly, you can enjoy a secure and functional entrance to your home.
Finishing Touches
Welcome to the final step of installing your prehung front door: the finishing touches. These small details make a big difference in the overall appearance, energy efficiency, and protection of your new door. In this section, we will guide you through the essential steps of insulating the door frame, adding weatherstripping for energy efficiency, and applying a protective finish to the door.
Insulating the Door Frame
Proper insulation of the door frame is crucial for maintaining a comfortable temperature inside your home and preventing drafts. With the following steps, you can ensure that your door frame is adequately insulated:
- Using fiberglass insulation, fill any gaps between the frame and the rough opening. This will prevent air leakage and help with soundproofing.
- Apply expanding foam insulation around the edges of the frame, ensuring that it reaches all the small crevices. This will provide an additional barrier against air and moisture infiltration.
- Once the expanding foam insulation is dry, trim away any excess foam using a utility knife. This will give your door frame a neat and clean appearance.
Adding Weatherstripping for Energy Efficiency
Weatherstripping is an essential component for improving energy efficiency by sealing any gaps between the door and the frame. To add weatherstripping to your prehung front door, follow these steps:
- Measure the length of each side and the top of the door frame, and cut the weatherstripping accordingly.
- Starting from one side, attach the weatherstripping along the inside edge of the door frame using adhesive or nails, ensuring that it creates a tight seal when the door is closed.
- Repeat the process for the remaining sides and the top of the door frame, making sure the weatherstripping is securely in place.
Applying a Protective Finish to the Door
Applying a protective finish not only enhances the aesthetic appeal of your prehung front door but also helps protect it from external elements. Here’s how you can apply a protective finish:
- Clean the door surface using a mild detergent mixed with water, and allow it to dry completely.
- Prepare the protective finish according to the manufacturer’s instructions. This may involve mixing or diluting the finish.
- Apply the protective finish using a paintbrush or a roller, ensuring even coverage on all surfaces of the door.
- Allow the protective finish to dry completely as per the manufacturer’s recommendations before closing and using the door.
With these essential finishing touches, your prehung front door installation is complete. Not only will they improve the energy efficiency of your home, but they will also enhance the overall appearance of your entryway. Take the time to complete these final steps, and enjoy the benefits of a well-installed and protected front door.
Frequently Asked Questions On How To Install Prehung Front Door
Is It Hard To Install A Prehung Front Door?
Installing a Prehung front door is not hard. It requires careful measurements, proper tools, and following the manufacturer’s instructions. With basic DIY skills, you can successfully install it.
Should You Screw Or Nail A Prehung Door?
Screw a Prehung door for better stability and security. Screws provide stronger hold and can be adjusted easily.
What Do I Need To Install A Prehung Exterior Door?
To install a prehung exterior door, you will need the door itself, a level, a drill, screws, shims, a hammer, a saw, a measuring tape, a pry bar, and a screwdriver. Ensure the frame is square and level, attach it to the opening, shim and screw it in place, and test the door for smooth operation.
Can You Install A Front Door Yourself?
Yes, you can install a front door yourself. It is a doable DIY project if you have the necessary tools and skills. However, it’s important to follow proper installation instructions to ensure safety and proper functioning of the door.
Conclusion
Installing a prehung front door may seem daunting, but with the right steps and tools, it can be a straightforward process. By following the guidelines provided in this blog post, you can ensure a successful installation. Remember to measure accurately, prepare the door frame, secure the hinges, and weatherstrip effectively.
With patience and attention to detail, you can enhance your home’s security and