To install Ring Floodlight, simply follow these steps: 1. Turn off the power supply.
2. Remove the existing light fixture. Ring Floodlight is a popular outdoor security device that combines a motion sensor floodlight with a camera. Installing this device can enhance the security of your home or business. By following a few simple steps, you can have the Ring Floodlight up and running in no time.
We will guide you on how to install the Ring Floodlight quickly and safely. From turning off the power supply to removing the existing light fixture, we will cover all the important steps to ensure a successful installation. So let’s get started and make your property more secure with the Ring Floodlight.
Understanding The Ring Floodlight System
Ring Floodlight is a state-of-the-art security system that provides you with peace of mind and enhanced safety for your home. The Ring Floodlight is a smart outdoor lighting solution that not only brightens up your surroundings but also acts as a deterrent to potential intruders. With its advanced features and easy installation process, understanding the Ring Floodlight system is crucial to ensure you maximize its benefits.
Key features of Ring Floodlight
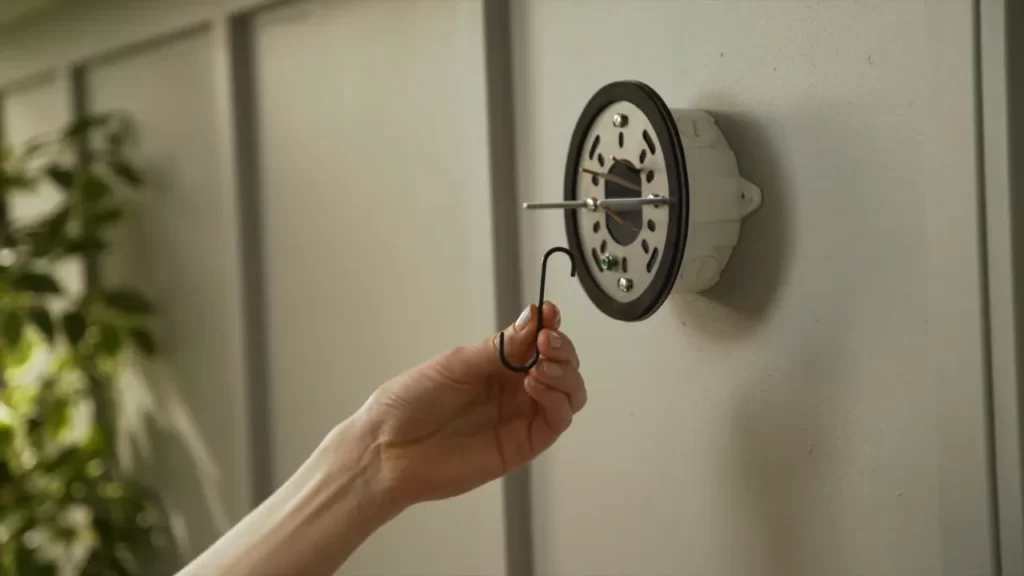
The Ring Floodlight comes equipped with a range of impressive features that make it a top choice for homeowners seeking reliable outdoor security. Here are some of the key features to look out for: 1. Ultra-bright LED Lights: The Ring Floodlight boasts powerful LED lights that illuminate your outdoor space, ensuring there are no dark corners for unwanted activities to take place. 2. Motion Detection: This smart system is equipped with advanced motion sensors that detect any movement within its range. Once triggered, the floodlight will instantly turn on, alerting you to any potential intruders. 3. Two-Way Audio: With the built-in microphone and speakers, you can communicate with anyone on your property through the Ring Floodlight system. This feature allows you to deter intruders with your voice or simply have a conversation with visitors at your doorstep. 4. HD Camera: The Ring Floodlight includes a high-definition camera that captures crystal-clear video footage of any activity it detects. This allows you to review the footage and have a visual record of any incidents that occur on your property. 5. Weather Resistance: Designed to withstand various weather conditions, the Ring Floodlight is built to last. Whether it’s rain, snow, or extreme heat, this system is equipped to keep your home protected all year round.
Benefits of installing Ring Floodlight in your home
Installing the Ring Floodlight in your home offers a multitude of benefits, making it an excellent investment for your security needs. Here are some of the advantages you can expect: 1. Enhanced Security: The Ring Floodlight acts as a visible deterrent to potential intruders, significantly reducing the likelihood of break-ins. The bright lights and motion detection work together to keep your property secure. 2. Remote Monitoring: With the Ring app, you can access your Ring Floodlight system from anywhere, anytime. This allows you to keep an eye on your property, receive live notifications, and review recorded footage, all from the convenience of your smartphone. 3. Peace of Mind: Knowing that your outdoor space is well-lit and protected gives you peace of mind, whether you’re at home or away. The Ring Floodlight offers a layer of security that ensures your family and belongings are safe. 4. Easy Installation: Installing the Ring Floodlight is a straightforward process that can be completed by following the provided instructions. With just a few simple steps, you can have your security system up and running in no time. 5. Expandable System: The Ring Floodlight system can be extended to include additional Ring devices such as doorbell cameras and security cameras. This allows you to create a comprehensive security network tailored to your specific needs. In conclusion, understanding the Ring Floodlight system is essential to fully capitalize on its impressive features and benefits. With its powerful LED lights, motion detection capabilities, two-way audio, HD camera, and weather resistance, the Ring Floodlight offers enhanced security for your home. Installing this system not only provides peace of mind but also allows for remote monitoring and easy expansion. Get the Ring Floodlight installed today and take control of your home’s security like never before.
Preparing For The Installation
Before you start installing your Ring Floodlight, it is important to make proper preparations. This will not only ensure a smooth installation process but also guarantee a safe and efficient operation of the floodlight. In this guide, we will walk you through the essential steps to follow when preparing for the installation.
Gathering the necessary tools and equipment
The first step in preparing for the installation of your Ring Floodlight is to gather all the necessary tools and equipment. This will help you save time and avoid any unnecessary interruptions during the installation process. Here’s a list of the tools and equipment you will need:
| Tools | Equipment |
|---|---|
| Drill | Ring Floodlight |
| Wire Strippers | Mounting Bracket |
| Screwdriver | Motion Sensor |
| Adjustable Wrench | Wire Nuts |
| Level | Mounting Hardware |
Assessing the installation area
After gathering the necessary tools and equipment, the next step is to assess the installation area. This will help you determine the best location for your Ring Floodlight and ensure optimal lighting coverage. Here are a few factors to consider when assessing the installation area:
- Evaluate the existing electrical wiring to ensure compatibility and determine if any modifications are required.
- Check for any obstructions, such as trees or other structures, that may hinder the performance of the floodlight.
- Consider the ideal height for mounting the floodlight to maximize its range and effectiveness.
- Ensure there is a suitable power source nearby for easy electrical connection.
Ensuring proper electrical connections
Proper electrical connections are crucial for the safe and efficient operation of your Ring Floodlight. Before proceeding with the installation, make sure to adhere to the following steps:
- Turn off the power supply to the area where you will be installing the floodlight.
- Carefully follow the manufacturer’s instructions to connect the electrical wires, ensuring proper grounding.
- Securely connect the motion sensor and test its functionality before finalizing the installation.
- Double-check all connections to ensure they are tight and properly insulated.
- Turn the power supply back on and test the floodlight to ensure it is functioning correctly.
Congratulations! You have now completed the preparation phase for installing your Ring Floodlight. Following these steps will help set the foundation for a successful installation process and ensure optimal performance of your floodlight. In the next section, we will guide you through the step-by-step installation process of your Ring Floodlight.
Step 1: Planning The Placement
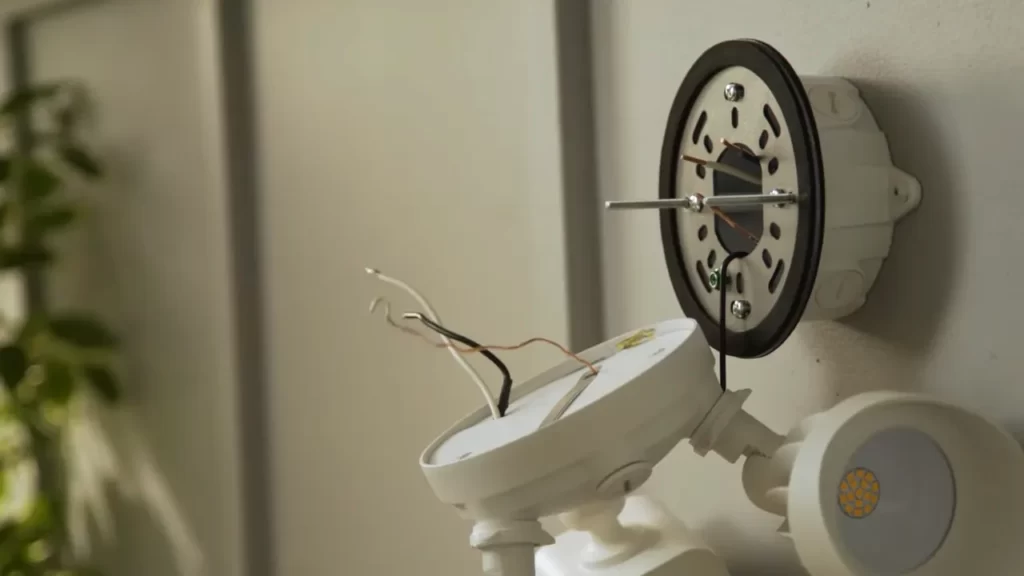
Before you start the installation process of your Ring Floodlight, it is essential to plan where you want to place it. The right placement will ensure optimal coverage, improved security, and maximum functionality. In this step, we will guide you through the process of identifying the best location for the floodlight, considering the angle and range, and ensuring proper coverage and security.
Identifying the best location for the floodlight
The first step in planning the placement of your Ring Floodlight is to identify the best location for it. You should choose an area that requires extra security and where the floodlight can cover a wide range. Here are a few factors to consider:
- Entry Points: Look for areas near entry points, such as doors, windows, and walkways, where the floodlight will capture any suspicious activity.
- Dark Spots: Identify areas around your property that are poorly lit or have blind spots that may provide cover for intruders.
- Power Source: Ensure that the chosen location is within reach of a power source for easy installation. You may also need to consider weatherproof electrical boxes.
Considering the angle and range of the floodlight
Once you have identified the best location for your Ring Floodlight, it is important to consider the angle and range of the floodlight. These factors will determine how much area the floodlight will cover and the effectiveness of its motion detection. Here’s what you need to keep in mind:
- Angle: The floodlight should be installed at an angle that provides the maximum coverage of the desired area. Avoid obstructions, such as trees, walls, or other objects that may interfere with the floodlight’s performance.
- Range: Check the specifications of your Ring Floodlight to determine its maximum range. Consider the distance between the floodlight and the areas you want to cover to ensure proper detection.
- Adjustment: Many Ring Floodlights come with adjustable heads, allowing you to customize the angle and direction of the lighting. Take advantage of these adjustments to achieve the best coverage and security.
Ensuring proper coverage and security
Proper coverage and security should be a top priority when installing your Ring Floodlight. By ensuring the floodlight is placed correctly, you can maximize its effectiveness in deterring and capturing any unauthorized activity. Here are a few additional tips:
- Overlap: If your property has multiple entry points or vulnerable areas, consider installing multiple Ring Floodlights to ensure complete coverage.
- Height: Install the floodlight at a height that provides optimal coverage and minimizes the risk of vandalism or tampering.
- Testing: Once the floodlight is installed, test its functionality by walking around the desired coverage area. Adjust the angle, range, and sensitivity settings if necessary.
By carefully planning the placement of your Ring Floodlight, you can enhance the security of your property and enjoy the peace of mind that comes with a well-lit and well-protected outdoor space.
Step 2: Assembling The Ring Floodlight
Once you have unboxed your Ring Floodlight and familiarized yourself with its components, it’s time to assemble the floodlight. Follow these simple steps to get your Ring Floodlight ready for installation:
Unboxing the Ring Floodlight
The first step in assembling your Ring Floodlight is to unbox it. Carefully remove the floodlight from its packaging and ensure that all the necessary components are included. These components typically include:
- Floodlight
- Mounting bracket
- Mounting screws
- Wire nuts
- Security screws
Make sure you have all these components before moving on to the next step.
Familiarizing yourself with the components
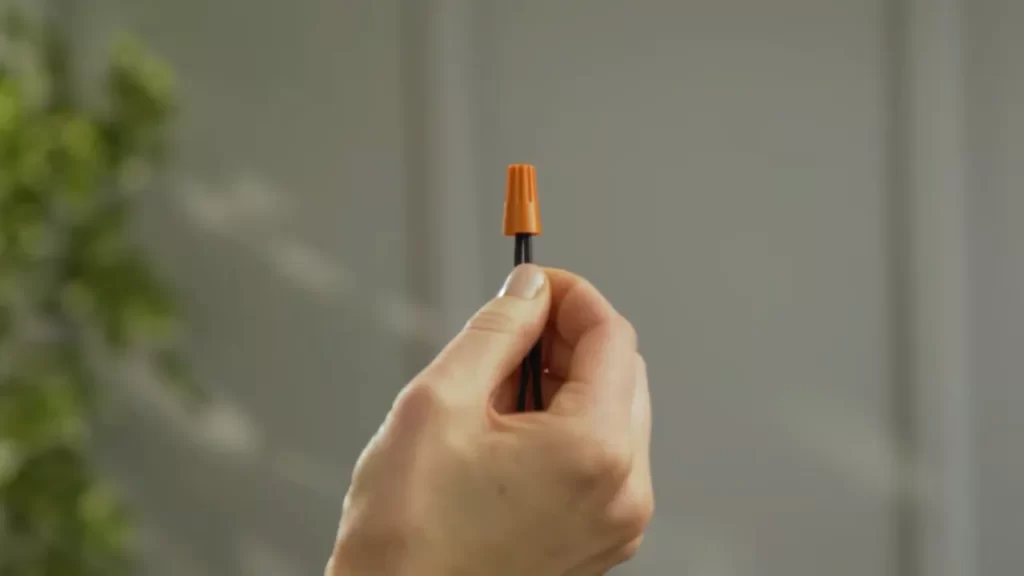
Before you start assembling the Ring Floodlight, it’s important to familiarize yourself with the various components. Take a moment to examine each component and understand its purpose. This will help you during the assembly process and ensure that everything is installed correctly.
Refer to the user manual or any accompanying documentation to get a clear understanding of the components and their functions.
Connecting the floodlight to the mounting bracket
Now that you have familiarized yourself with the components, it’s time to connect the floodlight to the mounting bracket. This step will ensure that your Ring Floodlight is securely attached to the desired location.
To connect the floodlight to the mounting bracket:
- Align the holes on the back of the floodlight with the corresponding holes on the mounting bracket.
- Insert the mounting screws through the aligned holes.
- Tighten the screws securely to ensure a stable connection between the floodlight and the mounting bracket.
Make sure to use the provided wire nuts to secure any electrical connections, following the instructions provided in the user manual or accompanying documentation.
Once you have completed these steps, your Ring Floodlight will be assembled and ready for installation. In the next step, we will guide you through the process of wiring and mounting the floodlight.
Step 3: Mounting The Floodlight
Now that you have prepared the electrical connections and adjusted the motion settings, it’s time to mount your Ring Floodlight. Properly mounting the floodlight ensures optimal positioning for maximum functionality and effectiveness. Follow these straightforward steps to securely mount your floodlight:
Marking the mounting holes on the wall or ceiling
Before drilling any holes, it is essential to accurately mark the mounting points on the designated installation surface. This will ensure that your Ring Floodlight is positioned correctly and securely. Here’s how to mark the mounting holes:
- Hold the mounting bracket against the desired installation spot on the wall or ceiling.
- Use a marker or pencil to outline the distinct hole positions onto the surface. Be sure to mark the spots where the screws will go into.
- If you are mounting the floodlight to a brick or concrete surface, it is recommended to use a hammer drill with the appropriate masonry bit to create pilot holes.
Drilling pilot holes and securing the mounting bracket
Once you have marked the mounting holes, it’s time to drill pilot holes and secure the mounting bracket. Follow these steps:
- Using an appropriate drill bit based on your installation surface, carefully drill pilot holes at the marked spots. Take care to drill straight and at the correct depth.
- Insert wall anchors if required, ensuring a snug and secure fit.
- Align the mounting bracket with the pilot holes and secure it to the surface using screws or bolts, depending on the material. Make sure the bracket is level and firmly attached.
Attaching the floodlight to the mounting bracket
Now that the mounting bracket is securely in place, you can attach the Ring Floodlight to it. Follow these steps:
- Locate the screw holes on the back of the floodlight.
- Hold the floodlight up against the mounting bracket, aligning the screw holes with the corresponding holes on the bracket.
- Securely fasten the floodlight to the bracket using the provided screws or bolts. Ensure each screw is tightened properly, but be careful not to over-tighten as it may damage the floodlight or the bracket.
- Double-check the alignment and stability of the floodlight once it is attached to the mounting bracket.
By following these simple steps, you can efficiently and securely mount your Ring Floodlight. Once it is installed, you’ll be able to enjoy enhanced security and peace of mind knowing that your property is well-illuminated and protected. Whether installed on your home’s exterior or any desired location, the Ring Floodlight is designed to provide reliable and effective lighting and surveillance capabilities.
Step 4: Wiring The Floodlight
Wiring the floodlight is a crucial step in the installation process to ensure it works seamlessly and provides optimal security. In this step, we will discuss the steps to understand the electrical connections, cut power to the existing light fixture, and connect the wires to the floodlight and power supply.
Understanding the electrical connections
Before you start the wiring process, it’s important to familiarize yourself with the electrical connections involved. Take a close look at the existing wiring setup and understand which wires correspond to the power supply, neutral, and ground.
In most cases, you will see three wires: black (hot/live wire), white (neutral wire), and green or bare copper (ground wire). However, every electrical system may have its own color coding, so refer to the user manual or consult a professional if you are unsure.
Cutting power to the existing light fixture
Next, it’s critical to cut the power supply to the existing light fixture to ensure safety during the installation process. Locate the circuit breaker that controls the lights in the area where you are installing the floodlight.
Switch off the circuit breaker, and test the existing light fixture to ensure there is no power running through it. Use a voltage tester to confirm that the wires are not live before proceeding with the wiring.
Connecting the wires to the floodlight and power supply
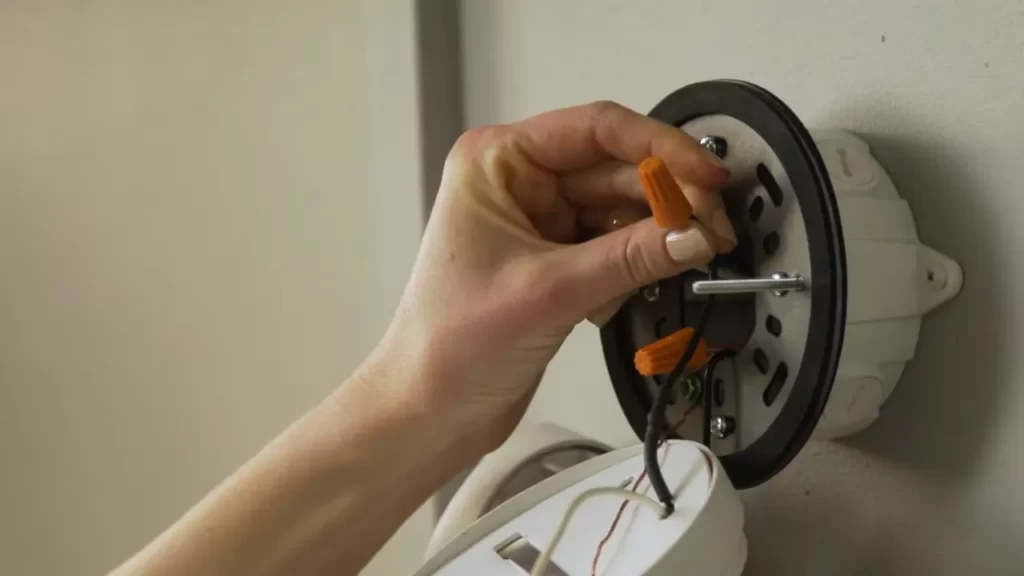
Now that you have disconnected the power supply, it’s time to connect the wires to the floodlight and power supply.
Start by stripping the ends of the wires, exposing around half an inch of bare wire. Connect the corresponding wires of the floodlight to the power supply. For example, connect the black wire of the floodlight to the black (hot/live) wire of the power supply, the white wire to the white (neutral) wire, and the green or bare copper wire to the green or bare copper wire of the power supply.
Secure the connections by twisting the wires together. Optionally, you can also use wire nuts or electrical tape to ensure a more secure and reliable connection.
Once the connections are made, carefully tuck the wires inside the electrical box and secure the floodlight in place according to the manufacturer’s instructions.
Before moving forward, double-check all the connections to ensure they are properly secured and there are no loose wires. This will help prevent any electrical issues or malfunctions in the future.
Finally, restore power by switching on the circuit breaker and test your newly installed floodlight to ensure it functions correctly.
By following these simple steps, you can wire your Ring Floodlight effectively, ensuring a successful installation and improved security around your property.
Step 5: Adjusting Settings And Testing
Now that you have successfully installed your Ring Floodlight, it’s time to move on to the final step – adjusting the settings and testing the functionality. This step is crucial to ensure that your floodlight performs optimally and meets your specific needs. In this section, we will guide you through the process of setting up the Ring mobile app, configuring the floodlight’s motion sensor, and thoroughly testing its functionality.
Setting up the Ring mobile app
The first thing you need to do is download and install the Ring mobile app on your smartphone or tablet. This app will serve as your control center for the floodlight, allowing you to monitor and customize its settings from anywhere. Follow these simple steps to set up the app:
- Go to the respective app store on your device and search for the Ring app.
- Download and install the app.
- Open the app and create a new Ring account or log in if you already have one.
- Follow the on-screen instructions to connect the app to your Ring Floodlight.
Configuring the floodlight’s motion sensor
One of the most important settings to adjust is the motion sensor. This allows the floodlight to detect any activity in its coverage area and trigger the lights and any connected cameras or alarms. To configure the motion sensor, follow these steps:
- Open the Ring mobile app and select your Floodlight from the device list.
- Navigate to the “Motion Settings” or similar option in the app menu.
- Adjust the motion sensitivity level to your preference. Keep in mind that higher sensitivity might lead to more frequent activations, while lower sensitivity may cause the floodlight to miss some events.
- Explore additional options such as motion zones, scheduling, and linked devices to customize the settings further.
Testing the floodlight’s functionality
Before considering the installation process complete, it is crucial to test the floodlight to ensure that all its features are working as intended. Follow these steps to perform a thorough functionality test:
- Walk in front of the floodlight to test its motion detection capabilities. Make sure it triggers the lights and any linked devices appropriately.
- Observe the range and coverage area of the floodlight to ensure it adequately illuminates the desired space.
- Check if the floodlight’s integrated camera or any connected cameras are capturing clear footage during nighttime operation.
- Test any additional features or settings you have customized, such as alarm sounds or notifications.
By following these steps, you can fully adjust the settings of your Ring Floodlight and thoroughly test its functionality. This will give you peace of mind, knowing that your home is well-protected and that your floodlight is optimized to meet your specific needs.
Tips For Troubleshooting
Even with the simplest of installations, it’s not uncommon to encounter a few hiccups along the way. When installing your Ring Floodlight, it’s helpful to be prepared for any challenges that may arise. In this section, we’ll explore some common installation issues and their solutions, as well as how to troubleshoot connectivity or sensor problems.
Common Installation Issues and Solutions
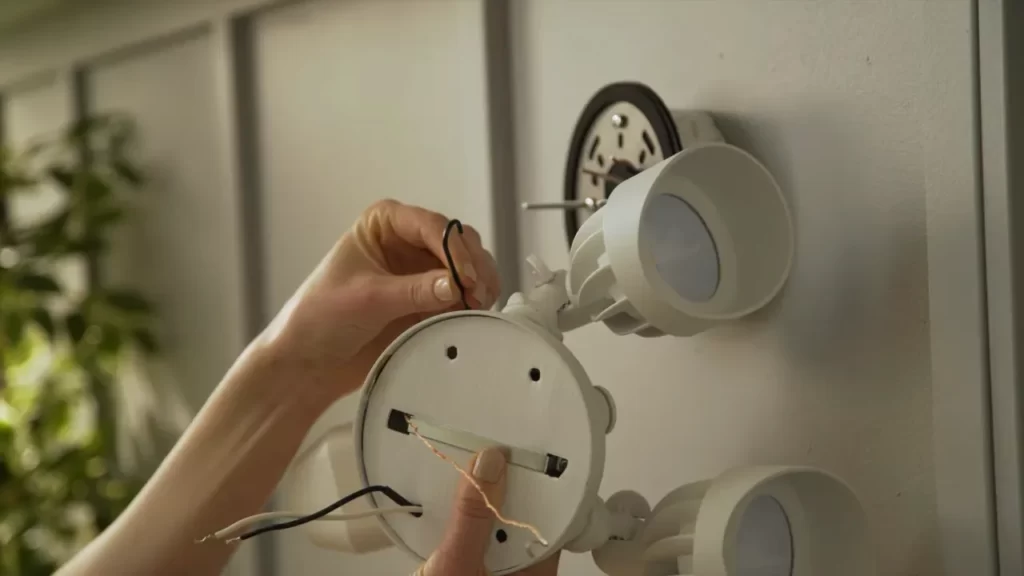
While installing the Ring Floodlight is generally a straightforward process, there are a few common issues that you may encounter. Here are some solutions to help you overcome these challenges:
| Issue | Solution |
|---|---|
| Floodlight not powering on | Check if the power source is active and properly connected. Ensure that the wiring is correct and securely connected. If the issue persists, consult a qualified electrician. |
| Improper positioning of the floodlight | Make sure that the floodlight is positioned correctly for optimal coverage. Adjust the angle and height to ensure adequate lighting in the desired areas. |
| Incompatible existing wiring | Some older homes may have incompatible wiring that may not provide sufficient power for the floodlight. In such cases, consult an electrician to upgrade the wiring. |
Troubleshooting Connectivity or Sensor Problems
If you’re experiencing connectivity or sensor issues with your Ring Floodlight, follow these steps to troubleshoot the problem:
- Check your Wi-Fi signal strength: Ensure that your Wi-Fi signal is strong and the floodlight is within range of your router. A weak signal can cause connectivity issues.
- Restart your router: Sometimes a simple router restart can resolve connectivity problems. Turn off the router, wait for a few seconds, and then turn it back on.
- Reset the floodlight: Press and hold the reset button on the floodlight for 15 seconds to factory reset the device. This can help resolve sensor issues or other persistent problems.
- Update the firmware: Ensure that your floodlight is running the latest firmware version. Check the Ring app or website for any available updates and install them if necessary.
- Check the sensor settings: Adjust the sensor sensitivity and range settings in the Ring app to ensure they are appropriate for your needs. Excessive sensitivity may result in false motion alerts.
By following these troubleshooting tips, you should be able to address most issues that may arise during the installation or operation of your Ring Floodlight. Remember, if you encounter persistent problems, don’t hesitate to reach out to Ring’s customer support for further assistance.
Safety Precautions And Best Practices
Safety Precautions and Best Practices
When it comes to installing a Ring Floodlight, safety should be your top priority. By following the proper safety precautions and best practices, you can ensure a smooth and secure installation process. In this section, we will discuss the essential steps to ensure electrical safety during installation and the proper maintenance and care of the Ring Floodlight.
Ensuring electrical safety during installation
Before you start the installation process, it is crucial to take certain measures to ensure electrical safety. Here are some steps you should follow:
- Turn off the power: Start by turning off the power to the area where you will be installing the Ring Floodlight. Locate the circuit breaker or fuse box and switch off the appropriate breaker or remove the fuse.
- Test the power: Even after turning off the power, it is crucial to double-check if the electricity is indeed off. Use a voltage tester to check for live wires before proceeding.
- Wear protective gear: To protect yourself from potential electrical hazards, always wear appropriate protective gear such as gloves and safety glasses.
- Follow the manufacturer’s instructions: Each Ring Floodlight comes with specific installation instructions provided by the manufacturer. Make sure to carefully read and follow these instructions to ensure proper installation.
- Use proper wiring techniques: When connecting the electrical wires, use appropriate wiring techniques such as wire nuts or electrical tape to secure the connections and prevent any accidental exposure.
Proper maintenance and care of the Ring Floodlight
Proper maintenance and care of your Ring Floodlight are essential to ensure optimal performance and longevity. Here are some best practices to follow:
- Regularly inspect the floodlight: Periodically inspect the floodlight for any signs of damage, loose connections, or excessive wear. If any issues are detected, address them promptly to maintain the efficiency and effectiveness of the floodlight.
- Keep the floodlight clean: Over time, dirt, dust, and debris can accumulate on the floodlight, affecting its performance. Clean the floodlight periodically using a soft cloth and mild detergent, avoiding abrasive cleaners that could damage the surface.
- Check the light settings: Verify that the light settings are properly configured according to your preferences. Adjust the motion sensitivity and duration settings as needed to ensure optimal functionality.
- Test the floodlight: To ensure that your Ring Floodlight is working correctly, perform regular testing. Activate the motion sensor or manually trigger the lights to confirm that they illuminate as expected.
By following these safety precautions and best practices, you can install the Ring Floodlight with confidence, and maintain its performance over time. Remember to prioritize safety and regular maintenance to enjoy the benefits of a secure and well-functioning floodlight.
Frequently Asked Questions Of How To Install Ring Floodlight
Do You Need An Electrician To Install A Ring Floodlight?
No, you don’t need an electrician to install a ring floodlight. The installation process is designed to be straightforward and user-friendly. Just follow the provided instructions, and you’ll be able to install it yourself without any professional assistance.
What Do I Need To Install Ring Floodlight?
To install a Ring Floodlight, follow these steps: 1. Ensure you have a stable Wi-Fi connection and a compatible smartphone or tablet. 2. Download the Ring app from your device’s app store. 3. Connect the Floodlight to a power source using the provided wire connectors.
4. Use the app to scan the QR code on the Floodlight and follow the on-screen instructions to complete the setup. 5. Mount the Floodlight in a desired location and adjust the settings in the app as needed.
Do I Need A Junction Box To Install Ring Floodlight?
Yes, a junction box is required to install a Ring Floodlight.
How Much Is Labor To Install Ring Floodlight?
The cost of labor for installing a Ring Floodlight may vary depending on the location and the complexity of the installation. It is recommended to contact a professional installer or electrician for an accurate quote.
How Do I Choose The Right Location For Installing The Ring Floodlight?
To ensure optimal performance, choose a location that provides clear visibility and covers the desired area.
Conclusion
To wrap it up, installing the Ring Floodlight is a straightforward process that can enhance your home security. By following these step-by-step instructions, you can successfully set up this smart device to enjoy its benefits. Remember to choose an ideal location and ensure a stable Wi-Fi connection.
With the Ring Floodlight in place, you can have peace of mind knowing you have taken an important step towards safeguarding your property. Upgrade your security today and enjoy a safer living environment.
