To install a Schlage Lockset, follow these simple steps: First, remove the existing lockset from the door. Next, attach the new lockset using the provided screws and fasteners.
When it comes to keeping your home secure, a reliable lockset is essential. Installing a Schlage Lockset is a straightforward process that can be completed in just a few steps. By replacing your old lockset with a new Schlage Lockset, you can enhance the security of your home while adding a stylish touch to your door.
In this guide, we will walk you through the steps to successfully install a Schlage Lockset, ensuring that your home is protected and secure. So let’s get started with the installation process of a Schlage Lockset.
Understanding The Schlage Lockset Components
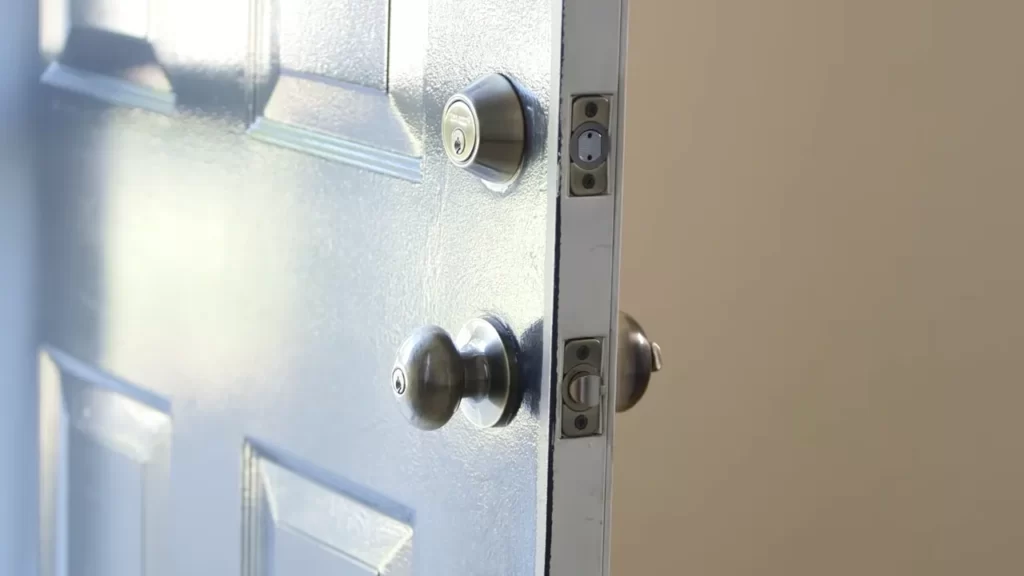
Understanding the Schlage Lockset Components is essential before attempting to install it. By familiarizing yourself with each component, you can ensure a successful installation and enjoy the security and convenience offered by Schlage locksets. In this article, we will walk you through the different components of the Schlage lockset, including the keyed cylinder and deadbolt assembly, strike plate and latch, as well as the exterior and interior trim.
Keyed Cylinder and Deadbolt Assembly
The keyed cylinder and deadbolt assembly is the heart of the Schlage lockset, providing the primary locking mechanism. The cylinder is the part of the lock that you insert your key into, while the deadbolt extends and retracts to secure the door. When choosing a Schlage lockset, make sure the keyed cylinder matches the key you want to use. This ensures that you will only need one key to operate all of your Schlage locks.
Strike Plate and Latch
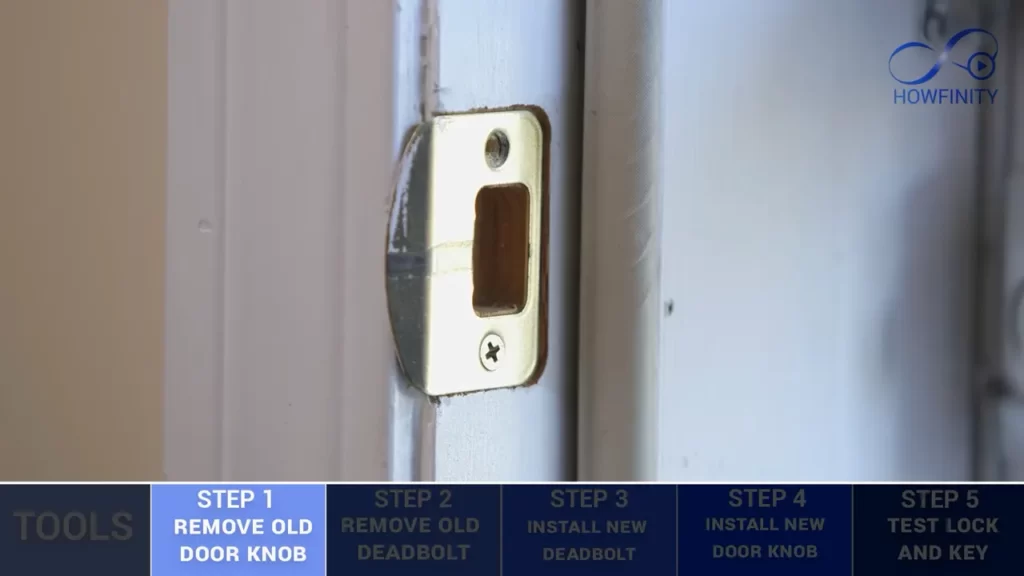
The strike plate and latch work together to secure the door when it is closed. The latch is a spring-loaded metal component that extends from the lock to hold the door in place. The strike plate is installed on the door frame and provides a solid surface for the latch to engage with when the door is closed. It is important to properly align the strike plate with the latch to ensure a secure fit and smooth operation.
Exterior and Interior Trim
The exterior and interior trim are the visible parts of the Schlage lockset and contribute to its aesthetics. The exterior trim typically includes the handle or knob, as well as any additional decorative elements. The interior trim, on the other hand, can vary depending on the design of the lockset and may include a thumb turn or lever handle for easy locking and unlocking from the inside. When installing the trim, make sure to follow the manufacturer’s instructions to ensure proper alignment and functionality.
By understanding the different components of the Schlage lockset, you can confidently install it and enhance the security of your doors. Take your time to carefully install each component and make any necessary adjustments to ensure a perfect fit. With a properly installed Schlage lockset, you can enjoy peace of mind knowing that your doors are secure and your home is protected.
Preparing For Installation
Before you can begin installing your Schlage lockset, it’s crucial to properly prepare. This stage includes gathering the necessary tools, measuring and marking the door, and removing the existing lockset. By completing these steps with precision, you’ll set yourself up for a smooth installation process.
Gathering the Necessary Tools
To start, ensure you have all the tools required for the installation. Here’s a handy table summarizing the tools you’ll need:
| Tool | Quantity |
|---|---|
| Screwdriver | 1 |
| Tape Measure | 1 |
| Chisel | 1 |
| Hammer | 1 |
Make sure your screwdriver is appropriate for the screws provided with your Schlage lockset. Having the right tools at hand will save you time and frustration later on.
Measuring and Marking the Door
The next step involves accurately measuring and marking the door to ensure proper placement of the lockset. Follow these steps:
- Measure the backset, which is the distance between the edge of the door and the center of the hole for the lockset. The standard backset is 2 3/8 inches or 2 3/4 inches.
- With the backset measurement in mind, mark the centerline of the door where the lockset will be installed.
- Measure the height for the lockset, typically around 36 inches from the bottom of the door, unless specified otherwise by local building codes or personal preference.
- Use the tape measure to establish the bore hole’s diameter, typically 2 1/8 inches for most locksets.
By accurately measuring and marking the door, you’ll ensure that the lockset is installed at the correct position and height.
Removing the Existing Lockset
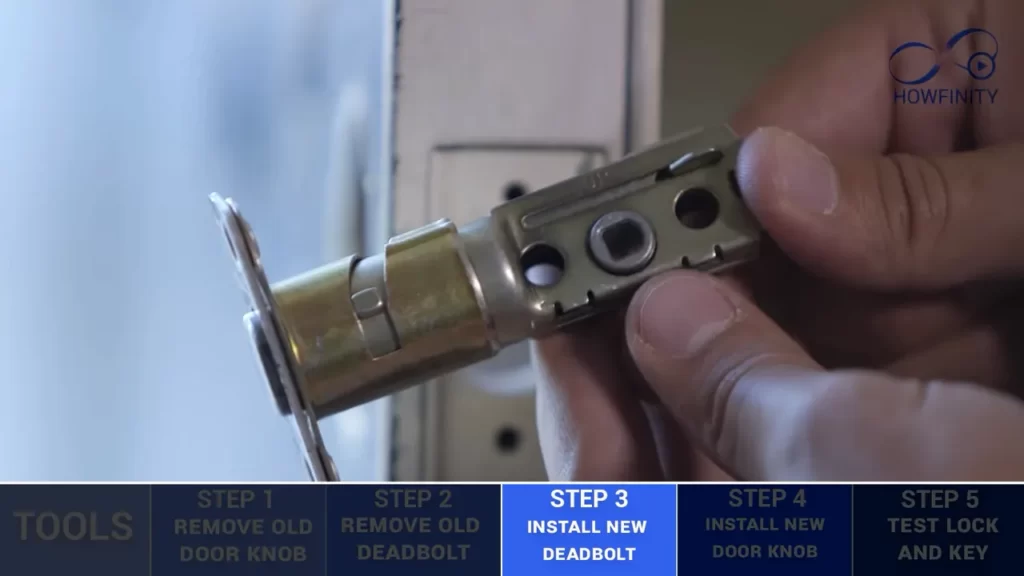
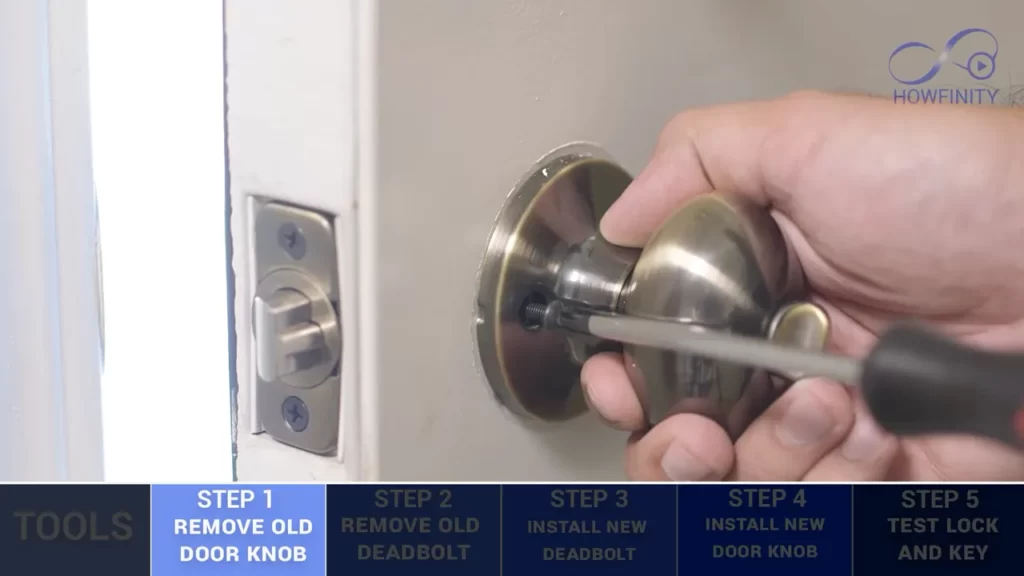
Before installing the new Schlage lockset, you must remove the existing one. Follow these steps:
- Start by unscrewing and removing the screws that secure the faceplate on the edge of the door.
- Gently pry off the faceplate using a chisel and a hammer if necessary.
- Next, unscrew and remove the screws that secure the latch plate on the edge of the door.
- Once the screws are removed, carefully slide out the latch mechanism from the hole in the edge of the door.
When removing the existing lockset, be cautious not to damage the door or surrounding areas.
With the old lockset removed, you’re now ready to move forward with the installation of your new Schlage lockset.
Installing The Keyed Cylinder And Deadbolt Assembly
Installing the keyed cylinder and deadbolt assembly is an essential step in securing your home. This section will guide you through the process of preparing the cylinder holes, inserting the keyed cylinder, and attaching the deadbolt assembly. By following these steps carefully, you can ensure that your Schlage lockset is installed correctly and provides maximum security for your door.
Preparing the Cylinder Holes
Before you begin the installation, it’s important to prepare the cylinder holes on your door. This involves measuring the existing holes and ensuring they are the correct size for the Schlage lockset. Here are the steps to prepare the cylinder holes:
- Measure the diameter of the existing holes using a caliper or ruler. The cylinder holes should have a diameter of 2⅛ inches.
- If the existing holes are larger or smaller than 2⅛ inches, you will need to use a hole saw or drill to adjust the size accordingly. Be sure to follow the manufacturer’s instructions for adjusting the cylinder holes.
- Clean any debris or dust from the cylinder holes using a soft cloth or brush.
Inserting the Keyed Cylinder
Now that you have prepared the cylinder holes, it’s time to insert the keyed cylinder. The keyed cylinder is the part of the lockset that accepts the key and allows you to lock and unlock the door. Follow these steps to insert the keyed cylinder:
- Hold the keyed cylinder with the keyway facing the door’s exterior side.
- Insert the keyed cylinder into the cylinder holes and align it with the door’s exterior side.
- Once aligned, push the keyed cylinder firmly into the cylinder holes until it is flush with the door’s surface.
Attaching the Deadbolt Assembly
With the keyed cylinder in place, the next step is to attach the deadbolt assembly. The deadbolt provides an additional layer of security by extending a bolt into the door frame when locked. Here’s how to attach the deadbolt assembly:
- Position the deadbolt assembly on the interior side of the door, aligning it with the keyed cylinder.
- Insert the screws provided with the deadbolt assembly into the holes on the interior side of the door and tighten them using a screwdriver. Make sure the deadbolt assembly is securely attached to the door.
- Test the deadbolt by turning the latch from the interior side. It should extend and retract smoothly without any obstructions.
By following these steps, you can successfully install the keyed cylinder and deadbolt assembly of your Schlage lockset. Once installed, don’t forget to test the lock to ensure it functions properly. With your new lockset in place, you can have peace of mind knowing that your home is secure.
Installing The Strike Plate And Latch
As you continue the installation process of your Schlage lockset, the next step is to install the strike plate and latch. This crucial step ensures that the lockset functions properly and provides security for your door. Follow the steps below to position and secure the strike plate, as well as install the latch into the door frame.
Positioning the Strike Plate
To begin, you’ll need to position the strike plate on the door frame. The strike plate is the metal plate that attaches to the door jamb and receives the latch when the door is closed. Here’s how to do it:
- Close the door and hold the strike plate against the door jamb, aligning it with the latch hole.
- Ensure that the strike plate sits flush with the door jamb and that the latch hole lines up perfectly with the latch bolt.
- Use a pencil or pen to mark the screw holes on the door jamb, outlining where you’ll need to secure the strike plate.
Securing the Strike Plate with Screws
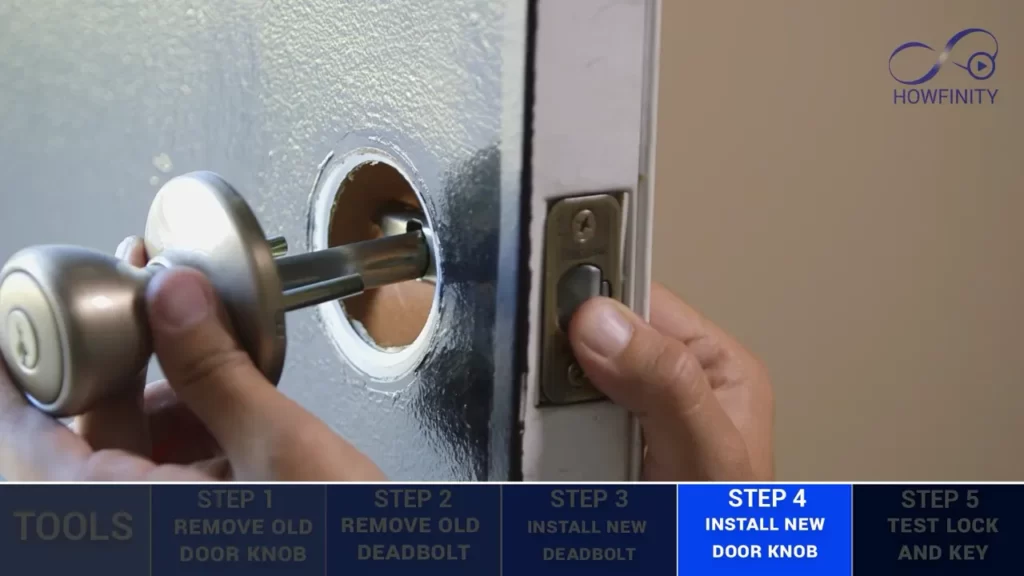
With the strike plate positioned correctly, it’s time to secure it to the door jamb. Follow these steps to ensure a secure installation:
- Using a power drill or screwdriver, drill pilot holes into the door jamb along the previously marked screw hole outlines.
- Align the strike plate over the pilot holes and insert the screws.
- Tighten the screws firmly, but be careful not to overtighten and strip the holes.
- Double-check that the strike plate is securely attached to the door jamb and that it aligns perfectly with the latch bolt.
Installing the Latch into the Door Frame
Now that the strike plate is in place, you’ll need to install the latch into the door frame. The latch is the spring-loaded mechanism that extends or retracts when the door is opened or closed. Follow these steps to complete the installation:
- Hold the latch against the edge of the door frame, aligning it with the strike plate and latch hole.
- Ensure that the latch sits flush and the latch bolt fully extends and retracts without obstruction.
- Mark the outline of the latch plate on the door frame using a pencil or pen.
- Using a chisel or utility knife, carve out a recess within the marked outline to accommodate the latch plate.
- Insert the latch into the recess and secure it to the door frame using the provided screws.
- Test the latch by closing and opening the door to confirm that it functions smoothly.
With the strike plate and latch successfully installed, you can now move on to the final steps of the Schlage lockset installation process. Stay tuned for our next blog post, where we’ll guide you through the process of attaching the lockset components and verifying their proper operation.
Attaching The Exterior And Interior Trim
When it comes to installing a Schlage Lockset, attaching the exterior and interior trim is an important step. This ensures that your lockset is properly secured and functions correctly. In this section, we will outline the steps for aligning and installing the exterior trim, connecting the interior trim, and ensuring proper fit and functionality.
Aligning and Installing the Exterior Trim
To begin, aligning and installing the exterior trim is crucial for a secure lockset. Here’s how to do it:
- Start by placing the exterior trim plate against the door, ensuring that it is centered over the bore hole.
- Insert the screws provided with the lockset into the holes on the trim plate and tighten them with a screwdriver.
- Verify that the exterior trim is securely attached to the door.
Connecting the Interior Trim
Next, it’s time to connect the interior trim. Follow these steps:
- Hold the interior trim plate against the edge of the door, making sure it aligns with the exterior trim plate.
- Insert the spindle into the latch mechanism, ensuring that it is fully inserted.
- Align the holes on the interior trim plate with the holes on the door.
- Insert the screws provided into the holes and tighten them with a screwdriver.
- Double-check that the interior trim is securely connected to the door.
Ensuring Proper Fit and Functionality
Once the exterior and interior trim are attached, it’s important to ensure that the lockset fits properly and functions correctly. Here are a few additional steps to consider:
- Check that the latch extends fully when the door is closed and retracts smoothly when the door is opened.
- Test the operation of the handle or knob to ensure it turns and operates smoothly.
- If needed, make adjustments to the trim plates or screws to ensure a proper fit.
- Verify that the lockset is securely attached to the door and there are no loose components.
By following these steps, you can confidently attach the Schlage lockset’s exterior and interior trim, ensuring a secure installation and optimal functionality. Enjoy the peace of mind that comes with a properly installed lockset.
Testing And Adjusting The Lockset
Testing and adjusting the lockset is a crucial step to ensure the proper functioning and security of your Schlage lockset installation. By properly testing and adjusting the lockset, you can minimize any potential issues and ensure that the lock operates smoothly and securely. In this section, we will cover the steps involved in testing and adjusting the lockset, including inserting the key and testing the lock, adjusting the strike plate as needed, and checking the smooth operation of the lockset.
Inserting the Key and Testing the Lock
Once you have installed the Schlage lockset, the first step in testing is to insert the key and test the lock. This will help you ensure that the lock is functioning properly, and all components are aligned correctly. Follow these steps to insert the key and test the lock:
- Insert the key into the keyhole.
- Turn the key clockwise to engage the lock.
- Test the lock by turning the key counterclockwise to unlock the door.
If the lock operates smoothly and without any resistance, you can proceed to the next step of adjusting the strike plate. However, if you encounter any difficulties during the testing process, you may need to make some adjustments to ensure proper functioning.
Adjusting the Strike Plate as Needed
The strike plate is an essential component of the lockset that helps secure the door when it is closed. If the door does not lock smoothly or encounters resistance during locking or unlocking, you may need to adjust the strike plate. Follow these steps to adjust the strike plate:
- Loosen the screws securing the strike plate to the door frame.
- Move the strike plate slightly to align it with the latch bolt.
- Tighten the screws to secure the strike plate in its new position.
After adjusting the strike plate, retest the lock by inserting the key and turning it to lock and unlock the door. Ensure that the lock operates smoothly without any resistance or difficulties. If necessary, repeat the adjustment process until the lockset operates properly.
Checking the Smooth Operation of the Lockset
Once you have inserted the key, tested the lock, and adjusted the strike plate if needed, it is essential to check the smooth operation of the lockset. Follow these steps to ensure the lock operates seamlessly:
- Try locking and unlocking the door several times with the key to confirm smooth operation.
- Pay attention to any sticking or resistance during the locking or unlocking process.
- If you encounter any issues, carefully examine the lockset components and make additional adjustments as necessary.
By thoroughly testing and adjusting the lockset, you can ensure that your Schlage lock installation provides the security and functionality you need. Taking the time to properly test and adjust the lockset will give you peace of mind and confidence in your home’s security.
Finishing Touches
When it comes to installing a Schlage lockset, there are a few important finishing touches that can enhance both the appearance and functionality of the lockset. These finishing touches ensure that the lockset is secure, clean, and properly disposed of. In this section, we will discuss tightening any loose screws, cleaning and polishing the lockset, and disposing of the old lockset properly.
Tightening Any Loose Screws
After installing the lockset, it is important to check for any loose screws and tighten them properly. Loose screws can not only affect the performance of the lockset but also pose a security risk. To tighten any loose screws, follow these steps:
- Locate the screws on the lockset, including the strike plate and latch plate.
- Using a screwdriver, carefully tighten each screw, making sure not to over-tighten.
- Check the lockset for any remaining loose screws and repeat the tightening process if necessary.
By ensuring all screws are secure, you can have peace of mind that your Schlage lockset is installed correctly and effectively.
Cleaning and Polishing the Lockset
To maintain the appearance and functionality of your Schlage lockset, it is important to clean and polish it regularly. Follow these steps to keep your lockset looking its best:
- Prepare a mixture of mild soap or detergent and warm water.
- Gently wipe down the lockset with a soft cloth or sponge dipped in the soapy water mixture.
- Rinse the lockset with clean water to remove any soap residue.
- Dry the lockset thoroughly with a clean, lint-free cloth.
- Once dry, apply a small amount of non-abrasive metal polish to a soft cloth and gently polish the lockset.
Regular cleaning and polishing will help remove any dirt, grime, or fingerprints from the lockset, keeping it looking shiny and new.
Disposing of Old Lockset Properly
If you are replacing an old lockset with a Schlage lockset, it is important to dispose of the old lockset properly. Follow these guidelines to ensure proper disposal:
- Remove the old lockset from the door by unscrewing the screws or bolts that hold it in place.
- Separate any metal or plastic parts that can be recycled from the non-recyclable parts.
- Contact your local recycling facility to inquire about their policies on recycling metal and plastic lockset components.
- If recycling is not an option, dispose of the non-recyclable parts according to your local waste management guidelines.
By disposing of the old lockset properly, you are not only minimizing waste but also contributing to a sustainable environment.
Frequently Asked Questions On How To Install Schlage Lockset
How Do You Install A Schlage Keyed Entry Lock?
To install a Schlage keyed entry lock, follow these steps: 1. Begin by removing the old lock. 2. Insert the new lock assembly into the door, aligning it with the existing holes. 3. Secure the lock with the provided screws. 4.
Install the strike plate onto the door frame. 5. Test the lock to ensure proper function.
How Do You Install A Schlage Latch?
To install a Schlage latch, follow these steps: 1. Start by positioning the latch plate on the edge of the door. 2. Ensure the latch bolt aligns with the strike plate on the door jamb. 3. Secure the latch plate using screws provided in the Schlage latch kit.
4. Test the latch to ensure smooth operation. 5. Finally, close the door and check if it latches properly.
What Tools Do You Need To Install A Schlage Lock?
Tools needed for installing a Schlage lock are a screwdriver, tape measure, drill, hole saw, chisel, and a hammer.
How Do You Install A Smart Lock On A Front Door?
To install a smart lock on a front door, follow these steps: 1. Measure the door’s thickness to ensure compatibility. 2. Remove the existing lock and check if the door requires modifications. 3. Install the smart lock according to the manufacturer’s instructions.
4. Connect the lock to a compatible smart home system or app. 5. Test the lock to ensure it’s working properly.
Conclusion
Installing a Schlage lockset may seem daunting at first, but with the right tools and instructions, it is actually a straightforward process. By following the step-by-step guide provided in this blog post, you can ensure a secure and reliable lock for your home or office.
Remember to gather all the necessary materials, take accurate measurements, and carefully follow the instructions to ensure a successful installation. Enjoy the peace of mind that comes with having a high-quality lockset protecting your property. Happy installing!
