To install a Simplisafe camera, first plug it into a power source, then connect it to your Wi-Fi network using the Simplisafe app. Are you looking to enhance your home security system with a Simplisafe camera?
You’re in the right place. In this guide, we’ll walk you through the process of installing a Simplisafe camera step by step, ensuring that you can quickly and easily set up your new device to keep your home safe and secure.
With its user-friendly app and straightforward installation process, Simplisafe makes it easy to monitor your home from anywhere, providing you with peace of mind. Whether you’re a homeowner, renter, or simply looking to bolster your security measures, installing a Simplisafe camera is a great choice. Let’s get started!
Understanding The Components
The Simplisafe Camera is a popular choice for anyone looking to enhance their home security. Before diving into the installation process, it’s important to understand the key components that come with the camera system. This knowledge will not only ensure a smoother setup but also enable you to make the most of its features. In this section, we’ll delve into the key elements of Simplisafe Camera setup, as well as the required tools and equipment you’ll need to have on hand.
Key elements of Simplisafe Camera setup
Before installing your Simplisafe Camera, it’s essential to familiarize yourself with the various components that come with the system. Having a clear understanding of each part will make the installation process easier and help you troubleshoot any issues that may arise. Here are the key elements you’ll find in a typical Simplisafe Camera setup:
| Component | Description |
|---|---|
| Camera | The camera itself is the core component of the Simplisafe Camera system. It is responsible for capturing and transmitting the video feed to your smartphone or other devices. |
| Mounting Bracket | The mounting bracket allows you to securely attach the camera to a wall, ceiling, or any other desired surface. It provides flexibility in positioning and angles. |
| Power Adapter | The power adapter supplies the necessary electrical power to the camera. It ensures uninterrupted functionality by keeping the camera powered at all times. |
| USB Cable | The USB cable connects the camera to the power adapter. It is responsible for transmitting power and data between the camera and the adapter. |
| Wall Anchors and Screws | These accessories are crucial for securely mounting the camera bracket onto walls or other surfaces. They provide stability and prevent accidental dislodgment. |
| Quick Start Guide | The quick start guide is a comprehensive manual that provides step-by-step instructions for installing and setting up your Simplisafe Camera. It includes diagrams and troubleshooting tips. |
Required tools and equipment
To successfully install your Simplisafe Camera, you’ll need to gather a few essential tools and equipment. Having these items ready will ensure a seamless setup process and save you time. Here’s what you’ll need:
- Power drill
- Drill bits
- Screwdriver (Phillips head)
- Tape measure
- Pencil or marker
- Level
Make sure to have all these tools and equipment handy before beginning the installation process. Being prepared will make the setup easier and help avoid any unnecessary delays or frustrations.
Preparing For Installation
Installing a Simplisafe camera can provide peace of mind and added security to your home. Before you begin the installation process, it’s important to properly prepare. This includes choosing the optimal camera placement and ensuring the camera is compatible with your home.
Choosing the optimal camera placement
When it comes to installing a Simplisafe camera, choosing the right location is crucial. Consider the areas around your home that require the most surveillance. This may include the front door, back porch, or garage. Additionally, take into account the camera’s field of view to ensure it covers the desired area. Keep the following factors in mind:
- Clear line of sight: Position the camera where it has a clear line of sight, avoiding any obstructions that might hinder its view.
- Height: Mount the camera at a sufficient height to capture a wide perspective while ensuring it is out of reach from potential tampering.
- Lighting conditions: Take note of the lighting conditions in the area you wish to monitor. Ensure that there is sufficient lighting for the camera to capture clear footage.
- Weather resistance: If you plan to install an outdoor camera, make sure it is built to withstand various weather conditions.
Checking the camera’s compatibility with your home
Before proceeding with the installation, it’s important to verify that the Simplisafe camera is compatible with your home’s existing infrastructure, as well as any other Simplisafe devices you may have. Take the following steps:
- Internet connectivity: Ensure that you have a stable internet connection. Most Simplisafe cameras require a Wi-Fi connection to function properly.
- Power source: Check if the camera requires a power source or if it is battery-operated. If it needs an electrical outlet, make sure one is easily accessible in the desired location.
- Camera hub: If you have a Simplisafe security system with a central hub, confirm that the camera is compatible and can connect to it seamlessly.
- Mobile app compatibility: If you plan to control and monitor the camera through your smartphone, check if the Simplisafe app is compatible with your device’s operating system.
By considering these factors and performing the necessary compatibility checks, you can ensure a smooth and successful installation of your Simplisafe camera. With its optimal placement and seamless integration with your home, you’ll be on your way to enhancing your security system in no time.
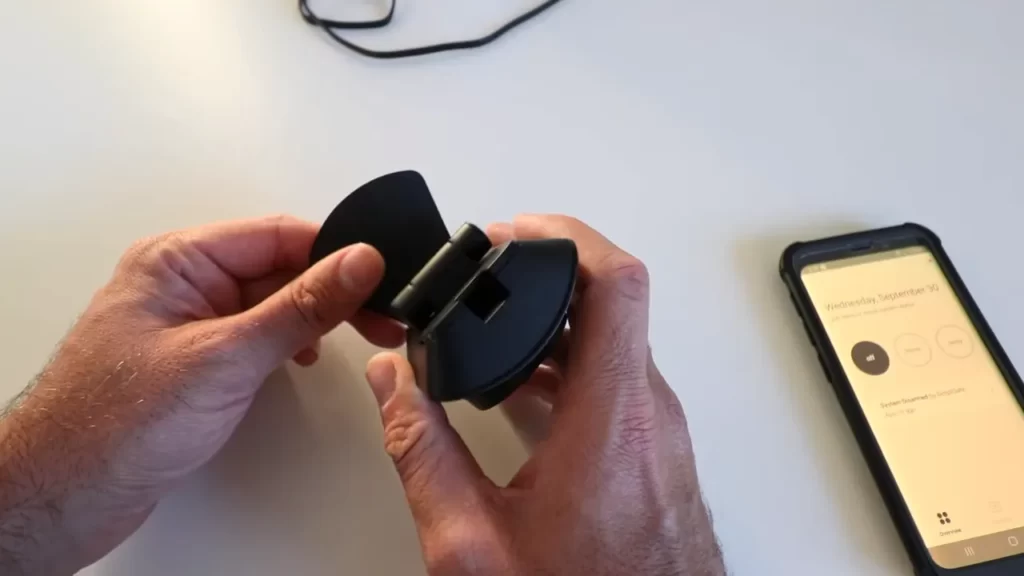
Step 1: Assembling The Camera
Before you can begin using your Simplisafe Camera, you’ll need to assemble it properly. This step-by-step guide will walk you through the process, ensuring that you have everything set up and ready to go.
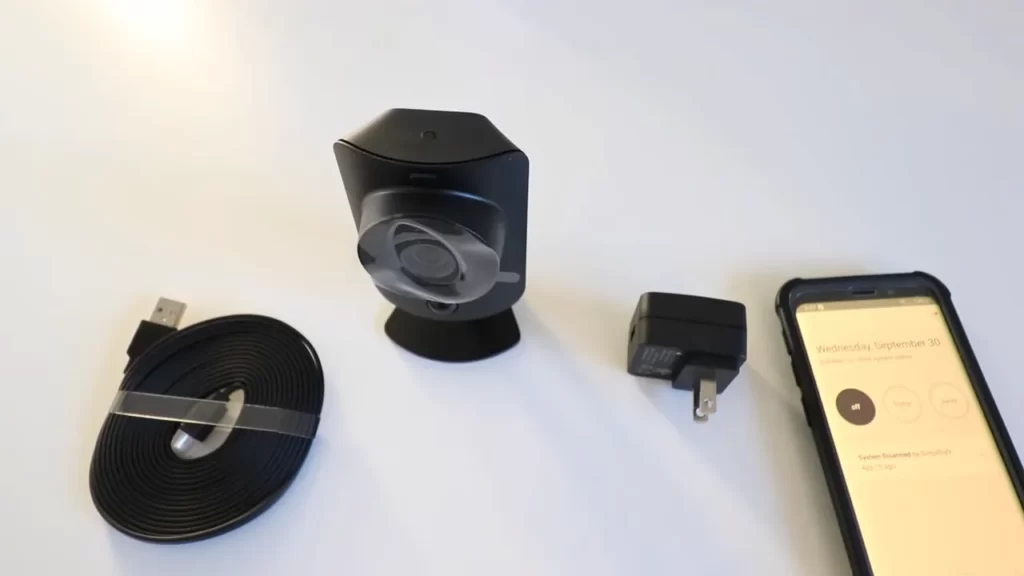
Unpacking the Camera Package
Start by unpacking the camera package to ensure that you have all the necessary components. Inside the package, you should find:
- The Simplisafe Camera
- Mounting brackets and screws
- Power adapter
- Ethernet cable
- User manual and installation guide
Take a moment to inspect each item and make sure nothing is damaged or missing. If you notice any issues, reach out to Simplisafe customer support for assistance.
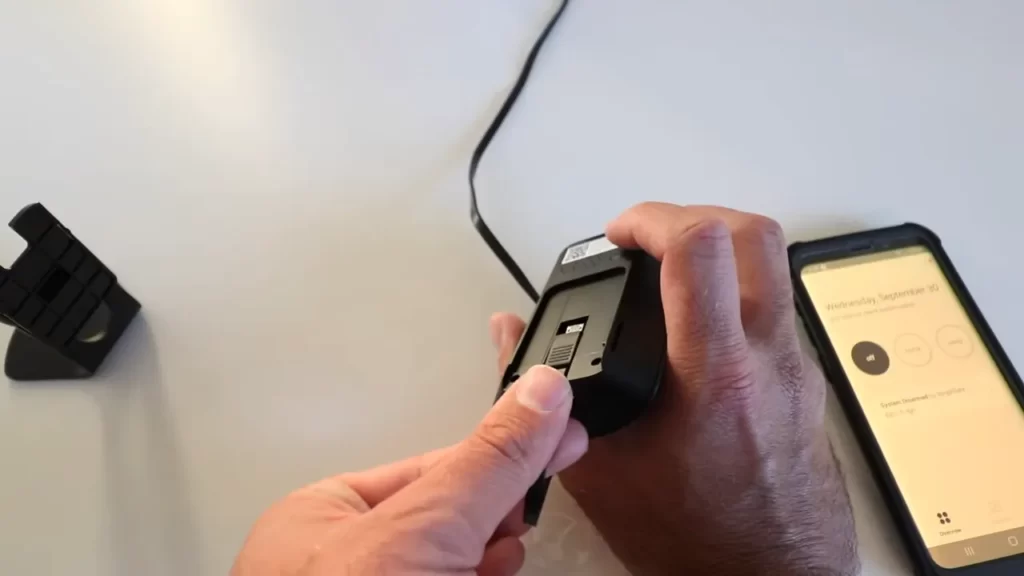
Connecting the Necessary Cables and Accessories
Once you have everything unpacked and checked, it’s time to connect the necessary cables and accessories. Follow these steps:
- Connect one end of the Ethernet cable to the camera’s Ethernet port.
- Plug the other end of the Ethernet cable into your Wi-Fi router.
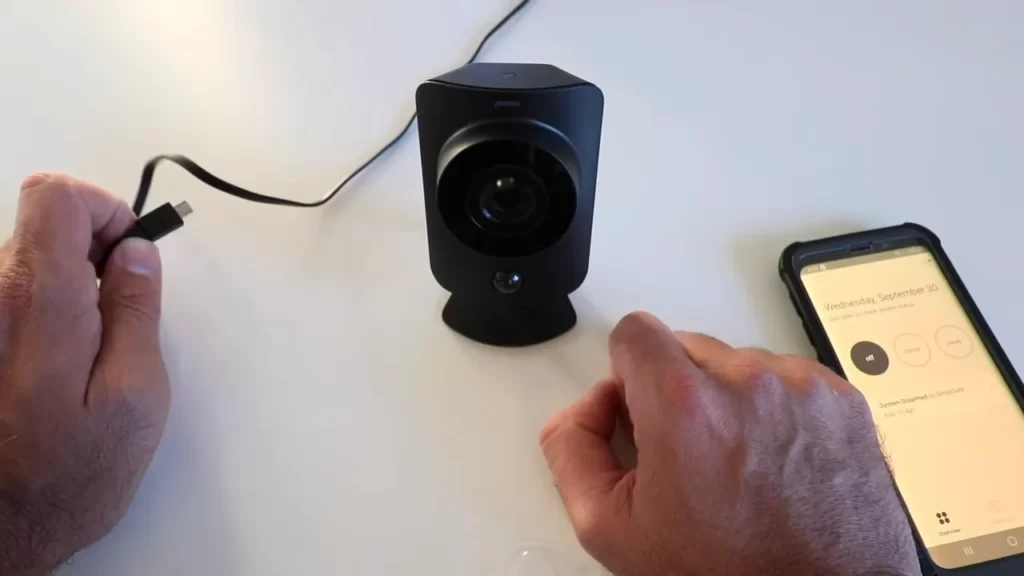
- Connect the power adapter to the camera’s power input.
- Plug the power adapter into a nearby power outlet.
Ensure that all the connections are secure and properly fitted. This will ensure a stable and reliable connection for your Simplisafe Camera.
Mounting Options: Wall, Ceiling, or Freestanding
Now that your camera is connected, you can choose how to mount it. Simplisafe offers three mounting options: wall, ceiling, or freestanding. Consider the following:
- Wall Mount: If you want to mount the camera on a wall, use the included mounting brackets and screws. Find a suitable location, preferably at eye level, and mark the spots for drilling. Once the brackets are securely attached to the wall, simply slot the camera onto the brackets and tighten the screws.
- Ceiling Mount: For a ceiling-mounted camera, follow a similar process as the wall mount. Locate a spot on the ceiling that provides optimal coverage, mark the drilling points, attach the brackets, and mount the camera.
- Freestanding: If you prefer a freestanding camera, you can position it on any flat surface. Simply place the camera wherever you desire, ensuring it has a stable base to prevent it from falling or being knocked over.
Choose the mounting option that best suits your needs and the area you wish to monitor. Each option offers its own benefits, so consider factors such as visibility, reach, and accessibility.
Once you have assembled your Simplisafe Camera, connected the necessary cables and accessories, and decided on the mounting option, you are ready to move on to the next step of the installation process. Stay tuned for Step 2: Connecting to the Simplisafe App, where we’ll guide you through the setup and pairing process.
Step 2: Configuring The Camera
After successfully connecting the SimpliSafe camera to the system, the next step is to configure the camera settings. This allows you to optimize the camera’s functionality and ensure it integrates seamlessly with your home security system. The configuration process can be done either through the SimpliSafe mobile app or the web interface.
Connecting the camera to the SimpliSafe system
The first step in configuring your SimpliSafe camera is to establish a connection between the camera and the SimpliSafe system. This is crucial for the camera to communicate and sync with other security devices within your home. Follow these steps to connect the camera:
- Ensure that the SimpliSafe system is powered on and connected to your Wi-Fi network.
- Locate the camera’s power cord and plug it into an electrical outlet.
- Wait for the camera’s LED lights to turn on, indicating that it is ready for configuration.
- Open the SimpliSafe mobile app or access the web interface on your computer.
- Go to the camera settings section and select the option to add a new camera.
- Follow the on-screen instructions to scan the QR code on the camera or enter the camera’s unique identification number.
- Once the camera is successfully recognized by the system, it will be added to your device list.
Configuring the camera settings via the mobile app or web interface
Once the camera is connected, you can now proceed to configure its settings according to your preferences. SimpliSafe offers two convenient methods for configuring the camera: the mobile app and the web interface.
To configure the camera settings using the mobile app:
- Open the SimpliSafe mobile app on your smartphone or tablet.
- Navigate to the camera settings section within the app.
- Here, you will find a range of settings you can customize, including motion detection sensitivity, camera resolution, and recording schedules.
- Make the desired adjustments to the settings based on your specific needs and preferences.
- Save the changes once you are satisfied with the configuration.
If you prefer to configure the camera settings using the web interface, follow these steps:
- Access the SimpliSafe web interface on your computer by logging into your SimpliSafe account.
- Go to the camera settings page within the interface.
- Similar to the mobile app, you will find various adjustable settings, such as motion detection, image quality, and storage options.
- Customize the settings according to your preferences, ensuring they align with your specific security requirements.
- Remember to save the changes before exiting the web interface.
By configuring the camera via either the mobile app or web interface, you can ensure optimal performance and tailor the camera’s features to suit your monitoring needs. Take some time to explore the available settings, and fine-tune them until you achieve the desired level of protection for your home.
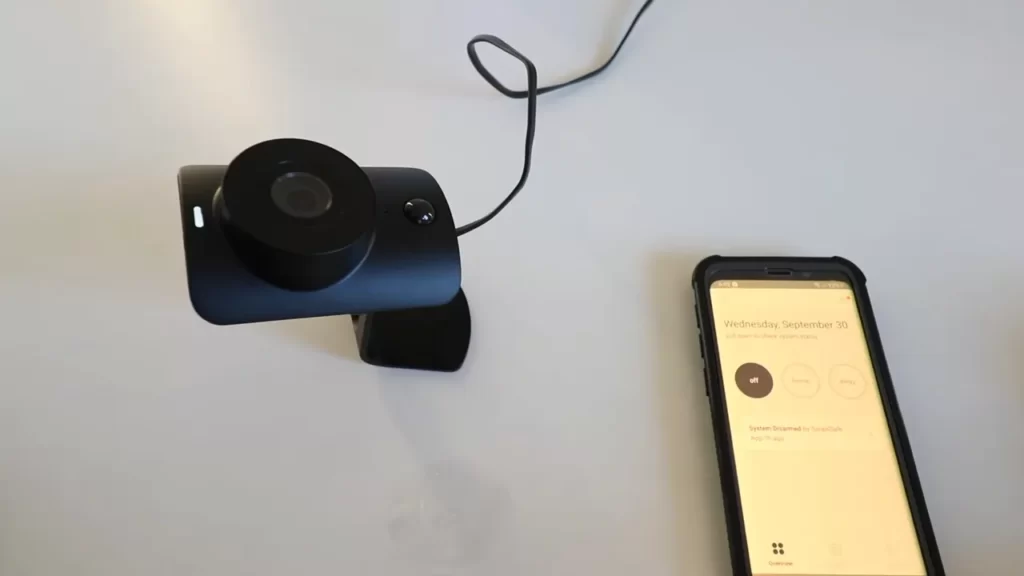
Step 3: Testing The Camera
Verifying camera connectivity and image quality
Once you have successfully installed your SimpliSafe camera following the previous steps, it’s important to test its connectivity and image quality to ensure its optimal functionality. This step will help you identify any potential issues or errors that may affect the camera’s performance.
To verify the camera’s connectivity, follow these simple steps:
- Position the camera in the desired location where it has a clear line of sight with the SimpliSafe base station.
- Connect the camera to a power source and wait for it to boot up.
- Ensure that the LED light on the camera is solid green, indicating it has successfully connected to the base station.
- Using the SimpliSafe mobile app or the web portal, navigate to the camera’s settings to check the status and signal strength.
<a href="#">Here is an example of HTML hyperlink</a>
Additionally, it’s crucial to assess the image quality of the camera. To do so, follow these steps:
- Access the live feed of the camera through the SimpliSafe app or web portal by selecting the appropriate camera.
- Observe the image quality and ensure it is clear and sharp, with no distortion or blurriness.
- Check for any delays in the video feed, as this could indicate a slower connectivity or technical issue.
- Try zooming in and out, as well as panning the camera, to ensure smooth movement and adjustability.
Checking for any technical issues or errors
During the camera testing process, it’s crucial to pay attention to any technical issues or errors that may arise. By identifying and addressing these problems early on, you can ensure that your SimpliSafe camera works seamlessly.
Here are a few things to consider:
- Check for any error messages or notifications displayed on the SimpliSafe app or web portal.
- Ensure that the camera firmware is up to date. If an update is available, follow the prompts to install it.
- If you experience connectivity issues or intermittent video feed, consider repositioning the camera to optimize its signal strength.
- Remove any obstructions, such as walls or furniture, that may hinder the camera’s connection to the base station.
By following these steps and thoroughly testing your SimpliSafe camera, you can have peace of mind knowing that your home is under reliable surveillance. Remember to regularly perform these tests to ensure ongoing performance and security.
Step 4: Integrating With Home Security System
Synchronizing the camera with other Simplisafe devices
Once you have successfully set up your Simplisafe camera, the next step is to synchronize it with other Simplisafe devices in your home security system. This integration allows you to create a seamless network of interconnected devices that work together to keep your home safe and secure.
To synchronize your camera with other Simplisafe devices, follow these simple steps:
- Access the Simplisafe mobile app or website and navigate to the settings section.
- Select the option to add a new device and choose the camera from the list of available devices.
- Follow the prompts to connect the camera to your home Wi-Fi network.
- Once the camera is connected, it will automatically sync with other Simplisafe devices in your system, such as motion sensors, door/window sensors, and the base station.
By synchronizing your camera with other Simplisafe devices, you can enhance the overall effectiveness of your home security system. This integration allows for seamless communication and coordination between devices, ensuring comprehensive coverage and quick response to any security threats.
Customizing security settings and alerts
After synchronizing your camera with other Simplisafe devices, the next step is to customize your security settings and alerts. This allows you to personalize your system according to your specific needs and preferences, maximizing its effectiveness.
To customize your security settings and alerts, follow these steps:
- Access the Simplisafe mobile app or website and navigate to the settings section.
- Select the camera from the list of devices and choose the option to customize settings.
- Adjust the camera’s sensitivity to motion detection according to your desired level of security. This allows you to minimize false alarms while ensuring reliable detection of any suspicious activity.
- Configure the camera’s field of view and recording preferences to suit your specific monitoring requirements. This can include selecting specific areas for motion detection or setting up continuous recording.
- Set up personalized alerts, such as notifications on your mobile device or email, to instantly receive updates and notifications about any detected activity.
- Regularly review and update your security settings to ensure they align with your evolving security needs and preferences.
By customizing your security settings and alerts, you can tailor your Simplisafe camera and home security system to perfectly suit your unique needs. This level of customization ensures that you receive accurate and timely notifications, allowing you to take appropriate action when necessary.
Troubleshooting Common Issues
If you encounter any problems during the installation or operation of your Simplisafe camera, don’t panic. In this section, we will guide you through some of the common issues you may experience and provide troubleshooting tips to help you resolve them effectively. Addressing these issues will ensure that your Simplisafe camera is up and running smoothly, providing you with the peace of mind you deserve.
Addressing connectivity problems
If you are facing connectivity issues with your Simplisafe camera, there are several steps you can take to troubleshoot the problem:
- Check your internet connection: Ensure that your router is properly connected and receiving a stable internet connection. You can try restarting your router to see if it resolves the issue.
- Move the camera closer to the router: Sometimes, the camera’s distance from the router can affect the signal strength. Try relocating the camera closer to the router to see if it improves the connectivity.
- Reset the camera: If the previous steps don’t work, you can try resetting the camera. Locate the reset button on the camera and press it for a few seconds. This will restore the camera to its default settings, including the Wi-Fi configuration.
- Update camera firmware: Ensure that your Simplisafe camera has the latest firmware installed. You can check for firmware updates through the Simplisafe app or the official website. Updating the firmware can often fix connectivity issues.
- Contact customer support: If the problem persists, it’s recommended to reach out to Simplisafe customer support for further assistance. They have a team of experts who can guide you through specific troubleshooting steps based on your camera model and setup.
Dealing with camera errors or malfunctions
In some cases, your Simplisafe camera may encounter errors or malfunctions. Here are some steps to help you resolve these issues:
- Check power supply: Ensure that your camera has a stable power supply. Make sure it is firmly plugged into a working power outlet, and there are no loose connections.
- Restart the camera: Sometimes, a simple restart can fix minor errors. Try turning off the camera, disconnecting the power source, waiting for a few seconds, and then reconnecting it.
- Update camera software: Similar to firmware updates, it’s crucial to keep your camera software up to date. Check for software updates through the Simplisafe app or website. Updating the software can often resolve common errors.
- Clean the camera lens: If you notice blurred or distorted images, the camera lens may be dirty. Gently clean the lens with a soft cloth to remove any dust or smudges.
- Contact customer support: If the above steps do not resolve the issue, get in touch with Simplisafe customer support. Explain the error or malfunction you are experiencing, and their team will assist you in finding a solution.
By following these troubleshooting steps, you can effectively address the most common issues with your Simplisafe camera. Remember, if you are unsure or need additional assistance, don’t hesitate to seek help from the Simplisafe customer support team. They are there to ensure that your camera works seamlessly, allowing you to keep your property and loved ones safe.
Maintaining And Upgrading The Simplisafe Camera
Cleaning and maintaining the camera for optimal performance
Regular cleaning and maintenance is crucial to ensure that your Simplisafe camera continues to deliver optimal performance and clear video footage. By following a few simple steps, you can keep your camera in top-notch condition for years to come.
1. Keep the lens clean
The lens is the most important part of your camera, as it captures the video footage. Over time, dirt, dust, and fingerprints can accumulate on the lens, obstructing the view and compromising video quality. To clean the lens:
- Gently wipe the lens with a soft, lint-free cloth.
- If there are stubborn smudges or dirt, use a lens cleaning solution or lens cleaning wipes. Be sure to follow the manufacturer’s instructions.
- Avoid using harsh chemicals or abrasive materials, as they can damage the lens.
2. Check and clean the camera housing
The camera housing, especially if it is installed outdoors, may collect dust, debris, or spider webs over time. These obstructions can affect the camera’s field of view or trigger false motion detection alerts.
To clean the camera housing:
- Gently dust off the housing using a soft brush or compressed air.
- If there are stubborn dirt or stains, dampen a cloth with water and mild soap. Gently wipe the housing, making sure not to get any water inside the camera.
- Dry the housing thoroughly before reattaching it to the camera.
3. Ensure proper cable management
It’s important to keep the camera cables properly organized and protected. Improper cable management can lead to cable damage or disconnection, resulting in loss of video feed.
Here are some tips for maintaining proper cable management:
- Use cable clips or adhesive hooks to secure the cables and prevent them from getting tangled or pulled.
- Avoid exposing the cables to extreme temperatures or direct sunlight, as this can cause them to deteriorate over time.
- If the cables get damaged, replace them immediately to ensure uninterrupted camera operation.
Upgrading or expanding your camera setup
If you’re looking to upgrade your security system or expand your camera setup, Simplisafe offers a range of options to meet your needs. Whether you want to add more cameras or upgrade to advanced features, the process is seamless and straightforward.
1. Assess your needs
Before upgrading or expanding, it’s important to assess your security needs and identify the areas you want to monitor. This will help determine the number of cameras and the features you require. Consider factors such as the size of your property, potential blind spots, and specific security concerns.
2. Check compatibility
Ensure that the new cameras or features you wish to add are compatible with your existing Simplisafe system. You can refer to the Simplisafe website or consult customer support for information regarding compatibility.
3. Purchase and install
Once you’ve determined your needs and checked compatibility, you can proceed with purchasing the additional cameras or features. Simplisafe offers a user-friendly installation process, and the instructions provided are easy to follow.
To install additional cameras:
- Choose the optimal locations for your new cameras, making sure they provide the desired coverage.
- Follow the manufacturer’s instructions to mount and connect the cameras.
- Sync the new cameras with your existing Simplisafe system following the provided guidelines.
By following these steps, you can easily maintain and upgrade your Simplisafe camera setup, ensuring enhanced security and peace of mind.
Best Practices For Simplisafe Camera Installation
Installing a Simplisafe camera can provide you with peace of mind knowing that your home or office is protected. But to ensure that your camera functions optimally and securely, it’s important to follow best practices for installation. Here are some essential tips to maximize the camera’s efficiency and effectiveness, and ensure the privacy and security of your camera footage.
Tips for maximizing the camera’s efficiency and effectiveness
- Choose the right location: Find an optimal position for your Simplisafe camera that provides a wide and clear view of the area you want to monitor. Avoid placing the camera near obstacles such as trees or walls that could obstruct the view.
- Ensure proper camera angle: Position the camera at an appropriate angle to cover the desired area effectively. Adjust the camera’s tilt and pan settings, if available, to ensure the best view.
- Test camera placement: Before finalizing the installation, test the camera’s position to ensure it captures the desired field of view. This will help avoid the need for readjustments after installation.
- Optimize lighting conditions: Ensure that the camera has sufficient lighting to capture clear footage. Avoid placing the camera in areas with excessive glare or direct sunlight that could affect image quality.
- Maintain a stable internet connection: For smooth real-time monitoring and video streaming, it is crucial to have a stable internet connection. Consider positioning the camera within the range of your Wi-Fi network for consistent performance.
Ensuring the privacy and security of your camera footage
- Use a strong password: When setting up your Simplisafe camera, create a unique and strong password to protect unauthorized access. Avoid using predictable combinations and keep the password confidential.
- Enable two-factor authentication: Enhance the security of your camera footage by enabling the two-factor authentication feature provided by Simplisafe. This adds an extra layer of protection and ensures that only authorized users can access your camera’s feed.
- Regularly update firmware: Keep your Simplisafe camera up to date by regularly checking for firmware updates. These updates often address security vulnerabilities and ensure that your camera remains protected against potential threats.
- Secure your Wi-Fi network: Protect your camera’s feed from interception by securing your Wi-Fi network with a strong password and encryption. Additionally, consider disabling remote access to your router’s administration panel to prevent unauthorized changes.
- Monitor for suspicious activity: Regularly review your camera’s footage for any unauthorized access or suspicious activity. If you notice anything unusual, contact Simplisafe support immediately to address any potential security breaches.
By following these best practices, you can ensure that your Simplisafe camera installation is not only efficient and effective but also prioritizes the privacy and security of your camera footage.
Frequently Asked Questions On How To Install Simplisafe Camera
How Do I Install My Simplisafe Camera?
To install your SimpliSafe camera, follow these steps: 1. Select a suitable location for the camera. 2. Power on the camera and connect it to Wi-Fi. 3. Download the SimpliSafe app and create an account. 4. Follow the app’s instructions to add the camera to your system.
5. Mount the camera securely and adjust its position as needed.
Where Is The Best Place To Put Simplisafe Cameras?
The best place for SimpliSafe cameras is where they can cover vulnerable areas of your home. Good locations include entrances, windows, and hallways. Make sure to place them at a height that captures faces and activities clearly. Always avoid pointing cameras at private areas and install them out of reach from potential tampering.
How Do I Connect My Simplisafe Camera To Wi-Fi?
To connect your SimpliSafe camera to Wi-Fi, follow these steps: 1. Open the SimpliSafe app on your smartphone. 2. Go to settings and select “Camera Setup. ” 3. Choose your camera and tap “Begin Setup. ” 4. Follow the on-screen instructions to connect to your Wi-Fi network.
5. Once connected, your camera will be ready to use.
Does Simplisafe Camera Need To Be Plugged In?
Yes, SimpliSafe cameras need to be plugged in for power.
Can I Install Simplisafe Camera On My Own?
Yes, installing Simplisafe Camera is simple and can be done by yourself without any professional help.
Conclusion
Installing the Simplisafe Camera is a simple and efficient process. By following the step-by-step instructions provided in this blog post, you can easily set up the camera in your desired location. Whether you’re a tech-savvy individual or a beginner, the installation instructions are designed to be user-friendly and easy to understand.
Make sure to carefully read and follow each step to ensure a successful installation and enjoy the peace of mind that comes with a secure home.