o install a single torsion spring on a garage door, follow these steps.
Essential Tools For Ensuring A Safe And Efficient Installation Process
When it comes to installing a single torsion spring on your garage door, having the right tools is essential. Not only does it ensure a safe and efficient installation process, but it also helps you avoid unnecessary accidents and damage. In this article, we will discuss three essential tools that you must have on hand for a successful installation.
Winding Bars
The first tool you need is a pair of winding bars. These are specially designed tools that help you safely wind and unwind the torsion spring tension. Winding bars provide leverage and control, allowing you to safely adjust the tension of the spring without risking injury.
When using winding bars, it’s important to choose the correct size that matches your torsion spring. This ensures a proper fit and maximizes safety. Remember to always wear safety glasses while working with winding bars to protect your eyes from any potential debris.
Safety Glasses
Safety glasses are an absolute must when installing a single torsion spring on your garage door. They protect your eyes from any flying debris or particles that may result from the tension adjustment process. Even the smallest piece of debris can cause serious eye injury, so it’s crucial to wear safety glasses at all times.
Choose safety glasses that provide both impact and UV protection. Look for a pair that is ANSI Z87.1 certified to ensure maximum safety. Don’t compromise on eye protection – even a minor accident can have long-lasting consequences.
Measuring Tape
A measuring tape is another essential tool that ensures accurate measurements during the installation process. It helps you determine the length, diameter, and other critical measurements of the torsion spring. This information is crucial for selecting the right size and ensuring a proper fit.
Make sure to use a sturdy and reliable measuring tape that is at least 25 feet long. This length allows you to measure long distances accurately. With a measuring tape in hand, you can be confident that your torsion spring installation will be precise and efficient.
By having the essential tools – winding bars, safety glasses, and measuring tape – ready for your garage door torsion spring installation, you can ensure a safe and efficient process. Remember to always wear safety glasses and use the correct size of winding bars for the spring. Accurate measurements with a measuring tape are also critical for a successful installation. Equip yourself with these tools, and you’ll be well-prepared to handle your garage door spring installation like a pro.
Measuring And Determining The Appropriate Torsion Spring Size For Your Garage Door
Installing a single torsion spring on your garage door is a crucial step to ensure smooth and reliable operation. However, choosing the right torsion spring size is equally important in order to prevent any potential issues and ensure optimal performance. In this section, we will guide you through the process of measuring and determining the appropriate torsion spring size for your garage door.
Measuring the Height and Weight of the Garage Door
The first step in determining the correct torsion spring size for your garage door is to accurately measure its height and weight. This information plays a vital role in calculating the necessary spring tension to counterbalance the weight of the door.
To measure the height of the garage door, start from the bottom to the top, taking into account any tracks or additional hardware. Use a tape measure to obtain an accurate measurement in feet and inches.
Next, you need to determine the weight of the garage door. This can be achieved by using either a bathroom scale or a specially designed garage door scale. Open the door halfway and place the scale underneath it, ensuring it is properly supported. Take note of the weight measurement in pounds.
Calculating the Required Torsion Spring Size
Once you have measured the height and weight of your garage door, you can proceed to calculate the required torsion spring size. The calculation involves multiplying the door’s weight by a factor based on its height.
To make this calculation easier, a standard industry formula is used. However, it is always recommended to refer to the manufacturer’s guidelines or consult with a professional to ensure accuracy.
Here is a general formula you can use as a reference:
| Garage Door Height Range (in feet) | Factor |
|---|---|
| Up to 7 feet | 0.225 |
| 7 to 8 feet | 0.250 |
| 8 to 10 feet | 0.283 |
| 10 to 12 feet | 0.332 |
- Multiply the weight of your garage door by the corresponding factor based on its height range.
- The resulting value will be the required spring torque in inch-pounds.
- It is important to note that this calculation assumes a standard balance for the garage door. If you suspect an unbalanced or improperly functioning door, it is best to consult with a professional.
Once you have obtained the required torsion spring size, it is recommended to purchase a high-quality spring from a reputable supplier. Incorrect spring sizes can lead to imbalances and potential safety hazards, so ensure you follow the specifications precisely.
By accurately measuring and calculating the appropriate torsion spring size for your garage door, you can ensure smooth and reliable operation while minimizing the risk of issues. Take the time to gather precise measurements and consult with professionals when needed to ensure optimal performance and safety.
Safety Precautions Before Starting The Installation Process
Before installing a single torsion spring on your garage door, it’s crucial to prioritize your safety. Following these safety precautions will help ensure a smooth and accident-free installation process. Remember, the well-being of yourself and others should always be the top priority.
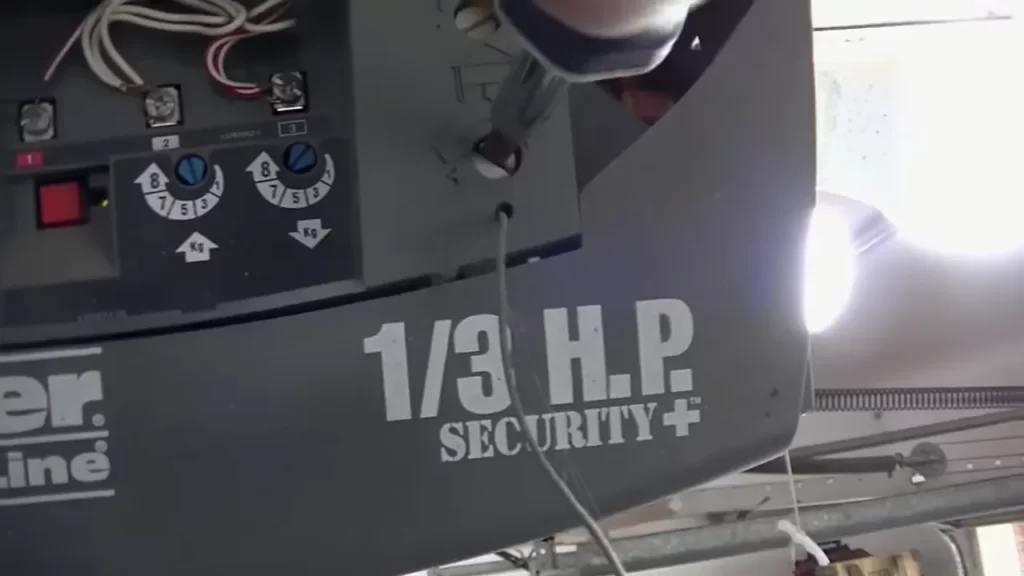
Disconnecting the Power to the Garage Door Opener
To avoid any accidental movement of the garage door during the installation, you must disconnect the power to the garage door opener. Unplugging the opener or shutting off the power supply at the circuit breaker will prevent any unexpected activation of the door, reducing the risk of injuries or property damage.
Ensuring Proper Support for the Garage Door
Before beginning the installation, it’s essential to ensure that the garage door is properly supported. An unsupported door can become unstable and pose a significant safety hazard during the installation process. To ensure proper support, use a sturdy ladder and place wooden blocks or clamps under the door to keep it secure and prevent it from moving.
Additionally, it’s recommended to have a second person available to assist you during the installation. Having an extra set of hands will not only make the process easier but also provide an extra layer of safety in case of any unforeseen circumstances.
By adhering to these safety precautions, you can minimize the risks associated with installing a single torsion spring on your garage door. Remember, safety should always be the first consideration during any DIY project.
Removing The Old Torsion Spring
Releasing the Tension from the Existing Spring
Removing the old torsion spring from your garage door may seem like a daunting task, but with the right knowledge and tools, it can be done safely and efficiently. The first step in this process is releasing the tension from the existing spring. This is crucial as the spring holds a tremendous amount of force, and if not handled properly, it can lead to serious injuries. Below are the steps to safely release the tension from the existing spring:
- Put on your safety glasses and gloves to protect yourself from any flying debris or injuries.
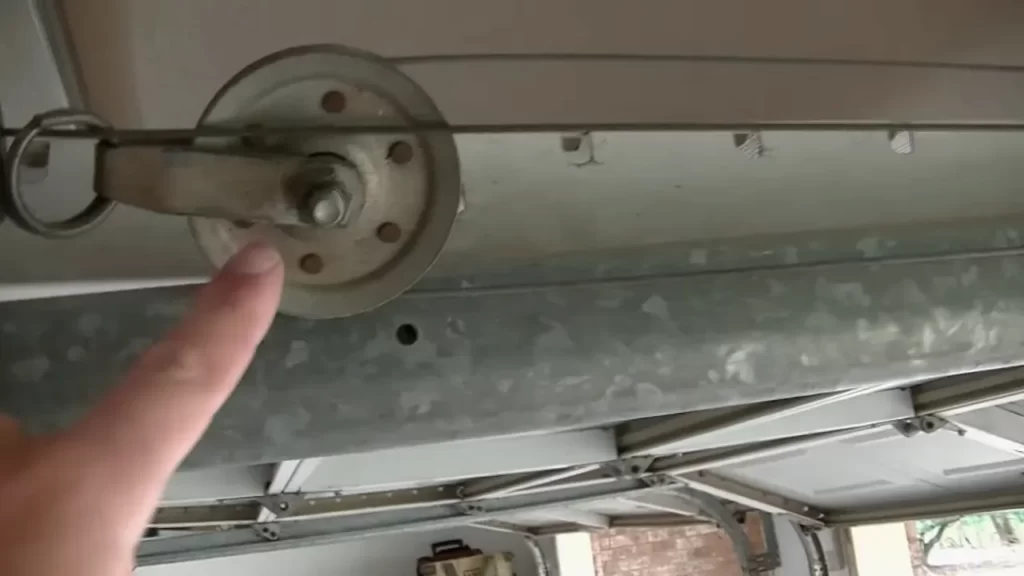
- Locate the winding cone on the torsion spring. This is the part of the spring that holds the tension.
- Insert a winding bar into one of the holes on the winding cone. Make sure the bar is securely in place, as it will be used to rotate the cone.
- Hold the winding bar firmly and slowly rotate the cone counterclockwise. This will release the tension from the spring and loosen the coils.
- Continue rotating the cone until the tension is fully released. Take your time and be cautious as you do this step.
- Once the tension is released, use a clamp to secure the torsion spring to prevent any accidental movement.
Unscrewing the Spring from the Center Bracket
Now that the tension has been released from the existing spring, you can proceed to unscrew the spring from the center bracket. This step requires careful attention to detail and the use of the right tools. Follow the steps below to safely remove the old torsion spring:
- Inspect the center bracket to identify the screws holding the spring in place. There are usually four screws that need to be removed.
- Using a wrench or socket set, carefully unscrew each of the four screws from the center bracket. Keep them in a safe place, as you will need them for the installation of the new spring.
- Once the screws are removed, carefully slide the old torsion spring out of the center bracket, taking note of its orientation for future reference.
- Inspect the center bracket and the surrounding area for any signs of wear or damage. It is important to address any issues before installing the new spring.
- Clean the center bracket and remove any debris or rust that may have accumulated over time. A clean surface will ensure smooth installation of the new spring.
Removing the old torsion spring from your garage door is a necessary step when installing a single torsion spring. By following the proper techniques, you can safely release the tension from the existing spring and remove it from the center bracket. Always prioritize safety and take your time throughout this process. With the old spring out of the way, you can now move on to installing the new torsion spring for a properly functioning garage door.
Installing The New Single Torsion Spring
Installing a new single torsion spring on your garage door is a task that requires careful attention to detail and knowledge of the proper techniques. By following the steps outlined below, you can ensure a successful installation that will effectively balance the weight of your garage door and allow for smooth and reliable operation.
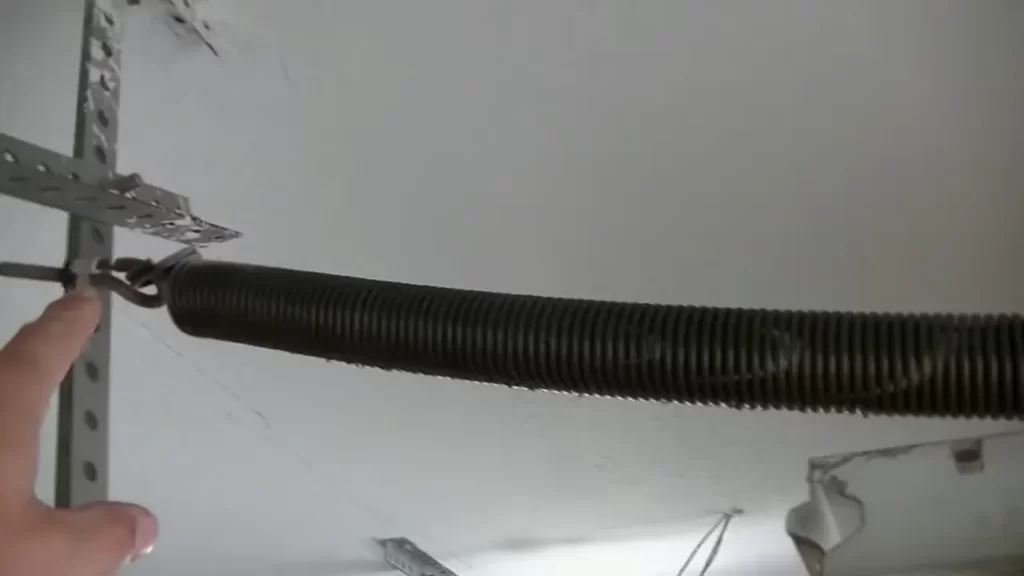
Positioning the New Spring on the Center Bracket
The first step in installing the new single torsion spring is to position it on the center bracket of your garage door. This bracket is located above the garage door opening and has multiple holes to accommodate the spring’s winding cone. To position the spring:
- Carefully lift the spring and align it with the holes on the center bracket.
- Insert the winding cone into the appropriate hole, ensuring it is securely in place.
- Use a wrench to tighten the set screws on the winding cone, firmly securing the spring to the center bracket.
Positioning the new spring on the center bracket is crucial for ensuring proper functioning and safety of your garage door. Make sure the spring is securely attached before proceeding to the next step.
Winding the Spring to Achieve the Appropriate Tension

Once the new single torsion spring is properly positioned on the center bracket, the next step is to wind it to achieve the appropriate tension. This tension will counterbalance the weight of the garage door and allow it to open and close smoothly. To wind the spring:
- Position the winding cone in the hole on the end of the spring.
- Using a winding bar inserted into the holes on the winding cone, rotate the bar in a clockwise direction to wind the spring.
- Continue winding the spring until the appropriate tension is achieved. Refer to your garage door manufacturer’s specifications for the recommended number of turns or consult a professional if you are uncertain.
Winding the spring to the appropriate tension requires caution and precision. The tension should be evenly distributed and tailored to the weight of your garage door. Failure to achieve the proper tension can result in an imbalanced door and potential safety hazards.
By following these steps to position the new single torsion spring on the center bracket and wind it to the appropriate tension, you can successfully install a new spring on your garage door. Remember to prioritize safety and consult a professional if you are unsure about any aspect of the installation process. With a properly installed torsion spring, you can enjoy smooth and reliable operation of your garage door for years to come.
Testing And Adjustment Of The Torsion Spring
Verifying the balance of the garage door is an essential step in ensuring the proper functioning of the single torsion spring. If the door is not balanced, it can lead to premature wear and tear on the spring, resulting in costly repairs down the line. Adjusting the tension of the torsion spring is also crucial to make sure the door opens and closes smoothly.
Verifying the Balance of the Garage Door
Before proceeding with the adjustment process, it is important to determine whether your garage door is correctly balanced. An imbalanced door can put excess strain on the torsion spring, leading to a shorter lifespan and potentially hazardous situations.
To check the balance of your garage door, follow these steps:
- Disconnect the opener: Start by shutting off the power to the garage door opener to ensure safety during testing.
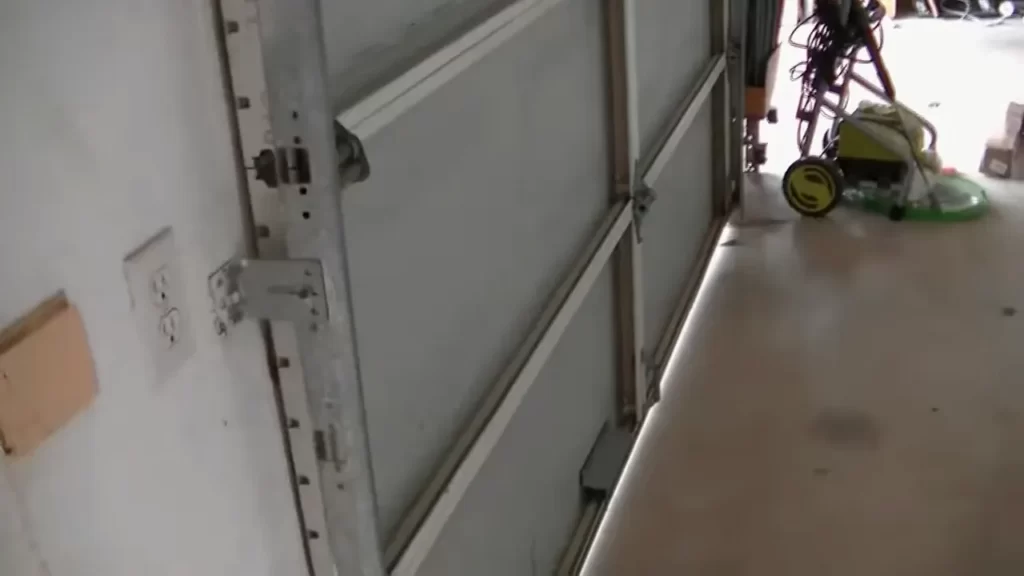
- Manually open the door: Raise the garage door manually until it is about halfway open. Let go of the door and observe if it stays in position or starts to move either upward or downward. A balanced door will remain stationary.
- Test the other half: Repeat step 2 for the other half of the door. A balanced door should stay in place when released.
If your garage door fails the balance test, there may be an issue with the torsion spring or other components. In such cases, it is recommended to consult a professional garage door technician for further inspection and adjustment.
Adjusting the Tension as Needed
Adjusting the tension of the torsion spring is vital to ensure the smooth operation of your garage door. This process requires caution and precision, as improper adjustments can cause damage and compromise the safety of the door.
Follow these steps to adjust the tension of the torsion spring:
- Secure the door: Ensure the garage door is fully closed and properly secured before starting the adjustment process.
- Identify the winding cone: With caution, locate the winding cone at the end of the torsion spring. This cone holds the tension and allows for adjustments.
- Insert winding bars: Insert the winding bars into the holes on the winding cone. Make sure the bars are securely in place.
- Unwind the spring: Carefully turn the winding cone counterclockwise to release tension on the spring. Take note of the number of turns required to achieve the necessary adjustment.
- Test the door: Once the adjustment is complete, test the door to ensure it opens and closes smoothly. If necessary, repeat the adjustment process until the desired tension is achieved.
Remember to exercise caution and wear appropriate safety gear while adjusting the tension of the torsion spring. If you are unsure or uncomfortable performing the adjustment yourself, it is recommended to seek the assistance of a professional garage door technician.
Regular Lubrication And Inspection To Prevent Wear And Tear
Regular lubrication and inspection of your garage door’s single torsion spring are essential to prevent wear and tear and ensure its proper functioning. By following these maintenance steps, you can extend the lifespan of your garage door and minimize the risk of costly repairs. ***H3: Applying Lubricant to the Spring and Moving Parts*** One crucial aspect of maintaining your garage door’s single torsion spring is regularly applying lubricant to both the spring itself and the various moving parts. This lubrication helps to reduce friction, prevent rust, and promote smooth operation. To apply lubricant effectively, follow these steps: ***H4: Step 1: Identify the key areas to lubricate*** Firstly, identify the key areas of the torsion spring and the surrounding moving parts that require lubrication. These areas might include the coils of the spring, hinges, rollers, tracks, and pulleys. Lubricate any other metal-on-metal contact points that you observe. ***H4: Step 2: Choose the appropriate lubricant*** Next, choose an appropriate lubricant for your garage door. It is recommended to use a silicone-based lubricant or a lithium grease-based lubricant. These types of lubricants are ideal for garage doors as they provide long-lasting protection against wear and tear. ***H4: Step 3: Apply the lubricant*** Using a clean cloth or a small brush, apply the chosen lubricant to the identified areas. Be sure to apply it carefully and evenly, covering all the relevant surfaces. Avoid over-lubricating, as excess lubricant can attract dirt and dust, potentially causing more harm than good. ***H3: Inspecting for Any Signs of Damage or Fraying*** In addition to lubrication, regular inspections are vital to catch any signs of damage or fraying that may compromise the functionality of your garage door’s torsion spring. Follow these simple steps to ensure its overall condition: ***H4: Step 1: Visually inspect the spring*** Regularly examine the torsion spring for signs of wear, damage, or fraying. Look closely for any gaps, cracks, or rusting. If you notice any visible issues, it is crucial to address them promptly. ***H4: Step 2: Test the balance of the door*** Test the balance of your garage door by disconnecting the opener and manually lifting the door halfway up. If the door does not remain in place or tends to fall or rise abruptly, it may be an indication of an imbalanced or faulty spring. ***H4: Step 3: Seek professional assistance if needed*** If you notice any significant damage, fraying, or imbalance during your inspection, it is recommended to seek professional assistance. Attempting to repair or replace a garage door spring without proper knowledge and experience can be dangerous and cause further damage. By regularly lubricating your single torsion spring and conducting thorough inspections, you can prevent wear and tear on your garage door. These simple maintenance steps can save you time, money, and potential inconvenience in the long run. Keep your garage door functioning smoothly and extend its lifespan by incorporating these practices into your regular maintenance routine. Code:
Applying Lubricant to the Spring and Moving Parts
One crucial aspect of maintaining your garage door’s single torsion spring is regularly applying lubricant to both the spring itself and the various moving parts. This lubrication helps to reduce friction, prevent rust, and promote smooth operation. To apply lubricant effectively, follow these steps:
Step 1: Identify the key areas to lubricate
Firstly, identify the key areas of the torsion spring and the surrounding moving parts that require lubrication. These areas might include the coils of the spring, hinges, rollers, tracks, and pulleys. Lubricate any other metal-on-metal contact points that you observe.
Step 2: Choose the appropriate lubricant
Next, choose an appropriate lubricant for your garage door. It is recommended to use a silicone-based lubricant or a lithium grease-based lubricant. These types of lubricants are ideal for garage doors as they provide long-lasting protection against wear and tear.
Step 3: Apply the lubricant
Using a clean cloth or a small brush, apply the chosen lubricant to the identified areas. Be sure to apply it carefully and evenly, covering all the relevant surfaces. Avoid over-lubricating, as excess lubricant can attract dirt and dust, potentially causing more harm than good.
Inspecting for Any Signs of Damage or Fraying
In addition to lubrication, regular inspections are vital to catch any signs of damage or fraying that may compromise the functionality of your garage door’s torsion spring. Follow these simple steps to ensure its overall condition:
Step 1: Visually inspect the spring
Regularly examine the torsion spring for signs of wear, damage, or fraying. Look closely for any gaps, cracks, or rusting. If you notice any visible issues, it is crucial to address them promptly.
Step 2: Test the balance of the door
Test the balance of your garage door by disconnecting the opener and manually lifting the door halfway up. If the door does not remain in place or tends to fall or rise abruptly, it may be an indication of an imbalanced or faulty spring.
Step 3: Seek professional assistance if needed
If you notice any significant damage, fraying, or imbalance during your inspection, it is recommended to seek professional assistance. Attempting to repair or replace a garage door spring without proper knowledge and experience can be dangerous and cause further damage.
By regularly lubricating your single torsion spring and conducting thorough inspections, you can prevent wear and tear on your garage door. These simple maintenance steps can save you time, money, and potential inconvenience in the long run. Keep your garage door functioning smoothly and extend its lifespan by incorporating these practices into your regular maintenance routine.
Importance Of Professional Inspection And Maintenance Services
When it comes to maintaining your garage door, it’s crucial to prioritize professional inspection and maintenance services. Regular maintenance checks and inspections play a vital role in keeping your garage door functioning properly and avoiding costly repairs in the long run. Hiring a professional for these services ensures that every component of your garage door, including the single torsion spring, is in optimal condition, promoting safety and extending the lifespan of your garage door.
Hiring a Professional to Conduct Regular Maintenance Checks
Regular maintenance checks are essential to identify any potential issues and address them before they turn into larger problems. A professional garage door technician not only has the expertise but also the experience to perform a thorough inspection of your garage door system. By hiring a professional, you can ensure that all components, including the single torsion spring, are checked for signs of wear, lubricated properly, and adjusted as necessary. Regular maintenance checks can prevent unexpected breakdowns, enhance the performance of your garage door, and increase its overall longevity.
Understanding When to Replace the Torsion Spring
The torsion spring is a critical component of your garage door system as it helps counterbalance the weight of the door, making it easier to open and close. Over time, however, the torsion spring may wear out and lose its tension, posing a safety hazard. Recognizing the signs of a worn-out torsion spring is crucial for the safety of your family and the security of your property. A professional garage door technician can assess the condition of the torsion spring during regular maintenance checks and advise you on when it needs to be replaced. Ignoring a worn-out torsion spring can lead to serious accidents or even damage to your garage door system.
Replacing a torsion spring requires specialized knowledge and tools. Attempting to replace it yourself can be dangerous and may result in personal injury or damage to the garage door. By relying on a professional garage door technician, you can ensure that the torsion spring is replaced safely and correctly, minimizing the risk of accidents and guaranteeing the reliable operation of your garage door.</p
Frequently Asked Questions On How To Install Single Torsion Spring On Garage Door
What If My Garage Door Only Has One Torsion Spring?
A garage door with only one torsion spring is still functional, but having two springs is recommended for better balance and longevity. It’s vital to ensure that the existing spring is in good condition and properly adjusted. Regular maintenance and professional inspection are advised to prevent any issues with single spring setups.
How Many Turns On A Single Spring Garage Door?
A single spring garage door typically has around 7-9 turns. These turns help to balance the weight of the door and allow for smooth operation.
Can You Replace Just One Torsion Spring On A Garage Door?
Yes, you can replace just one torsion spring on a garage door.
Can Garage Doors Work With One Spring?
Yes, garage doors can work with just one spring. However, having two springs is recommended for better balance and safety.
How Do You Install A Single Torsion Spring On A Garage Door?
To install a single torsion spring on a garage door, follow these steps: adjust the tension, secure the brackets, wind the spring, and test the door’s balance.
What Tools Are Needed To Install A Single Torsion Spring On A Garage Door?
To install a single torsion spring on a garage door, you will need the following tools: winding bars, tape measure, level, ladder, adjustable wrench, and safety glasses.
Conclusion
Installing a single torsion spring on a garage door may seem like a daunting task, but with the right information and tools, it can be easily accomplished. By following the step-by-step instructions provided in this blog post, you can ensure a successful and safe installation process.
Remember to prioritize safety precautions and consult a professional if needed. With patience and attention to detail, you’ll have your garage door up and running smoothly in no time. Happy DIY-ing!