To install spring-loaded door hinges, follow these steps: First, remove the existing hinges from the door frame. Next, align the new spring-loaded hinges with the door and frame, ensuring they are level.
Then, secure the hinges by screwing them into place using a power drill. Finally, test the door to ensure it opens and closes smoothly. When it comes to installing spring-loaded door hinges, it is important to follow the proper steps to ensure a secure and functional installation.
By removing the old hinges, aligning the new ones correctly, and securely fastening them, you can ensure that your door opens and closes smoothly. We will guide you through the installation process in a simple and straightforward manner, helping you achieve the desired results efficiently. So, let’s get started and learn how to install spring-loaded door hinges the right way.
Spring Loaded Door Hinges: A Primer
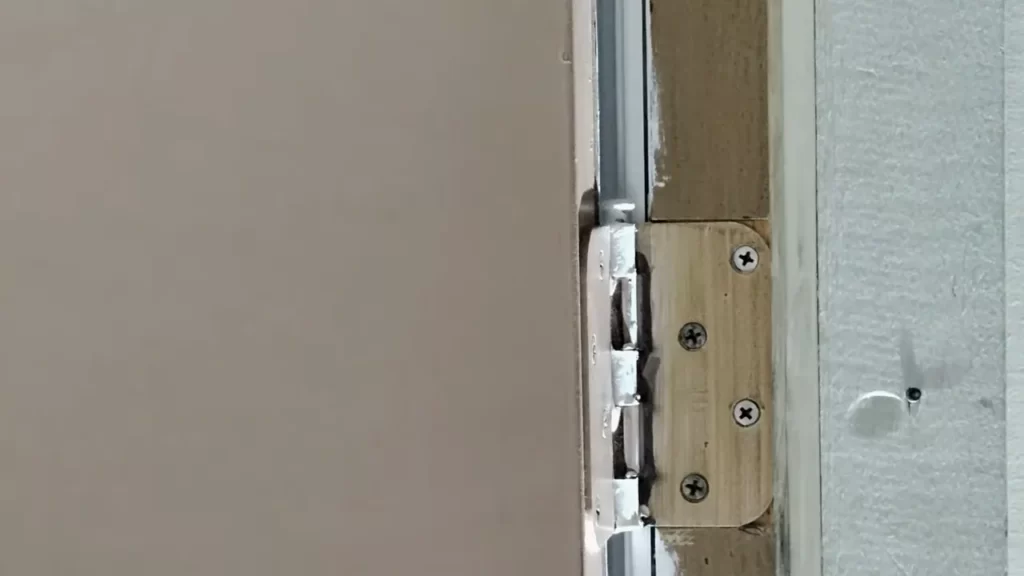
When it comes to installing door hinges, one type that stands out is the spring-loaded door hinge. These hinges are a popular choice for easy installation and provide added functionality to your doors. In this article, we will explore the world of spring-loaded door hinges, including what they are and why they are important for a hassle-free installation.
What are spring-loaded door hinges?
Spring-loaded door hinges, also known as self-closing hinges, are hinges designed to automatically close a door once it is opened. These hinges feature a built-in spring mechanism that exerts pressure on the door, ensuring it returns to its closed position. This automatic closing feature eliminates the need to manually close the door, providing convenience and security for any room.
Unlike traditional hinges, which require you to exert force to close the door completely, spring-loaded hinges take care of this task for you. This can be especially useful in high-traffic areas where doors are frequently left open, as it helps maintain privacy, temperature control, and security.
Importance of spring-loaded door hinges for easy installation
Spring-loaded door hinges offer several benefits that make them an excellent choice for easy installation. Here are a few reasons why these hinges should be considered:
- Convenience: With spring-loaded hinges, you no longer need to worry about manually closing the door. The self-closing feature ensures that the door is always closed, even if you forget to do so. This is particularly useful in spaces where there is a constant flow of people or in rooms that require privacy.
- Enhanced safety: Spring-loaded hinges can improve safety by ensuring doors are securely closed. This can be especially beneficial in areas where fire safety regulations require doors to be automatically closed in case of emergencies. Additionally, it prevents doors from being left ajar, reducing the risk of accidents or break-ins.
- Energy efficiency: By automatically closing the door, spring-loaded hinges help maintain consistent temperatures within rooms. This can result in energy savings by minimizing heat or cool air from escaping, reducing the load on heating and cooling systems.
- Easy installation: Installing spring-loaded hinges is a straightforward process that can be accomplished with a few simple steps. Their design allows for easy attachment to both the door and the frame, making them a popular choice for DIY enthusiasts.
With their automatic closing mechanism and other benefits, spring-loaded door hinges offer a hassle-free installation solution for a variety of applications. Whether you are looking to improve convenience, safety, or energy efficiency, these hinges prove to be a reliable choice.
Tools And Materials Needed For Installation
Tools and Materials Needed for Installation
Installing spring-loaded door hinges is an excellent way to enhance the functionality and security of your doors. To successfully complete the installation process, you will need a few essential tools and materials. In this section, we will provide you with a detailed list of the tools required and the necessary materials for a hassle-free installation. Make sure to gather these items before you begin to ensure a smooth and efficient process.
List of tools required
Here is a comprehensive list of the tools you will need for installing spring-loaded door hinges:
- Drill
- Screwdriver (Phillips or flat-head, depending on screw type)
- Chisel
- Hammer
- Masking tape
- Ruler or measuring tape
- Center punch
- Utility knife
Required materials for installation

In addition to the tools mentioned above, you will also need the following materials:
- Spring-loaded door hinges (make sure to purchase the correct size for your doors)
- Screws (make sure they are compatible with the hinges and are of appropriate length)
- Lubricant or WD-40 (to ensure smooth operation of the hinges)
- Pencil or marker (for marking the hinge locations on the doors and frames)
Step-By-Step Guide To Installing Spring Loaded Door Hinges
Installing spring-loaded door hinges can be a simple and effective way to amp up the functionality and convenience of your doors. Whether you want to add some self-closing ability to your kitchen cabinets or ensure that your screen door always shuts behind you, spring-loaded hinges can save the day. In this step-by-step guide, we will walk you through the process of installing spring-loaded door hinges, from preparing the door and frame to testing and adjusting the spring tension for optimal function. Let’s get started!
Preparing the door and frame for installation
Before you start installing the spring-loaded door hinges, it’s crucial to make sure that both the door and frame are ready for the installation process. Here’s how you can prepare them:
- Remove the existing door hinges from both the door and the frame using a screwdriver. Make sure to keep any screws that can be reused later.
- Clean the areas where the old hinges were attached, removing any dirt, dust, or debris. A clean surface will ensure a smooth installation process and optimal functioning of the spring-loaded hinges.
Marking the hinge placement
Once the door and frame are prepared, the next step is to mark the placement of the spring-loaded hinges. Follow these steps:
- Decide on the number of hinges you will be using for your door. Typically, two hinges are sufficient for most standard-sized doors, but larger or heavier doors may require three or more.
- Measure and mark the desired position of the hinges on both the door and the frame. It’s important to ensure that the hinges are aligned perfectly for smooth operation.
Drilling pilot holes for the hinges
To ensure a secure and stable installation, it’s essential to drill pilot holes for the hinges. Here’s how to do it:
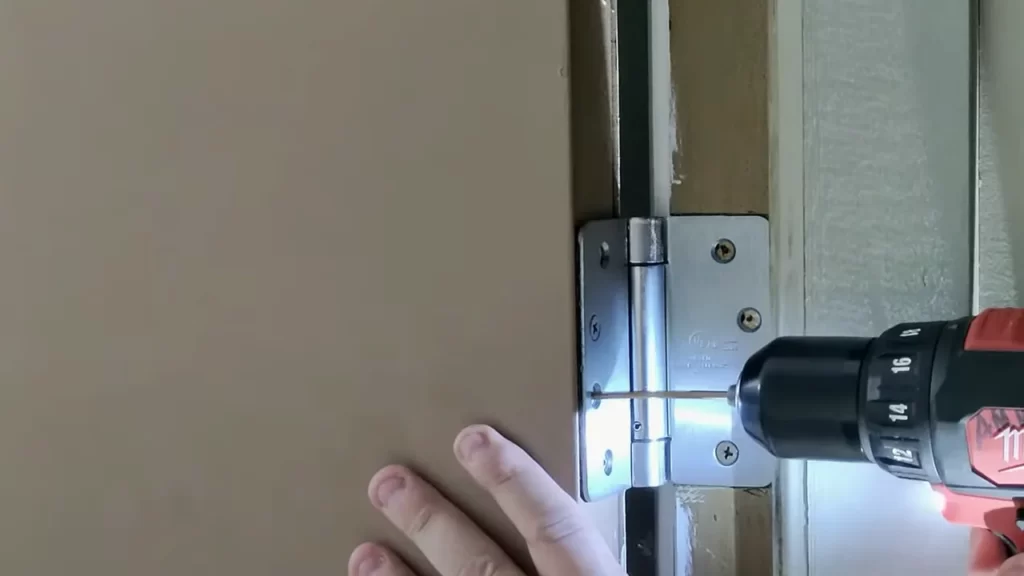
- Using a drill and a suitable drill bit, carefully drill pilot holes at the marked locations on both the door and the frame. The size of the drill bit should be slightly smaller than the screws that came with the hinges.
- Make sure to drill the holes to a depth that allows the screws to securely hold the hinges in place without penetrating too far and damaging the door or frame.
Attaching the hinges to the door and frame
Now that the pilot holes are drilled, it’s time to attach the spring-loaded hinges to both the door and the frame. Follow these steps:
- Align the hinges with the pilot holes on the door and frame. Ensure that they are positioned correctly and level.
- Using the screws provided with the hinges, secure the hinges to the door and frame by tightening them with a screwdriver.
Testing and adjusting the spring tension
After attaching the hinges, it’s important to test and adjust the spring tension to ensure smooth and reliable door closure. Here’s what you need to do:
- Gently open and close the door several times to check if the spring-loaded hinges are functioning properly.
- If the door closes too quickly or doesn’t close with adequate force, adjust the tension of the hinges using the adjustment screws provided. Turning these screws clockwise will increase the tension, while turning them counterclockwise will decrease it.
- Continue testing and adjusting the spring tension until you achieve the desired functionality and closing speed.
Congratulations! You have successfully installed spring-loaded door hinges, providing your doors with the convenience of self-closure. Enjoy the added ease and functionality that these hinges bring to your doors!
Troubleshooting Common Installation Issues
While installing spring-loaded door hinges may seem like a straightforward task, there are some common issues that you might encounter along the way. In this section, we will discuss these issues and provide you with solutions to help you overcome them.
Hinges not aligning properly
One of the most common issues during the installation of spring-loaded door hinges is hinges not aligning properly. This can lead to difficulty in closing or opening the door smoothly. Here are some steps you can take to troubleshoot and resolve this issue:
- Ensure that the hinges are correctly positioned on both the door and the door frame.
- If the hinges are misaligned, you can use a hinge shim to adjust their position. Place the shim between the hinge knuckles to align them properly.
- Tighten the screws on the hinges to secure them in place. Loose screws can cause misalignment, resulting in poor functionality.
- Double-check the dimensions and specifications of the hinges. Using hinges that are not suitable for your door can lead to alignment issues.
Difficulty in drilling pilot holes
Drilling pilot holes is an important step in the installation process, as it ensures that the hinges are securely fastened to the door and door frame. Here are some troubleshooting tips if you encounter difficulties while drilling pilot holes:
- Use the appropriate size of drill bit for the pilot holes. Using a drill bit that is too small or too large can cause problems.
- Make sure to use a drill with enough power to penetrate the material without any issues.
- Apply steady pressure while drilling, but avoid using excessive force that may damage the door or door frame.
- If you are having trouble drilling into hardwood, consider using a pilot hole starter to create a small indentation before drilling.
Adjusting the spring tension for smooth operation
After installing the hinges, you may find that the door does not close or open smoothly due to incorrect spring tension. To troubleshoot this issue and adjust the spring tension for smooth operation, follow these steps:
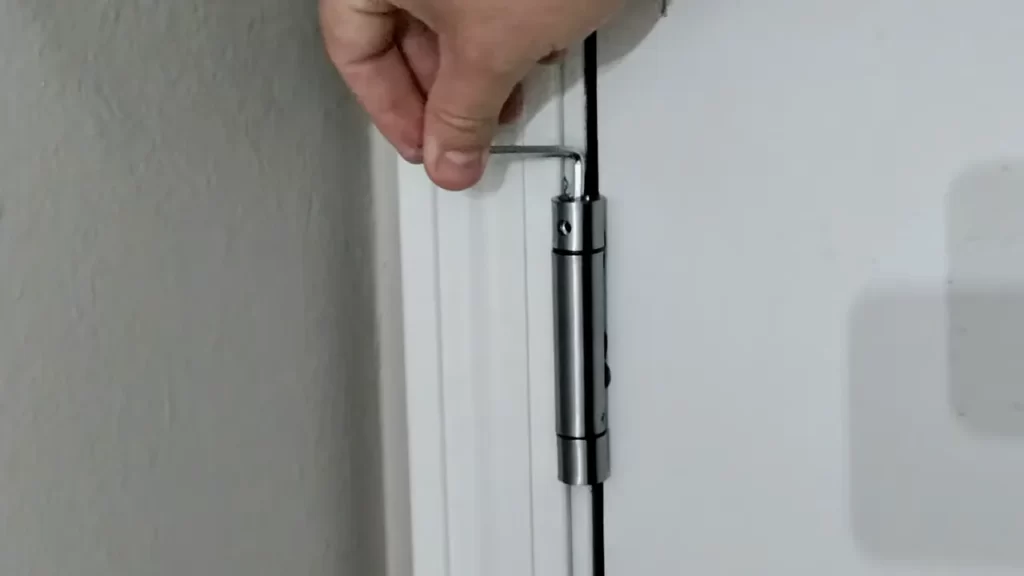
- Locate the tension adjustment screws on the hinges.
- Using a screwdriver, turn the tension adjustment screws clockwise to increase tension or counterclockwise to decrease tension.
- Test the door after each adjustment to ensure that it operates smoothly.
- Repeat the adjustment process until you achieve the desired tension and smooth operation.
- Make sure to tighten the lock nuts on the tension adjustment screws to secure the adjusted tension in place.
By following these troubleshooting steps for common installation issues with spring-loaded door hinges, you can ensure a smooth and hassle-free installation process. Remember to take your time, use the proper tools, and double-check your work to achieve the best results.
Maintenance And Care For Spring Loaded Door Hinges
Maintenance and care are essential for prolonging the lifespan of your spring-loaded door hinges. By following a few simple steps and incorporating regular cleaning and lubrication into your maintenance routine, you can ensure that your hinges continue to function smoothly and efficiently for years to come.
Tips for keeping the hinges in good condition

Regular maintenance is key to keeping your spring-loaded door hinges in optimal condition. Here are some tips to help you maintain your hinges:
- Inspect the hinges periodically to check for any signs of wear or damage. If you notice any loose or damaged parts, it’s important to address them promptly to avoid further issues.
- Clean the hinges regularly to remove any dirt, dust, or grime that may accumulate over time. You can use a mild detergent and warm water to gently clean the hinges. Be sure to dry them thoroughly afterward to prevent rusting.
- Lubricate the hinges at least once every six months or as needed. Apply a silicone-based lubricant or a light lubricating oil to the moving parts of the hinge to ensure smooth operation. Avoid using heavy oils or greases as they can attract dust and debris.
- Check the tension of the springs regularly. Over time, the springs may lose their tension, causing the door to close improperly. Adjust the tension as needed using the adjustment screws provided with the hinges.
Cleaning and lubricating the hinges regularly
Cleaning and lubricating your spring-loaded door hinges should be part of your regular maintenance routine. Here’s a step-by-step guide:
- Start by removing any dust or debris from the hinges using a soft brush or cloth.
- Mix a small amount of mild detergent with warm water to create a cleaning solution.
- Dampen a clean cloth or sponge in the cleaning solution and gently wipe down the hinges, paying close attention to the moving parts.
- Rinse the hinges with clean water to remove any soap residue.
- Dry the hinges thoroughly with a dry cloth to prevent rusting.
- Once the hinges are dry, apply a silicone-based lubricant or a light lubricating oil to the moving parts of the hinge. Use a small brush or applicator to ensure an even application.
- Wipe away any excess lubricant with a clean cloth.
By incorporating these cleaning and lubrication steps into your regular maintenance routine, you can ensure that your spring-loaded door hinges remain in optimal condition, providing smooth operation and extending their lifespan.
Frequently Asked Questions For How To Install Spring Loaded Door Hinges
How Do You Install Self Closing Spring Hinges?
To install self-closing spring hinges: 1. Remove old hinges and prepare the door and frame. 2. Align the hinge holes and insert the spring hinge. 3. Screw the hinges onto the door and frame. 4. Adjust the tension by turning the adjustment screw.
5. Test the hinge to ensure it closes properly.
How Do You Install Double Action Spring Loaded Hinges?
To install double action spring loaded hinges, follow these steps: 1. Measure and mark the desired location for the hinges on the door and frame. 2. Pre-drill holes for the screws in the marked areas. 3. Attach one side of the hinge to the door and the other side to the frame using the provided screws.
4. Ensure the hinge operates smoothly by testing its movement. 5. Adjust the tension of the spring if needed.
How Do You Install A Spring Door Closer?
To install a spring door closer, follow these steps: (1) Attach the bracket to the door frame and align it with the door closer. (2) Make sure the bracket is secure. (3) Insert and secure the pin in the closer body.
(4) Adjust the tension to your desired setting. (5) Test the door to ensure it closes properly.
How Do You Adjust A Spring Loaded Gate Hinge?
To adjust a spring-loaded gate hinge, follow these steps: 1. Open the gate fully. 2. Locate the adjustment screws on the hinge. 3. Use a screwdriver to tighten or loosen the screws, depending on the desired tension. 4. Test the gate to ensure it closes smoothly and stays in place.
5. Make further adjustments as needed until the desired tension is achieved.
How Do Spring Loaded Door Hinges Work?
Spring loaded door hinges work by using a coiled spring mechanism that applies tension to automatically close the door.
Are Spring Loaded Hinges Adjustable?
Yes, spring loaded hinges are adjustable. You can adjust the tension of the spring to make the door close more forcefully or more gently.
Conclusion
To sum up, installing spring-loaded door hinges can greatly improve the functionality and convenience of your doors. By following the step-by-step guide mentioned in this blog post, you can easily upgrade your hinges and enjoy the benefits they offer. From providing smooth and effortless operation to reducing noise and wear, these hinges are a valuable addition to any door.
So, don’t wait any longer – get started on installing your spring-loaded door hinges today!
