To install a storm door handle with a lock, follow these steps: 1) Measure and mark the desired location, 2) Drill holes according to the handle’s template, 3) Insert the handle components into the holes, 4) Attach the inside and outside handles using screws, 5) Test the lock’s functionality. Now, let’s delve into the details for a comprehensive guide on installing a storm door handle with a lock.
Installing a storm door handle with a lock is a simple process that can enhance the security and functionality of your storm door. By following a few steps, you can easily incorporate a lockable handle onto your door. In this guide, we will take you through the necessary steps to ensure a successful installation.
Whether you are a seasoned DIY enthusiast or a beginner, this guide will provide clear instructions to help you complete the task with ease. So, let’s get started and learn how to install a storm door handle with a lock.
Choosing The Right Storm Door Handle With Lock
When it comes to selecting a storm door handle with lock, there are several factors to consider. Not only do you want a handle that adds functionality to your door, but you also want one that complements the style of your home. This guide will walk you through the key aspects to evaluate when choosing the right storm door handle with lock, ensuring that you make an informed decision.
Factors to Consider When Selecting a Storm Door Handle With Lock
Before making a purchase, it’s important to take into account certain factors that will directly impact the performance and functionality of your storm door handle with lock. Here are the key considerations:
- Durability: The longevity of your storm door handle with lock depends on its durability. Look for handles made from high-quality materials such as stainless steel or solid brass, as these are known to withstand harsh weather conditions and frequent use.
- Security Features: Ensuring the safety of your home is crucial. You will want a storm door handle with a reliable locking mechanism that offers maximum security. Features such as deadbolts and tamper-resistant screws can enhance the level of protection provided by the handle.
- Ease of Installation: Installing a storm door handle should be a hassle-free process. Look for handles that come with detailed installation instructions, as well as the necessary mounting hardware to make the process easier for you.
- Compatibility: Make sure the storm door handle with lock is compatible with your door. Measure the thickness of your door and check the specifications provided by the manufacturer to ensure a proper fit. Some handles may require additional modifications or accessories for installation, so it’s essential to double-check compatibility.
- Price: Consider your budget when selecting a storm door handle with lock. While it’s important to invest in a high-quality handle, you should also look for options that offer value for money.
Evaluating Durability and Security Features
The durability and security features of a storm door handle with lock are crucial aspects to consider before making a purchase. When it comes to durability, opt for handles made from materials like stainless steel or solid brass, as they are known for their strength and ability to withstand harsh weather conditions. Security features to look for include a reliable locking mechanism, deadbolts, and tamper-resistant screws, which can provide an added layer of protection to your home.
Tips for Matching the Style of Your Door
In addition to functionality and security, it’s important to consider the aesthetics and match the style of your door when choosing a storm door handle with lock. A handle that complements the overall design of your home can enhance its curb appeal. Pay attention to the finish, shape, and design of the handle, as well as the color options available. By carefully selecting a handle that blends well with your door, you can ensure a cohesive and visually appealing look.
Preparing For Installation
Before you start installing a storm door handle with lock, it is crucial to properly prepare for the installation process. This will ensure a smoother and more efficient installation, as well as a secure and functional storm door lock. In this section, we will guide you through the necessary steps of gathering the necessary tools and materials, ensuring the door handle and lock are compatible, and assessing the door’s surface condition.
Gathering the Necessary Tools and Materials
Before you begin the installation, it’s essential to gather all the tools and materials you will need. This will save you time and effort during the installation process. We’ve compiled a list of the most commonly required tools and materials for installing a storm door handle with lock:
| Tools | Materials |
| ScrewdriverDrillKeyhole sawTape measurePencil or markerChiselLevel | Storm door handle with lockScrewsStrike plateLatch mechanismTemplate (if provided) |
Make sure you have all the tools and materials on hand before starting the installation process. This will help prevent any unnecessary delays or interruptions.
Ensuring the Door Handle and Lock are Compatible
Compatibility is key when it comes to installing a storm door handle with lock. Before proceeding, ensure that the door handle and lock you have chosen are compatible with your storm door. This includes checking the dimensions, hole patterns, and any specific requirements mentioned in the product specifications. Failure to use compatible parts may result in an improper fit or compromised security.
Assessing the Door’s Surface Condition
Before installation, it is imperative to assess the condition of the door surface where the storm door handle and lock will be installed. Look for any damages, such as cracks, dents, or rot, that may affect the installation process or compromise the door’s structural integrity. Address any surface issues or repair the door before proceeding with the installation.
By following these steps and ensuring you have the necessary tools, compatible parts, and a sound door surface, you will be well-prepared for the installation of a storm door handle with lock. This preparation will contribute to a successful and secure installation process.
Step-By-Step Installation Guide
How to Install Storm Door Handle With Lock
When it comes to enhancing the security and functionality of your storm door, installing a handle with a lock is a crucial step. In this step-by-step installation guide, we will walk you through the process of installing a storm door handle with lock. Whether you are replacing an old handle or adding a new one, this guide will provide you with the necessary instructions to accomplish the task. Follow these easy steps to ensure a successful installation.
Before you can install a new storm door handle with lock, you need to remove the existing handle and lock mechanism. Follow these steps to safely remove the old components:
- Begin by unscrewing the screws that secure the handle and lock to the door using a screwdriver. Keep the screws in a safe place as you will need them for the new installation.
- Gently detach the handle and lock from the door, taking care not to damage the surrounding areas.
- Inspect the door for any remaining screws or hardware that may need to be removed before proceeding.
Once the old handle and lock have been successfully removed, it’s time to prepare the door for the installation of the new storm door handle. Follow these steps to ensure a proper fit:
- Thoroughly clean the door surface where the new handle will be installed, removing any dirt, debris, or adhesive residue.
- Check the dimensions of the new handle to ensure it aligns with the pre-drilled holes in the door. If necessary, use a measuring tape and a pencil to mark the correct locations.
- Using a drill or an appropriate size hole saw, carefully create or enlarge the holes as needed to accommodate the new handle.
Now that the door is prepared, it’s time to install the new storm door handle. Follow these steps to ensure a secure and proper installation:
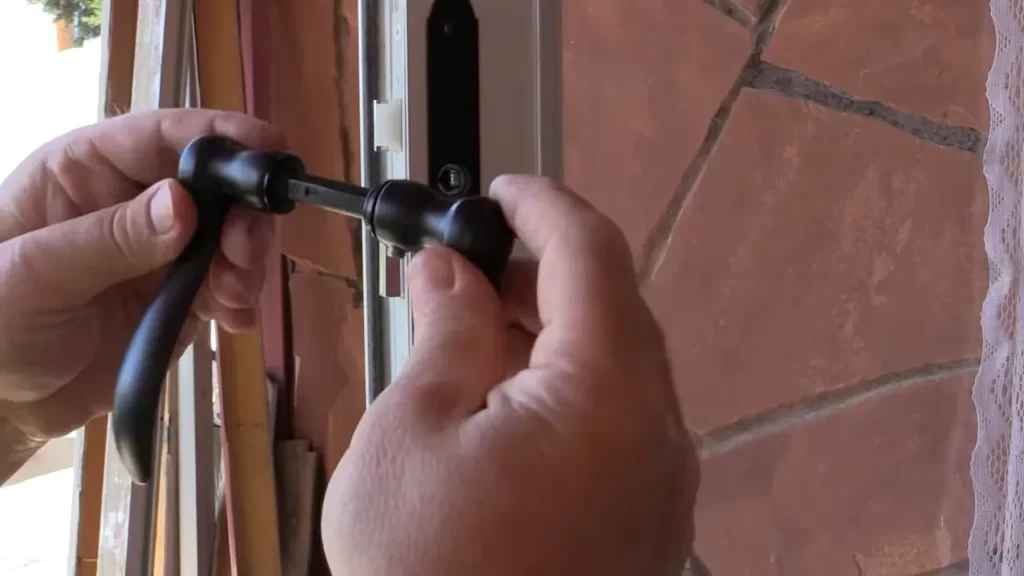
- Begin by inserting the handle assembly into the holes you prepared in the previous step.
- Align the handle properly, ensuring that it sits flush against the door surface.
- Secure the handle in place by tightening the screws provided with the handle assembly. Make sure the screws are tightened sufficiently to prevent any wobbling or looseness.
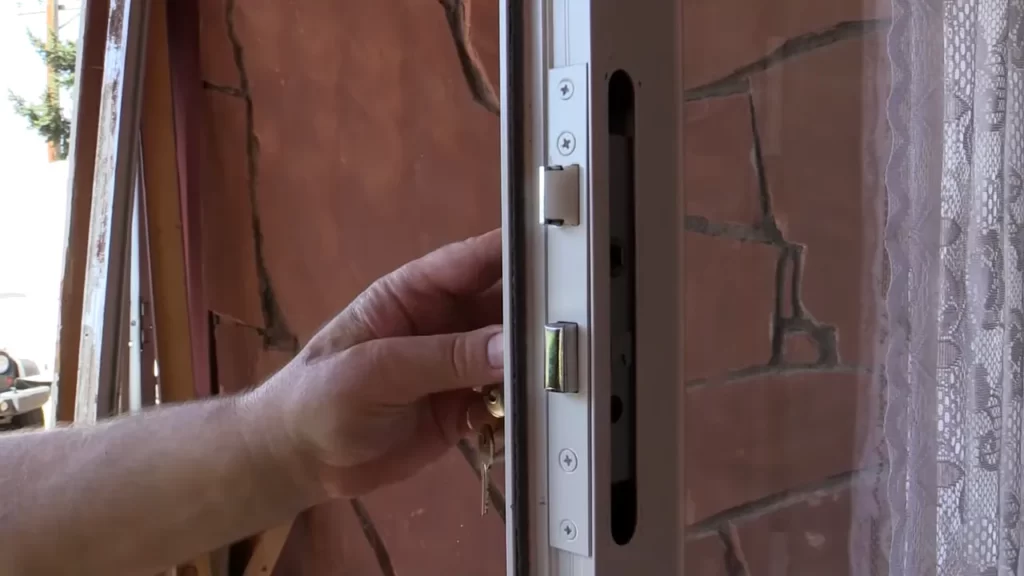
Now that the handle is installed, it’s time to attach and align the lock mechanism. Follow these steps to ensure proper alignment and functionality:
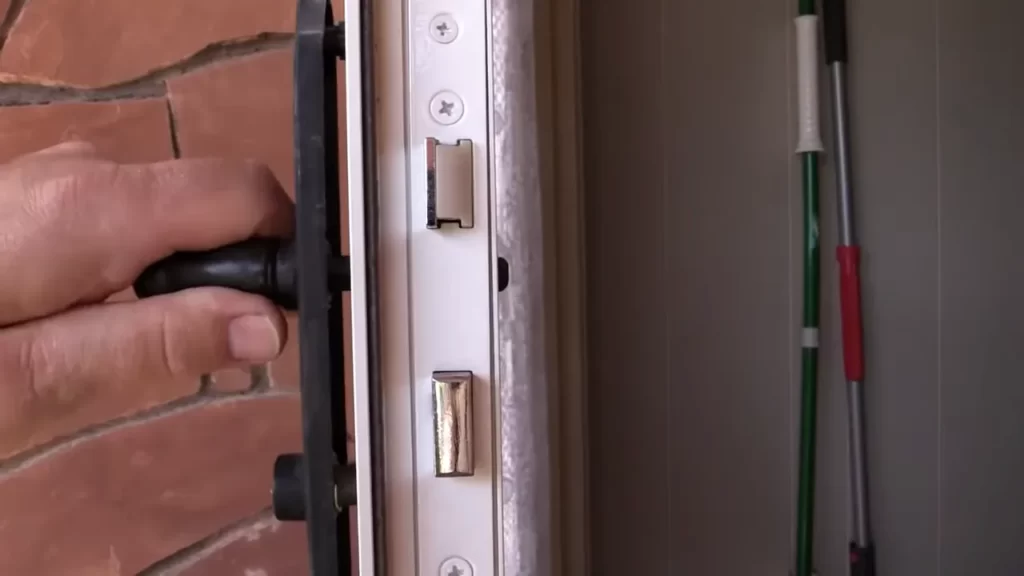
- Insert the lock mechanism into the designated slot on the handle assembly. It should fit snugly without any forceful pushing or pulling.
- Align the lock mechanism with the strike plate on the door frame, ensuring that the latch easily slides into the strike plate.
- Tighten any screws or fasteners provided with the lock mechanism to secure it in place. Ensure the lock operates smoothly without any resistance.
With the installation complete, it’s crucial to test the functionality of the door handle and lock to ensure everything is working correctly. Follow these steps to perform a quick functionality test:
- Simulate opening and closing the door several times, checking for smooth operation and consistent latching of the lock mechanism.
- Engage and disengage the lock to ensure it securely holds the door in place when locked and releases smoothly when unlocked.
- Check for any signs of misalignment, sticking, or other issues that may require adjustment or additional tightening.
Congratulations! You have successfully installed a storm door handle with lock. By following this step-by-step guide, you have enhanced both the security and functionality of your storm door. Now you can enjoy the convenience of a sturdy and reliable handle that provides peace of mind.
Removing The Existing Door Handle And Lock
If you’re looking to give your storm door a fresh new look or simply need to replace a faulty handle and lock, you’ll need to start by removing the existing door handle and lock. This step is crucial to ensure a smooth installation process for your new storm door handle. Follow these simple steps to get started:
Removing Screws and Disconnecting Components
The first step in removing the existing door handle and lock is to locate and remove the screws that are holding them in place. Use a screwdriver or an appropriate tool to carefully unscrew and remove all the screws around the handle and lock plates.
Once the screws are removed, you can start disconnecting the components of the door handle and lock. This may include removing the latch assembly, spindle, or any connecting bars. Carefully observe how these components are connected to ensure you can reassemble them correctly later.
Inspecting the Door for Damages or Repairs Needed
With the components removed, take a moment to inspect the door for any damages or repairs that may be needed. Look for any cracks, dents, or other signs of wear and tear. If you notice any damages, consider addressing them before moving forward with the installation of the new handle and lock.
Cleaning and Preparing the Door Surface for Installation
Before installing the new storm door handle and lock, it’s important to clean and prepare the surface of the door. This will ensure proper adhesion and longevity of the new hardware.
Start by wiping down the door surface with a damp cloth to remove any dirt or dust. If there are any sticky residues or stubborn stains, you may use a mild detergent or cleaner. Be sure to dry the surface thoroughly before proceeding to the next step.
Once the door surface is clean and dry, take a moment to examine it for any imperfections or rough spots. You can use sandpaper or a sanding block to gently smooth out any rough areas and create a smooth surface for the new handle and lock to be installed.
Lastly, ensure that the door surface is free from any debris or particles that may interfere with the installation. You can use a vacuum cleaner or a soft-bristle brush to remove any remaining dust or particles.
| Important Points |
|---|
| Take note of how the components are connected to ensure easy reassembly. |
| Inspect the door for damages before proceeding with the installation. |
| Create a smooth surface for the new hardware by sanding out any imperfections. |
| Make sure the door surface is free from debris or particles that may interfere with installation. |
By following these steps and properly removing the existing door handle and lock, you’re now ready to move on to the next stage of installing your new storm door handle. Stay tuned for our upcoming blog post on how to install the new handle with lock for a complete and successful storm door upgrade!
Preparing The Door For New Handle Installation
Before you can install a storm door handle with a lock, it’s important to properly prepare the door. This involves measuring and marking the handle placement, drilling pilot holes and creating mortises, and ensuring proper alignment for a secure fit. By following these steps, you can ensure a smooth and successful installation process.
Measuring and Marking the Handle Placement
The first step in preparing your door for a new handle installation is to measure and mark the handle placement. Start by determining the proper height for the handle. Generally, the handle should be installed at a comfortable height, around 36 to 40 inches from the bottom of the door. Use a tape measure to measure this height and make a mark on the door accordingly.
Next, you’ll need to determine the correct location for the handle on the door. Measure the width of the door and divide it in half to find the center. Make a mark at this center point, ensuring that it aligns with the height mark you made earlier. This will be the starting point for your handle installation.
Drilling Pilot Holes and Creating Mortises
Once you have marked the handle placement on the door, you can proceed to drill pilot holes. Pilot holes are necessary to prevent the wood from splitting when you screw in the handle screws. Use an appropriately sized drill bit for the screws that came with your handle. Make sure the drill bit is slightly smaller than the screw so that it creates a snug fit.
Position the drill bit on the marks you made for the handle and drill the pilot holes. Be careful not to drill too deep, as you don’t want to go all the way through the door. Once the pilot holes are drilled, you can move on to creating mortises.
To create mortises, use a chisel and a hammer or a router. The purpose of creating mortises is to create space for the handle backplate to sit flush with the door surface. Carefully chip away the wood within the marked areas for the handle, ensuring that the mortises are deep enough to accommodate the handle.
Ensuring Proper Alignment for a Secure Fit
Once the pilot holes and mortises are done, it’s crucial to ensure proper alignment for a secure fit of the handle. Test fit the handle backplate into the mortises and make any necessary adjustments. The backplate should sit flush against the door surface, with no gaps or misalignments.
If needed, use a chisel or sandpaper to adjust the mortises and ensure a proper fit. Take your time with this step, as a secure and aligned handle will provide added security and functionality to your storm door.
Once you are satisfied with the alignment, you can attach the handle to the door using the screws provided. Make sure to tighten them securely, but be careful not to overtighten and risk damaging the door or handle.
With these steps, you are now ready to install your storm door handle with a lock. By properly preparing the door, measuring and marking the handle placement, drilling pilot holes and creating mortises, and ensuring proper alignment, you can achieve a secure and professional installation.
Installing The Storm Door Handle
Installing the Storm Door Handle When it comes to installing a storm door handle with a lock, proper installation is crucial for both functionality and security. The process may seem daunting, but with the right steps, you’ll have your storm door handle securely installed in no time. In this guide, we will walk you through the process in three simple steps: Attaching the Handle Components Together, Inserting and Securing the Handle on the Door, and Tightening Screws and Checking for Handle Stability. Attaching the Handle Components Together The first step in installing the storm door handle is to attach the handle components together. Ensure that you have all the necessary components, including the handle plate, lock cylinder, latch mechanism, and screws. Once you have confirmed all the components are present, follow these steps: 1. Start by positioning the handle plate on the exterior side of the storm door, aligning it with the pre-drilled holes. 2. Insert the lock cylinder into the designated opening on the handle plate. Make sure it fits snugly and is aligned correctly. 3. Take the latch mechanism and align it with the handle plate. Insert the latch into the corresponding opening until it clicks securely into place. 4. Once all the components are aligned and properly inserted, tighten the screws to secure them together. Use a screwdriver to ensure a tight fit, but be cautious not to overtighten and strip the screw holes. Inserting and Securing the Handle on the Door With the handle components securely attached together, the next step is to insert and secure the handle on the storm door. Follow these steps to complete this process: 1. Locate the pre-drilled holes on the interior side of the storm door where the handle will be installed. 2. Hold the handle assembly up to the door, ensuring that it aligns with the pre-drilled holes. 3. Insert the provided screws into the holes, one at a time, and begin tightening them with a screwdriver. 4. As you tighten the screws, ensure that the handle remains aligned and level. Adjust if necessary to achieve a proper fit. 5. Continue tightening the screws until they are secure but again, be careful not to overtighten and damage the door or handle. Tightening Screws and Checking for Handle Stability In the final step, you’ll want to double-check the handle’s stability and make any necessary adjustments. Here’s how: 1. Once all the screws are tightened, give the handle a gentle tug to ensure it feels secure. 2. Check the handle for any wobbling or movement that may indicate loose screws. If you notice any, go back and tighten them further. 3. Test the handle’s functionality by turning the knob or lever and confirming that it operates smoothly. 4. Make sure the lock cylinder aligns correctly with the strike plate and the latch engages properly. 5. If everything feels stable and secure, congratulations! You have successfully installed your storm door handle with a lock. By following these simple steps and properly installing your storm door handle, you can enjoy enhanced functionality and security for your storm door. Take your time during each step, ensuring that all components are aligned and properly secured. With a little patience, your storm door handle will be ready to use in no time.
Attaching And Aligning The Lock Mechanism
Installing a storm door handle with a lock can provide an added layer of security to your home. Attaching and aligning the lock mechanism is an essential step in ensuring that the handle functions smoothly and effectively. In this section, we will guide you through the process of positioning the lock mechanism on the door, aligning the lock cylinder and latch plate, and making necessary adjustments for smooth operation.
Positioning the Lock Mechanism on the Door
Before you can attach the lock mechanism, you need to determine the ideal position for it on the storm door. Keep in mind that the lock should be easily accessible and at a comfortable height for everyone in your household. To position the lock mechanism, follow these steps:
- Measure the distance from the top of the door to the ideal height for the lock mechanism.
- Using a tape measure, mark this distance on the storm door.
- Next, measure the distance from the edge of the door to the center of the lock mechanism.
- Make another mark on the door using this measurement.
By accurately positioning the lock mechanism, you can ensure that it operates smoothly and efficiently.
Aligning the Lock Cylinder and Latch Plate
Once the lock mechanism is in position, the next step is to align the lock cylinder and latch plate. This alignment is crucial for the lock to function properly. Follow these steps to align the lock cylinder and latch plate:
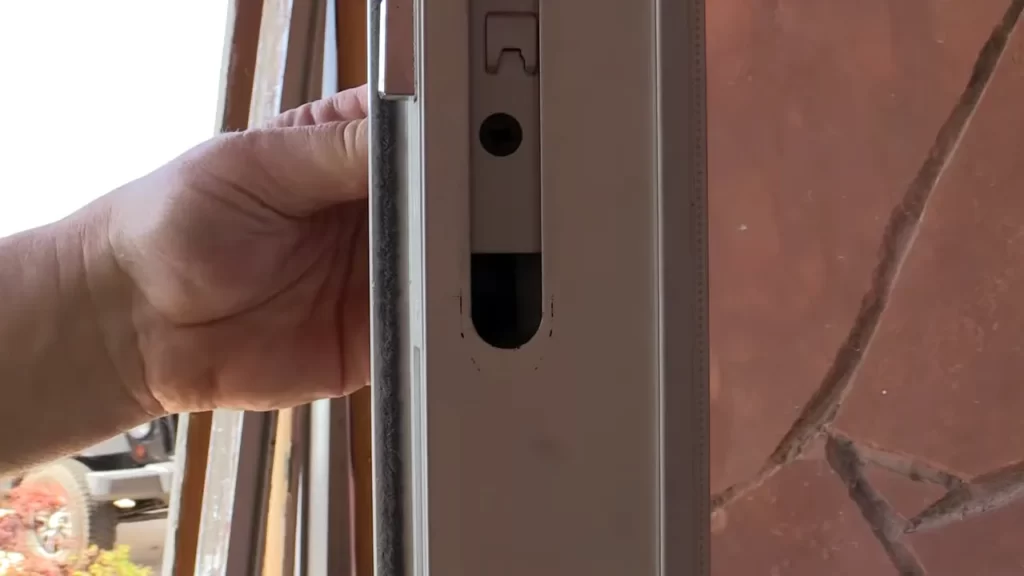
- Insert the lock cylinder into the designated hole on the exterior side of the storm door.
- Ensure that the lock cylinder is securely in place.
- Align the latch plate with the lock cylinder, making sure that the holes on the latch plate align with the corresponding holes on the lock cylinder.
- Secure the latch plate to the interior side of the storm door using the provided screws.
Proper alignment of the lock cylinder and latch plate is crucial for the smooth and reliable operation of the storm door handle with lock.
Making Necessary Adjustments for Smooth Operation
After attaching and aligning the lock mechanism, you may need to make some adjustments for smooth operation. Here are a few tips to ensure the handle functions smoothly:
- Check that the lock cylinder turns freely without any resistance.
- Test the latch plate by closing the storm door and checking if it securely latches into place.
- If the lock cylinder or latch plate is not functioning as desired, make slight adjustments by loosening the screws and repositioning them.
- Ensure that the lock mechanism is properly aligned with the strike plate on the door frame.
- Finally, lubricate the lock mechanism periodically to prevent any stiffness or sticking.
By following these steps and making necessary adjustments, you can ensure the smooth operation of your storm door handle with a lock.
Testing The Functionality Of The Door Handle And Lock
Once you have successfully installed your storm door handle with a lock, it is crucial to test its functionality. Testing ensures that the handle and lock are aligned correctly, engage and disengage properly, and are comfortable and easy to use. In this section, we will explore how to test the handle and lock to ensure a robust and reliable installation.
Closing and Opening the Door to Check Alignment
One of the key aspects to consider when testing a storm door handle with a lock is the alignment of the door when closing and opening. To check the alignment, follow these simple steps:
- Open the storm door completely and observe if it closes smoothly without any resistance or misalignment.
- If you notice any misalignment, adjust the hinges or strike plate accordingly to ensure a proper fit. This step is crucial as misalignment could lead to difficulty in operating the door handle and lock.
- Close the door gently and observe if it aligns perfectly with the strike plate. If there is any resistance or the door fails to align correctly, further adjustments may be required.
Ensuring Proper Lock Engagement and Disengagement
Once you have confirmed the alignment, it is crucial to test the lock’s engagement and disengagement. This step ensures that the door can be adequately secured. Follow these steps to ensure a proper lock engagement:
- Close the storm door fully and turn the handle clockwise until the lock engages securely.
- Test the lock by applying gentle pressure to the door to ensure it remains latched and locked.
- To disengage the lock, turn the handle counterclockwise and observe if the lock releases smoothly.
Testing the Handle’s Comfort and Ease of Use
Lastly, it is essential to test the handle’s comfort and ease of use. A well-designed and ergonomic handle ensures comfortable operation. Follow these steps to test the handle:
- Grip the handle firmly and evaluate if it feels comfortable to hold. The handle should be neither too small nor too large, providing a good grip without straining your hand.
- Try opening and closing the door multiple times to evaluate the handle’s ease of use. It should operate smoothly without excessive force or resistance.
- Ensure that the handle is securely fastened to the door. If it feels loose or wobbly, tighten the mounting screws to ensure a sturdy installation.
By testing the functionality of the door handle and lock, you can ensure they work seamlessly and contribute to the overall security and convenience of your storm door. Take the time to align the door, ensure proper lock engagement, and test the handle’s comfort and usability. With these steps, you can confidently enjoy the benefits of a fully functional storm door handle with a lock
Frequently Asked Questions For How To Install Storm Door Handle With Lock
How Do You Install A Door Handle On A Storm Door?
To install a door handle on a storm door, follow these steps: 1. Place the handle on the door and mark the installation holes. 2. Drill pilot holes at the marked spots. 3. Attach the handle using screws and a screwdriver.
4. Test the handle to ensure it functions properly.
How Do You Install A Door Lock Latch?
To install a door lock latch: 1. Measure the door thickness and mark the latch position. 2. Drill holes for the latch body and faceplate. 3. Insert the latch body and screw it in place. 4. Attach the faceplate over the latch.
5. Test the latch to ensure it functions properly.
Why Does My Door Latch Not Spring Back?
The door latch doesn’t spring back because it may be worn out or damaged. Check for any debris or obstructions hindering the latch’s movement. Lubricate it with a silicone-based lubricant. If the latch still doesn’t spring back, it may need to be replaced by a professional.
Should A Storm Door Handle Be On The Same Side As The Main Door?
Yes, a storm door handle can be on the same side as the main door. However, it can also be installed on the opposite side for convenience and functionality. Ultimately, it depends on personal preference and the layout of the entrance.
How Do I Choose A Storm Door Handle With Lock?
To choose a storm door handle with lock, consider factors like material, design, durability, and security features.
What Tools Do I Need To Install A Storm Door Handle With Lock?
For installing a storm door handle with lock, you will need a screwdriver, measuring tape, drill, and safety glasses.
Conclusion
Installing a storm door handle with a lock may seem like a daunting task, but it is actually quite straightforward. By following the steps outlined in this blog post, you can easily install a storm door handle with a lock on your own.
Remember to gather all the necessary tools and materials before you begin. With a little patience and attention to detail, you’ll have a secure and functional storm door handle in no time. Happy installing!