To install a wireless camera, start by choosing a suitable location and mounting the camera securely. Then, connect the camera to a power source and configure it to your Wi-Fi network.
Installing a wireless camera involves a few simple steps. Firstly, choose where you want to place the camera and ensure the area has a stable Wi-Fi connection. Next, mount the camera in the desired location using screws or adhesive. After that, connect the camera to a power source and ensure it is turned on.
Finally, follow the manufacturer’s instructions to configure the camera to your Wi-Fi network. By following these steps, you can easily install a wireless camera for your home or office.
Factors To Consider Before Purchasing
Finding the perfect wireless camera for your surveillance needs can be an overwhelming task. With so many options available in the market, it’s important to consider several factors before making a purchase. These factors will help determine the quality, range, and overall performance of the camera.
Budget
One of the most important factors to consider before purchasing a wireless camera is your budget. Setting a budget will help you narrow down your options and find a camera that fits within your financial means. Keep in mind that while cheaper cameras may save you money upfront, they may lack the features and durability of more expensive models. It’s important to strike a balance between cost and quality when making your decision.
Camera Resolution
The resolution of the camera plays a crucial role in the clarity of the footage it captures. Higher resolution cameras produce sharper and more detailed images, allowing you to see important details clearly, such as facial features or license plate numbers. Consider opting for a camera with at least 1080p resolution to ensure optimal image quality.
Wireless Range
When selecting a wireless camera, it’s important to consider the range it offers. The wireless range determines how far the camera can transmit its video feed to the receiver or viewing device. A camera with a longer wireless range will allow you to cover more area without sacrificing signal strength. This is especially important if you have a large property or wish to monitor outdoor areas that are far from the receiver.
Power Source Options
Understanding the power source options available for your wireless camera is essential. Some cameras are battery-powered, while others are plugged into an electrical outlet. Battery-powered cameras offer flexibility in terms of placement but may require frequent battery changes or recharging. On the other hand, cameras that are plugged into an electrical outlet provide a continuous power source, but their placement may be limited by the availability of nearby outlets. Consider your specific needs and preferences when choosing the right power source option.
Security Features
Lastly, it’s crucial to consider the security features offered by the wireless camera. Look for cameras that have built-in encryption protocols to prevent unauthorized access to your video feed. Additionally, consider cameras with motion detection and night vision capabilities, as these features enhance the overall security and functionality of the camera.
Researching And Comparing Different Wireless Camera Models
When it comes to securing your home or business, wireless cameras have become increasingly popular. With their easy installation and flexible placement options, these cameras offer convenience and peace of mind. However, with a plethora of options available in the market, it can be overwhelming to choose the right wireless camera for your needs. That’s why it’s crucial to put some time into researching and comparing different wireless camera models before making a purchase. In this post, we’ll discuss three essential factors to consider when researching and comparing wireless camera models: online reviews and ratings, feature comparison, and compatibility with existing security systems.
Online Reviews and Ratings
Before making any buying decision, it’s always a good idea to check out online reviews and ratings of the wireless cameras you are interested in. These reviews provide valuable insights into the experiences of other customers who have already purchased and used the product. They can give you a clear picture of the camera’s performance, reliability, and ease of use. Additionally, online ratings can help you gauge the overall satisfaction level of customers with a particular wireless camera model.
To find reliable online reviews, visit reputable websites that specialize in consumer reviews, such as Amazon, Best Buy, or CNET. Look for cameras that have a significant number of reviews and a high average rating. It’s also important to read both positive and negative reviews to get a well-rounded understanding of the camera’s pros and cons. Pay attention to common themes in the reviews and consider how they align with your specific requirements.
Feature Comparison
Wireless cameras come with various features and functionalities, and it’s crucial to compare these features to determine which camera model best suits your needs. Some key features to consider include:
- Resolution: Look for cameras with high-resolution capabilities, such as 1080p or higher, to ensure clear and detailed video footage.
- Field of view: Consider the camera’s field of view to determine how wide an area it can cover. A wider field of view means less blind spots.
- Night vision: If you require surveillance during nighttime or low-light conditions, look for cameras equipped with infrared or night vision capabilities.
- Motion detection: Cameras with motion detection can send notifications to your smartphone or email when any movement is detected, ensuring you stay informed about potential intrusions.
- Two-way audio: If you want to communicate with people near the camera, look for models that offer two-way audio, allowing you to listen and talk through the camera’s built-in speakers and microphone.
- Cloud storage or local storage options: Consider how the camera stores recorded footage – either in the cloud or on a local storage device – and choose the option that best aligns with your preferences.
By comparing the features of different wireless camera models, you can prioritize the ones that are most important to you and select a camera that meets your specific requirements.
Compatibility with Existing Security Systems
If you already have a security system in place, it’s essential to ensure that the wireless camera you choose is compatible with your existing setup. Not all wireless cameras integrate seamlessly with all security systems, so it’s vital to check the camera’s specifications and compatibility information. Some key aspects to consider include:
- Wireless protocols: Make sure the camera’s wireless protocols, such as Wi-Fi or Bluetooth, are compatible with your security system’s protocols.
- Integration options: Check if the camera offers integration with popular security system brands or platforms, such as Google Home or Amazon Alexa.
- Additional equipment: Determine if any additional equipment or adapters are necessary for connecting the wireless camera to your existing security system.
Ensuring compatibility with your existing security system will save you time, effort, and potential frustration down the line.
In conclusion, researching and comparing different wireless camera models is essential to find the best fit for your home or business. By exploring online reviews and ratings, comparing features, and considering compatibility with your existing security system, you can make an informed decision and select a wireless camera that meets your unique requirements.
Determining Camera Placement
Installing wireless cameras in the right positions is crucial to ensure your home or business remains secure. Determining the perfect spots for your cameras requires careful consideration of vulnerable entry points, optimal angles, and coverage areas. In this section, we will explore how to identify vulnerable entry points, as well as the importance of optimal camera angles and coverage areas.
Identifying Vulnerable Entry Points
Before you begin installing your wireless cameras, it’s essential to identify the vulnerable entry points around your property. These are the areas most susceptible to break-ins or unauthorized access. Take a walk around your property and pay close attention to:
- Main entrances such as front and back doors
- Windows, especially those on the ground floor
- Garage doors and other exterior access points
By identifying these vulnerable entry points, you can strategically position your wireless cameras to cover these areas effectively.
Optimal Camera Angles and Coverage Areas
Once you have identified the vulnerable entry points, it’s time to determine the optimal angles and coverage areas for your wireless cameras. Here are some factors to consider:
- Field of view: Assess the range of vision of your wireless cameras. Determine how much area you want to cover and adjust the angle accordingly.
- Height: Mount the cameras at a height that provides a clear view without any obstructions. This will help capture useful details and avoid tampering.
- Overlapping coverage: To ensure no blind spots, consider overlapping the coverage areas of multiple cameras, especially in large spaces.
- Night vision: If you anticipate threats during the night, choose cameras with adequate night vision capabilities. Position them in areas that provide clear visibility in low-light conditions.
- Weather resistance: In outdoor spaces, select cameras that are weather-resistant and position them where they are shielded from extreme weather conditions.
Remember, the goal is to maximize the visibility of important areas while minimizing blind spots. By following these guidelines, you can effectively position your wireless cameras for optimal security coverage.
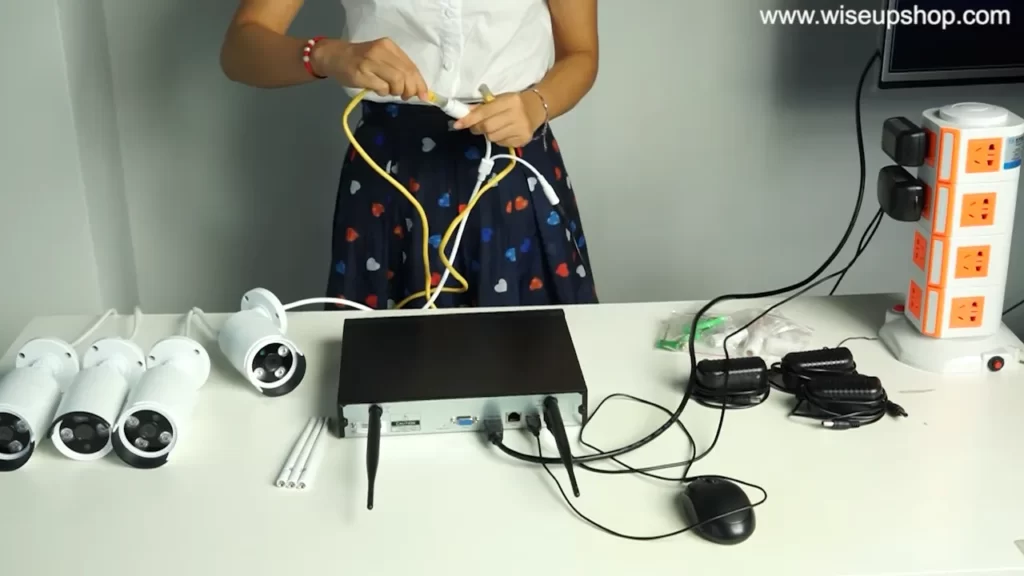
Gathering The Necessary Tools And Equipment
Before you start installing a wireless camera, it’s crucial to gather all the necessary tools and equipment. Having everything on hand will ensure a smooth installation process and help you avoid any unexpected delays. In this section, we will discuss the required tools for installation and additional equipment that can enhance the security of your wireless camera setup.
Required tools for installation
To install a wireless camera, you will need the following tools:
- Screwdriver set: A versatile screwdriver set will help you with any screwing or unscrewing tasks during the installation process.
- Drill: If you need to drill holes for mounting the camera or running cables, a drill will be your go-to tool. Make sure to use the appropriate drill bits for the surface you are working on.
- Tape measure: A tape measure will come in handy for measuring distances and ensuring precise camera placement.
- Ladder or step stool: Depending on the height at which you plan to install the camera, you may need a ladder or step stool to safely reach the desired spot.
- Level: To ensure that your camera is properly positioned and aligned, use a level to make sure it is straight.
- Cable management tools: If you need to run cables along walls or ceilings, cable clips or wire staples will help you keep them organized and hidden.
- Power drill: If your wireless camera requires a power source, a power drill will be essential for running the necessary power cables.
- Power extension cord: In case the power outlet is not conveniently located near the camera installation spot, a power extension cord will allow you to connect the camera to a power source.
Additional equipment for enhanced security (optional)
If you want to enhance the security of your wireless camera setup, consider investing in the following additional equipment:
- Wireless range extenders: These devices can boost the signal strength of your wireless camera, allowing it to transmit and receive data from a greater distance.
- Outdoor camera housing: If you plan to install a wireless camera outdoors, an outdoor camera housing will protect it from harsh weather conditions and potential damage.
- Security camera signs and stickers: Displaying signs and stickers indicating the presence of surveillance cameras can be an effective deterrent against potential trespassers or intruders.
- Extra memory cards or cloud storage subscription: To ensure you have enough storage space for your camera’s recordings, consider investing in extra memory cards or a cloud storage subscription.
By gathering the necessary tools and equipment for your wireless camera installation, you’ll be well-prepared to set up your security system efficiently and effectively.
Mounting The Camera
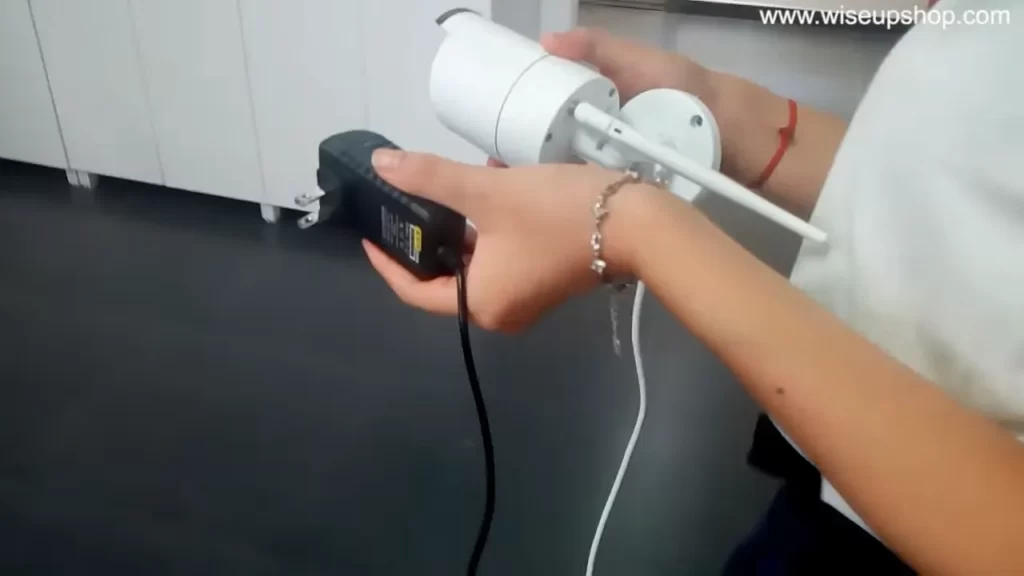
When it comes to installing a wireless camera, one of the most crucial steps is mounting the camera properly. A well-mounted camera ensures stability and visibility, allowing you to maximize the security benefits of your wireless camera system. In this section, we will discuss the different mounting options, the use of brackets or mounting plates, and how to ensure stability and visibility for your camera.
Mounting options
Before you start mounting your wireless camera, it’s important to consider the best location for optimal coverage. Depending on your needs, you can choose to mount your camera on a wall or ceiling. The choice of mounting option depends on the layout of the area you want to monitor and the range of view required. Let’s take a closer look at each option:
Wall mounting
Wall mounting is a popular choice for wireless cameras as it provides a versatile positioning option. By mounting the camera on the wall, you can easily adjust the angle and direction to cover the desired area effectively. Ensure that the wall chosen for mounting is sturdy to provide the necessary support for the camera and avoid any potential vibrations.
Ceiling mounting
Ceiling mounting is another excellent option, especially when you want to have a broader view of the area. By mounting the wireless camera on the ceiling, you can achieve a bird’s eye view, ensuring maximum coverage. However, when opting for ceiling mounting, make sure that the camera is securely fixed to prevent any accidental detachment.
Using brackets or mounting plates
Once you have determined the ideal mounting option, you can move on to using brackets or mounting plates to fix the camera securely. Brackets allow you to easily adjust the camera’s position and angle, ensuring the best view. Mounting plates, on the other hand, provide a stable base to securely attach the camera to the wall or ceiling. When choosing brackets or mounting plates, ensure compatibility with your camera model and select ones that offer sufficient stability and durability.
Ensuring stability and visibility
When mounting your wireless camera, stability and visibility are of utmost importance. To ensure stability, it is crucial to fix the camera securely and tightly to avoid any swaying or unintended movement. Use appropriate screws or anchors depending on the mounting surface to provide a strong and reliable hold. Moreover, make sure that the camera is positioned in such a way that it offers maximum visibility without any obstructions. Take into consideration factors like lighting conditions and potential obstacles that could hinder the camera’s view. Regularly check the camera’s position and readjust if necessary to maintain optimal coverage and security.
Making sure the wireless camera is mounted correctly is essential for efficient monitoring and security. By considering the mounting options, using brackets or mounting plates, and ensuring stability and visibility, you can establish a reliable and effective surveillance system. Following these guidelines will allow you to make the most out of your wireless camera installation.
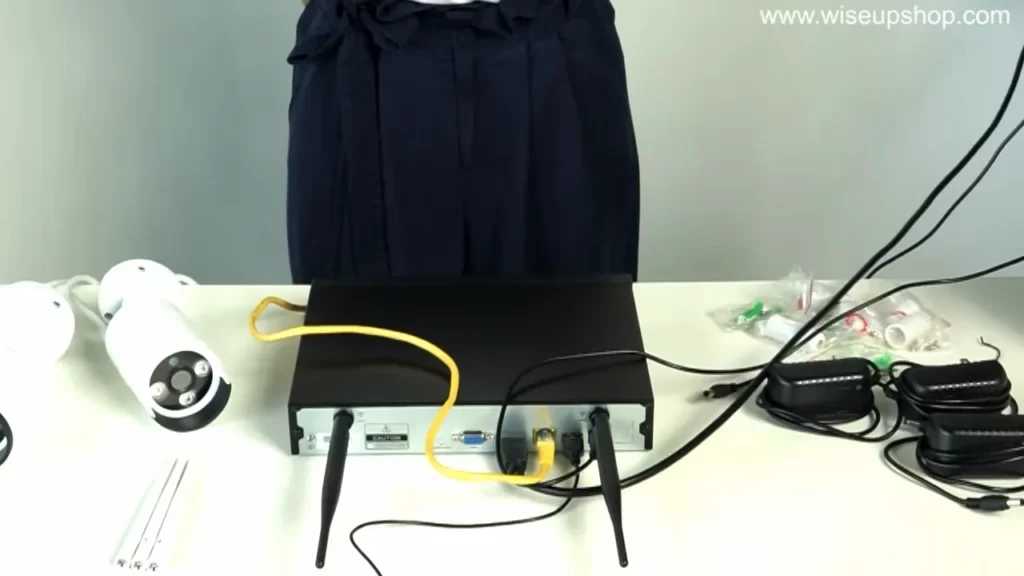
Connecting Power Source
When it comes to installing a wireless camera, connecting the power source is a crucial step. A reliable power source ensures uninterrupted surveillance and peace of mind. In this section, we will explore different options for choosing a power source, routing power cables (if applicable), and securing power connections.
Choosing a Power Source
When selecting a power source for your wireless camera, you have a variety of options to consider. Here are two popular choices:
- Battery: Opting for a battery-powered wireless camera provides flexibility and ease of installation. With this option, you don’t have to worry about electrical outlets or complicated wiring. Simply ensure the batteries are charged or replace them when needed.
- Solar: If you prefer an eco-friendly solution and have access to sufficient sunlight, a solar-powered wireless camera might be the ideal choice. These cameras come with built-in solar panels that charge the batteries during the day, providing continuous power without the need for frequent battery replacements.
Before making a decision, assess the location and environmental conditions where you plan to place the camera. Consider factors such as sunlight exposure, accessibility for battery replacement, and the camera’s power consumption.
Routing Power Cables
If your wireless camera requires a power cable, routing it properly is essential for a clean and secure installation. Follow these steps to route power cables:
- Plan the cable path: Determine the best route for the power cable from the camera to the power source. Ensure it is hidden from view and protected from possible damage.
- Use cable clips or conduit: To keep the power cable organized and secure, utilize cable clips or conduit. This will prevent cables from becoming tangled or tripping hazards.
- Consider weatherproofing: If you intend to route the power cable outdoors, make sure it is designed to withstand harsh weather conditions. Weatherproof cable covers or conduit can help protect the cable from moisture and extend its lifespan.
By following these steps, you can ensure a neat and professional installation of the power cable, reducing the risk of accidents and damage.
Securing Power Connections
To ensure a reliable power connection, it’s essential to properly secure the power cables and connections. Here are a few tips to help secure your power connections:
- Use cable ties: Use cable ties to secure the power cables together, preventing them from coming loose or tangling. This will maintain a tidy and organized setup.
- Choose waterproof connectors: If your camera is exposed to outdoor elements, opt for waterproof connectors to safeguard against moisture and ensure a durable power connection.
- Perform regular maintenance: Regularly inspect the power connections to detect any signs of wear or damage. Replace any faulty cables or connectors promptly to maintain a reliable power supply.
By adopting these practices, you can safeguard your power connections and enjoy uninterrupted surveillance from your wireless camera.
Connecting To The Network
Setting up your wireless camera and connecting it to your network is crucial for seamless monitoring and surveillance. In this guide, we will walk you through the steps of configuring camera settings and pairing with a dedicated mobile app or platform.
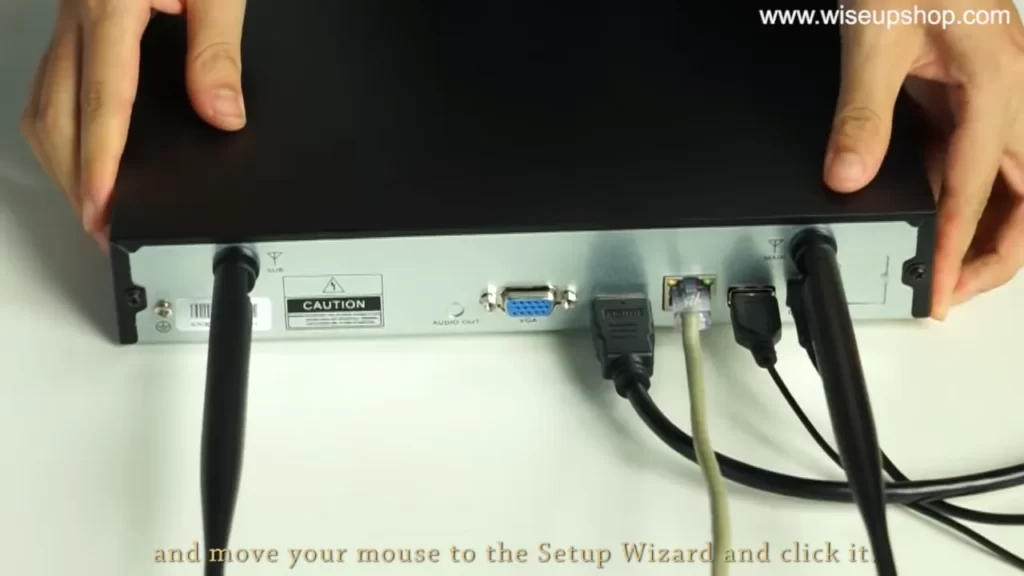
Configuring camera settings (e.g., Wi-Fi, IP address)
Before you can start using your wireless camera, you need to configure its settings, including the Wi-Fi connection and IP address. Follow these steps to ensure a smooth setup process:
- Power on the camera and ensure it is within range of your Wi-Fi network.
- Access the camera’s settings by either scanning the QR code provided with the camera or typing in its IP address in your web browser.
- In the settings menu, locate the Wi-Fi section.
- Select your Wi-Fi network from the list and enter the password if prompted.
- Once connected, make sure to save the settings and wait for the camera to reconnect to the network.
- To ensure accessibility, assign a static IP address to your wireless camera. This will prevent any network conflicts and make it easier to locate the device on your network.
- Save the IP address settings and restart the camera for the changes to take effect.
Pairing with a dedicated mobile app or platform
In order to access and control your wireless camera remotely, you will need to pair it with a dedicated mobile app or platform. Follow these steps to complete the pairing process:
- Download the dedicated mobile app or navigate to the provided platform’s website.
- Create an account or sign in if you already have one.
- Ensure that your camera and mobile device are connected to the same Wi-Fi network.
- Open the app or platform and select the option to add a new camera.
- Follow the on-screen instructions to pair your camera with the app or platform.
- Provide any required information, such as the camera’s unique identifier or QR code, to complete the pairing process.
- Once paired, you can now access live video feeds, adjust camera settings, and view recordings from anywhere using the app or platform.
By following these steps to connect your wireless camera to the network and pair it with a dedicated mobile app or platform, you can ensure seamless monitoring and peace of mind knowing that your property is under reliable surveillance.
Verifying Camera Functionality
Checking Live Video Feed
Once you have successfully installed your wireless camera, the next step is to verify its functionality. The first thing you need to do is check the live video feed. This will ensure that you can monitor your property or desired area in real-time. Follow these steps to check the live video feed:
- Launch the camera’s mobile app or access the camera’s web interface on your computer.
- Login to your camera’s account using the provided credentials.
- Locate the live video feed option in the app or web interface.
- Tap or click on the live video feed option to start viewing.
- Ensure that the video feed is clear and that you can see the desired area.
Testing Motion Detection and Alerts
Motion detection is a key feature of wireless cameras, as it allows you to receive alerts whenever there is any movement in the camera’s field of view. To test this functionality and ensure that you will be promptly notified of any suspicious activity, follow these steps:
- Access the camera’s settings menu through the mobile app or web interface.
- Look for the motion detection settings and make sure it is enabled.
- Adjust the sensitivity settings to your desired level.
- Ask someone to walk within the camera’s field of view to trigger the motion detection.
- Check for alerts on your smartphone or computer, depending on the device you are using.
- Verify that you receive timely notifications and that they accurately indicate motion.
Adjusting Camera Settings
After verifying the live video feed and motion detection capabilities, it is important to adjust the camera settings to meet your specific preferences and needs. Follow these steps to ensure optimal camera functionality:
- Access the camera’s settings menu through the app or web interface.
- Explore the available settings options, such as resolution, night vision, audio, and recording preferences.
- Make the necessary adjustments based on your requirements.
- Take your time to familiarize yourself with each setting and its impact on the camera’s performance.
- Regularly review and update the camera settings as needed.
Addressing Common Installation Issues
Installing a wireless camera can provide your home or business with an added layer of security and peace of mind. However, like any technology, it’s not uncommon to encounter some hiccups along the way. In this section, we will address some of the most common installation issues that users may face when setting up their wireless cameras. By following these troubleshooting steps, you can ensure that your camera functions optimally and that you can take full advantage of its features.
Poor Signal Strength
One of the most frequent problems that users encounter during wireless camera installation is poor signal strength. If you have noticed that your camera’s feed is choppy or frequently disconnects, this issue may be the culprit. Here are a few steps you can take to improve your signal strength:
- Position the camera closer to your wireless router. Ideally, there should be minimal obstructions (such as walls or furniture) between the camera and the router.
- Check the strength of your Wi-Fi signal in the area where you plan to install the camera. You can use a smartphone or laptop to determine if the signal is weak or strong. If it’s weak, consider installing a Wi-Fi range extender or relocating your router for better coverage.
- Ensure that your wireless router is operating on a channel with minimal interference. You can use applications or utilities, such as Wi-Fi Analyzer, to identify congested channels and switch to a less crowded one.
- If all else fails, upgrading your router to a more powerful model may improve the signal strength and overall performance of your wireless camera system.
Connectivity Issues
Another common installation issue is connectivity problems between the camera and the wireless network. If you are having trouble connecting your camera to the network or experiencing frequent disconnections, try the following steps to resolve the issue:
- Power cycle your wireless camera and router by unplugging them from their power sources for 30 seconds, then plugging them back in.
- Make sure that the Wi-Fi password you are entering is correct. Double-check the password for any typos or errors.
- Update the firmware of your wireless camera to the latest version. Manufacturers often release firmware updates that address connectivity and compatibility issues.
- Check if your wireless camera’s IP address conflicts with any other device on the network. If it does, assign a static IP address to the camera to avoid conflicts.
- If none of these steps resolve the connectivity issues, consider contacting the manufacturer’s customer support for further assistance.
Video and Audio Quality Problems
Lastly, some users may encounter video and audio quality problems when installing wireless cameras. If you are experiencing blurry or pixelated footage, or if the audio is distorted or nonexistent, try the following troubleshooting steps:
- Ensure that the camera lens is clean and free from any obstructions. Use a soft cloth to gently clean the lens and remove any dirt or fingerprints that may be affecting the image quality.
- Adjust the camera’s settings, such as brightness, contrast, and resolution, to find the optimal configuration for your specific needs.
- Check if your wireless camera’s streaming quality settings are set too high for your network’s bandwidth. Adjusting the streaming quality to a lower resolution or frame rate can help improve video and audio performance.
- If you are still experiencing video and audio quality issues, consider upgrading your wireless camera to a model with better image and sound capabilities.
By following these troubleshooting steps, you can tackle the common installation issues that may arise when setting up a wireless camera. Remember, patience and persistence are key when troubleshooting, and don’t hesitate to reach out to the manufacturer for additional support if needed.
Creating Secure Login Credentials
When it comes to installing wireless cameras, creating secure login credentials is crucial to protect your camera system and ensure the privacy of your footage. In this section, we will discuss three important steps to establish strong login credentials:
Unique username and password
One of the primary steps in securing your wireless camera is to create a unique username and password. It is essential to choose a username that is distinct and not easily guessable. Avoid using generic names like “admin” or “user” as these are often targeted by hackers.
When creating a password, make sure to include a combination of uppercase and lowercase letters, numbers, and special characters. Aim for a password length of at least eight characters, and avoid using easily guessable information such as your name, birthdate, or phone number.
| Tip: | Use a reliable password manager to store and generate complex passwords for your wireless camera login. |
|---|
Enabling two-factor authentication (2FA)
Adding an extra layer of security, two-factor authentication (2FA) can significantly enhance the protection of your wireless camera system. With 2FA enabled, you will require an additional verification method, such as a code or fingerprint, in addition to your username and password.
To enable 2FA, check if your wireless camera system supports this feature. If so, follow the instructions provided by the manufacturer to set it up. Once implemented, it will provide an added level of security, making it more difficult for unauthorized individuals to access your camera system.
Changing default login credentials
By default, many wireless cameras come with generic login credentials, which are widely known among potential attackers. Changing these default credentials is vital to ensure that your camera system remains secure.
To change the default login credentials, access the camera’s settings through the manufacturer’s app or web interface. Navigate to the account or user settings and follow the instructions to update your username and password. Remember to use the same principles mentioned earlier for creating strong credentials.
- Once you’ve completed the setup process and created secure login credentials, make sure to regularly update them. This will help keep your wireless camera system protected from any potential security breaches.
- Additionally, consider enabling other security features provided by your camera system, such as network encryption, motion detection alerts, and remote access restrictions.
By following these steps, you can significantly enhance the security of your wireless camera system and have peace of mind knowing that your footage remains private and protected.
Configuring Privacy Settings
When it comes to installing a wireless camera, it’s essential to prioritize the security and privacy of your surveillance system. Configuring privacy settings is a crucial step in ensuring that your wireless camera remains secure and protected from unauthorized access. By following these steps, you can take control of your privacy and safeguard your camera’s feed.
Disabling remote access
One of the first privacy settings to configure is disabling remote access to your wireless camera. This prevents anyone from accessing the camera’s feed from outside your network. By doing so, you maintain full control over who can view your camera’s video footage.
To disable remote access:
- Log in to your camera’s admin panel through a web browser.
- Navigate to the settings or configuration menu.
- Locate the remote access option and disable it.
- Save your changes and exit the admin panel.
Setting up access restrictions
In addition to disabling remote access, setting up access restrictions further enhances the privacy of your wireless camera. Access restrictions allow you to specify who can access the camera’s feed within your network. By implementing these restrictions, you create an additional layer of security against unauthorized access.
To set up access restrictions:
- Access your camera’s admin panel.
- Look for the access restrictions or user management section.
- Create unique usernames and strong passwords for each user who will have access to the camera.
- Assign specific privileges and permissions to each user, such as viewing access only or administrative control.
- Save the changes and close the admin panel.
Implementing encryption protocols
To ensure the integrity and confidentiality of your wireless camera’s feed, implementing encryption protocols is vital. Encryption protects your video footage from being intercepted and viewed by unauthorized individuals. By encrypting the data transmission, you enhance the security of your camera system.
To implement encryption protocols:
- Access your camera’s admin panel and navigate to the encryption settings.
- Select a strong encryption protocol, such as WPA-2 or AES, if available.
- Configure the encryption settings according to your network’s specifications.
- Save the changes and exit the admin panel.
By following these steps and configuring privacy settings, you can strengthen the security and privacy of your wireless camera installation. Protecting your camera’s feed from remote access, setting up access restrictions, and implementing encryption protocols are essential measures to ensure the confidentiality and integrity of your surveillance system.
Regular Maintenance And Upgrades
Once you have successfully installed your wireless camera system, it’s important to regularly maintain and upgrade it to ensure optimal performance. This will not only extend the lifespan of your cameras but also enhance their functionality. In this section, we will discuss three key aspects of regular maintenance and upgrades: firmware updates, battery replacement, and system performance optimization.
Firmware Updates
Firmware updates are crucial for the smooth operation of your wireless camera system. Manufacturers constantly release new firmware to fix bugs, improve security, and add new features. To keep your system up to date:
- Check the manufacturer’s website regularly for firmware updates specific to your camera model.
- Download the latest firmware version and save it to your computer.
- Access the camera’s settings through the provided software or web interface.
- Locate the firmware update section and follow the on-screen instructions to upload the new firmware.
- Once the update is complete, restart the camera system to apply the changes.
Battery Replacement
Wireless cameras usually rely on rechargeable batteries for power. Over time, these batteries may lose their capacity to hold a charge, resulting in reduced camera performance. To maintain optimal battery life:
- Use only the recommended replacement batteries provided by the manufacturer.
- Follow the camera’s user manual or manufacturer’s instructions for replacing the batteries.
- Regularly check the battery status indicator on the camera or in the accompanying software to identify when replacement is necessary.
- Dispose of old batteries in accordance with local regulations to minimize environmental impact.
System Performance Optimization
To ensure the best possible performance from your wireless camera system, consider the following optimization tips:
- Position the cameras strategically to capture the desired areas and minimize blind spots.
- Regularly clean the camera lenses and housing to remove dirt, dust, and debris that can affect image quality.
- Test the camera’s motion detection settings periodically and adjust them as needed to prevent false alerts.
- Monitor the Wi-Fi signal strength at each camera location and consider using Wi-Fi range extenders or repositioning the wireless router for better coverage.
- Ensure that your cameras are connected to a stable power source to avoid disruptions in operation.
By following these regular maintenance and upgrade practices, you can maximize the longevity and performance of your wireless camera system. Stay vigilant and proactive to have peace of mind knowing that your surveillance is always optimized.
Accessing Live Video Feed
To make the most out of your wireless camera installation, it is important to know how to access the live video feed. With the advancement in technology, accessing the live video feed has become easier than ever. In this section, we will explore two methods that you can use to access the live video feed from your wireless camera: using mobile apps and desktop software.
Using mobile apps
One of the easiest ways to access the live video feed from your wireless camera is by using mobile apps. These apps are designed to provide you with a seamless viewing experience on your smartphones or tablets. To get started, follow these steps:
- Download and install the mobile app provided by your camera manufacturer from the app store or play store.
- Launch the app and log in using your camera credentials.
- Once you are logged in, you will be able to view the live video feed from your wireless camera directly on your mobile device.
By using mobile apps, you can access the live video feed from anywhere, allowing you to stay connected and monitor your surroundings even if you are away from home or the office.
Configuring remote viewing options
In addition to mobile apps, you can also access the live video feed from your wireless camera using desktop software. This method provides a more comprehensive viewing experience and allows you to configure remote viewing options. To access the live video feed using desktop software, follow these steps:
- Download and install the desktop software provided by your camera manufacturer from their official website.
- Launch the software and log in using your camera credentials.
- Once you are logged in, you will have access to a range of features, including the live video feed, playback options, and remote viewing configuration.
With desktop software, you can configure remote viewing options such as adjusting camera angles, setting recording schedules, and customizing motion detection settings. This allows you to personalize your viewing experience based on your specific needs and preferences.
Setting up motion alerts and notifications
Another important aspect of accessing the live video feed is setting up motion alerts and notifications. These features are crucial for staying informed about any suspicious activities or events captured by your wireless camera. To set up motion alerts and notifications, follow these steps:
- Access the settings menu within your mobile app or desktop software.
- Navigate to the motion detection section and enable the feature.
- Adjust the sensitivity levels to ensure accurate motion detection.
- Configure the notification settings, including email alerts or push notifications to your mobile device.
By setting up motion alerts and notifications, you can receive instant updates and take appropriate action when unusual events are detected by your wireless camera. This adds an extra layer of security and peace of mind to your surveillance system.
Accessing the live video feed from your wireless camera is essential for staying connected and informed. By using mobile apps or desktop software, configuring remote viewing options, and setting up motion alerts and notifications, you can maximize the potential of your wireless camera installation.
Reviewing And Saving Recorded Footage
Installing a wireless camera system is an effective way to enhance the security of your home or business. But the real power of these camera systems lies in their ability to record and store footage for later review. In this section, we will explore the various options available for reviewing and saving the recorded footage, ensuring that your valuable data is safe and easily accessible when you need it.
Cloud Storage Options
Cloud storage has revolutionized the way we store and access data. Many wireless camera systems offer cloud storage options where the recorded footage is securely uploaded to a remote server. This not only provides a convenient way to access the footage from anywhere but also ensures that your data is safe even if the camera or local storage gets damaged or stolen.
Cloud storage typically comes with a subscription-based model, with varying plans to suit different needs and budgets. Some providers offer a limited amount of free storage, while others provide premium plans with increased capacity and additional features. Before opting for a particular cloud storage service, it’s crucial to consider factors like storage capacity, data retention policies, and the overall cost involved.
Local Storage Alternatives
In addition to cloud storage, wireless camera systems often offer local storage alternative options. These options allow you to save the recorded footage directly onto a physical medium connected to the camera system. One popular local storage alternative is the use of SD cards, which provide a compact and removable option for storage. Another option is network-attached storage (NAS), where the footage is saved on a separate device connected to the local network.
SD cards are especially useful for smaller camera systems or situations where the internet connection might be unreliable. They are easy to install and can often store a significant amount of footage depending on their capacity. On the other hand, NAS provides a more scalable solution, allowing for larger storage capacities and centralized access to the captured footage from multiple cameras.
Retrieving Footage for Evidence or Analysis
Whether you’re dealing with a security incident or analyzing foot traffic patterns, quick and easy access to the recorded footage becomes crucial. With wireless camera systems, retrieving footage for evidence or analysis is a straightforward process. Most systems provide user-friendly interfaces that allow you to search and filter the recorded footage based on specific criteria such as time, date, or camera location.
Once the desired footage is located, you can review it directly from the interface or export it for further analysis or submission as evidence. It’s worth noting that the retrieval process may vary depending on the camera system and storage method used. Therefore, it’s essential to familiarize yourself with the specific instructions provided by the manufacturer to ensure a seamless experience when retrieving footage.
To summarize, wireless camera systems offer a range of options for reviewing and saving recorded footage. Cloud storage provides convenient remote access and backup capabilities, while local storage alternatives like SD cards and NAS offer flexibility and scalability. With user-friendly interfaces, retrieving important footage for evidence or analysis is a breeze. By understanding and utilizing these options effectively, you can ensure the safety of your data and the efficiency of your surveillance system.
Frequently Asked Questions Of How To Install Wireless Camera
Is It Easy To Install Wireless Cameras?
Yes, installing wireless cameras is easy. Just follow the instructions provided and connect them to your Wi-Fi network. No complicated wiring is required, making it a hassle-free process.
How Do Wireless Cameras Get Power?
Wireless cameras get power from batteries or through a power cable connected to a power source. The batteries can be rechargeable or replaceable, while the power cables provide a continuous power supply to the camera.
Do Wireless Cameras Need Wifi?
Wireless cameras require WiFi to transmit video and audio signals wirelessly to a connected device.
How Do I Connect My Wireless Security Camera To My Phone?
To connect your wireless security camera to your phone, follow these steps: 1. Download the camera’s mobile app from the App Store or Google Play. 2. Connect the camera to your Wi-Fi network using the app. 3. Open the app on your phone and follow the on-screen instructions to connect the camera.
4. Once connected, you can view the camera feed and control settings from your phone.
Can Wireless Cameras Be Installed Outdoors?
Yes, wireless cameras can be easily installed outdoors to monitor your property and enhance its security.
Conclusion
To sum it up, installing a wireless camera is a straightforward process that requires careful planning and execution. By following the steps outlined in this guide, you can enhance the security of your property and gain peace of mind. Remember to choose the right location, ensure a stable network connection, and customize the settings to suit your needs.
With a wireless camera, you can keep an eye on your home or business effortlessly. Stay safe and protected!