To install a wireless ring doorbell, you need to follow a few simple steps. First, download the Ring app on your smartphone, then create an account and log in.
Next, select “Set Up a Device” and follow the in-app instructions to connect your doorbell to your Wi-Fi network. Once connected, install the doorbell by attaching it to your existing doorbell wires or using the provided screws. Finally, set up the doorbell settings and customize the preferences according to your needs.
Factors To Consider When Selecting The Installation Location
When installing a wireless Ring doorbell, there are several important factors to consider to ensure optimal performance and functionality. Placement for optimal coverage and visibility, ensuring a stable Wi-Fi connection, and considering the power source proximity are crucial. Let’s take a closer look at each of these factors to help you find the perfect location for your wireless Ring doorbell installation.
Placement for Optimal Coverage and Visibility
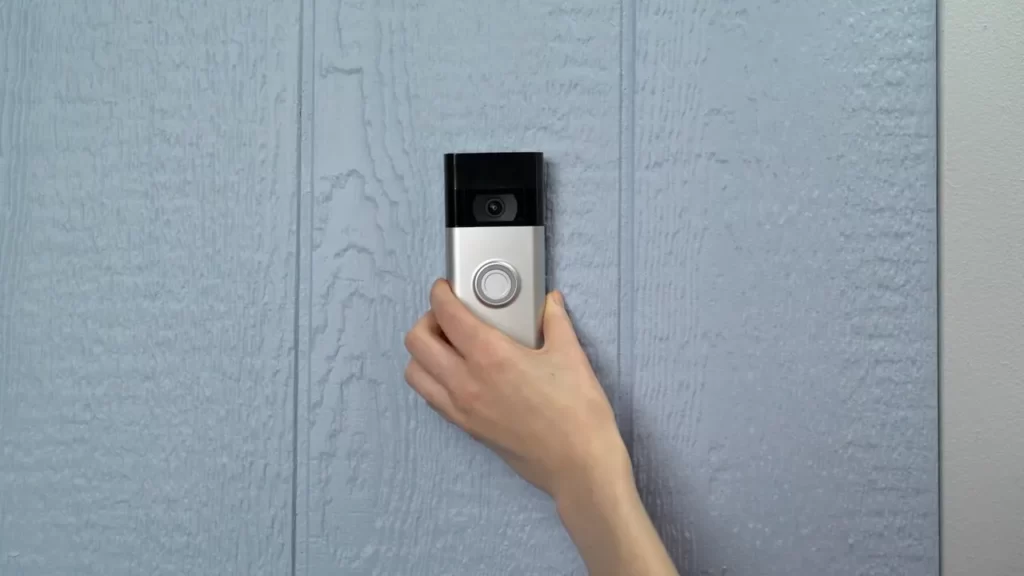
One of the first things to consider when selecting the installation location for your wireless Ring doorbell is the placement that will provide optimal coverage and visibility. It’s important to choose a spot that allows the doorbell to capture a wide angle of view, ensuring that you can see anyone approaching your front door.
Here are a few things to keep in mind while deciding the placement:
- Position the doorbell at a height that provides a clear view of the entire area without any obstructions.
- Ensure that the doorbell is angled correctly to capture both people’s faces and any packages or items left at your doorstep.
- Avoid placing the doorbell too high or too low, as it may hinder visibility and coverage.
Ensuring a Stable Wi-Fi Connection
A stable Wi-Fi connection is vital for the wireless Ring doorbell to function properly. Before finalizing the installation location, it’s crucial to check the Wi-Fi signal strength in that area to ensure a reliable connection.
Here are a few steps to follow:
- Go near the planned installation location with your smartphone or tablet.
- Check the Wi-Fi signal strength on your device.
- If the signal strength is weak or fluctuating, consider installing a Wi-Fi extender or moving the router nearer the installation area.
Considering the Power Source Proximity
The proximity of the power source is another factor to consider when selecting the installation location for your wireless Ring doorbell. Ideally, the doorbell should be installed in close proximity to an existing power source if you’re opting for a wired connection. This ensures a stable power supply and eliminates the need for frequent battery changes.
Here’s what you should do:
- Identify nearby power outlets or existing doorbell wiring that can power the wireless Ring doorbell.
- Check the distance between the power source and the installation location to ensure it’s within reach of the doorbell’s power cord.
- If there are no nearby power sources, you may need to consider using a battery-powered version of the doorbell.
Considering these factors will help you select the perfect installation location for your wireless Ring doorbell, ensuring optimal coverage, visibility, a stable Wi-Fi connection, and easy access to a power source. With careful planning and placement, you can enjoy enhanced security and convenience with your Ring doorbell installation.
Checking For Compatibility With Your Existing Doorbell
If you are planning to install a wireless Ring Doorbell, one of the first steps you should take is to ensure compatibility with your existing doorbell system. This will help you avoid any trouble in the installation process and ensure that everything works seamlessly once it’s set up. In this section, we will guide you through the steps to check for compatibility with your existing doorbell system, ensuring a smooth installation of your wireless Ring Doorbell.
Ensuring your doorbell meets the system requirements
Before you proceed with the installation of a wireless Ring Doorbell, it is crucial to ensure that your existing doorbell meets the necessary system requirements. This will help guarantee that your doorbell system is compatible with the wireless Ring Doorbell, enabling it to function optimally.
- Power supply: Firstly, check the power supply of your existing doorbell. The wireless Ring Doorbell requires a constant power supply of 16-24 volts AC to function correctly. If your existing doorbell operates on a lower voltage or uses batteries, you may need to upgrade your transformer to meet the required power supply.
- Chime compatibility: Verify that your existing doorbell chime is compatible with the wireless Ring Doorbell. Some older chimes may not work well with the Ring Doorbell due to compatibility issues. In such cases, you might need to install a Ring Chime or Ring Chime Pro for proper functionality.
- Compatibility check: To make sure your existing doorbell is compatible with the wireless Ring Doorbell, consult the Ring website or contact their support team. They can provide you with specific details and help you determine if your doorbell meets the required specifications.
Verifying the compatibility of your Wi-Fi network
Aside from your existing doorbell, you also need to verify the compatibility of your Wi-Fi network to ensure a successful installation and operation of the wireless Ring Doorbell.
- Wi-Fi signal strength: Check if your Wi-Fi signal reaches the location where you plan to install the Ring Doorbell. A strong and stable Wi-Fi signal is essential for the doorbell to connect to the Ring app and function properly. If your signal strength is weak, consider using a Wi-Fi extender or relocating your router to improve coverage.
- Frequency compatibility: Ensure that your Wi-Fi network operates on a frequency of 2.4 GHz. The Ring Doorbell is only compatible with 2.4 GHz Wi-Fi networks, so if you are using a 5 GHz network, you may need to switch your network’s frequency to ensure compatibility.
- Network security: Double-check the security settings of your Wi-Fi network. Ensure that your network uses a WPA2 password and has proper encryption enabled. This will help protect your Ring Doorbell and ensure secure communication between the doorbell, your smartphone, and other connected devices.
By ensuring your doorbell meets the system requirements and verifying the compatibility of your Wi-Fi network, you can have peace of mind knowing that your wireless Ring Doorbell installation will proceed smoothly. Taking these essential steps at the beginning will save you time and frustration, allowing you to enjoy the convenience and security that the Ring Doorbell brings to your home.
Gathering The Necessary Tools And Equipment
Before you start installing your wireless Ring doorbell, it’s important to gather all the necessary tools and equipment you’ll need for the process. This will help ensure a smooth and hassle-free installation, saving you time and frustration in the long run. In this section, we’ll provide you with a comprehensive list of tools and equipment needed, as well as any additional materials that may be required.
List of tools and equipment needed for the installation process
Here’s a list of the essential tools and equipment you’ll need to install your wireless Ring doorbell:
- Power drill with a suitable drill bit
- Screwdriver set with various screwdriver heads
- Tape measure to ensure accurate measurements
- Level to ensure proper alignment
- Pencil for marking drill holes
- Wire strippers to prepare the wires for connection
- Wire connectors for secure wire connections
- Wireless router with internet connection
- Smartphone or tablet with the Ring app installed
Identifying additional materials required, if any
In addition to the tools and equipment listed above, you may also need a few additional materials depending on the specific installation requirements. These materials can include:
- Extension cables if the existing wiring is too short
- Junction box to protect and organize the wiring connections
- Drill bit extension to reach deeper mounting surfaces
- Silicone sealant for weatherproofing the mounting area
- Mounting bracket if the original one is damaged or missing
Make sure to check the installation instructions provided by Ring to determine if any additional materials are required for your specific model or scenario.
Gathering the necessary tools and equipment before starting the installation process will help ensure you have everything you need at your fingertips without any interruptions. By being well-prepared, you’ll be able to complete the installation smoothly and start enjoying the benefits of your wireless Ring doorbell in no time.
Step 1: Removing Your Existing Doorbell
Before you begin installing your wireless Ring doorbell, it is crucial to follow the proper steps to remove your existing doorbell. This ensures a safe and seamless installation process. In this step, we will guide you through turning off the power to your doorbell and removing the old doorbell from its mounting bracket. Let’s get started!
Turn off the power to your doorbell
To avoid any electrical mishaps during the installation process, you need to disconnect the power supply to your doorbell. Follow the steps below:
- Locate your doorbell’s circuit breaker: Check your electrical panel or fuse box for the switch that controls the power supply to your doorbell. It is usually labeled as “Doorbell” or something similar. If you can’t find a specific switch, you may need to turn off the main power to your house temporarily.
- Switch off the circuit breaker: Flip the switch associated with the doorbell to the “Off” position. This will cut off the power supply and ensure your safety throughout the installation process.
Removing the old doorbell from its mounting bracket
Now that the power is off, it’s time to remove the old doorbell from its mounting bracket. Follow these steps carefully:
- Inspect the doorbell: Take a close look at your existing doorbell. Note any screws or bolts securing it to the wall or the mounting bracket. You may need a screwdriver or other tools to remove it.
- Remove the screws or bolts: Using the appropriate tools, unscrew or unbolt the old doorbell from the mounting bracket. Keep these screws or bolts, as you may need them later during the installation of your wireless Ring doorbell. Take extra care not to damage the electrical wiring behind the doorbell.
- Detach the wires: Gently loosen the wires connected to the back of the old doorbell. Take note of the wire colors and their corresponding terminals, as this information will be useful when connecting the wires to your new wireless Ring doorbell. If necessary, label the wires to ensure a proper connection later.
- Release the old mounting bracket: Once the wires are detached, you can remove the old doorbell’s mounting bracket from the wall. Inspect the wall for any damage or debris that may interfere with the installation of your wireless Ring doorbell.
With the old doorbell and its mounting bracket successfully removed, you are one step closer to enjoying the convenience and security of your wireless Ring doorbell. In the next step, we will guide you through the process of installing the new mounting bracket. Stay tuned!
Step 2: Installing The Mounting Bracket
Once you have unpacked your Wireless Ring Doorbell, it’s time to install the mounting bracket. This step is crucial as it ensures a secure and level base for your device. Follow the instructions below to position the mounting bracket securely and ensure level placement for optimal angle and functionality.
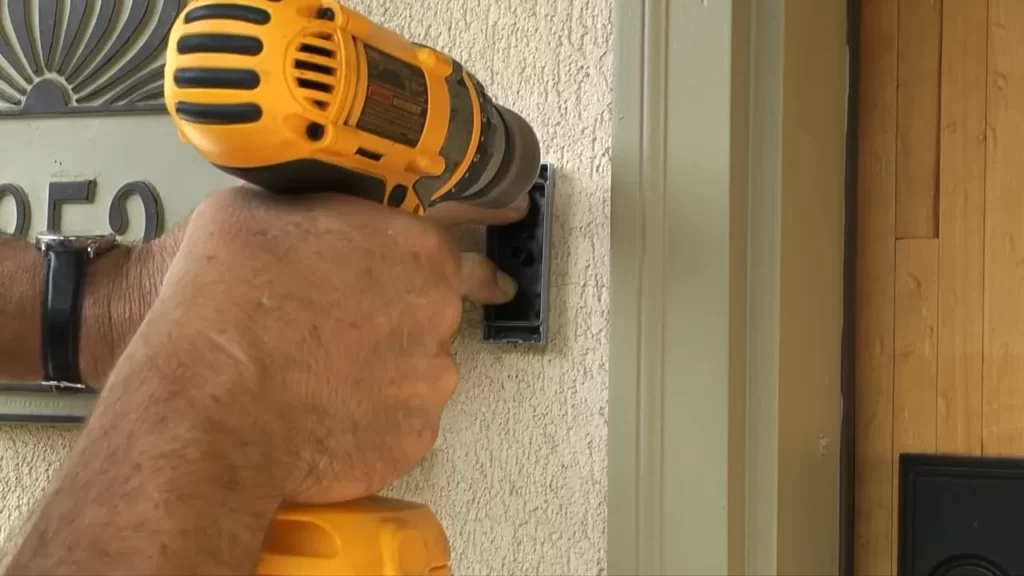
Positioning the mounting bracket securely
To position the mounting bracket securely, follow these steps:
- Choose a suitable location for your Ring Doorbell, preferably near your front door or any other entrance you want to monitor.
- Using the provided screws and a drill, firmly attach the mounting bracket to the selected spot. Make sure to firmly fasten the screws to ensure stability.
By securing the mounting bracket properly, you guarantee that your Ring Doorbell stays in place and functions effectively.
Ensuring level placement for optimal angle and functionality
To ensure level placement for optimal angle and functionality, follow these steps:
- Use a carpenter’s level to ensure that the mounting bracket is perfectly level. This step is essential to ensure that the doorbell’s camera captures an accurate view of your surroundings.
- Make any necessary adjustments to level the mounting bracket before proceeding to the next step.
By ensuring level placement, you can take full advantage of your Ring Doorbell’s features and ensure it operates at its best.
Now that you have successfully installed the mounting bracket securely and ensured level placement, you can move on to the next step in setting up your Wireless Ring Doorbell.
Step 3: Connecting And Securing The Wiring
Connecting the wires from the doorbell to the mounting bracket
Before you connect the wires from your wireless Ring Doorbell to the mounting bracket, make sure you have identified the correct wires. The doorbell should come with two wires, usually labeled “Front” and “Trans.” These wires are responsible for transmitting power and connecting your doorbell to your home’s electrical system.
To begin the connection process, follow these steps:
- Locate the two wires that came with your doorbell. Make sure they are untangled and free from any obstructions.
- Strip the ends of the wires, exposing a small section of the copper conductor. This will allow for a secure and proper connection.
- Identify the mounting bracket on your door or wall where you want to install the doorbell. The bracket should have two terminals, usually labeled “+/-” or “Positive/Negative.”
- Attach the stripped end of the “Front” wire to the positive terminal on the mounting bracket. Ensure that it is securely connected.
- Repeat the previous step with the “Trans” wire, connecting it to the negative terminal on the mounting bracket.
By correctly connecting the wires from your doorbell to the mounting bracket, you are now ready to move on to the next step of securing the wiring to prevent any damage or interference.
Securing the wiring to prevent damage or interference
Properly securing the wiring of your wireless Ring Doorbell is essential to ensure that it remains functional and protected against external factors that may cause damage or interference. Follow these steps to secure the wiring:
- Using cable clips or adhesive hooks, neatly fasten the wires to the wall or doorframe. This will prevent them from dangling and being accidentally pulled or tugged on.
- Avoid placing the wires near any sharp edges or moving parts that could potentially damage or sever them.
- If your doorbell is installed outdoors, consider using weatherproof electrical tape or conduit to protect the wiring from exposure to harsh environmental elements.
- Ensure that the wiring is not in close proximity to any other electrical wiring or devices that could cause interference. This will help optimize the performance of your wireless doorbell.
- Regularly inspect the wiring and connections to ensure they are secure and free from any signs of wear or damage. If you notice any issues, such as frayed wires or loose connections, take immediate action to fix or replace them.
By securing the wiring of your wireless Ring Doorbell properly, you can enjoy a reliable and uninterrupted connection while protecting the integrity of the wiring.
Step 4: Attaching The Wireless Ring Doorbell
Now that you have prepared the mounting bracket and installed the doorbell’s battery, it’s time to securely attach the wireless Ring Doorbell to your front door. In this step, we will explain how to align the doorbell with the mounting bracket and secure it in place using the provided screws. Follow these simple instructions to complete the installation process.
Aligning the doorbell with the mounting bracket
Before attaching the doorbell, it is crucial to ensure that it is aligned with the mounting bracket correctly. To align the doorbell, follow these steps:
- Hold the doorbell against the mounting bracket, making sure that the screw holes on the back of the doorbell line up with the holes on the bracket.
- Gently slide the doorbell until it rests flush against the bracket.
- Check the alignment by verifying that the doorbell’s lens is facing forward and there is no visible gap between the doorbell and the bracket.
By aligning the doorbell precisely, you can ensure optimal performance and a clean installation.
Securing the doorbell in place using the provided screws
Once the doorbell is properly aligned with the mounting bracket, it’s time to secure it in place. Follow these steps to complete this final stage of the installation process:
- Using the provided screws, insert them into the screw holes located at the top and bottom of the doorbell.
- Using a screwdriver, tighten the screws until the doorbell feels secure and does not wobble.
- Double-check that the doorbell is still aligned with the mounting bracket after tightening the screws.
Ensure that the screws are tightened firmly but avoid over-tightening, as it may damage the doorbell or the mounting bracket.
Once the doorbell is securely attached and aligned, you can proceed to the next step of setting up and activating your wireless Ring Doorbell to enjoy its numerous features and enhance the security of your home.
Step 5: Testing And Activating The Wireless Ring Doorbell
After successfully installing your wireless Ring doorbell, it’s time to test and activate it. This step ensures that your doorbell is fully functional and ready to use. In this section, we will guide you through the process of testing and activating your wireless Ring doorbell.
Turning on the power to your doorbell
Before you can test your wireless Ring doorbell, you need to ensure that the power is turned on. Follow these steps to turn on the power:
- Locate the power switch or breaker for your doorbell system.
- Flip the switch or turn on the breaker to supply power to your doorbell.
- Wait for the doorbell to power up. You may see a light indicator or hear a chime to indicate that the power is on.
Pairing the device with your smartphone or tablet
Once the power is turned on, you need to pair your wireless Ring doorbell with your smartphone or tablet. This allows you to receive notifications and access the doorbell’s features remotely. Follow these steps to pair the device:
- Open the Ring app on your smartphone or tablet.
- Select “Set up a Device” or a similar option in the app’s menu.
- Follow the on-screen instructions to connect your device to the Ring doorbell.
- Wait for the app to confirm a successful pairing. This may take a few moments.
Testing the functionality and adjusting settings as needed
Once your wireless Ring doorbell is paired with your smartphone or tablet, it’s time to test its functionality and adjust settings as needed. This ensures that your doorbell is working correctly and customized to your preferences. Follow these steps to test the functionality and adjust settings:
- Open the Ring app on your smartphone or tablet.
- Select your doorbell device from the app’s home screen.
- Perform a test by pressing the virtual doorbell button in the app.
- Check if you receive a notification on your smartphone or tablet.
- If the notification is received, open the live view in the app to check the video and audio quality.
- Ensure that the motion detection and sensitivity settings are configured to your liking. You can adjust these settings in the app’s settings menu.
By testing the functionality and adjusting settings, you can ensure that your wireless Ring doorbell is fully activated and optimized for your needs. Now that you have completed Step 5, your doorbell is ready to use for enhanced security and convenience.
Issue 1: Inadequate Wi-Fi Signal Strength
One of the most common issues faced when installing a wireless Ring Doorbell is inadequate Wi-Fi signal strength. Without a strong, reliable Wi-Fi signal, the performance of your Ring Doorbell may be compromised, leading to missed notifications and connectivity issues. In this section, we will discuss steps you can take to improve the Wi-Fi signal for optimal performance of your Ring Doorbell.
Steps to improve Wi-Fi signal for optimal performance
1. Position your router properly: Ensure that your Wi-Fi router is positioned centrally and elevated, away from obstructions such as walls or electronic devices that may interfere with the signal. Placing it in an open area can help maximize the coverage. 2. Check router settings: Access your router settings and verify that the Wi-Fi channel is set to the least crowded one. Additionally, ensure that the router firmware is up to date to take advantage of the latest performance enhancements. 3. Use Wi-Fi extenders or boosters: If your Wi-Fi signal doesn’t reach the area where you plan to install the Ring Doorbell, consider using Wi-Fi extenders or boosters. These devices expand the coverage of your Wi-Fi network and strengthen the signal. 4. Position the Ring Doorbell closer to the router: If feasible, try installing the Ring Doorbell closer to your Wi-Fi router. Proximity to the router can help ensure a stronger signal reception and reduce any potential signal dropouts. 5. Optimize your home network: Minimize interference by removing any unnecessary devices connected to your Wi-Fi network. Turn off any unused devices that might hog bandwidth and potentially affect the signal strength. 6. Upgrade your internet plan: If you consistently experience weak Wi-Fi signal throughout your home, it might be worth considering an upgrade to a faster internet plan. A higher internet speed can support multiple devices and ensure a more robust Wi-Fi connection for your Ring Doorbell. 7. Contact your internet service provider: If all else fails and you continue to experience inadequate Wi-Fi signal strength, reach out to your internet service provider. They may be able to provide further assistance or suggest alternative solutions to enhance your Wi-Fi signal.
By following these steps, you can improve the Wi-Fi signal strength in your home and ensure optimal performance of your wireless Ring Doorbell. Having a strong and reliable connection will allow you to enjoy all the benefits and features that the Ring Doorbell has to offer.
Issue 2: Incorrect Wiring Connection
One of the most common issues you may encounter when installing a wireless ring doorbell is an incorrect wiring connection. This can lead to a range of problems, including a doorbell that doesn’t work at all or malfunctions in some way. To ensure a seamless installation and proper functionality of your wireless ring doorbell, it’s essential to identify and rectify any wiring mistakes. This section will guide you through the process of identifying common wiring mistakes and double-checking the wiring connections for accuracy.
Identifying and rectifying common wiring mistakes
During the installation process, it’s easy to make mistakes when connecting the wires for your wireless ring doorbell. Here are some of the most common wiring mistakes to watch out for:
- Incorrect wire placement: One common error is placing the wires in the wrong terminals. Each wire must be connected to the appropriate terminal in order for the doorbell to function correctly. Double-check the wire placement to ensure proper connections.
- Misaligned wires: Wires should be properly aligned before connecting them to the terminal screws. If not aligned correctly, this can lead to a weak or unstable connection. Make sure the wires are straight and securely fastened to the terminal screws.
- Loose connections: Loose connections can cause intermittent issues with your wireless ring doorbell, such as it randomly disconnecting or not working at all. Before moving on, double-check that all connections are tight and secure.
- Incorrect wire stripping: When preparing the wires for connection, it’s important to strip the insulation correctly. If the wires are not stripped enough or if too much insulation is removed, it can lead to poor connectivity. Take the time to strip the wires to the appropriate length, ensuring a proper connection.
Double-checking the wiring connections for accuracy
Once you have identified any potential wiring mistakes, it’s crucial to double-check the connections for accuracy. Here’s a step-by-step guide to help you double-check your wiring connections:
- Turn off the power: Before handling any wires, be sure to turn off the power to the doorbell system at the circuit breaker.
- Inspect the wires: Carefully examine each wire to make sure there are no frayed or damaged sections. If you notice any issues, replace the wire before proceeding further.
- Review the wiring diagram: Refer to the manufacturer’s instructions and review the wiring diagram to ensure you have the correct wire connections.
- Check the wire placement: Verify that each wire is connected to the appropriate terminal as indicated in the wiring diagram.
- Tighten the connections: Using a screwdriver, tighten the terminal screws for each wire connection. Ensure the wires are securely fastened in place.
- Restore power: Once all the connections are double-checked and secure, restore power to the doorbell system at the circuit breaker.
By following these steps and paying attention to common wiring mistakes, you can avoid potential issues with your wireless ring doorbell installation. Taking the time to double-check the wiring connections will help ensure that your doorbell functions properly and provides you with the convenience and security it is designed to deliver.
Issue 3: Insufficient Power Supply
Troubleshooting Power-Related Problems
If you are facing power-related issues with your wireless Ring Doorbell, it can be quite frustrating. However, by following a few simple troubleshooting steps, you can quickly identify and resolve the problem.
The first step is to ensure that the doorbell is receiving enough power. Insufficient power supply is a common issue that can affect the functionality of your Ring Doorbell. To troubleshoot this problem, follow the steps outlined below:
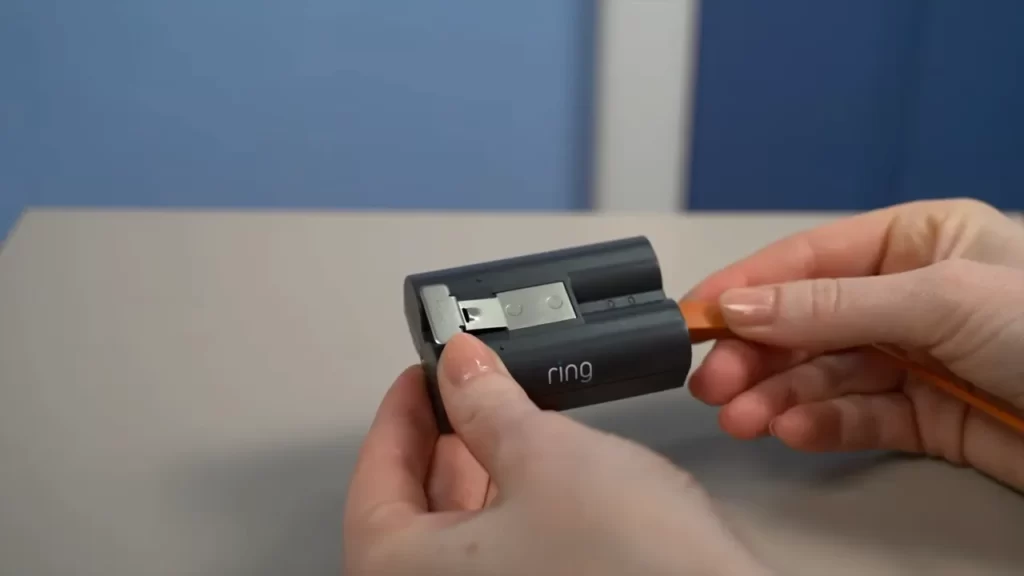
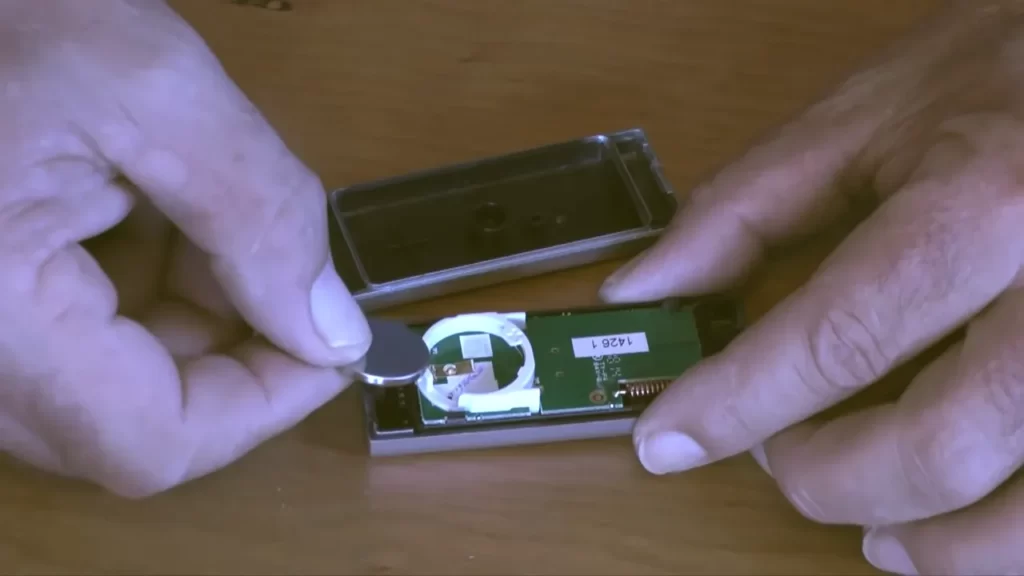
Step 1: Check the Battery
If you are using a battery-powered Ring Doorbell, the first thing you should check is the battery level. A low battery can result in poor performance or even cause the device to stop working altogether. To check the battery level:
- Open the Ring app on your smartphone.
- Select your Ring Doorbell from the list of devices.
- Navigate to the “Device Health” section.
- Check the battery level displayed on the screen.
If the battery level is low, it’s time to recharge or replace the battery. Refer to the Ring Doorbell user manual for instructions on how to do this.
Step 2: Verify Proper Wiring (For Wired Doorbells)
If you have a wired Ring Doorbell and are experiencing power issues, you need to ensure that the wiring is properly connected. Follow these steps to verify the wiring:
- Switch off the power to your doorbell at the circuit breaker.
- Remove the faceplate of your wired Doorbell.
- Inspect the wires and connections for any signs of damage or loose connections.
- If any wires are loose or damaged, carefully reconnect or replace them.
- Once you have checked and reconnected any loose or damaged wires, replace the faceplate.
- Restore the power at the circuit breaker.
Deciding Between Battery or Wired Power Sources
When it comes to deciding between using a battery or a wired power source for your Ring Doorbell, there are a few factors to consider. Each option has its pros and cons.
Battery-powered:
- Easy installation: With a battery-powered Ring Doorbell, you don’t need to worry about wiring or electrical connections.
- Flexible placement: You can install a battery-powered Doorbell virtually anywhere as long as it is within range of your Wi-Fi network.
- Regular battery replacements: Battery-powered Doorbells require periodic battery replacements, depending on the usage and battery life. Ensure you keep spare batteries handy for uninterrupted monitoring.
Wired-powered:
- Reliable power supply: Wired Doorbells offer a constant and reliable power supply, ensuring uninterrupted functioning.
- No battery replacements: With a wired Doorbell, you won’t need to worry about periodic battery replacements.
- Complex installation process: Installing a wired Doorbell requires working with electrical wiring, which can be challenging if you don’t have prior experience. Consider hiring a professional electrician for assistance if needed.
Ultimately, the choice between battery-powered and wired-powered Ring Doorbell depends on your personal preferences and specific requirements. Consider the convenience of installation and ongoing maintenance when making your decision.
In conclusion, ensuring a sufficient power supply is crucial for the proper functioning of your wireless Ring Doorbell. By following the troubleshooting steps outlined above and carefully considering your power source options, you can overcome power-related issues and enjoy seamless monitoring and security for your home.
Frequently Asked Questions Of How To Install Wireless Ring Doorbell
How Do You Install A Ring Doorbell Wireless Without Drilling?
To install a wireless Ring doorbell without drilling, follow these steps: first, charge the doorbell; then, use the provided adhesive to secure it to your desired spot; next, connect it to your Wi-Fi network using the Ring app; finally, adjust the doorbell’s settings according to your preferences.
Enjoy!
Is Ring Doorbell Wireless Easy To Install?
Yes, the Ring doorbell is wireless and very easy to install. It requires no complicated wiring or extensive technical knowledge. Simply follow the straightforward instructions provided, and you’ll have your doorbell up and running in no time.
Can You Install Ring Doorbell Without Wires?
Yes, it is possible to install a Ring doorbell without wires. The Ring doorbell comes with a battery that can be charged and lasts for a certain period. This allows for easy installation and flexibility in choosing the location for your doorbell.
How Do You Install A Wireless Ring Doorbell On Siding?
To install a wireless ring doorbell on siding, follow these steps: 1. Choose a suitable location on the siding near your entrance. 2. Mark the drilling points for the bracket. 3. Drill pilot holes at the marked points. 4. Attach the bracket using screws.
5. Mount the doorbell onto the bracket. Note: Make sure the doorbell is within range of your Wi-Fi signal for proper functioning.
Conclusion
Installing a wireless ring doorbell is a simple process that enhances the security of your home. By following the step-by-step instructions provided in this guide, you can easily set up your doorbell and start monitoring your property. With features like motion detection and two-way audio, a wireless ring doorbell is an excellent addition to your home security system.
Make sure to choose a suitable location, connect the doorbell to your Wi-Fi network, and customize the settings according to your preferences. Enjoy the convenience and peace of mind that a wireless ring doorbell provides.