To install a wireless security camera, you need to follow these steps. Begin by choosing an appropriate location for the camera and mounting it securely.
Then, connect the camera to a power source and your Wi-Fi network. Finally, download the camera’s app and complete the setup process. In today’s digital age, ensuring the safety of your home or workplace has become increasingly important. One way to achieve this peace of mind is by installing wireless security cameras.
These cameras provide a convenient and effective way to monitor your premises remotely. Whether you want to keep an eye on your children, deter potential intruders, or simply have a visual record of any incidents, wireless security cameras offer a wide range of benefits. We will guide you through the step-by-step process of installing a wireless security camera, empowering you to protect your property with confidence.
What To Consider Before Buying
When it comes to buying a wireless security camera, there are several factors you need to consider to ensure you make the right choice. From the location and coverage requirements to the power source options and camera features, each aspect plays a crucial role in determining the effectiveness of your security system. In this article, we will explore these considerations in detail, helping you make an informed decision.
Location and Coverage Requirements
Before purchasing a wireless security camera, it’s important to determine the specific areas you want to monitor and the amount of coverage you require.
- Identify the vulnerable points in your property, such as entrances, windows, or blind spots.
- Consider the range of the camera and make sure it covers the desired area.
- Take into account any obstacles or obstructions that may affect the camera’s line of sight.
Indoor or Outdoor Use
Decide whether you need a wireless security camera for indoor or outdoor use based on your specific security needs.
- If you want to monitor the interior of your property, go for an indoor camera.
- For outdoor surveillance, choose a camera designed to withstand the elements, such as rain, snow, or extreme temperatures.
- Ensure that the camera is equipped with the necessary features like weather resistance, night vision, and motion detection for optimal outdoor performance.
Power Source Options
Consider the available power source options to determine the most convenient setup for your wireless security camera.
- Choose a camera powered by batteries if you need the flexibility of relocating the camera easily.
- Opt for a camera with a rechargeable battery to avoid the hassle of constantly buying new batteries.
- If a power outlet is easily accessible near the camera’s intended location, consider a camera that can be plugged into the wall.
Camera Features and Resolution
Take into account the specific features and resolution you require from a wireless security camera.
- Check for features like two-way audio, cloud storage, and mobile app integration for enhanced functionality.
- Consider the resolution requirements based on the level of detail you need in your camera footage.
- Higher resolution cameras provide clearer images, but they may also consume more bandwidth and storage space.
Popular Wireless Security Camera Brands
When it comes to ensuring the security of your home or business, installing a wireless security camera can be a great option. Wireless security cameras offer flexibility, ease of installation, and reliable monitoring. In this article, we will discuss some of the most popular wireless security camera brands available in the market today.
Brand A
Brand A is a leading name in the wireless security camera industry. They offer a wide range of high-quality cameras that are known for their advanced features and exceptional performance. These cameras are designed to provide crystal-clear video footage with high resolution, even in low-light conditions.
Brand A cameras come equipped with motion detection technology, allowing you to receive instant alerts on your smartphone whenever any movement is detected. This can be incredibly useful in keeping your property safe and secure. Additionally, these cameras often have two-way audio capabilities, making it possible to communicate with visitors or potential intruders.
Brand B
Brand B is another popular name in the wireless security camera market. They are known for their innovative designs and user-friendly interfaces. Brand B cameras are easy to install and set up, making them suitable for both DIY enthusiasts and professional installers.
These cameras offer a range of features such as night vision, wide-angle viewing, and weatherproof construction. They are also compatible with various mobile devices, allowing you to monitor your property from anywhere at any time. Brand B cameras are built to last and provide reliable performance, ensuring the safety of your premises.
Brand C
Brand C is a trusted name when it comes to wireless security cameras. They offer a range of cameras that are known for their durability and long lifespan. With advanced encryption technology, Brand C cameras provide secure and private monitoring.
These cameras often come with intelligent video analytics, allowing you to customize your monitoring preferences and receive targeted notifications. Brand C cameras also offer easy integration with other smart home devices, making it convenient to control and manage your security system.
Gathering Tools And Equipment
Gathering Tools and Equipment
Before you begin the installation process for your wireless security camera, it is important to gather all the necessary tools and equipment. Having everything at hand will ensure a smooth and efficient installation. Here are the essential tools and equipment you will need:
<h3>Screwdrivers</h3>
A suitable screwdriver is crucial for installing a wireless security camera. Make sure you have a variety of screwdrivers on hand, including flathead and Phillips-head screwdrivers. These will be necessary for removing covers, mounting brackets, and securing the camera in place.
<h3>Drill</h3>
A drill will be required to create holes for mounting your camera. Choose a drill that is appropriate for the surface you will be drilling into, whether it is wood, drywall, or concrete. Ensure you have the correct drill bits as well, as they come in various sizes depending on the needs of your installation.
<h3>Ladder</h3>
If your installation requires the camera to be mounted in a higher location, such as on the side of a building or on a pole, a sturdy ladder is essential. Safety should always be a priority, so ensure that the ladder is in good condition and placed on a stable surface before use.
<h3>Mounting brackets</h3>
Mounting brackets are used to attach the wireless security camera to a wall, ceiling, or other surfaces. They provide stability and ensure the camera’s optimal positioning for capturing videos. Make sure you have the appropriate brackets that are compatible with your specific camera model.
<h3>Power adapters</h3>
Most wireless security cameras require power to operate. Ensure you have the correct power adapter for your camera, as different models may have different power requirements. Having the appropriate power adapters will enable you to connect your camera to a power source without any issues.
<h3>Ethernet cables</h3>
While wireless cameras eliminate the need for physical connectivity, Ethernet cables might still be necessary for the initial setup and configuration processes. These cables connect your camera to the network router for the camera’s signal transmission. Ensure you have Ethernet cables of suitable length to facilitate a smooth setup process.
Assessing Wi-Fi Signal Strength
Before installing your wireless security camera, it’s crucial to assess the strength of your Wi-Fi signal. A strong and stable signal is necessary to ensure smooth video streaming and uninterrupted connectivity. In this section, we will discuss how to check Wi-Fi coverage, extend the Wi-Fi signal if needed, and troubleshoot connectivity issues.
Checking Wi-Fi coverage
Checking Wi-Fi coverage is the first step in assessing the strength of your signal. You want to ensure that your wireless security camera will receive a strong and reliable signal from your Wi-Fi router.
To check Wi-Fi coverage, follow these steps:
- 1. Position the camera: Place the wireless security camera where you intend to install it. Make sure it is within the range of your Wi-Fi router.
- 2. Perform a signal test: Use a Wi-Fi signal strength app or the built-in Wi-Fi diagnostics tool on your smartphone or computer to measure the signal strength at the camera’s location.
- 3. Check the signal strength: Look for the signal strength indicator on the app or diagnostics tool. Ideally, you want a signal strength of at least 70% or higher for optimal performance.
- 4. Repeat the test: Move the camera to different locations within the intended installation area and perform the signal test again. This will help you identify any areas with weak signal coverage.
By checking Wi-Fi coverage, you can determine if the camera’s location is suitable for a reliable connection. If you find areas with weak signal coverage, it may be necessary to extend the Wi-Fi signal.
Extending Wi-Fi signal
If you discover weak signal coverage in certain areas, extending the Wi-Fi signal can help improve connectivity for your wireless security camera. Here are some methods to extend the Wi-Fi signal:
- 1. Move the router: If possible, relocate your Wi-Fi router to a centralized location within your home or office. This can help distribute the signal more evenly throughout the space.
- 2. Use a Wi-Fi range extender: A Wi-Fi range extender amplifies the existing signal and extends its range. Plug the range extender into an electrical outlet midway between your router and the weak signal area.
- 3. Upgrade your router: Consider upgrading to a higher-quality router that offers extended range and better signal coverage. This can provide a stronger signal for your wireless security camera.
- 4. Use a powerline adapter: Powerline adapters use your home or office’s electrical wiring to extend the Wi-Fi signal. Simply plug one adapter near your router and another near the weak signal area.
By extending the Wi-Fi signal, you can ensure that your wireless security camera receives a strong and stable connection throughout its intended installation area.
Troubleshooting connectivity issues
Even with strong Wi-Fi coverage, you may encounter connectivity issues when installing a wireless security camera. Here are some troubleshooting tips to address common connectivity problems:
- 1. Check camera settings: Ensure that the camera is properly configured with the correct Wi-Fi network name (SSID) and password. Double-check these settings, as typos and incorrect password entries can cause connectivity problems.
- 2. Restart the camera: Sometimes, a simple restart can resolve connectivity issues. Power off the camera, wait for a few seconds, and then power it back on.
- 3. Move the camera closer to the router: If the camera is far from the router, signal strength may be weakened. Temporarily move the camera closer to the router during the initial setup to establish a strong connection.
- 4. Reset the camera: If all else fails, you can try resetting the camera to its factory settings. Be aware that this will erase any custom configurations, so make sure to document any important settings beforehand.
By troubleshooting connectivity issues, you can ensure that your wireless security camera is properly connected to your Wi-Fi network, allowing you to monitor your property with ease.Eric
Mounting The Camera
Mounting your wireless security camera in the right location is crucial to ensure optimal security coverage. In this section, we will discuss how to choose the right location, install the mounting bracket, and secure the camera effectively.
Choosing the right location
Before you start the installation process, it is important to choose the right location for your wireless security camera. Here are a few factors to consider:
- Visibility: Ensure that the camera has a clear line of sight to the area you want to monitor. Avoid obstructions such as walls, trees, or other objects that can block the camera’s view.
- Coverage: Determine the area you want the camera to cover and select a location that provides the best coverage. Consider the camera’s field of view and the distance it can capture.
- Power source: Choose a location that is easily accessible to a power source or close to an electrical outlet if your camera requires one.
- Weather resistance: If you plan to install the camera outdoors, make sure it is designed to withstand the elements. Look for features like waterproof or weatherproof ratings.
Once you have identified the ideal location, it’s time to install the mounting bracket.
Installing the mounting bracket
The mounting bracket is a crucial component that holds your wireless security camera in place. Follow these steps to install it:
- Prepare the surface: Clean the area where you plan to install the camera and make sure it is smooth and free from dust or debris.
- Mark the positions: Hold the mounting bracket against the wall or surface and mark the screw holes with a pencil.
- Drill pilot holes: Use an appropriate-sized drill bit to create pilot holes at the marked positions. This will ensure that the screws go in smoothly and securely.
- Secure the bracket: Align the screw holes on the bracket with the pilot holes and use screws to attach it firmly to the wall or surface.
Now that you have installed the mounting bracket, it’s time to secure the camera itself.
Securing the camera
Once the mounting bracket is in place, you can securely attach the wireless security camera to it. Follow these steps to ensure a proper installation:
- Attach the camera to the bracket: Depending on the camera model, you may need to slide or screw it onto the mounting bracket.
- Tighten the camera: Make sure the camera is securely fastened to the bracket to prevent any movement or misalignment.
- Adjust the angle: If your camera allows for it, adjust the angle to ensure the optimal view of the area you want to monitor.
- Test the stability: Gently shake the camera to ensure it is securely attached and won’t come loose over time.
By following these steps, you can mount your wireless security camera effectively and ensure maximum security coverage for your property.
Connecting The Camera To Power And Wi-Fi
Once you have chosen the perfect wireless security camera for your needs, it’s time to get it up and running. In this guide, we will walk you through the process of connecting the camera to power and Wi-Fi. This step is crucial as it ensures that your camera will be able to function properly and transmit the footage to your desired devices.
Powering the Camera
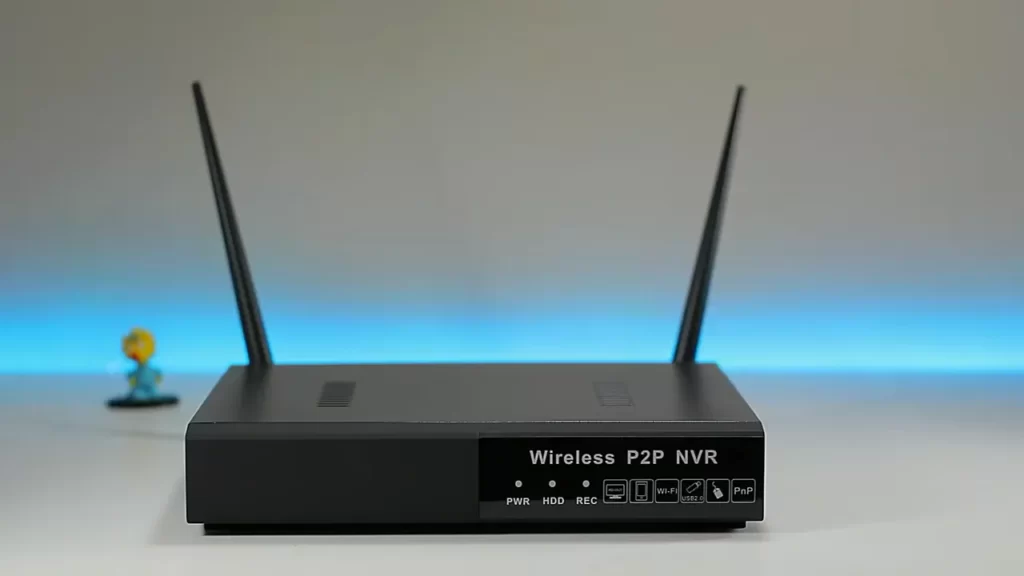
Before beginning the installation process, it’s important to make sure that you have a power source nearby. Most wireless security cameras come with a power adapter and cord, allowing you to connect them to a standard electrical outlet. Here’s how you can power your camera:
- Locate the power input on the camera. It is usually marked with a symbol that resembles a lightning bolt.
- Connect one end of the power adapter to the camera’s power input.
- Plug the other end of the power adapter into a nearby electrical outlet.
- Ensure that the camera’s power indicator light is on, indicating that it is receiving power.
By following these steps, you can easily provide the necessary power to your wireless security camera.
Connecting to Wi-Fi Network
Now that your camera is powered, the next step is to connect it to your Wi-Fi network. This enables you to access the live feed and recorded footage from anywhere using your smartphone, tablet, or computer. Here’s how you can establish a connection:
- Download and install the companion app for your wireless security camera on your mobile device. The app is usually available on both iOS and Android platforms.
- Launch the app and create an account if prompted. Then, log in using your credentials.
- Follow the on-screen instructions provided by the app to connect your camera to Wi-Fi. This typically involves selecting your home network from the available list and entering your Wi-Fi password.
- Wait for the camera to establish a connection with your Wi-Fi network. This may take a few seconds.
- Once the connection is established, you will receive a confirmation message on your app.
With these simple steps, your wireless security camera will be successfully connected to your Wi-Fi network, allowing you to monitor your property remotely.
Troubleshooting Connection Problems
In some cases, you may encounter connection issues while attempting to connect your camera to Wi-Fi. If you experience any problems, here are a few troubleshooting steps you can try:
- Double-check your Wi-Fi network name and password to ensure that you have entered them correctly. A simple typo can cause connectivity problems.
- Move your camera closer to your Wi-Fi router to improve the signal strength. Obstructions and distance can weaken the connection.
- Restart both your camera and Wi-Fi router. Sometimes, a simple reboot can resolve connectivity issues.
- Ensure that your Wi-Fi router is using a 2.4GHz signal, as most wireless security cameras are not compatible with 5GHz networks.
- If all else fails, consult the troubleshooting section of your camera’s user manual or contact customer support for further assistance.
By following these troubleshooting steps, you can overcome common connection problems and ensure that your wireless security camera is properly connected to your Wi-Fi network.
Adjusting Camera Settings
Accessing camera settings
Once you have successfully installed your wireless security camera, the next step is to adjust the camera settings to customize it according to your specific needs. Accessing the camera settings is a straightforward process that allows you to fine-tune various aspects of your security system.
To access the camera settings, you need to connect your camera to a computer or mobile device with internet access. Here’s a step-by-step guide:
- Open the app or software provided by your camera manufacturer. This app or software is usually available for free and is compatible with both Android and iOS devices.
- Log in to your account using the credentials provided during the initial setup.
- Once logged in, navigate to the settings section within the app or software.
- From the settings menu, you can now customize various camera parameters such as motion detection, video quality, and more.
Setting up motion detection
Motion detection is a crucial feature of wireless security cameras as it allows you to receive alerts whenever any movement is detected within the camera’s field of view. To set up motion detection on your wireless security camera, follow these steps:
- Navigate to the motion detection settings within the camera’s app or software.
- Adjust the sensitivity level to determine how easily motion will trigger the camera’s recording and alerts.
- Define the detection zone by selecting specific areas of the camera’s field of view where you want motion to be detected.
- Enable push notifications or email alerts to receive immediate notifications whenever motion is detected.
By setting up motion detection, you can ensure that you are promptly notified about any suspicious activity around your property, enhancing the security and peace of mind provided by your wireless security camera.
Adjusting video quality
Another important aspect of wireless security camera settings is adjusting the video quality. Higher video quality allows for clearer and more detailed footage, enabling you to identify individuals or objects more accurately. Follow these steps to adjust the video quality:
- Locate the video quality settings within the camera’s app or software.
- Choose the desired resolution for your camera’s recordings. Higher resolutions, such as 1080p or even 4K, offer better clarity but may consume more storage space.
- Adjust other video settings, such as frame rate and bitrate, to optimize the balance between quality and storage requirements based on your specific needs.
By adjusting the video quality, you can ensure that your wireless security camera captures clear and detailed footage, enabling you to closely monitor your property and effectively respond to any security concerns.
Accessing Camera Footage
Using a smartphone app
One of the most convenient ways to access the footage from your wireless security camera is through a smartphone app. With advancements in technology, many camera brands now offer their own dedicated apps that can be easily downloaded and installed on your smartphone. These apps typically provide you with a user-friendly interface that allows you to monitor your camera’s live feed, adjust settings, and access recordings with just a few taps on your phone.
Accessing footage remotely
The beauty of wireless security cameras lies in their ability to be accessed remotely. Once you have set up and connected your camera to your home’s Wi-Fi network, you can access its footage from anywhere in the world, as long as you have an internet connection and the appropriate login credentials. This means that whether you’re at work, on vacation, or simply away from home, you can easily check in on your property and view the live feed or recordings from your wireless security camera using your smartphone, tablet, or computer.
Reviewing recordings
One of the key functionalities of a wireless security camera is the ability to review recordings. Whether it’s to investigate a potential security breach or to simply keep an eye on activity in and around your property, being able to review past footage is crucial. With a smartphone app or web portal provided by the camera manufacturer, you can easily access and review recordings made by your wireless security camera. These recordings are typically stored either locally on a memory card or on a cloud-based storage system, depending on your camera’s specifications. Once accessed, you can review the recordings, playback specific events, and even save or download important clips for future reference.
Performing Regular Maintenance
Cleaning the camera
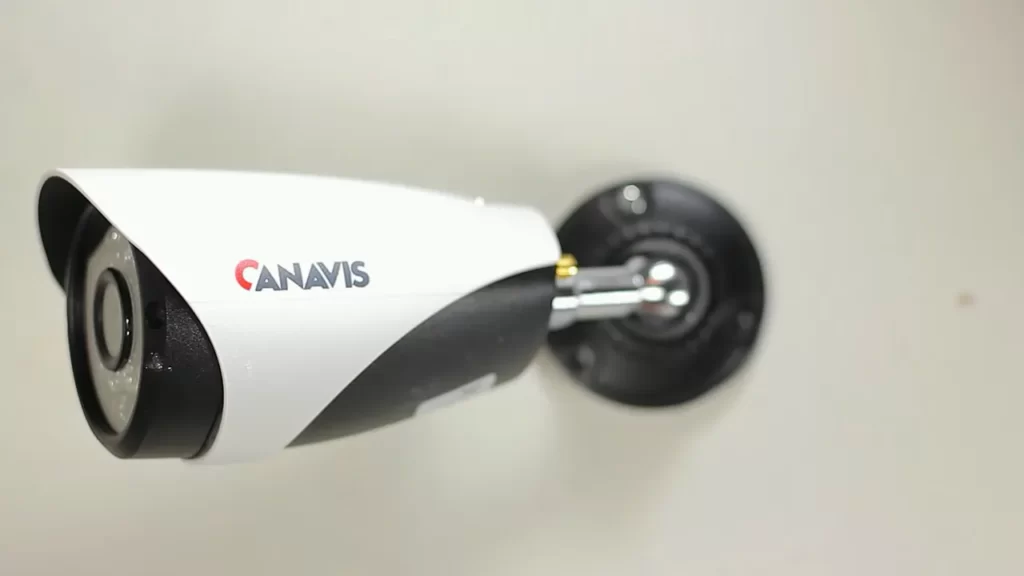
Regular cleaning of your wireless security camera is essential to maintain its functionality and keep it in optimal condition. Dust, dirt, and debris can accumulate on the lens, affecting the image quality. To clean your camera:
- Use a microfiber cloth or lens cleaning solution specifically designed for camera lenses to gently wipe the lens surface. Avoid using abrasive materials or harsh chemicals that could damage the lens.
- Inspect the camera housing for any dirt or grime. Use a soft, damp cloth to wipe away any residue.
- Ensure that the camera is powered off before cleaning to prevent accidental damage or electric shock.
Regularly cleaning your wireless security camera will help maintain clear and sharp video footage, ensuring that you can rely on it for optimal security.
Checking for firmware updates
Updating your wireless security camera’s firmware is crucial as it often includes bug fixes, security enhancements, and new features. Firmware updates can improve the overall performance and reliability of your camera. To check for firmware updates:
- Access the camera’s manufacturer website or app.
- Locate the Firmware/Software update section.
- Follow the specified instructions to download and install the latest firmware version for your camera model.
- Ensure that the camera is connected to a stable internet connection during the update process.
Regularly checking for firmware updates and keeping your wireless security camera up-to-date will ensure that you have access to the latest features and security measures, maximizing the reliability and effectiveness of your surveillance system.
Recharging or replacing batteries
For wireless security cameras that are powered by batteries, regular maintenance includes recharging or replacing batteries when needed. Follow these steps:
- Refer to the camera’s user manual or manufacturer’s instructions to determine the type of batteries required.
- Check the battery level using the camera’s app or dashboard. If the battery level is low, proceed with recharging or replacing the batteries.
- For rechargeable batteries, use the provided charging cable or dock to recharge them fully before placing them back into the camera.
- If using replaceable batteries, ensure you have a fresh set of batteries of the appropriate type ready to be installed.
- Always follow proper battery handling instructions and dispose of used batteries responsibly.
Maintaining the battery life of your wireless security camera will ensure continuous surveillance and prevent any interruptions in your monitoring system.
Troubleshooting Common Issues
Having a wireless security camera brings peace of mind, but like any technological device, it can encounter some common issues that hinder its optimal performance. In this section, we will discuss some of the most common issues that you may encounter while installing a wireless security camera and provide solutions to address them.
Dealing with connectivity problems
Connectivity problems can occur when your wireless security camera is unable to establish a stable connection with your Wi-Fi network. If you encounter this issue, here are some steps you can take to troubleshoot it:
- Ensure that the camera is within the range of your Wi-Fi network. Walls, obstructions, or distance can weaken the signal strength.
- Check the Wi-Fi credentials you entered during the setup process. Make sure they are correct and consistent with your network.
- Reboot your wireless router and camera. Sometimes, a simple restart can solve connectivity issues.
- Upgrade the firmware of your wireless security camera. Manufacturers often release firmware updates that improve connectivity performance.
- If the problem persists, consider contacting your internet service provider to ensure that your Wi-Fi network is functioning properly.
Resolving video quality issues
Poor video quality can compromise the effectiveness of your wireless security camera. To improve video quality, follow these troubleshooting steps:
- Check the camera lens for any dirt, dust, or obstructions. Clean it carefully using a soft, lint-free cloth.
- Ensure that the camera’s resolution settings are properly configured. Higher resolution settings may require a stronger Wi-Fi connection.
- Inspect the positioning of the camera. Adjust its angle or location to optimize the field of view and minimize any potential physical obstructions.
- Consider enhancing your Wi-Fi network’s signal strength by installing a Wi-Fi extender or relocating your wireless router closer to the camera.
Addressing motion detection glitches
Motion detection glitches can be frustrating as they may lead to unnecessary alerts or missed events. Follow these steps to address motion detection issues:
- Adjust the sensitivity settings of the motion detection feature. Experiment with different levels until you find the optimal sensitivity for your environment.
- Ensure that the camera is positioned correctly. Avoid pointing it towards reflective surfaces, trees, or areas with frequent movement, as they can trigger false motion detection alerts.
- If your camera supports it, set up motion detection zones. This allows you to specify specific areas within the camera’s field of view where you want motion to be detected.
- Regularly check for firmware updates for your camera. Manufacturers often release updates that improve the accuracy and reliability of motion detection.
By following these troubleshooting techniques, you can overcome common issues that may arise during the installation and use of your wireless security camera. Remember to always refer to the camera’s user manual or contact the manufacturer’s customer support for further assistance if needed.
Frequently Asked Questions Of How To Install Wireless Security Camera
How Easy Is It To Install Wireless Security Cameras?
Wireless security camera installation is easy. Simply mount the camera, connect it to power, and sync it with a compatible device. No complicated wiring or technical expertise required.
How Do Wireless Cameras Connect To Wifi?
Wireless cameras connect to WiFi by accessing the network using built-in WiFi capabilities. Users simply need to connect the camera to their WiFi network by selecting the network name and entering the password. Once connected, the camera can transmit live video and audio wirelessly over the WiFi network.
How Do I Install A Wireless Security Camera Without Internet?
To install a wireless security camera without Internet, follow these steps. First, ensure your camera has an SD card slot. Insert an SD card and set the camera to record to it. Next, connect the camera to a power source and position it where you want surveillance.
Finally, you can access the recorded footage by removing the SD card from the camera and viewing it on a computer or compatible device.
Do All Security Cameras Need To Be Connected To Wifi?
Not all security cameras require WiFi. Some models can work with an Ethernet cable or through cellular networks like 4G or 5G. WiFi-enabled cameras offer flexible installation options and remote access, but it ultimately depends on the specific camera’s capabilities and your preferences.
How Does A Wireless Security Camera Work?
Wireless security cameras use Wi-Fi signals to transmit video and audio to your device, providing real-time monitoring and recording of your surroundings.
Conclusion
Installing a wireless security camera may seem daunting, but with the right guidance and tools, it can be a straightforward process. By following these step-by-step instructions, you can ensure the safety and security of your home or office. Remember to choose a suitable location, connect the camera to the power source, and configure it to your mobile device.
With a wireless security camera in place, you can have peace of mind knowing that you are taking proactive steps towards protecting your property.
